Table of Contents
Advertisement
Quick Links
Owner's Manual
* This device contains demo data (Phrase Memory 95–99).
Once you delete these, they cannot be recovered. Please back them up as described in "Backing up to your computer" (p. 27).
* The power to this unit will be turned off automatically after a predetermined amount of time has passed since it was last used for
playing music, or its buttons or controls were operated (Auto Off function).
If you do not want the power to be turned off automatically, change the system setting "Auto Off" (p. 22) to "OFF" as described on "Basic
Procedure for Editing the Settings" (p. 5).
• Any settings that you are in the process of editing will be lost when the power is turned off. If you have any settings that you want to keep,
you should save them beforehand.
• To restore power, turn the power on again (p. 7).
Main Features
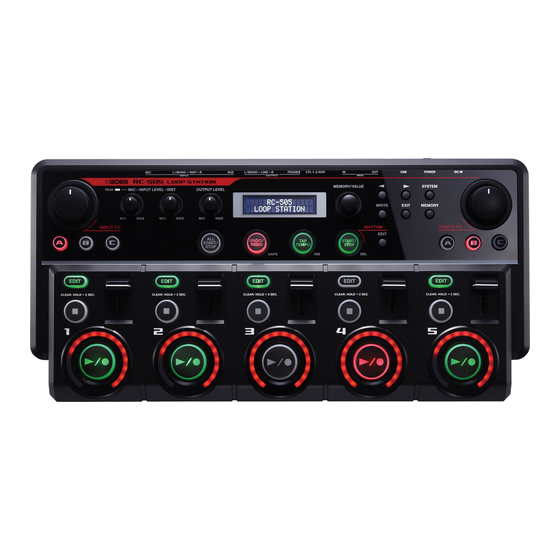
The RC-505 is a live performance tool that lets you record your vocal or guitar performance and then play it back instantly.
You can maximize your live performance potential by layering sounds in real time.
• Combine five loop tracks for a variety of expressive possibilities.
• Input FX are provided for recording, letting you use effects such as robot voice or vocoder to make your phrase loops
even more diverse.
• Track FX are provided for the playback tracks, letting you enhance and develop your live performances by applying
effects that simulate changing the rotational speed of a turntable or the "stuttering" created by repeated notes on a
sampler.
• Combine previously-recorded phrase loops with realtime recording to make your performances even more exciting. You
can also import WAV files from your computer to use as phrase loops.
• Use the RC-505 in conjunction with other MIDI equipment for an even broader range of live performance possibilities.
Before using this unit, carefully read the sections entitled " USING T HE UNIT SAFELY" and " IMPORTANT NOTES" (p. 33; p. 34). T hese
sections provide important information concerning the proper operation of the unit. Additionally, in order to feel assured
that you have gained a good grasp of every feature of your new unit, read Owner's Manual in its entirety. This manual should
be saved and kept on hand as a convenient reference.
Copyright © 2013 BOSS CORPORATION
All rights reserved. No part of this publication may be reproduced in any form without the written permission of BOSS
CORPORATION.
English
Deutsch
Français
Italiano
Español
Português
Nederlands
Advertisement
Table of Contents

Related Manuals for Boss RC-505


Summary of Contents for Boss RC-505
-
Page 1: Main Features
• To restore power, turn the power on again (p. 7). Main Features The RC-505 is a live performance tool that lets you record your vocal or guitar performance and then play it back instantly. You can maximize your live performance potential by layering sounds in real time. • Combine five loop tracks for a variety of expressive possibilities. • Input FX are provided for recording, letting you use effects such as robot voice or vocoder to make your phrase loops even more diverse. • Track FX are provided for the playback tracks, letting you enhance and develop your live performances by applying effects that simulate changing the rotational speed of a turntable or the “stuttering” created by repeated notes on a sampler. English • Combine previously-recorded phrase loops with realtime recording to make your performances even more exciting. You can also import WAV files from your computer to use as phrase loops. Deutsch • Use the RC-505 in conjunction with other MIDI equipment for an even broader range of live performance possibilities. Français Italiano Español Before using this unit, carefully read the sections entitled “ USING T HE UNIT SAFELY” and “ IMPORTANT NOTES” (p. 33; p. 34). T hese sections provide important information concerning the proper operation of the unit. Additionally, in order to feel assured Português that you have gained a good grasp of every feature of your new unit, read Owner’s Manual in its entirety. This manual should be saved and kept on hand as a convenient reference. Nederlands Copyright © 2013 BOSS CORPORATION All rights reserved. No part of this publication may be reproduced in any form without the written permission of BOSS CORPORATION. -
Page 2: Table Of Contents
System Settings (Settings for the Entire RC-505) . . . . . . . . . . . . . . . . . -
Page 3: Overview Of The Rc-505
Overview of the RC-505 How the RC-505 is organized Phrase Memory 99 Phrase Memory 1 Track 1 Input FX Track FX Track 2 Track 3 Track 4 Track 5 Rhythm System Settings (settings that apply to the entire RC-505) What are tracks 1–5 (p. 12) and phrase memories (p. 15)? The RC-505 provides five “tracks” that are used to record and play back the sound of an instrument or a microphone. -
Page 4: Basic Operation Guide
. Pressing the [ / ] button at the point you want to loop will switch to overdubbing . Indicator * Pressing the [ / ] button will normally switch the RC-505’s state in the order of recording g overdub g playback. However, if desired, you can change Recording this order to recording g playback g overdub (p. 15). Yellow Overdub... - Page 5 REVERS - - - o - buttons buttons buttons By pressing the [ ] buttons you can check the on/off status for Reverse (p. 12), One-Shot Phrase memory number Name (p. 12), and Play Mode (Multi; p. 12), and also check the remaining recordable time (p. 22). Basic Procedure for Editing the Settings Editing the RC-505’s settings is a simple and consistent procedure. Phrase Memory System Before you continue, please take a moment to learn the basic editing procedures. Rhythm Input FX Tracks 1–5 Press the button (Left figure) for the type of item you want to Track FX edit .
-
Page 6: Connections (Rear Panel)
Always turn the phantom power off when connecting any device other than condenser USB port PHONES jack microphones that require phantom power. You risk causing damage if you mistakenly supply You can use a commercially available Connect a set of headphones (sold Page phantom power to dynamic microphones, USB cable to connect the RC-505 separately) here. audio playback devices, or other devices that to your computer, and use the don’t require such power. Be sure to check the computer to read/write RC-505 specifications of any microphone you intend to tracks (WAV files). Outputting the rhythm only to headphones use by referring to the manual that came with it. -
Page 7: Turning On The Power
Caution when turning off the power While the RC-505 is in the following states, you must never turn off the power. Doing so may cause all the saved data to be lost. • While recording/overdub/playing back • While undoing/redoing • While switching between phrase memories... -
Page 8: Example Of Actual Loop Recording
Turn the [MEMORY/VALUE] knob to select an empty phrase memory (the [EDIT] buttons of all tracks are unlit) . INIT MEMORY Available tracks for recording/overdub Recording/overdub can be performed on only one track at a time. For example, if all tracks in the phrase memory are empty, and you’re recording track 1, pressing the track 2 [ / ] button will switch track 1 to playback, and recording will occur on track 2. Track 1 button Track 2 button Track 3 button Track 1 Recording Playback Track 2 Recording Playback Track 3 Recording Record while listening to the rhythm sound In addition to its five tracks, the RC-505 can sound a “rhythm. ” By recording while you listen to a rhythm at the tempo you’ve specified, you can record at an accurate tempo. For details, refer to “Rhythm Settings” (p. 19). -
Page 9: Recording On A Single Track
Basic Operation Guide Recording on a Single Track With this method, you’ll overdub all of the sounds on track 1. When two measures have ended, press the track 1 [ / ] button to loop the sound at that point. Record your vocal into the microphone: Press the track 1 [ / ] button to start “Dun! Dun! Dun! ...” recording. Overdub your vocal into the microphone: Recording “Pah! Pah! Pah!” Overdub Overdub your vocal into the microphone: The sound will “Chi! Chi! Chi!” automatically start over at the end of the second measure. Press the track 1 [ / ] button to switch to loop playback. -
Page 10: Saving A Phrase Memory
Saving a Phrase Memory Saving a Phrase Memory (Write) Exchanging Phrase Memories If you select a different phrase memory or turn off the power after You can exchange phrase memories with one another, rearranging recording or editing the settings, the recorded content or edited the phrase memories. settings will be lost. If you want to keep the data, you must save it. Select an exchange-source phrase memory . Press the [WRITE] button . Press the [WRITE] button . Press the [ ] buttons until “Exchange” appears in the display . Number Exchange My Memory... -
Page 11: Copying A Track From Another Phrase Memory (Copy Track)
Saving a Phrase Memory Copying a Track from Another Phrase Loading Frequently-Used Settings Memory (Copy Track) (User Set) You can take a specific track from a phrase memory and copy it to If you save your frequently-used phrase memory settings as the the current phrase memory. user set, you’ll be able to quickly load those settings when needed, for example during a live performance. This is a convenient method to use when you need a pattern with the same backing, as it allows you to prepare tracks simply and easily without having to start recording from scratch again. Phrase Memory A Write User Set Track Rhythm To prevent loss of the content of the current work, press User Set the [WRITE] button twice to save the current phrase memory . -
Page 12: Track 1-5 Settings
Track 1–5 Settings Here you can specify the playback method and other settings individually for each track. For details of the procedure on setting up, refer to “Basic Procedure for Editing the Settings” (p. 5). MEMO Use the [ ] buttons to select parameters. By pressing the [EDIT] button several times, you can also jump to parameters marked by the “ ” symbol. Parameter Value Explanation Playing a Track Backward (Reverse) Track1:Reverse Specifies conventional playback (OFF) or reverse playback (ON). * When Reverse is set to “ON, ” you won’t be able to switch to overdubbing after a recording has been completed. Adjusting the Playback Level of the Tracks (Play Level) Track1:PlayLevel Adjusts the playback level of the tracks. “Play Level” is a different parameter than the sliders of tracks [1]–[5]. Use the track [1]–[5] sliders for temporary adjustments of the volume between tracks. Adjusting the Positioning of the Track’s Sound (Pan) Track1:Pan CENTER Adjusts the positioning (panning) of the track’s sound. -
Page 13: Specifying How The Track Will Start (Start Mode)
Track 1–5 Settings Parameter Value Explanation Specifying How the Track Will Start (Start Mode) Track1:StartMode IMMEDIATE When playing back track, you can select whether to start playback with a fade-in or have playback start immediately. IMMEDIATE Playback starts immediately. Playback starts while fading in. FADE IN * You can use “Fade Time” (p. 16) to specify the length of the fade-in. Specifying How the Track Will Stop (Stop Mode) Track1:Stop Mode IMMEDIATE Specifies how the track will stop when you press the [ ] button. • The [ / ] indicator will blink until playback stops. • If you press the [ ] button once again before playback stops, playback will stop immediately. -
Page 14: Synchronizing The Tempo Of The Tracks (Tempo Sync)
Track 1–5 Settings Parameter Value Explanation Synchronizing the Tempo of the Tracks (Tempo Sync) Track1:TempoSync Each track saves the tempo at which that track was recorded. This is called the “original tempo” of the track. The phrase memory also has a “phrase memory tempo” that is shared by all tracks 1–5. Normally, you should leave Tempo Sync on, so all tracks will play at the same tempo (the phrase memory tempo). If you turn Tempo Sync off for tracks for which you don’t want the tempo to change (such as those with special effects), you’ll be able to obtain playback that is always at the original tempo (track 3 in the illustration below). Tracks for which Tempo Sync is ON will play at the phrase memory tempo. Phrase Memory Tempo: Tempo Sync: Track 1 Playback Tempo: 120 Original Tempo: 140 Tempo Sync: Track 2 Playback Tempo: 120 Original Tempo: 100 Tracks for which Tempo Sync is OFF will play at... -
Page 15: Phrase Memory Settings
Changing the Switching Order of Recording g Overdub Rec:Rec Action REC→OVERDUB g Playback (Rec Action) When you press the [ / ] button, the RC-505 will switch its operation in the order of Recording g Overdub g Playback (p. 4). However, you can change this so that the order is Recording g Playback g Overdub. REC g Operation will switch in the order of Recording g Overdub g Playback. OVERDUB REC g PLAY Operation will switch in the order of Recording g Playback g Overdub. -
Page 16: Automatically Correcting The Timing Of Button Presses
Phrase Memory Settings Parameter Value Explanation Automatically Correcting the Timing of Button Presses Play:Quantize REC END (Loop Quantize) With tracks for which Loop Sync is “ON, ” under any of the conditions listed below, your timing will be corrected (Loop Quantize) based on the tempo and time signature of the rhythm, even if the timing at which you press a button is slightly inaccurate. • If the rhythm is on Start Stop • If there is an already-recorded track whose Loop Sync is turned on Recorded phrase • If the MIDI Sync is on REC END Quantize to the measure start location only for recording. MEASURE Quantize to the measure start location for recording, for overdubbing, and for playback. Quantize to the measure start location for recording. BEAT Quantize to the beat location for overdubbing and for playback. Specifying the Length of Loop Sync (Loop Length) Play:Loop Length AUTO... -
Page 17: (Assign)
Phrase Memory Settings Assigning the Function of FX knobs and External Controllers (Assign) For each phrase memory, you can assign the function of the RC-505’s FX knobs and any connected external pedals (expression pedal, footswitches; p. 18). You can also make assignments for control change messages received from an external MIDI device (e.g., FC-300). For each phrase memory, you can create eight different assignments (assignment numbers 1–8), which specify the parameter controlled by each controller. Parameter Value Explanation Enabling Assignments 1–8 (Assign Switch) Assign1 Switch Here you can specify whether assignments will be used (ON/OFF). Specifying the Controller (Assign Source) Assign1 Source EXP PEDAL Here you can specify the controller (source) that will control the target. EXP PEDAL An Expression pedal connected to the CTL 1, 2/EXP jack (p. 18) -
Page 18: Specifying The Target Range (Target Range)
Phrase Memory Settings Parameter Value Explanation Specifying the Target Range (Target Range) Assign1TargetMin Specifies the range in which the parameter can be controlled. The value will depend on the parameter that’s assigned as the Target (Assign Target). Assign1TargetMax Connecting to External Pedals Connect your expression pedal (EV-5 ; sold separately) or footswitches (FS-5U, FS-6; sold separately) as shown in the illustration. , etc. The function of the external pedal (expression pedal or footswitch) can be assigned independently for each phrase memory. For details, refer to “Assigning the Function of FX knobs and External Controllers (Assign)” (p. 17). When Connecting EV-5 When Connecting FS-5Us When Connecting FS-6 Cable: Cable: Stereo 1/4” phone Stereo 1/4” phone type fg type fg 1/4” phone type x 2 Stereo 1/4” phone type White... -
Page 19: Rhythm Settings
Rhythm Settings Here’s how to make rhythm settings. For details of the procedure on setting up, refer to “Basic Procedure for Editing the Settings” (p. 5). MEMO Use the [ ] buttons to select parameters. By pressing the [RHYTHM] (EDIT) button several times, you can also jump to parameters marked by the “ ” symbol. Parameter Value Explanation Adjusting the Rhythm Volume (Rhythm Level) Rhythm:Level Adjusts the volume of the rhythm sound. Selecting the Rhythm Sound (Rhythm Pattern) Rhythm:Pattern Simple Beat 1 Selects the rhythm pattern from a choice of rock drums, Latin percussion, and other patterns. Reference Refer to “Rhythm Pattern List” (p. 32). Selecting the Beat (Time Signature) for the Rhythm Rhythm:Beat Sound (Beat) Selects the rhythm sound beat. -
Page 20: Input Fx/Track Fx Settings
Input FX/Track FX settings You can apply effects to the audio input and to the sound of the tracks, respectively. These effects are referred to as “Input FX” and “Track FX. ” For details of the procedure on setting up, refer to “Basic Procedure for Editing the Settings” (p. 5). * The FX parameter that appears first when you press the [ ] button will depend on the FX type that’s selected. * Parameters indicated by the “ ” symbol can be controlled by the [INPUT FX]/[TRACK FX] knobs. * When you press the track FX [A] – [C] button, the [EDIT] button of the target tracks to which FX is applied, will blink. You can also use the [EDIT] buttons to select the tracks to which track FX is applied. Parameter Value Explanation Selecting the FX Type (FX Type) IFxA:Type FILTER You can select the Input FX/Track FX type. Types available for both Input FX and Track FX TFxA:Type BEAT REPEAT FILTER A filter modifies the brightness or thickness of the sound by cutting a specific frequency range. PHASER Gives the sound a swishing quality by adding a phase-shifted sound. -
Page 21: Fx Parameters
Input FX/Track FX settings FX Parameters FX Type Parameter Explanation Adjusts the low frequency range tone. Low-Mid Adjusts the low-middle frequency range tone. FX Type Parameter Explanation High-Mid Adjusts the high-middle frequency range tone. Selects the type of filter. High Adjusts the high frequency range tone. This reduces the volume of all frequen- Adjusts the overall volume level of the cies above the cutoff frequency. Level equalizer. This leaves only the frequencies in the Type Select the range (LOW, MID, HIGH) that will be region of the cutoff frequency, and cuts Band cut. the rest. FILTER Adjusts the rate of modulation. This lets you cut This cuts the frequencies in the region the low- or high-frequency range at intervals of below the cutoff frequency. Rate ISOLATOR the specified note value in synchronization with Rate... -
Page 22: System Settings (Settings For The Entire Rc-505)
System Settings (Settings for the Entire RC-505) Settings that are shared by the entire RC-505, such as those for the contrast of display and the auto off function are called “system settings. ” For details of the procedure on setting up, refer to “Basic Procedure for Editing the Settings” (p. 5). MEMO Use the [ ] buttons to select parameters. By pressing the [SYSTEM] button several times, you can also jump to parameters marked by the “ ” symbol. Parameter Value Explanation Adjusting the Display’s Brightness (LCD Contrast) Sys:LCD Contrast Adjusts the contrast of the display in a range from 1 (lightest) to 16 (darkest). Sys:PhantomPower Reference For details on the Phantom Power, refer to “Phantom Power Setting” (p. 6). Play Screen Setting (Display) Sys:Display MEMORY NUMBER Specifies the play screen that will be immediately after start-up. INIT MEMORY MEMORY The memory number will be shown in large characters (default NUMBER setting). INIT MEMORY LEVEL The playback levels of tracks 1–5 will be shown. -
Page 23: Enabling The Input Audio To Be Output From The Line
(p. 27). * If you execute “SYSTEM + MEMORY” or “MEMORY,” all of Press the [SYSTEM] button a number of times until the the RC-505’s phrase memories will be erased, and cannot “Factory Reset” appears . be recovered. Factory Reset... -
Page 24: Usb-Related Settings
System Settings (Settings for the Entire RC-505) USB-Related Settings Here you can make USB-related settings for when the RC-505 is USB audio flow connected to a computer via USB. RC-505 USB Audio Routing LINEOUT USB IN Level SUB MIX Reference LOOP IN To Looper For details on USB connection, refer to “Connecting to Your USB OUT Level Computer via USB” (p. 26). Same output sound as the LINE OUTPUT jacks * The [OUTPUT LEVEL] knob does not affect USB audio (OUT). -
Page 25: Midi-Related Settings
System Settings (Settings for the Entire RC-505) MIDI-Related Settings Here you can make settings for using the RC-505 with an external MIDI device or with a USB MIDI connection. Reference For details on MIDI, refer to “Connecting an External MIDI Device” (p. 28). Parameter Value Explanation MIDI Receive Channel Sys:MIDI Rx Ch 1–16 Sets the MIDI channel used for receiving MIDI messages. MIDI Omni Mode Sys:MIDI Omni Messages will be received only on the channel specified by the MIDI Receive Channel setting. Messages are received via all MIDI channels, regardless of the MIDI Receive Channel settings. MIDI Transmit Channel Sys:MIDI Tx Ch 1–16 Sets the MIDI channel used for transmitting MIDI messages. The MIDI transmit channel will be the same as the MIDI receive channel. Synchronizing the Tempo (MIDI Sync) -
Page 26: Connecting To Your Computer Via Usb
Turn the [MEMORY/VALUE] knob to select the “STORAGE . ” Computer Sys:USB Mode STORAGE Use an USB cable to connect the RC-505’s USB port to your computer’s USB port (a connector that supports USB 2 .0 Hi-Speed) . Press the [EXIT] button . - Page 27 Disconnect, OK? Y:WRITE N:EXIT * Performing this operation will erase all phrase memories that are currently saved in the RC-505. Be sure to make a backup before you proceed. To disconnect the connection, press the RC-505’s [WRITE] In the BOSS_RC-505 drive, delete the “ROLAND” folder, and then button .
-
Page 28: Connecting An External Midi Device
MIDI settings For details on the RC-505’s various MIDI parameters, refer to “MIDI-Related Settings” (p. 25). * Use of MIDI requires that the MIDI channels be matched with those of the connected device. Data cannot be transmitted to, nor received from another MIDI device unless the MIDI channels are set properly. Controlling an External MIDI Device from the RC-505 Operation Over View Explanation Setting an external MIDI device to the same tempo as the RC-505 The RC-505’s performance tempo data is MIDI clock messages are output from the RC-505 at all times. Set the external MIDI device transmitted to external MIDI devices as MIDI beforehand so it is ready to receive MIDI Clock and MIDI Start and Stop messages. For details, clock. refer to the owner’s manual that came with the device. Transmitting Start/Stop Transmitting Tempo... -
Page 29: Controlling The Rc-505 From An External Midi Device
Connecting an External MIDI Device Controlling the RC-505 from an External MIDI Device Operation Over View Explanation Setting the RC-505 to the same tempo as an external MIDI device Make settings on your external MIDI device so that it will transmit MIDI clock and MIDI start/stop data. For The RC-505 will synchronize to details, refer to the owner’s manual of your device. the tempo of MIDI clock data from an external MIDI device. Set the RC-505’s MIDI Sync (p. 25) to “AUTO. ” * You can’t switch the tempo during recording. Receiving Tempo Data... -
Page 30: Troubleshooting
Troubleshooting Problem Items to Check Action Problems with Sound Are the connection cables shorted? Try replacing the connection cable. Is the RC-505 properly connected to other Check the connections to other devices (p. 6). devices? Is the power to the connected amp or mixer not Check the settings for connected devices. turned on, or is the volume turned down? Could the [TRACK] sliders or the [OUTPUT Adjust sliders/knobs to the suitable positions. LEVEL] knob be lowered? No sound/low volume Could the following levels be lowered? Adjust each level. • Phrase Memory Level (p. 15) Check whether an external expression pedal might have been used to adjust the level (p. 17). • Track Play Level (p. 12) • System Line Output Level (p. 22) Check the track’s [EDIT] button to see whether the track has been recorded. If the [EDIT] Has anything been recorded to the tracks? button is unlit, nothing has been recorded. Is Rhythm Line Out (p. 19) set correctly? Check the Rhythm Line Out setting. No rhythm sound Could the Rhythm Level (p. 19) be lowered? -
Page 31: Error Message List
Data Damaged! In the Factory Reset function (p. 23), choose “SYSTEM + MEMORY” to you used your computer to format the “BOSS_RC-505” drive return the RC-505 to its factory settings. when connected in USB mass storage mode, causing the RC-505 to stop operating correctly . Data Read Error! A problem has occurred with the content of the RC-505’s Consult your Roland dealer or local Roland Service. -
Page 32: Rhythm Pattern List
Rhythm Pattern List Beat Pattern Beat Pattern Beat Pattern Beat Pattern Simple Beat 1–4 Simple Beat 1–7 Simple Beat 1–6 Simple Beat 1–6 Shu e 1–2 Groove Beat 1–2 Groove Beat 1–3 Groove Beat 1–3 Hi-Hat 1–2 Shu e Bossa Feel Bossa Feel Kick &... -
Page 33: Using The Unit Safely
USING THE UNIT SAFELY CAUTION About WARNING and CAUTION Notices About the Symbols Place in a well ventilated location symbol alerts the user to important instructions or Used for instructions intended to alert the warnings.The specific meaning of the symbol is The unit and the AC adaptor should be user to the risk of death or severe injury determined by the design contained within the triangle. -
Page 34: Important Notes
• MMP (Moore Microprocessor Portfolio) refers to a has been spilled on the surface of this unit, be sure to patent portfolio concerned with microprocessor promptly wipe it away using a soft, dry cloth. architecture, which was developed by Technology Properties Limited (TPL). Roland has licensed this Maintenance technology from the TPL Group. • For everyday cleaning wipe the unit with a soft, • The SD logo ( ) and SDHC logo ( ) are dry cloth or one that has been slightly dampened trademarks of SD-3C, LLC. with water. To remove stubborn dirt, use a cloth impregnated with a mild, non-abrasive detergent. • ASIO is a trademark and software of Steinberg Media Afterwards, be sure to wipe the unit thoroughly with Technologies GmbH. a soft, dry cloth. • This product contains eCROS integrated software • Never use benzine, thinners, alcohol or solvents of platform of eSOL Co.,Ltd. eCROS is a trademark of any kind, to avoid the possibility of discoloration eSOL Co., Ltd. in Japan. and/or deformation. • Roland, BOSS and LOOP STATION are either registered trademarks or trademarks of Roland Corporation in the United States and/or other countries. • Company names and product names appearing in this document are registered trademarks or trademarks of their respective owners. -
Page 35: Index
Index All Start ..... 16 Indicator .... 22 Pan . -
Page 36: Specifications
Specifications BOSS RC-505: Loop Station INPUT MIC (variable): -40 dBu (typ.), -10 dBu (max) Mass Storage Class Nominal Input Level INPUT INST (variable): -10 dBu (typ.), +4 dBu (max) Audio/MIDI INPUT AUX: -20 dBu INPUT MIC jack: XLR type (balanced, phantom power: DC 48 V, 10 mA Max) INPUT MIC: 4 k ohms INPUT INST (L/MONO, R) jacks: 1/4-inch phone type Input Impedance INPUT INST: 200 k ohms INPUT AUX jack: Stereo miniature phone type INPUT AUX: 22 k ohms PHONES jack: 1/4-inch Stereo phone type Nominal Output LINE OUT: -10 dBu Connectors LINE OUTPUT (L/MONO, R) jacks: 1/4-inch Stereo phone Level type Output Impedance LINE OUT: 2 k ohms CTL 1, 2/EXP jack: 1/4-inch TRS phone type Recommended Load LINE OUT: 10 k ohms or greater USB port: USB Type B Impedance MIDI (IN, OUT) connectors Maximum Recording Time: Approx. 3 hours (stereo) - Page 37 Memo...
- Page 38 For EU Countries For China...
- Page 39 This product contains chemicals known to cause cancer, birth defects and other reproductive harm, including lead. For the USA DECLARATION OF CONFORMITY Compliance Information Statement Model Name : RC-505 Type of Equipment : Effector Responsible Party : Roland Corporation U.S.