Table of Contents
Advertisement
Quick Links
BARKO
BARKO
BARKO
BARKO
BARKO
LOADERS
LOADERS
LOADERS
LOADERS
LOADERS
NOTE: The Grapple Service and Installation Information is not included in this manual. See separate
Grapple Service and Installation manual which accompanies all grapples from the factory.
OPERATORS: 800-00040
OPERATORS: 800-00040
OPERATORS: 800-00040
OPERATORS: 800-00040
OPERATORS: 800-00040
012501
SERVICE MANUAL
SERVICE MANUAL
SERVICE MANUAL
SERVICE MANUAL
SERVICE MANUAL
475A
475A Crawler
475A
475A
475A
Machine
Serial Number
The information and illustrations in this manual have
been approved as accurate at the time of printing.
However, the manual may contain information on options
not present on your loader. The right is reserved by
Barko Hydraulics,LLC to make changes and
improvements in it's product at anytime without notice
or obligation.
BARKO
BARKO
BARKO
BARKO
BARKO
HYDRAULICS,
HYDRAULICS,
HYDRAULICS,
HYDRAULICS,
HYDRAULICS,
mailing: PO Box 16227, Duluth, MN 55816 shipping: 1 Banks Avenue, Superior, WI 54880
phone: 715-392-5641 fax: 715-392-3931
website: www.barko.com email: barko@barko.com
PARTS: 800-00101
PARTS: 800-00101
PARTS: 800-00101
PARTS: 800-00101
PARTS: 800-00101
Crawler
Crawler
Crawler
Crawler
SERVICE: 800-00167
SERVICE: 800-00167
SERVICE: 800-00167
SERVICE: 800-00167
SERVICE: 800-00167
LLC
LLC
LLC
LLC
LLC
Advertisement
Table of Contents
Troubleshooting

Subscribe to Our Youtube Channel
Summary of Contents for BARKO LOADERS Crawler 475A
- Page 1 BARKO BARKO BARKO BARKO BARKO LOADERS LOADERS LOADERS LOADERS LOADERS SERVICE MANUAL SERVICE MANUAL SERVICE MANUAL SERVICE MANUAL SERVICE MANUAL 475A 475A 475A Crawler Crawler Crawler Crawler 475A 475A Crawler Machine Serial Number NOTE: The Grapple Service and Installation Information is not included in this manual. See separate Grapple Service and Installation manual which accompanies all grapples from the factory.
-
Page 2: Table Of Contents
TABLE OF CONTENTS TABLE OF CONTENTS TABLE OF CONTENTS TABLE OF CONTENTS TABLE OF CONTENTS C. Electrical System Maintenance C. Electrical System Maintenance ......INTRODUCTION INTRODUCTION INTRODUCTION INTRODUCTION INTRODUCTION ..................................................3 3 3 3 3 C. - Page 3 page 3 page 3 page 3 page 3 page 3 475 A CRL 800-00167...
-
Page 4: Introduction
INTRODUCTION INTRODUCTION INTRODUCTION INTRODUCTION INTRODUCTION Your Barko Loader has been designed and manufactured with high quality materials and care in workmanship. This manual is intended as a permanent reference to aid professioinal operator's in their work, and should be available for use at any time. If the loader is not eqipped with this manual, ask your supervisor to obtain one for you. -
Page 5: Abbreviations And Symbols
ABBREVIATIONS AND SYMBOLS ABBREVIATIONS AND SYMBOLS ABBREVIATIONS AND SYMBOLS ABBREVIATIONS AND SYMBOLS ABBREVIATIONS AND SYMBOLS air conditioner number Articulated Carrier (Art. Car.) Not Sold Separately adj. adjust or adjusting opt. optional appl. application page quart As Required assy assembly RH (rh) right hand Back of Cab sec. -
Page 6: Hydraulic Pressure Warning Sheet
HYDRAULIC PRESSURE WARNING SHEET HYDRAULIC PRESSURE WARNING SHEET HYDRAULIC PRESSURE WARNING SHEET HYDRAULIC PRESSURE WARNING SHEET HYDRAULIC PRESSURE WARNING SHEET MODEL 475A MODEL 475A MODEL 475A MODEL 475A MODEL 475A WARNING WARNING WARNING WARNING WARNING MAXIMUM HYDRAULIC PRESSURE FOR MAXIMUM HYDRAULIC PRESSURE FOR MAXIMUM HYDRAULIC PRESSURE FOR MAXIMUM HYDRAULIC PRESSURE FOR MAXIMUM HYDRAULIC PRESSURE FOR... -
Page 7: Warranty
WARRANTY WARRANTY WARRANTY WARRANTY WARRANTY BARKO HYDRAULICS, LLC BARKO HYDRAULICS, LLC BARKO HYDRAULICS, LLC BARKO HYDRAULICS, LLC BARKO HYDRAULICS, LLC hydraulic BARKO HYDRAULICS, L.L.C. ("Barko") warrants to the Distributor and/or original Buyer each new knuckle boom loader, feller buncher or other product in BARKO HYDRAULICS Equipment Group including attach- ments and accessories thereto, ("Product") sold by BARKO to be free from defects in material and workmanship under normal use, maintenance and service. -
Page 8: Know Your Machine
KNOW YOUR MACHINE KNOW YOUR MACHINE KNOW YOUR MACHINE KNOW YOUR MACHINE KNOW YOUR MACHINE The following is a list of ten important safety precautions and warnings you should read through and understand before operating or servicing your machine. 1. 1. 1. 1. 1. Don't assume that because you know the control functions of other similar machinery, that you can run and/ Don't assume that because you know the control functions of other similar machinery, that you can run and/ Don't assume that because you know the control functions of other similar machinery, that you can run and/ Don't assume that because you know the control functions of other similar machinery, that you can run and/... -
Page 9: Safety Summary
SAFETY SUMMARY SAFETY SUMMARY SAFETY SUMMARY SAFETY SUMMARY SAFETY SUMMARY Failure to follow safety precautions in this manual can result in death, severe personal injury and/or property damage. Carefully read safety precautions below and within this manual. Heed all decals on machine. DANGER DANGER DANGER... - Page 10 SAFETY SUMMARY CONTINUED... WARNING WARNING WARNING WARNING WARNING WARNING WARNING WARNING WARNING WARNING Do not operate or work on machine until you: Do not operate or work on machine until you: Allow only the operator on the machine. Keep Allow only the operator on the machine. Keep Allow only the operator on the machine.
- Page 11 SAFETY SUMMARY CONTINUED... WARNING WARNING WARNING WARNING WARNING WARNING WARNING WARNING WARNING WARNING High pressure hydraulic fluid can penetrate skin High pressure hydraulic fluid can penetrate skin High pressure hydraulic fluid can penetrate skin Improper load handling and/or hydraulic pressure Improper load handling and/or hydraulic pressure Improper load handling and/or hydraulic pressure High pressure hydraulic fluid can penetrate skin...
- Page 12 SAFETY SUMMARY CONTINUED... WARNING WARNING WARNING WARNING WARNING WARNING WARNING WARNING WARNING WARNING Always wear seat belt when operating or running Always wear seat belt when operating or running Always wear seat belt when operating or running Always wear seat belt when operating or running Always wear seat belt when operating or running If this machine is equipped with electric motor If this machine is equipped with electric motor...
-
Page 13: Fire Prevention
FIRE PREVENTION FIRE PREVENTION FIRE PREVENTION FIRE PREVENTION FIRE PREVENTION This machine may have several components which are at high temperatures under normal operating conditions, such as the engine, exhaust system, brake system and transmission. Clean the machine often. High pressure washing of the machine is suggested every 1000 hours (or 6 months) and always after a spill. -
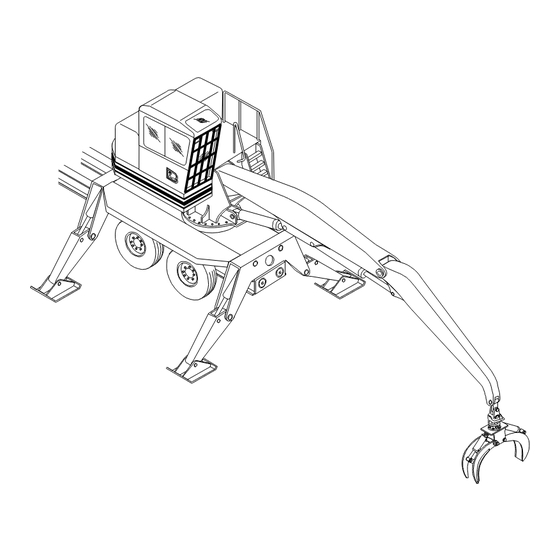
Page 14: Model Description
MODEL DESCRIPTION MODEL DESCRIPTION MODEL DESCRIPTION MODEL DESCRIPTION MODEL DESCRIPTION STICK BOOM STICK BOOM STICK BOOM STICK BOOM STICK BOOM CYLINDER CYLINDER CYLINDER CYLINDER CYLINDER MAIN BOOM MAIN BOOM MAIN BOOM MAIN BOOM MAIN BOOM STICK BOOM STICK BOOM STICK BOOM STICK BOOM STICK BOOM MAIN BOOM... -
Page 15: Maintenance Maintenance
A. PREVENTIVE MAINTENANCE A. PREVENTIVE MAINTENANCE A. PREVENTIVE MAINTENANCE A. PREVENTIVE MAINTENANCE A. PREVENTIVE MAINTENANCE page 15 page 15 page 15 page 15 page 15 475 A CRL 800-00167... -
Page 16: Safety While Servicing
SAFETY WHILE SERVICING SAFETY WHILE SERVICING SAFETY WHILE SERVICING SAFETY WHILE SERVICING SAFETY WHILE SERVICING The following maintenance section gives suggested guidelines for operational maintenance on your machine. It is not intended for use as a service manual. In severe conditions (extreme dust, heat, cold, humidity, etc.) you will need to service your machine more often. Your experience will dictate a more severe servicing program. -
Page 17: Preventive Maintenance
PREVENTIVE MAINTENANCE PREVENTIVE MAINTENANCE PREVENTIVE MAINTENANCE PREVENTIVE MAINTENANCE PREVENTIVE MAINTENANCE Preventive maintenance is really just a simple matter of common sense. If you keep any piece of mechanical equipment clean and properly lubricated, and promptly replace any worn or damaged parts, you are going to "prevent" deterioration and promote long life and safe, productive service. -
Page 18: Service Schedule
SERVICE SCHEDULE SERVICE SCHEDULE SERVICE SCHEDULE SERVICE SCHEDULE SERVICE SCHEDULE 8 HRS. 8 HRS. 8 HRS. 8 HRS. 8 HRS. 50 HRS. 50 HRS. 50 HRS. 50 HRS. 50 HRS. 100 HRS. 100 HRS. 100 HRS. 100 HRS. 100 HRS. 400 HRS. - Page 19 SERVICE SCHEDULE CONTINUED... CRAWLER LOWER SERVICE SCHEDULE CRAWLER LOWER SERVICE SCHEDULE CRAWLER LOWER SERVICE SCHEDULE CRAWLER LOWER SERVICE SCHEDULE CRAWLER LOWER SERVICE SCHEDULE 8 HRS. 8 HRS. 8 HRS. 400 HRS. 400 HRS. 1000 HRS. 1000 HRS. 8 HRS. 8 HRS. 50 HRS.
-
Page 20: Lubrication Points
LUBRICATION POINTS LUBRICATION POINTS LUBRICATION POINTS LUBRICATION POINTS LUBRICATION POINTS (PERFORM DAILY) (PERFORM DAILY) (PERFORM DAILY) (PERFORM DAILY) (PERFORM DAILY) Grapple Arms 13 Pump Drive GREASE GREASE GREASE GREASE GREASE Grapple Rotator 14 Track Drive Gearbox Grapple Cylinders 15 Crawler Final Drive Grapple Hanger (2 fittings) 16 Crawler Front Idlers Main Boom Pivot... - Page 21 LUBRICATION POINTS CONTINUED... TURNTABLE BEARING LUBRICATION TURNTABLE BEARING LUBRICATION TURNTABLE BEARING LUBRICATION TURNTABLE BEARING LUBRICATION TURNTABLE BEARING LUBRICATION Turntable Bearing must be greased daily. Use a grease with Bearing Lubrication Point Bearing Lubrication Point Bearing Lubrication Point Bearing Lubrication Point Bearing Lubrication Point Pinion Lubrication Pinion Lubrication...
-
Page 22: Fluid Specifications
FLUID SPECIFICATIONS FLUID SPECIFICATIONS FLUID SPECIFICATIONS FLUID SPECIFICATIONS FLUID SPECIFICATIONS GREASE GREASE GREASE GREASE GREASE Use grease shown on chart below, depending on the expected air temperature range. AIR TEMPERATURE RANGE AIR TEMPERATURE RANGE AIR TEMPERATURE RANGE AIR TEMPERATURE RANGE AIR TEMPERATURE RANGE Fahrenheit (F) Fahrenheit (F) - Page 23 FLUID SPECIFICATIONS CONTINUED... FUEL STORAGE FUEL STORAGE FUEL STORAGE FUEL STORAGE FUEL STORAGE NOTE: NOTE: NOTE: Diesel fuels stored for a long time may form gum or bacteria and plug filters. NOTE: NOTE: Keep fuel in a clean container and store in a protected area. Water and sediment must be removed before fuel gets to the engine.
-
Page 24: Special Torque Specifications
SPECIAL TORQUE SPECIFICATIONS SPECIAL TORQUE SPECIFICATIONS SPECIAL TORQUE SPECIFICATIONS SPECIAL TORQUE SPECIFICATIONS SPECIAL TORQUE SPECIFICATIONS WARNING WARNING WARNING WARNING WARNING Loose or overtorqued bolts can cause death, severe injury, or property Loose or overtorqued bolts can cause death, severe injury, or property Loose or overtorqued bolts can cause death, severe injury, or property Loose or overtorqued bolts can cause death, severe injury, or property Loose or overtorqued bolts can cause death, severe injury, or property... -
Page 25: General Torque Specifications
GENERAL TORQUE SPECIFICATIONS GENERAL TORQUE SPECIFICATIONS GENERAL TORQUE SPECIFICATIONS GENERAL TORQUE SPECIFICATIONS GENERAL TORQUE SPECIFICATIONS See Special Torque Specifications that pertain specifically to this machine. * * * * * LUBRICATED LUBRICATED LUBRICATED LUBRICATED LUBRICATED DIA. DIA. DIA. DIA. DIA. WARNING WARNING WARNING... -
Page 26: Hydraulic System Maintenance
B. HYDRAULIC SYSTEM B. HYDRAULIC SYSTEM B. HYDRAULIC SYSTEM B. HYDRAULIC SYSTEM B. HYDRAULIC SYSTEM MAINTENANCE MAINTENANCE MAINTENANCE MAINTENANCE MAINTENANCE page 26 page 26 page 26 page 26 page 26 475 A CRL 800-00167... -
Page 27: Hydraulic Schematic
HYDRAULIC SCHEMATIC HYDRAULIC SCHEMATIC HYDRAULIC SCHEMATIC HYDRAULIC SCHEMATIC HYDRAULIC SCHEMATIC 607-00006 607-00006 607-00006 607-00006 607-00006 page 27 page 27 page 27 page 27 page 27 475 A CRL 800-00167... -
Page 28: Hydraulic Pressure Settings
HYDRAULIC PRESSURE SETTINGS HYDRAULIC PRESSURE SETTINGS HYDRAULIC PRESSURE SETTINGS HYDRAULIC PRESSURE SETTINGS HYDRAULIC PRESSURE SETTINGS RELIEF VALVES RELIEF VALVES RELIEF VALVES RELIEF VALVES RELIEF VALVES The Relief Valve portion of the control valves in your Barko Loader limit the flow of hydraulic oil, which relieves the excess pressure in the hydraulic system, if for any reason pressure is built up above a predetermined, safe, maximum. - Page 29 HYDRAULIC PRESSURE SETTINGS CONTINUED... BOOM AND TRAVEL FUNCTION VALVES BOOM AND TRAVEL FUNCTION VALVES BOOM AND TRAVEL FUNCTION VALVES BOOM AND TRAVEL FUNCTION VALVES BOOM AND TRAVEL FUNCTION VALVES The most important servicing required on the Boom & Travel Function Valves is the pressure setting. Each valve "bank"...
-
Page 30: Hydraulic Pressure Adjustment Procedure
HYDRAULIC PRESSURE ADJUSTMENT HYDRAULIC PRESSURE ADJUSTMENT HYDRAULIC PRESSURE ADJUSTMENT HYDRAULIC PRESSURE ADJUSTMENT HYDRAULIC PRESSURE ADJUSTMENT PROCEDURE PROCEDURE PROCEDURE PROCEDURE PROCEDURE Use this illustration as a reference for pump locations, for the following procedures. Use this illustration as a reference for pump locations, for the following procedures. Use this illustration as a reference for pump locations, for the following procedures. - Page 31 HYDRAULIC PRESSURE ADJUSTMENT PROCEDURE CONTINUED... SERVO MANIFOLD SERVO MANIFOLD SERVO MANIFOLD SERVO MANIFOLD SERVO MANIFOLD 5. Set the servo pressure to 500 PSI at high idle. TURN TO SET TURN TO SET TURN TO SET TURN TO SET TURN TO SET PRESSURE PRESSURE PRESSURE...
- Page 32 HYDRAULIC PRESSURE ADJUSTMENT PROCEDURE CONTINUED... GRAPPLE PUMP GRAPPLE PUMP GRAPPLE PUMP GRAPPLE PUMP GRAPPLE PUMP 11. Then reset the grapple pump compensator to 2500 PSI. PRESSURE PRESSURE PRESSURE PRESSURE PRESSURE ADJUSTING ADJUSTING ADJUSTING ADJUSTING ADJUSTING NOTE: NOTE: NOTE: NOTE: 2500 PSI is the maximum factory NOTE: SCREW SCREW...
- Page 33 HYDRAULIC PRESSURE ADJUSTMENT PROCEDURE CONTINUED... TRAVEL COUNTERBALANCE VALVE TRAVEL COUNTERBALANCE VALVE TRAVEL COUNTERBALANCE VALVE TRAVEL COUNTERBALANCE VALVE TRAVEL COUNTERBALANCE VALVE 14. To stall the tracks, disconnect the brake lines inside the drive motor compartment where it connects to the brake assembly and plug the lines with a #6 o-ring plug (Barko part number 569-00460, two are required).
- Page 34 HYDRAULIC PRESSURE ADJUSTMENT PROCEDURE CONTINUED... BOOM & TRAVEL PUMP (NEW STYLE) BOOM & TRAVEL PUMP (NEW STYLE) BOOM & TRAVEL PUMP (NEW STYLE) BOOM & TRAVEL PUMP (NEW STYLE) BOOM & TRAVEL PUMP (NEW STYLE) ADJUSTING ADJUSTING ADJUSTING ADJUSTING ADJUSTING SCREW SCREW SCREW...
-
Page 35: Hydraulic Reservoir Maintenance
HYDRAULIC RESERVOIR MAINTENANCE HYDRAULIC RESERVOIR MAINTENANCE HYDRAULIC RESERVOIR MAINTENANCE HYDRAULIC RESERVOIR MAINTENANCE HYDRAULIC RESERVOIR MAINTENANCE The supply source for the hydraulic system, the oil reservoir, is located on the frame on the right side of the machine. The reservoir features return line filters and suction screens to keep the oil clean. Filters are cleanable, and/or replaceable. - Page 36 HYDRAULIC RESERVOIR MAINTENANCE CONTINUED... HYDRAULIC OIL CHANGING PROCEDURE HYDRAULIC OIL CHANGING PROCEDURE HYDRAULIC OIL CHANGING PROCEDURE HYDRAULIC OIL CHANGING PROCEDURE HYDRAULIC OIL CHANGING PROCEDURE This procedure should be used once during the breaking in period of a new loader (after one week, or 50 hours of operation) and then every six months, or 1000 hours.
- Page 37 HYDRAULIC RESERVOIR MAINTENANCE CONTINUED... CLEANING THE RESERVOIR CLEANING THE RESERVOIR CLEANING THE RESERVOIR CLEANING THE RESERVOIR CLEANING THE RESERVOIR 1. Clean the area around the inspection cover on tank, and then remove the cover. 2. Remove the suction strainer from inside the reservoir. Clean it with a solvent. 3.
-
Page 38: Hydraulic Oil Filter Maintenance
HYDRAULIC OIL FILTER MAINTENANCE HYDRAULIC OIL FILTER MAINTENANCE HYDRAULIC OIL FILTER MAINTENANCE HYDRAULIC OIL FILTER MAINTENANCE HYDRAULIC OIL FILTER MAINTENANCE A. THE "RETURN" FILTERS A. THE "RETURN" FILTERS A. THE "RETURN" FILTERS A. THE "RETURN" FILTERS A. THE "RETURN" FILTERS Two Return Filters are used, which are mounted together with a "manifold"... - Page 39 HYDRAULIC OIL FILTER MAINTENANCE CONTINUED... 5. Replace element on the diverter/bypass valve assembly and install in the filter housing. Make sure that the diverter o-ring seats properly into the head. 6. Check to make sure the notch on the diverter/bypass valve assembly lines up with the notch in the head. 7.
- Page 40 HYDRAULIC OIL FILTER MAINTENANCE CONTINUED... C. THE "SUCTION" FILTER C. THE "SUCTION" FILTER C. THE "SUCTION" FILTER C. THE "SUCTION" FILTER C. THE "SUCTION" FILTER The suction filter is mounted to the reservoir and contains a replaceable filter element which simply unscrews from the filter head to be replaced.
-
Page 41: Eliminating Air From The System
ELIMINATING AIR FROM THE SYSTEM ELIMINATING AIR FROM THE SYSTEM ELIMINATING AIR FROM THE SYSTEM ELIMINATING AIR FROM THE SYSTEM ELIMINATING AIR FROM THE SYSTEM All hydraulic fluid contains some dissolved air, usually about 10% by volume. Under increased pressure, the fluid will absorb much more air. -
Page 42: Hydraulic Fittings, Hoses And Tubing
HYDRAULIC FITTINGS, HOSES AND TUBING HYDRAULIC FITTINGS, HOSES AND TUBING HYDRAULIC FITTINGS, HOSES AND TUBING HYDRAULIC FITTINGS, HOSES AND TUBING HYDRAULIC FITTINGS, HOSES AND TUBING A heavy wall tubing and multi-wire hose network carries the hydraulic oil from the reservoir to the pumps and valves and then to cylinders and motors and finally back to the reservoir. -
Page 43: Hydraulic Cylinder Maintenance
HYDRAULIC CYLINDER MAINTENANCE HYDRAULIC CYLINDER MAINTENANCE HYDRAULIC CYLINDER MAINTENANCE HYDRAULIC CYLINDER MAINTENANCE HYDRAULIC CYLINDER MAINTENANCE Hydraulic cylinders provide force used to operate booms, attachment, and stabilizers. Proper maintenance of cylinders will promote long life and smooth operation. Inspect cylinders daily for leaks or damage and repair or replace as necessary. Lubricate cylinder grease fittings daily. - Page 44 Piston and Gland shown may not be type used on your machine but are shown as a reference. 3 3 3 3 3 2 2 2 2 2 1 1 1 1 1 2 2 2 2 2 6 6 6 6 6 Piston Piston Piston...
-
Page 45: Collector Maintenance
COLLECTOR MAINTENANCE COLLECTOR MAINTENANCE COLLECTOR MAINTENANCE COLLECTOR MAINTENANCE COLLECTOR MAINTENANCE All hydraulic components below the turntable bearing continue to be operable during rotation of the upper assembly because of the hydraulic collector. Located on the rotating turntable assembly, the collector is so designed as to allow the flow of hydraulic oil to the cylinders at all points in the turntable rotation. - Page 46 HYDRAULIC COLLECTOR MAINTENANCE CONTINUED... COLLECTOR SHOWN MAY NOT BE TYPE USED ON YOUR MACHINE BUT IS SHOWN AS A REFERENCE. COLLECTOR SHOWN MAY NOT BE TYPE USED ON YOUR MACHINE BUT IS SHOWN AS A REFERENCE. COLLECTOR SHOWN MAY NOT BE TYPE USED ON YOUR MACHINE BUT IS SHOWN AS A REFERENCE. COLLECTOR SHOWN MAY NOT BE TYPE USED ON YOUR MACHINE BUT IS SHOWN AS A REFERENCE.
-
Page 47: Valve Maintenance (A20/A35 Control Valves)
VALVE MAINTENANCE (A20/A35 CONTROL VALVES) VALVE MAINTENANCE (A20/A35 CONTROL VALVES) VALVE MAINTENANCE (A20/A35 CONTROL VALVES) VALVE MAINTENANCE (A20/A35 CONTROL VALVES) VALVE MAINTENANCE (A20/A35 CONTROL VALVES) SERVICING THE CONTROL VALVES SERVICING THE CONTROL VALVES SERVICING THE CONTROL VALVES SERVICING THE CONTROL VALVES SERVICING THE CONTROL VALVES Remove the valve bank from the equipment and disconnect all hoses, fittings, control handles, and linkage connectors that might be attached to the valve. - Page 48 A20/A35 CONTROL VALVE MAINTENANCE CONTINUED... STEP 2 - TIE BOLTS STEP 2 - TIE BOLTS STEP 2 - TIE BOLTS STEP 2 - TIE BOLTS STEP 2 - TIE BOLTS Remove the four (4) tie bolts which hold the bank together and separate the sections. NOTE NOTE NOTE...
- Page 49 A20/A35 CONTROL VALVE MAINTENANCE CONTINUED... STEP 6 - TRANSITION CHECK STEP 6 - TRANSITION CHECK STEP 6 - TRANSITION CHECK STEP 6 - TRANSITION CHECK STEP 6 - TRANSITION CHECK The transition check is located in the bottom center of the work section housing. Remove the check valve cap (Item 10) and its o-ring seal (Item 11) then remove the check spring (Item 12) and the check valve poppet (Item 13).
- Page 50 A20/A35 CONTROL VALVE MAINTENANCE CONTINUED... PARTS LIST ( for figures 2 and 3-4 ) PARTS LIST ( for figures 2 and 3-4 ) PARTS LIST ( for figures 2 and 3-4 ) PARTS LIST ( for figures 2 and 3-4 ) PARTS LIST ( for figures 2 and 3-4 ) ITEM ITEM...
- Page 51 A20/A35 CONTROL VALVE MAINTENANCE CONTINUED... STEP 8 - DETENTED SPOOL STEP 8 - DETENTED SPOOL STEP 8 - DETENTED SPOOL STEP 8 - DETENTED SPOOL STEP 8 - DETENTED SPOOL Again these parts should not be removed from the spool unless they need to be replaced. Wrap the detent sleeve (Item 17) with a clean rag.
- Page 52 A20/A35 CONTROL VALVE MAINTENANCE CONTINUED... Assemble the spring (Item 15), spring guides (Item 16) and stripper bolt (Item 14) onto the spool (Reverse of Step 7). Lightly coat the spring assembly with high temperature grease to prevent rusting. SPOOL ASSEMBLY - DETENTED SPOOL ASSEMBLY - DETENTED SPOOL ASSEMBLY - DETENTED SPOOL ASSEMBLY - DETENTED...
- Page 53 A20/A35 CONTROL VALVE MAINTENANCE CONTINUED... SYSTEM OVERLOAD RELIEF VALVE SYSTEM OVERLOAD RELIEF VALVE SYSTEM OVERLOAD RELIEF VALVE SYSTEM OVERLOAD RELIEF VALVE SYSTEM OVERLOAD RELIEF VALVE The main relief valve protects the hydraulic system against overload pressures. It is located in the inlet housing and it also can be found in mid-inlet sections used in the valve bank.
- Page 54 A20/A35 CONTROL VALVE MAINTENANCE CONTINUED... SERVICE INSTRUCTIONS FOR VA/VG REMOTE CONTROL OPERATORS SERVICE INSTRUCTIONS FOR VA/VG REMOTE CONTROL OPERATORS SERVICE INSTRUCTIONS FOR VA/VG REMOTE CONTROL OPERATORS SERVICE INSTRUCTIONS FOR VA/VG REMOTE CONTROL OPERATORS SERVICE INSTRUCTIONS FOR VA/VG REMOTE CONTROL OPERATORS Read these instructions carefully.
- Page 55 A20/A35 CONTROL VALVE MAINTENANCE CONTINUED... NOTE: NOTE: NOTE: NOTE: NOTE: If stripper bolt (3) was not removed from spool, proceed to Step 6. 1. Place spool in a soft-jawed vise, threaded end up. 2. Spray the threads of the new stripper bolt (3) and hex nut (9) with LOCQUIC Primer Grade NF and let dry. Apply Loctite 262 Red to threads.
- Page 56 A20/A35 CONTROL VALVE MAINTENANCE CONTINUED... TROUBLESHOOTING CHART TROUBLESHOOTING CHART TROUBLESHOOTING CHART TROUBLESHOOTING CHART TROUBLESHOOTING CHART PROBABLE CAUSE PROBABLE CAUSE PROBABLE CAUSE REMEDY REMEDY REMEDY TROUBLE TROUBLE TROUBLE PROBABLE CAUSE PROBABLE CAUSE REMEDY REMEDY TROUBLE TROUBLE Replace seal. Oil leaks between sections. Pinched or blown section seal.
-
Page 57: Pump Maintenance (Swing)
PUMP MAINTENANCE (SWING) PUMP MAINTENANCE (SWING) PUMP MAINTENANCE (SWING) PUMP MAINTENANCE (SWING) PUMP MAINTENANCE (SWING) REMOVAL AND INSPECTION OF CHARGE PUMP REMOVAL AND INSPECTION OF CHARGE PUMP REMOVAL AND INSPECTION OF CHARGE PUMP REMOVAL AND INSPECTION OF CHARGE PUMP REMOVAL AND INSPECTION OF CHARGE PUMP Before removing charge pump mounting bolts, mark position of charge pump housing in relation to port block. -
Page 58: Pump Maintenance (Boom & Travel)
PUMP MAINTENANCE (BOOM & TRAVEL) PUMP MAINTENANCE (BOOM & TRAVEL) PUMP MAINTENANCE (BOOM & TRAVEL) PUMP MAINTENANCE (BOOM & TRAVEL) PUMP MAINTENANCE (BOOM & TRAVEL) SEAL KITS AND COMPONENT SEAL KITS AND COMPONENT SEAL KITS AND COMPONENT SEAL KITS AND COMPONENT SEAL KITS AND COMPONENT GROUPS GROUPS... - Page 59 BOOM & TRAVEL PUMP MAINTENANCE CONTINUED... 2. Lift off end ring. 3. Inspect dust and sealing lip (1), o-ring (2), o-ring groove (3), running area (4), and o-ring contact area (5). 4. Fit the shaft seal (dry) with insertion sleeve (1). Use shim (2) only if running groove is deep.
- Page 60 BOOM & TRAVEL PUMP MAINTENANCE CONTINUED... FITTING O-RINGS FITTING O-RINGS FITTING O-RINGS FITTING O-RINGS FITTING O-RINGS 7. O-ring in groove: Do not fill groove (1) with grease. Grease o-ring. Fill on the side with the chamfer (2). 8. O-ring behind thread or recess: Tape up recess or thread.
- Page 61 BOOM & TRAVEL PUMP MAINTENANCE CONTINUED... 4. Inspect the groove (1), o-ring (2), sealing face (3), and recess (4). 5. Before reassembling, fit the o-ring in the groove (1) with grease. Grease the piston ring (2). SEALING THE SUBPLATE SEALING THE SUBPLATE SEALING THE SUBPLATE SEALING THE SUBPLATE SEALING THE SUBPLATE...
- Page 62 BOOM & TRAVEL PUMP MAINTENANCE CONTINUED... 4. Fit the control lens (1) in the sliding surface with grease. Swivel the rotary group in the housing according to the position of the control lens. 5. Lay the gasket on flat. No fluid seal - seal thickness has been allowed for in the rotary group adjustment.
- Page 63 BOOM & TRAVEL PUMP MAINTENANCE CONTINUED... 4. Draw out rotary group. 5. Check that outer rings (1) in housing are not twisted and that the housing is not damaged. 6. Check that lens sliding surface (1), is free of scoring and not worn. 7.
- Page 64 BOOM & TRAVEL PUMP MAINTENANCE CONTINUED... 9. Reassemble subplate onto housing. page 64 page 64 page 64 page 64 page 64 475 A CRL 800-00167...
-
Page 65: Pump Maintenance (Servo)
PUMP MAINTENANCE (SERVO) PUMP MAINTENANCE (SERVO) PUMP MAINTENANCE (SERVO) PUMP MAINTENANCE (SERVO) PUMP MAINTENANCE (SERVO) Refer to Figure A below for the following procedures. Item Item Item Qty Description Description Description Item Item Item Qty Description Description Description Item Item Description Description Item... - Page 66 SERVO PUMP MAINTENANCE CONTINUED... DISASSEMBLY OF PUMP DISASSEMBLY OF PUMP DISASSEMBLY OF PUMP DISASSEMBLY OF PUMP DISASSEMBLY OF PUMP 1. Clean outside of pump with a good grade solvent and dry thoroughly. 2. On models with splined drive shaft, proceed to step 3. 3.
- Page 67 SERVO PUMP MAINTENANCE CONTINUED... 3. Remove pressure loading seal and Nylatron from wear plate. This seal may be two-piece or one-piece design. In either case, discard old seal or seals. All replacement seals are two-piece design and should be installed into groove. The seal should extend a minimum of .0005"...
- Page 68 SERVO PUMP MAINTENANCE CONTINUED... 10.On models equipped with keyed drive shaft, install snap ring on drive shaft and install drive key. 11.Check that drive shaft turns with adjustable wrench without evidence of mechanical bind. BREAK-IN PROCEDURE BREAK-IN PROCEDURE BREAK-IN PROCEDURE BREAK-IN PROCEDURE BREAK-IN PROCEDURE TEST STAND METHOD:...
-
Page 69: Motor Maintenance (Drive)
MOTOR MAINTENANCE (DRIVE) MOTOR MAINTENANCE (DRIVE) MOTOR MAINTENANCE (DRIVE) MOTOR MAINTENANCE (DRIVE) MOTOR MAINTENANCE (DRIVE) Figure 1: Internal view of drive motor. Figure 1 Figure 1 Figure 1 Figure 1 Figure 1 SHAFT SEAL REPLACEMENT SHAFT SEAL REPLACEMENT SHAFT SEAL REPLACEMENT SHAFT SEAL REPLACEMENT SHAFT SEAL REPLACEMENT See Figure 2. -
Page 70: Swing Motor Gearbox Maintenance (S10A)
SWING MOTOR GEARBOX MAINTENANCE (S10A) SWING MOTOR GEARBOX MAINTENANCE (S10A) SWING MOTOR GEARBOX MAINTENANCE (S10A) SWING MOTOR GEARBOX MAINTENANCE (S10A) SWING MOTOR GEARBOX MAINTENANCE (S10A) INTRODUCTION INTRODUCTION INTRODUCTION INTRODUCTION INTRODUCTION This manual is a step-by-step guide to assembly and disassembly of torque-hub units. It is designed for the customer or shop mechanic who is repairing a particular model of torque-hub final drive. - Page 71 S10A SWING MOTOR GEARBOX MAINTENANCE CONTINUED... 4. Now use a torque wrench to apply the specified torque to bolt “A”. 5. Continue around the bolt circle and apply an equal torque to the remaining bolts. Cross Sectional View of Gearbox Cross Sectional View of Gearbox Cross Sectional View of Gearbox Cross Sectional View of Gearbox...
- Page 72 S10A SWING MOTOR GEARBOX MAINTENANCE CONTINUED... MAIN DISASSEMBLY - PART ONE MAIN DISASSEMBLY - PART ONE MAIN DISASSEMBLY - PART ONE MAIN DISASSEMBLY - PART ONE MAIN DISASSEMBLY - PART ONE 1. Remove pipe plugs (1M) and drain the oil from the unit. 2.
- Page 73 S10A SWING MOTOR GEARBOX MAINTENANCE CONTINUED... CARRIER SUB-ASSEMBLY CARRIER SUB-ASSEMBLY CARRIER SUB-ASSEMBLY CARRIER SUB-ASSEMBLY CARRIER SUB-ASSEMBLY Place cluster gear (3F) onto your work surface, either side up. Press bearing cup (3C) into one side of cluster gear using cup pressing tool. Turn cluster gear (3F) over onto it’s other side.
- Page 74 S10A SWING MOTOR GEARBOX MAINTENANCE CONTINUED... Checking Rolling Torque Checking Rolling Torque Checking Rolling Torque Checking Rolling Torque Checking Rolling Torque Diagram 1 Diagram 1 Diagram 1 Diagram 1 Diagram 1 11. Once the rolling torque has been determined, apply a liberal coat of oil to the bearing cones (1F, 1D) and bearing cups (1C, 1E).
- Page 75 S10A SWING MOTOR GEARBOX MAINTENANCE CONTINUED... 18. Using locknut wrench tighten locknut (1J) to 300-350 Ft. Lbs., rotating the locknut until the locknut's slot is aligned with a tang of the lockwasher (1I). 19. Bend one of the tangs on the lockwasher (1I) into the aligned slot on the locknut (1J). 20.
- Page 76 S10A SWING MOTOR GEARBOX MAINTENANCE CONTINUED... Gear Teeth to 12 O'clock Position Gear Teeth to 12 O'clock Position Gear Teeth to 12 O'clock Position Gear Teeth to 12 O'clock Position Gear Teeth to 12 O'clock Position 12 O'CLOCK POSITION 12 O'CLOCK POSITION 12 O'CLOCK POSITION 12 O'CLOCK POSITION 12 O'CLOCK POSITION...
- Page 77 S10A SWING MOTOR GEARBOX MAINTENANCE CONTINUED... 10. Roll test the unit in both clockwise and counterclockwise directions. Perform the same number of turns in each direction as the ratio of the unit. The ratio is the same as the last two digits in the model number found on the ID tag of the unit.
-
Page 78: Swing Brake Maintenance
SWING BRAKE MAINTENANCE SWING BRAKE MAINTENANCE SWING BRAKE MAINTENANCE SWING BRAKE MAINTENANCE SWING BRAKE MAINTENANCE BRAKE FUNCTION BRAKE FUNCTION BRAKE FUNCTION BRAKE FUNCTION BRAKE FUNCTION The brake is designed to fit with a gearbox and a hydraulic motor. The common mounting surfaces of the brake, the motor, and the gearbox are machined to close tolerances and should be protected from damage during installation and removal. - Page 79 SWING BRAKE MAINTENANCE CONTINUED... Figure 1 Figure 1 Figure 1 Figure 1 Figure 1 Push or tap on the external spline end of the shaft and Shaft (9) and Bearing (3) will be removed as a sub-assembly. Bearing (3) must be removed from Shaft (9) prior to re-assembly. 3.
- Page 80 SWING BRAKE MAINTENANCE CONTINUED... 5. Remove Retaining Ring (2) and Bearing (3) from Housing (4). 6. Oil Relief Plug (23) should not be removed from Power Plate (20) unless the hole is contaminated. The plug should then be removed to allow the hole in the power plate to be cleaned. Figure 1 Figure 1 Figure 1...
- Page 81 SWING BRAKE MAINTENANCE CONTINUED... Visually align the center of the cutouts in Piston (14) with Torque Pin (8) holes in Power Plate (20). Avoid pushing the piston all the way to the bottom of the cylinder in the power plate. Generally, try to keep the top surface of the piston flush to 1/8"...
-
Page 82: Electrical System Maintenance
C. ELECTRICAL SYSTEM C. ELECTRICAL SYSTEM C. ELECTRICAL SYSTEM C. ELECTRICAL SYSTEM C. ELECTRICAL SYSTEM MAINTENANCE MAINTENANCE MAINTENANCE MAINTENANCE MAINTENANCE page 82 page 82 page 82 page 82 page 82 475 A CRL 800-00167... -
Page 83: Electrical System Description
ELECTRICAL SYSTEM MAINTENANCE ELECTRICAL SYSTEM MAINTENANCE ELECTRICAL SYSTEM MAINTENANCE ELECTRICAL SYSTEM MAINTENANCE ELECTRICAL SYSTEM MAINTENANCE ELECTRICAL SYSTEM DESCRIPTION ELECTRICAL SYSTEM DESCRIPTION ELECTRICAL SYSTEM DESCRIPTION ELECTRICAL SYSTEM DESCRIPTION ELECTRICAL SYSTEM DESCRIPTION This machine has 12 Volt electrical system with alternator, negative ground, and 12 Volt battery. There are two basic circuits in the electrical system: 1. - Page 84 ELECTRICAL SYSTEM MAINTENANCE CONTINUED... WARNING WARNING WARNING WARNING WARNING Do not touch battery terminals with any metal or allow jumper cable ends to touch Do not touch battery terminals with any metal or allow jumper cable ends to touch Do not touch battery terminals with any metal or allow jumper cable ends to touch Do not touch battery terminals with any metal or allow jumper cable ends to touch Do not touch battery terminals with any metal or allow jumper cable ends to touch each other.
-
Page 85: Alternator Drive Belt Adjustment
ELECTRICAL SYSTEM MAINTENANCE CONTINUED... Do not touch battery terminals with any metal. Sparks may occur, causing damage Do not touch battery terminals with any metal. Sparks may occur, causing damage Do not touch battery terminals with any metal. Sparks may occur, causing damage Do not touch battery terminals with any metal. - Page 86 ELECTRICAL SYSTEM MAINTENANCE CONTINUED... 3. If any of these tests show zero voltage, repair or replace wiring. 4. Check voltage again until correct reading appears. CHECKING ALTERNATOR OUTPUT CHECKING ALTERNATOR OUTPUT CHECKING ALTERNATOR OUTPUT CHECKING ALTERNATOR OUTPUT CHECKING ALTERNATOR OUTPUT 1.
-
Page 87: Electrical System Trouble Shooting
ELECTRICAL SYSTEM MAINTENANCE CONTINUED... ELECTRICAL SYSTEM TROUBLE SHOOTING ELECTRICAL SYSTEM TROUBLE SHOOTING ELECTRICAL SYSTEM TROUBLE SHOOTING ELECTRICAL SYSTEM TROUBLE SHOOTING ELECTRICAL SYSTEM TROUBLE SHOOTING The following trouble shooting chart is provided as an assistance in locating and correcting problems which are most common. -
Page 88: Power Unit Maintenance
D. POWER UNIT MAINTENANCE D. POWER UNIT MAINTENANCE D. POWER UNIT MAINTENANCE D. POWER UNIT MAINTENANCE D. POWER UNIT MAINTENANCE page 88 page 88 page 88 page 88 page 88 475 A CRL 800-00167... -
Page 89: Engine Maintenance
ENGINE MAINTENANCE ENGINE MAINTENANCE ENGINE MAINTENANCE ENGINE MAINTENANCE ENGINE MAINTENANCE The standard source of power for the hydraulic system in this machine is a Cummins 6C diesel engine. Complete specifications, operating instructions, and maintenance and lubrication information will be found in the Cummins engine manuals which accompanies the machine. -
Page 90: Pump Drive Maintenance
PUMP DRIVE MAINTENANCE PUMP DRIVE MAINTENANCE PUMP DRIVE MAINTENANCE PUMP DRIVE MAINTENANCE PUMP DRIVE MAINTENANCE (FOR FUNK PUMP DRIVES) (FOR FUNK PUMP DRIVES) (FOR FUNK PUMP DRIVES) (FOR FUNK PUMP DRIVES) (FOR FUNK PUMP DRIVES) A. TWO, THREE AND FOUR PAD PUMP DRIVES A. - Page 91 PUMP DRIVE MAINTENANCE CONTINUED... 6. Clean all magnetic drain plugs before replacing. 7. Always use clean fluid in clean containers. 8. Do not overfill. This will result in overheating and possible malfunction of the unit. 9. Fill with EP 80-90 gear fluid (until fluid comes back out of the fill hole). Do not overfill! 10.
- Page 92 PUMP DRIVE MAINTENANCE CONTINUED... NOTE: NOTE: NOTE: NOTE: NOTE: Drive in direction of arrow. 8. To remove bearings from gear hubs, use gear puller or Arbor Press. REASSEMBLY OF PUMP DRIVE REASSEMBLY OF PUMP DRIVE REASSEMBLY OF PUMP DRIVE REASSEMBLY OF PUMP DRIVE REASSEMBLY OF PUMP DRIVE For reassembly, use the reverse procedure of 1 through 8.
-
Page 93: Single Pad Pump Drives
PUMP DRIVE MAINTENANCE CONTINUED... B. SINGLE PAD PUMP DRIVES B. SINGLE PAD PUMP DRIVES B. SINGLE PAD PUMP DRIVES B. SINGLE PAD PUMP DRIVES B. SINGLE PAD PUMP DRIVES This type of Pump Drive (See Figure 4), is mounted to the engine (direct drive), and is virtually maintenance free. Figure 4 Figure 4 Figure 4... -
Page 94: Air Cleaner Maintenance
AIR CLEANER MAINTENANCE AIR CLEANER MAINTENANCE AIR CLEANER MAINTENANCE AIR CLEANER MAINTENANCE AIR CLEANER MAINTENANCE Proper air cleaner servicing will result in maximum engine protection against the ravages of dust. Proper servicing can also save you time and money by increasing filter life and dust cleaning efficiency. Two of the most common servicing problems are: 1. - Page 95 AIR CLEANER MAINTENANCE CONTINUED... AIR CLEANERS WITH VACUATOR VALVE AIR CLEANERS WITH VACUATOR VALVE AIR CLEANERS WITH VACUATOR VALVE AIR CLEANERS WITH VACUATOR VALVE AIR CLEANERS WITH VACUATOR VALVE On vacuator valve equipped models, (see figure 3) DUST CUP DUST CUP DUST CUP DUST CUP DUST CUP...
- Page 96 AIR CLEANER MAINTENANCE CONTINUED... IMPORTANT STEPS TO FOLLOW EVERY TIME AN AIR IMPORTANT STEPS TO FOLLOW EVERY TIME AN AIR IMPORTANT STEPS TO FOLLOW EVERY TIME AN AIR IMPORTANT STEPS TO FOLLOW EVERY TIME AN AIR IMPORTANT STEPS TO FOLLOW EVERY TIME AN AIR CLEANER ELEMENT IS REPLACED: CLEANER ELEMENT IS REPLACED: CLEANER ELEMENT IS REPLACED:...
- Page 97 AIR CLEANER MAINTENANCE CONTINUED... THE IMPORTANT "DON'TS" TO ALWAYS REMEMBER: THE IMPORTANT "DON'TS" TO ALWAYS REMEMBER: THE IMPORTANT "DON'TS" TO ALWAYS REMEMBER: THE IMPORTANT "DON'TS" TO ALWAYS REMEMBER: THE IMPORTANT "DON'TS" TO ALWAYS REMEMBER: DON'T DON'T DON'T DON'T DON'T DON'T DON'T DON'T DON'T...
-
Page 98: Cat 330 Crawler Lower Maintenance
E. CAT 330 CRAWLER LOWER E. CAT 330 CRAWLER LOWER E. CAT 330 CRAWLER LOWER E. CAT 330 CRAWLER LOWER E. CAT 330 CRAWLER LOWER MAINTENANCE MAINTENANCE MAINTENANCE MAINTENANCE MAINTENANCE page 98 page 98 page 98 page 98 page 98 475 A CRL 800-00167... -
Page 99: Track Adjustment Procedure
CAT 330 CRAWLER LOWER MAINTENANCE CAT 330 CRAWLER LOWER MAINTENANCE CAT 330 CRAWLER LOWER MAINTENANCE CAT 330 CRAWLER LOWER MAINTENANCE CAT 330 CRAWLER LOWER MAINTENANCE TRACK ADJUSTMENT PROCEDURE TRACK ADJUSTMENT PROCEDURE TRACK ADJUSTMENT PROCEDURE TRACK ADJUSTMENT PROCEDURE TRACK ADJUSTMENT PROCEDURE 1. -
Page 100: Crawler Lower Lubrication Points
CAT 330 CRAWLER LOWER MAINTENANCE CONTINUED... FINAL DRIVES - CHECKING THE FINAL DRIVES - CHECKING THE FINAL DRIVES - CHECKING THE FINAL DRIVES - CHECKING THE FINAL DRIVES - CHECKING THE FINAL DRIVES - CHANGING THE FINAL DRIVES - CHANGING THE FINAL DRIVES - CHANGING THE FINAL DRIVES - CHANGING THE FINAL DRIVES - CHANGING THE... -
Page 101: Structural Maintenance
F. STRUCTURAL MAINTENANCE F. STRUCTURAL MAINTENANCE F. STRUCTURAL MAINTENANCE F. STRUCTURAL MAINTENANCE F. STRUCTURAL MAINTENANCE page 101 page 101 page 101 page 101 page 101 475 A CRL 800-00167... -
Page 102: Turntable Bearing Maintenance
TURNTABLE BEARING MAINTENANCE TURNTABLE BEARING MAINTENANCE TURNTABLE BEARING MAINTENANCE TURNTABLE BEARING MAINTENANCE TURNTABLE BEARING MAINTENANCE WARNING WARNING WARNING WARNING WARNING The turntable bearing area is a potential pinch point. Before doing any The turntable bearing area is a potential pinch point. Before doing any The turntable bearing area is a potential pinch point. - Page 103 TURNTABLE BEARING MAINTENANCE CONTINUED... Possible Indicator Position Possible Indicator Position Possible Indicator Position Possible Indicator Position Possible Indicator Position Bearing Mounting Bolts Bearing Mounting Bolts Bearing Mounting Bolts Bearing Mounting Bolts Bearing Mounting Bolts Upper Bearing Upper Bearing Upper Bearing Upper Bearing Upper Bearing Mounting Surface...
- Page 104 TURNTABLE BEARING MAINTENANCE CONTINUED... TABLE 1 TABLE 1 TABLE 1 TABLE 1 TABLE 1 Maximum Allowable Clearances (inches) Maximum Allowable Clearances (inches) Maximum Allowable Clearances (inches) for 3000 Series Ball Bearings for 3000 Series Ball Bearings for 3000 Series Ball Bearings Maximum Allowable Clearances (inches) Maximum Allowable Clearances (inches) for 3000 Series Ball Bearings...
- Page 105 TURNTABLE BEARING MAINTENANCE CONTINUED... INSPECTING THE TURNTABLE BEARING INSPECTING THE TURNTABLE BEARING INSPECTING THE TURNTABLE BEARING INSPECTING THE TURNTABLE BEARING INSPECTING THE TURNTABLE BEARING WARNING WARNING WARNING WARNING WARNING The turntable bearing area is a potential pinch point. Before doing any maintenance The turntable bearing area is a potential pinch point.
-
Page 106: Trouble Shooting Trouble Shooting
page 106 page 106 page 106 page 106 page 106 475 A CRL 800-00167... -
Page 107: Trouble Shooting
TROUBLE SHOOTING TROUBLE SHOOTING TROUBLE SHOOTING TROUBLE SHOOTING TROUBLE SHOOTING Use this section only as a general guide to finding solutions for machine problems. If the machine should malfunction, find the problem in the headings listed then refer to the possible causes and remedies listed with the problem. - Page 108 TROUBLE SHOOTING CONTINUED... HYDRAULIC SYSTEM HYDRAULIC SYSTEM HYDRAULIC SYSTEM HYDRAULIC SYSTEM HYDRAULIC SYSTEM PROBLEM PROBLEM PROBLEM PROBLEM PROBLEM CAUSE CAUSE CAUSE REMEDY REMEDY REMEDY REMEDY REMEDY CAUSE CAUSE Pump or motor too noisy. Low hydraulic oil supply or wrong Fill hydraulic reservoir with proper viscosity.
- Page 109 TROUBLE SHOOTING CONTINUED... HYDRAULIC SYSTEM HYDRAULIC SYSTEM HYDRAULIC SYSTEM HYDRAULIC SYSTEM HYDRAULIC SYSTEM CONTINUED... CONTINUED... CONTINUED... CONTINUED... CONTINUED... PROBLEM PROBLEM PROBLEM PROBLEM PROBLEM CAUSE CAUSE CAUSE REMEDY REMEDY REMEDY REMEDY REMEDY CAUSE CAUSE No machine functions. Low hydraulic oil level. Fill hydraulic reservoir with proper oil.
- Page 110 TROUBLE SHOOTING CONTINUED... MACHINE OPERATIONS MACHINE OPERATIONS MACHINE OPERATIONS MACHINE OPERATIONS MACHINE OPERATIONS PROBLEM PROBLEM CAUSE CAUSE REMEDY REMEDY PROBLEM PROBLEM PROBLEM CAUSE CAUSE CAUSE REMEDY REMEDY REMEDY Boom will not remain raised. Replace valve. Main or Stick boom valve needs service.
- Page 111 TROUBLE SHOOTING CONTINUED... MACHINE OPERATIONS CONTINUED... MACHINE OPERATIONS CONTINUED... MACHINE OPERATIONS CONTINUED... MACHINE OPERATIONS CONTINUED... MACHINE OPERATIONS CONTINUED... PROBLEM PROBLEM CAUSE CAUSE REMEDY REMEDY REMEDY PROBLEM PROBLEM PROBLEM CAUSE CAUSE CAUSE REMEDY REMEDY Machine will not turn in either Damaged lines. Replace lines.
-
Page 112: Decals
NOTE NOTE NOTE NOTE NOTE This section of the manual is used for the decal kits appropriate for the 475A Crawler. Those kits are: 475A CRL Auxiliary Kit (539-00857) Base Kit (539-00775) Cab Kit (539-00808) Cab Tilt Kit (539-00837) If the decal kit information is missing from this section of your hard copy of this manual, contact your Barko dealer to obtain copies of the kits and insert them here.
Need help?
Do you have a question about the Crawler 475A and is the answer not in the manual?
Questions and answers