Table of Contents
Advertisement
Advertisement
Chapters
Table of Contents

Summary of Contents for Paradise POS Star TSP650ii
-
Page 2: Table Of Contents
Table of Contents Welcome to Paradise POS Introduction to Paradise POS..............5 Introduction to this Manual..............6 1 Installation Guide 1.1 Installing Your Router................9 1.2 Installing Your Equipment - Star Printers...........10-15 1.3 Installing Your Equipment - All-In-One Stands........16-20 1.4 Installing Your Equipment - Card Terminals........21-23 1.5 Installing Your Equipment - Scanners ..........24-25 1.6 Installing Your Equipment - Hardwire Kit...........26-27 1.7 Installing Your Equipment - KDS..............28 1.8 Installing Your Equipment - Scales............29 1.9 Installing Your Equipment - Networking Assistance......30-31 2 Button Descriptions 2.1 Login Screen..................33-34 2.2 Home Screen..................35-40 2.3 Employee Screen................41-42 2.4 Manager S creen.................43-44 2.5 Admin Screen..................45-46... - Page 3 4 Employee Screen Features 4.1 Open/Close Cash Drawer and Join Drawer........67-69 4.2 Pay In/Out....................70 4.3 Gift Card Balance and Price Check............71 4.4 Tip Adjustment, Shift Report, and Employee Tip Out.......72-75 4.5 Customer Database................76-79 4.6 Split/Combine Ticket.................80-83 4.7 Resend Ticket..................84 4.8 Scheduled Tickets................84-85 4.9 Delivery and To Go.................86 4.10 Rental Tickets..................87 4.11 Redemption....................87 5 Manager Screen Features 5.1 Ticket Recall..................89-92 5.2 Drawer Recall..................93-95 5.3 Inventory....................96-97 5.4 Reports and Hourly Overview..............98 5.5 Batch Adjustment...................99 5.6 Shift Maintenance.................100-101 5.7 Add Gratuity..................102 5.8 Reset Gift Card..................103...
- Page 4 6.9 Discount M aintenance..............159-164 6.10 Edit Table Diagram - Creating Your Table Layout......165-167 6.11 Color Scheme Maintenance............168-169 6.12 Edit Vendors..................170 6.13 Printer Maintenance................171 6.14 Printer R outing................172-173 6.15 Device Maintenance..............174-175 6.16 Open/Closed Print Jobs................176 6.17 Terminal Status..................177 6.18 Printer Status..................177 6.19 Rental Maintenance..............178-182 7 Reporting - An In-Depth Look 7.1 Web Reports vs. Local Reports............184-186 7.2 Sales....................187-209 7.3 Item L evels..................210-211 7.4 Inventory..................212-216 7.5 Employee..................217-220 7.6 Customer..................221-224...
-
Page 5: Welcome To Paradise Pos
Preface Welcome to Paradise POS Introduction to Paradise POS Congratulations on your new Paradise POS system, the best iOS based mobile point-of-sale on the market, for restaurant and retail alike. We’re dedicated to pro- viding the best database infrastructure without the need for a server by utilizing a revolutionary Peer-to-Peer mesh network while backing up all your data on the iCloud. Our POS system includes a full range of online reporting and menu custom- ization features, and is supported by a world class, 24/7 tech team you can rely on and reach at any time. We’ve created this User Manual for you to have a comprehensive guide to the fea- tures built into the Paradise POS system, as well as the basic knowledge you’ll need to get started with your POS equipment. The following manual will include infor- mation regarding equipment you may not have received, we have provided indexes in each section to assist getting you to the right instructions for your equipment. The manual also provides a reporting section, along with a troubleshooting guide to solve your issues prior to reaching out to tech support. We are pleased to pres- ent you with a POS you can count on to deliver your business’ needs, any further assistance or questions should be directed to the Paradise POS tech team. -
Page 6: Introduction To This Manual
Preface If you’re setting up your equipment for the first time, you will need to schedule your install and training with our training team to ensure we have plenty of time set apart to get you set up. Keep in mind that the tech support team is not meant to accommodate install and training sessions, so scheduling with the training team is vital for new merchants! Please find the training and install schedule at the following link: https://calendly.com/paradise-pos-installation-and-training Contact Us for Assistance Business Hours Phone: 877-777-5530 After Hours and Weekend Support: 877-777-5530, Ext. 1 Tech Support Email: support@paradisepos.com... - Page 7 Preface...
-
Page 8: Installation Guide
1 Installation Guide This chapter will walk you through the basic installation of any equipment you have received from Paradise POS with your order. Equipment not sent to you from Paradise will need to be configured differently. In this chapter... 1.1 Installing Your Router...............9 1.2 Installing Your Equipment - Star Printers........10-15 1.3 Installing Your Equipment - All-In-One Stands......16-20 1.4 Installing Your Equipment - Card Terminals.......21-23 1.5 Installing Your Equipment - Scanners ........24-25 1.6 Installing Your Equipment - Hardwire Kit........26-27 1.7 Installing Your Equipment - KDS.............28 1.8 Installing Your Equipment - Scales..........29 1.9 Installing Your Equipment - Networking Assistance....30-31... -
Page 9: Installing Your Router
Installation Guide 1.1 Installing Your Router Once you receive your equipment, you can begin installing it. Depending on what you have ordered through your agent, there are a few different configura- tions you may have. Typically though, you will have been sent a TP-Link Router. Connected to this router in the first orange port, directly next to the blue port, will be a device called an Orange Pi. This is a clear plastic box with a fan that will be uti- lized as your print queue. All of your Paradise equipment must route to this router. !!! Do not touch the reset button on the router! If you do, you will reset all IP addresses stored there and none of your equipment will communicate with each other. You will have to call Paradise Tech Support to resolve this issue. !!! 1. To begin, run a line from your internet source (modem, router, etc.) to the blue port on the back of your TP-Link Router. Plug in the TP-Link router to power. When the router powers on, the lights will begin to light up; you will know the router has internet when five of the lights on the front are lit up green. If you notice that the Wi-Fi symbol is yel- low, the TP-Link router does not have internet; ensure that the line you have running from your internet source has internet. The router will turn green when you do. 2. Once the lights are green on the TP-Link router, plug the orange pi into power. When it boots up, you will see three lights; a green and amber light on the side and a green one inside. Wait until the green light on the side begins to flicker before moving to the next step. 3. You will notice that you only have three ports left now and quite possibly more equip- ment left than ports. This can be easily solved and depending on what you have ordered, you may have received some 5-Port Switches. These devices can give you additional ports and also help you route your network lines further into your establishment. -
Page 10: Installing Your Equipment- Star Printers
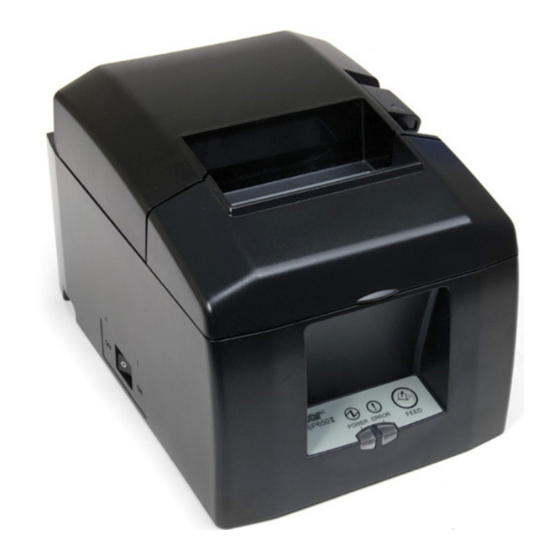
Installation Guide 1.2 Installing Your Equipment- Star Printers Depending on the needs of your business, you will have purchased a receipt or kitchen printer. There are a variety of different types of Star printers, most of which will be covered here. Receipt printers will be covered first, followed by kitch- en printers. Star TSP100iii Star TSP650ii Star SP700... - Page 11 Installation Guide Star TSP650II Bluetooth Receipt Printer 1. Plug the supplied power cord into your printer and insert thermal paper into the printer according to the directions in the lid. Power the printer on. The power button is located on the left side of the printer when facing the front. 2. Find the Settings app on your iPad. Select Bluetooth. If the printer’s power is on, the printer should appear in My Devices. It may be called REC 1, Receipt Printer 1, Sta Rec 1, etc. If next to the printer it says Connected then your printer has automatically connected to the iPad. If it says Not Connected, select the printer. This will cause the iPad to attempt to connect to it. If this doesn’t work and the iPad displays the “Unable to Connect to Device” error, you will have to re-pair the device. If it does work, continue to step 4. 3. To re-pair your Bluetooth printer, find the small button on the back of your printer labeled Pair. Press and hold this button down until the light either begins to flicker or change colors. Once this has been done, attempt to connect in Bluetooth under the Settings app again. The printer should now say connected. 4. Now that your printer is connected, you can open the Paradise app. Log in and go to the Ad- min screen and then Printer Maintenance. You should have a printer on the left that matches the one you have just paired to your iPad. Make sure the settings look similar to this: 5. Now select test print and you should get a small printout for the test. This ensures that your iPad and this printer are communicating. If it does not print a test slip, please refer to our trou- bleshooting guide. 6. Lastly, go back to the Admin screen. This time select Device Maintenance. On the next page, select the highlighted device on the left of the screen labeled This Device. On the right, check to make sure that this printer is also the one listed next to where is says Receipt Printer.
- Page 12 Installation Guide Star TSP650 Ethernet Receipt Printer 1. Plug the supplied power cord into your printer and insert thermal paper into the print- er according to the directions in the lid. Then plug in an Ethernet cord to the printer’s 100/1000 Base port on the back of it. This Ethernet cord should in some way route back to your Paradise-supplied TP-Link Router or a switch that leads to the router. Power the printer on. The power button is located on the left side of the printer when facing the front. If the error light stays on when powering on, it does not have internet. Ensure the cord is receiving internet from the TP-Link router and then turn the power on the printer off and then back on. The light will be blue when it is receiving internet. 2. Now that your printer is connected, you can open the Paradise app. Log in and go to the Admin screen and then Printer Maintenance. You should have a printer on the left that matches the one you have just paired to your iPad. Make sure the settings look sim- ilar to this: Keep in mind the IP address your printer has may be different. Now select test print and you should get a small printout for the test. This ensures that your iPad and this printer are communicating. If it does not print a test slip, please refer to our troubleshooting guide. 3. Lastly, go back to the Admin screen. This time select Device Maintenance. On the next page, select the highlighted device on the left of the screen labeled This Device. On the right, check to make sure that this printer is also the one listed next to where is says Re- ceipt Printer.
- Page 13 Installation Guide Star TSP100iii Ethernet Receipt Printer 1. Plug the supplied power cord into your printer and insert thermal paper into the printer according to the directions in the lid. Then plug in an Ethernet cord to the print- er’s 100/1000 Base port on the back of it. This Ethernet cord should in some way route back to your Paradise-supplied TP-Link Router. Power the printer on. The power button is located on the left side of the printer when facing the front. If the error light stays on when powering on, it does not have internet. Ensure the cord is receiving internet from the TP-Link router and then turn the power on the printer off and then back on. The light will be blue when it is receiving internet. 2. Now that your printer is connected, you can open the Paradise app. Log in and go to the Admin screen and then Printer Maintenance. You should have a printer on the left that matches the one you have just paired to your iPad. Make sure the settings look sim- ilar to this: Now select test print Keep in mind the IP address your printer has may be different. and you should get a small printout for the test. This ensures that your iPad and this printer are communicating. If it does not print a test slip, please refer to our troubleshooting guide. 3. Lastly, go back to the Admin screen. This time select Device Maintenance. On the next page, select the highlighted device on the left of the screen labeled This Device. One the right, check to make sure that this printer is also the one listed next to where is says Receipt Printer.
- Page 14 Installation Guide Star TSP100iii USB Receipt Printer 1. Plug the supplied power cord into your printer and insert thermal paper into the printer according to the directions in the lid. Then take the iPad’s charging cable and plug the USB end into the back of the printer in the appropriate port. Plug the other end into the iPad’s charging port. 2. Next, power the printer on. The power button is located on the left side of the printer when facing the front. 3. Once the power is on, open the Paradise application to finish connecting your printer. Log in and go to the Admin screen and then Printer Maintenance. You should have a printer on the left that corresponds to the receipt printer. Make sure the settings look similar to this: Now select test print and you should get a small printout for the test. This ensures that your iPad and this printer are communicating. If it does not print a test slip, please refer to our troubleshooting guide. 3. Lastly, go back to the Admin screen. This time select Device Maintenance. On the next page, select the highlighted device on the left of the screen labeled This Device. On the right, check to make sure that this printer is also the one listed next to where is says Receipt Printer.
- Page 15 Installation Guide Star SP700 Kitchen Printer 1. Plug the supplied power cord into your printer and insert thermal paper into the printer according to the directions in the lid. Then plug in an Ethernet cord to the print- er’s 100/1000 Base port on the back of it. This Ethernet cord should in some way route back to your Paradise-supplied TP-Link Router. Power the printer on. The power button is located on the left side of the printer when facing the front. If the error light stays on when powering on, it does not have internet. Ensure the cord is receiving internet from the TP-Link router and then turn the power on the printer off and then back on. The light will be green when it is receiving internet. 2. Now that your printer is connected, you can open the Paradise app. Log in and go to the Admin screen and then Printer Maintenance. You should have a printer on the left that matches the one you have just connected. Make sure the settings look similar to this: Keep in mind your IP address may be different. Now select test print and you should get a small printout for the test. This ensures that your iPad and this printer are communi- cating. If it does not print a test slip, please refer to our troubleshooting guide. 3. On this same page, you can add which items in your menu you would like to print out to this printer when you order them. Select the small plus sign and this should bring up a list of all your inventory. If you select the small “i” to the top left of this column, you can filter this data further. Select the items you would like to print to this printer and then tap once on the list to the right to move these items over. Save when you are finished.
-
Page 16: Installing Your Equipment- All In One Stands
Installation Guide 1.3 Installing Your Equipment- All in One Stands Depending on the needs of your business, you will have purchased from a variety of All in One stations. Likewise, there are a variety of All in One printers that will be covered here. Elo Paypoint/Paypoint Plus iSAPPOS Printer mPOP Printer... - Page 17 Installation Guide Elo Paypoint/Elo Paypoint Plus 1. Before plugging in your Elo printer, first identify which mounting tray fits your iPad. Remove 4 mounting screws to swap mounting trays if required. 2. Ensure lightning connector is pulled out before installing your iPad. Install the iPad by inserting top side first and then lightning connector side last. 3. Press the lightning connector cap into the tray and fasten locking screw if de- sired. iPad can be removed by pressing the eject button on the backside of the tray after lightning connector is pulled out. 4. Once the iPad is in place on the stand, plug the Elo into power. Once powered on, it should also supply power to your iPad. 5. Open the Settings app on the iPad. Check your Bluetooth settings and make sure Bluetooth is turned on. In your devices, you should see a device listed that should say Connected as its status. If not, select the device listed as TSP100 and connect to this device. 6. Now that your printer is connected, you can open the Paradise app. Log in and go to the Admin screen and then Printer Maintenance. You should have a printer on the left that matches the one you have just paired to your iPad. Make sure the settings look similar to this, depending on the Elo you have: Elo Paypoint Elo Paypoint Plus Now select test print and you should get a small printout for the test. This ensures that your iPad and the Elo are communicating. If it does not print a test slip, please refer to our troubleshooting guide. 7. Lastly, go back to the Admin screen. This time select Device Maintenance. On the next page, select the highlighted device on the left of the screen labeled This Device. On the right, check to make sure that this printer is also the one listed next to where is says Receipt Printer.
- Page 18 Installation Guide iSAPPOS Printer 1. In order to install your iPad with the iSAP printer, you must first assemble the stand. Begin by securing the Base Plate and Stand body with the M4 thumb screws (x2) found in the accessory box. 2. Connect the power adapter for charging. If using with a cash drawer, connect the cord that came with your cash drawer to the iSAP; one side of the drawer’s cord will be labeled cash drawer, the other side printer. Make sure these are plugged into their respective slots as this cord works only one-way. 3. Before placing the back cover on the back of the stand, power on your iPad that corresponds to this iSAP station and open the Settings app. Select Bluetooth and check to ensure that the device is connected already. Continue to the next step if it is. If it does not connect and gives you an error, refer to our troubleshooting sec- tion for this device. 4. Once you have ensured it is connected via Bluetooth, place the back cover to the back of the Stand. Secure the back cover on the Base Plate with the coin screws (x2) found in the accessory box. Tighten with a coin. 5. Next, locate the Jacket that will hold your iPad in place on the stand. Hold the Jacket with the iSAP logo to the right. Pull on this portion of the Jacket to expand it to fit your iPad. Insert the iPad to the Jacket inserting top side first and then light- ning connector side last. 6. Slide close the Jacket gently. Be sure to press down both corners of the iPad near the iPad’s Home Key to make sure it is aligned with the Jacket as you close it. 7. Flip the iPad and Jacket around. Secure the iPad in the Jacket with a Phillips screwdriver and the M2 screws (x2). Place the paddings included to cover these screw holes. 8. To install this to the iSAP stand, make sure the ‘Lock-Unlock Slider’ is on the un- lock position. To dock the iPad, place the Jacket onto the stand’s dock. To undock, push the button at the bottom of the dock and lift up the Jacket to detach from the stand. 6. Now that your printer is connected, you can open the Paradise app. Log in and go to the Admin screen and then Printer Maintenance. You should have a printer on the left that matches the one you have just paired to your iPad. Make sure the settings look similar to this:...
- Page 19 Installation Guide Now select test print and you should get a small printout for the test. This ensures that your iPad and the iSAP are communicating. If it does not print a test slip, please refer to our troubleshooting guide. 7. Lastly, go back to the Admin screen. This time select Device Maintenance. On the next page, select the highlighted device on the left of the screen labeled This Device. On the right, check to make sure that this printer is also the one listed next to where is says Receipt Printer.
- Page 20 Installation Guide mPOP Printer 1. Plug the supplied power cord into your printer and insert thermal paper into the printer according to the directions in the lid. Power the printer on. The power button is located on the left side of the printer when facing the front. 2. Find the Settings app on your iPad. Select Bluetooth. If the printer’s power is on, the printer should appear in My Devices. It may be called REC 1, Receipt Printer 1, Sta Rec 1, etc. If next to the printer it says Connected then your printer has automatically connected to the iPad. If it says Not Connected, select the printer. This will cause the iPad to attempt to connect to it. If this doesn’t work and the iPad displays the “Unable to Connect to Device” error, you will have to re-pair the device. If it does work, continue to step 4. 3. To re-pair your Bluetooth printer, open the Settings app on your iPad and go to Bluetooth. You may see an mPOP printer in My Devices; tapping on it should attempt to re-pair the print- er. It will then say that it’s connected or prompt an error message. Downloading the mPOP Utility from the App Store may help, otherwise, please refer to our troubleshooting guide. 4. Now that your printer is connected, you can open the Paradise app. Log in and go to the Ad- min screen and then Printer Maintenance. You should have a printer on the left that matches the one you have just paired to your iPad. Make sure the settings look similar to this: 5. Now select test print and you should get a small printout for the test. This ensures that your iPad and this printer are communicating. If it does not print a test slip, please refer to our trou- bleshooting guide. 6. Lastly, go back to the Admin screen. This time select Device Maintenance. On the next page, select the highlighted device on the left of the screen labeled This Device. On the right, check to make sure that this printer is also the one listed next to where is says Receipt Printer.
-
Page 21: Installing Your Equipment- Card Terminals
Installation Guide 1.4 Installing Your Equipment- Card Terminals Depending on the needs of your business, you will have purchased a card terminal. There are a variety of different types of terminals made compatible with Paradise, most of which will be covered here. PAX S80 PAX SP30 Castle V3000 Castle MP200L... - Page 22 Installation Guide PAX S80 1. On the back of the card terminal, plug an ethernet cable into the Lan port. This Eth- ernet cord should in some way route back to you Paradise-supplied TP-Link Router or a switch that leads to the router. Plug the power cable into the Power port. 2. Once the power adapter is plugged into a power outlet, press and hold the power but- ton to turn on the terminal. 3. Next open the Paradise app. Log in and go to the Admin screen. At the bottom right of the screen you should see a small section labeled Terminal Status. Next to status it should read ‘Available’ in green. If it doesn’t, select the Check Connection button below. This should search for the card terminal. If it does not connect, please refer to our trou- bleshooting guide. 4. Once connected, the best way to ensure the iPad and the card terminal are communi- cating is to go to the Employee tab in the Paradise software and select Gift Card Balance. A prompt should appear on your iPad and the card terminal should light up and ask for a swipe. If it does, the iPad and card terminal are connected and communicating with each other. Cancel the balance request on the card terminal which will allow you to cancel the request on your iPad. PAX SP30 1. The PAX SP30 will have an attachment that will branch off into three different ports. Run an Ethernet line to the LAN cord, which is color-coded red. This Ethernet cord should in some way route back to your Paradise-supplied TP-Link Router or a switch that leads to the router. The other cord ends will stay empty. Plug the power cable into the Power port. 2. Once the power adapter is plugged into a power outlet, press and hold the power but- ton to turn on the terminal. 3. Next open the Paradise app. Log in and go to the Admin screen. At the bottom right of the screen you should see a small section labeled Terminal Status. Next to status it should read ‘Available’ in green. If it doesn’t, select the Check Connection button below. This should search for the card terminal. If it does not connect, please refer to our trou- bleshooting guide. 4. Once connected, the best way to ensure the iPad and the card terminal are communi- cating is to go to the Employee tab in the Paradise software and select Gift Card Balance. A prompt should appear on your iPad and the card terminal should light up and ask for a swipe. If it does, the iPad and card terminal are connected and communicating with each other. Cancel the balance request on the card terminal which will allow you to cancel the request on your iPad.
- Page 23 Installation Guide Castle V3000 1. The Castle V3000 will have a port available for an ethernet cord. Run an ethernet cord from this port to one on the back of a router. This terminal does not have to connect to the Paradise-supplied TP-Link router but it is preferable that it does. Then plug the pow- er cable into the Power port. 2. Once the power adapter is plugged into a power outlet, turn on the device using the bottom left-hand button on the pin pad. 3. Next open the Paradise app and log in. With the way this device is configured, it should now be connected so long as it and the iPad are connected to internet. 4. Once connected, the best way to ensure the iPad and the card terminal are communi- cating is to go to the Employee tab in the Paradise software and select Gift Card Balance. A prompt should appear on your iPad and the card terminal should light up and ask for a swipe. If it does, the iPad and card terminal are connected and communicating with each other. Cancel the balance request on the card terminal which will allow you to cancel the request on your iPad. Castle MP200L 1. Begin by plugging in your MP200L terminal to ensure it has power and is charging. Once plugged in, open your Bluetooth settings in the Settings app. 2. Under My Devices you should see the MP200L device. Select this. It should automati- cally connect to Bluetooth. 3. If the device doesn’t automatically connect and gives you an error, press and hold the Bluetooth button on the Castle device until you see a different message displayed on the card terminal’s screen. It should ask you for a pin. Now attempt to connect in your iPad’s Bluetooth settings. Once it does, it will display a six-digit pin. Type this into your MP200L, then press the green button to confirm. 4. The device will now say connected. Once connected, the best way to ensure the iPad and the card terminal are communicating is to go to the Employee tab in the Paradise software and select Gift Card Balance. A prompt should appear on your iPad and the card terminal should light up and ask for a swipe. If it does, the iPad and card terminal are connected and communicating with each other. Cancel the balance request on the card terminal which will allow you to cancel the request on your iPad.
-
Page 24: Installing Your Equipment- Scanners
Installation Guide 1.5 Installing Your Equipment- Scanners Depending on the needs of your business, you will have purchased a scan- ner. There are a variety of different types of scanners usable with Paradise, most of which will be covered here. Code Scanner POSX Scanner Gryphon Scanner... - Page 25 Installation Guide Code Scanner 1. This scanner should already be paired to your iPad when you receive it. To check this, make sure the Code Scanner is turned on, in range, and fully charged. 2. Next, open your Settings app on the iPad and open your Bluetooth settings. Un- der where is says ‘My Devices’ ensure that the T500 is connected. If it says Not Connected, select it. After a moment it should say Connected. 3. To check that the scanner is working, open the Paradise app. Once open, you can scan a random barcode. This should open the New Item prompt if it is an item not currently in your database. Your device is now connected to the Paradise system. POS X Scanner 1. This scanner should already be paired to your iPad when you receive it. To check this, make sure the POS X Scanner is turned on, in range, and full charged. 2. Next, open your Settings app on the iPad and open your Bluetooth settings. Un- der where is says ‘My Devices’ ensure that the POS X Scanner is connected. If it says Not Connected, select it. After a moment it should say Connected. 3. To check that the scanner is working, open the Paradise app. Once open, you can scan a random barcode. This should open the New Item prompt if it is an item not currently in your database. Your device is now connected to the Paradise system. Gryphon Scanner 1. This scanner should already be paired to your iPad when you receive it. To check this, make sure the Gryphon Scanner is turned on, in range, and fully charged. 2. Next, open your Settings app on the iPad and open your Bluetooth settings. Un- der where is says ‘My Devices’ ensure that the Gryphon Scanner (may display as Keyboard or Datalogic Scanner) is connected. If it says Not Connected, select it. After a moment it should say Connected. 3. To check that the scanner is working, open the Paradise app. Once open, you can scan a random barcode. This should open the New Item prompt if it is an item not currently in your database. Your device is now connected to the Paradise system.
-
Page 26: Installing Your Equipment- Hardwire Kit
Installation Guide 1.6 Installing Your Equipment- Hardwire Kit 1. When you receive your iPad, if it was ordered with a hardwire kit, the iPad may already be connected to the device and you can skip to step 7. If the hardwire kit is not connected to your iPad, continue to following steps. 2. You will notice there is double-sided tape on both parts of the hardwire kit (the long portion that has an Ethernet adapter and a flat square portion that leads to the adaptor). Peel off the non-sticky protective layer from the tape from the long USB Ethernet Adapter and place this on the center of the iPad’s backside. The USB Cable should be pointing towards the charging port side of the iPad. Refer to pic- ture for proper placement. 3. Next, peel off the non-sticky protective layer from the tape located on the Apple Lightning-to-USB 3 Camera Adapter (flat square). This piece should be placed on the back side of the iPad, right beside the charging port, with the lightning charging tip facing the iPad’s charging port. Refer to pictures for proper placement. - Page 27 Installation Guide 4. Ensure the cables between these two pieces are plugged in as shown in the pic- tures. The USB Ethernet Adapter cord plugs into the USB port of the USB Camera Adapter. The USB Camera Adapter cord plugs into the iPad’s charging port. 5. Now connect the iPad charger that was included with your iPad from a power source to the USB Camera Adapter port. This is directly next to the USB port. 6. Next we are going to provide hardwired internet to the iPad by attaching an Ethernet cord from a router or Ethernet switch to the USB Ethernet Adapter on the iPad. 7. If all the cables have been connected properly, check the iPad by turning the WI- FI off in the iPad’s Settings and search Safari for https://www.yahoo.com/ . 8. If Safari loads the page correctly then the hardwire attachment is working. 9. If Safari doesn’t load Yahoo correctly, check that your router has internet and that the internet is working and that all cables are connected correctly. Also ensure that below Wi-Fi in the Settings app on the iPad, that you can see Ethernet dis- played. Sometimes unplugging the hardwire kit from the iPad and plugging it back in will reconnect it. !!! Make sure you are using the larger Apple charging block sup- plied with your iPad when using the Hardwire kit. Failure to do so will leave your iPad without power and internet as the hardwire kit requires more power than other power blocks supply. Make sure that you have your iPad screen brightnes lowered for heavy usage to ensure that your iPad stays charged!!!
-
Page 28: Installing Your Equipment- Kds
Installation Guide 1.7 Installing Your Equipment- KDS 1. Check to ensure your TP-Link router and Pi are plugged in and working before turning on your KDS. The KDS relies on this equipment to function properly. 2. Next, check the cables on the KDS Client (the small clear box on the back of the display screen) to ensure they are connected properly. The HDMI cord should route to your display screen and the USB will route to your bump bar. There should also be a power cord plugged into the KDS Client along with an Ethernet cord that should route in some way to either the TP-Link router or a network switch that leads to the TP-Link router. 3. Once all of these things are connected, supply power to both the display screen and the KDS Client and turn them both on. Once both are on, the display screen should now show the ticket boxes with a blue background. If it doesn’t and only shows the google screen, ensure that your KDS client is connected to the router’s network and restart the KDS client. 4. Once you can see the ticket boxes, open the Paradise app. Tap the SUM button on the bump bar to get to the menu screen. Here you’ll find many controls for the KDS, not all of which you’ll need to change. Use the ^ and v on the bump bar to select Printer IP Address, then press REDRAW on the bump bar to select wich printer you wish to emulate. Tap the SUM on the bump bar to save and exit the menu screen. Now ring in a few items on the Paradise app that are assigned to the printer that your KDS is emulating. When they are sent you should see that ticket appear on the KDS. 5. Next test to ensure the bump bar is working. Select Bump on the bump bar. This should bump the ticket you sent to the kitchen from the display screen. If one of these steps doesn’t work, restart the KDS client and refer to the troubleshooting guide for further assistance. !!! When you would like to switch between your scanner and your on-screen keyboard, you will need to pull the scanner’s trigger twice quickly. This will prompt the on-screen keyboard. This ap- plies to all scanners!!! -
Page 29: Installing Your Equipment- Scales
Installation Guide 1.8 Installing Your Equipment- Scales Depending on the needs of your business, you will have purchased a scale. There is only one type of scale you will receive from Paradise, please continue be- low for instructions. Brecknell 670 2u Scale Brecknell 670 2u Scale 1. When you receive your Brecknell scale, there may be a small clear box attached to it through a 9-pin connecter. This is your Scale Pi. Be sure to unplug the 9-pin connector from the scale at this point. 2. In order for this scale to be on the same network as your iPad, you will run an Ethernet line from the Ethernet port on the Scale Pi to either your TP-Link router or to a network switch that is connected to this router. 3. Next, power on the Scale Pi. 4. After the Scale Pi has a solid red light on the inside, plug the 9-pin connector into the scale and fasten. 5. Once that is turned on, all that is left is to turn on and test the scale. There should be a test item in your database set up to test the scale functions. Open the Paradise app and set an item on the scale. 6. Next, tap on the scale test button. It should read the weight of the item accu- rately and price it according to the settings on that item. If it does not read accu- rately, please refer to our troubleshooting guide. -
Page 30: Installing Your Equipment- Networking Assistance
Installation Guide 1.9 Installing Your Equipment- Networking Assistance A Pep Wave will be a part of your equipment if you and your agent have dis- cussed an issue with internet going out at your location often. What this piece of equipment does is supply internet to your TP-Link router through LTE in the event of a hardlined internet outtage. To install, follow the instructions below. Pep-Wave w/Auto Fail Open Mesh Access Point... - Page 31 Installation Guide Pep-Wave w/Auto-Fail 1. Before installing your TP-Link router, you will first need to install your Pep Wave if it is part of your supplied equipment. To begin, screw in the short antenna into both the knobs on the back of the Pep Wave labeled cellular main and cellular di- versity. There will be one large antenna as well. This one will screw onto the knob labeled Wi-Fi. You will have one empty knob when finished. 2. Next you will need to run your internet line into the Lan/Wan port on the Pep- Wave. Next you will run an Ethernet line from the Lan & Console port to the blue internet port on the back of the TP-Link router. 3. To ensure this device broadcasts your backup cellular data, remove the plate labeled A/B with a screwdriver and insert the SIM card given to you by your cellular provider. !!! Without this SIM card, the device WILL NOT supply internet when your landline internet goes down !!! Open Mesh Access Point 1. In order to broadcast Wi-Fi further in your store or restaurant than the TP-Link can transmit, you may have ordered an Open Mesh Access Point. Locate the POE injector. This is a small box with a power port and two Ethernet ports. 2. Run a line from your TP-Link router to the POE injector in the LAN port. This will ensure the Open Mesh is receiving internet from this network. 3. Next, run an Ethernet cord between the POE injector and the Wi-Fi extender from the POE port. 4. Plug in the power supply to the POE Injector to supply power to both devic- es. This device may require additional installation assistance. In this case, please schedule training with the Paradise Training Team to complete the installation.
-
Page 32: 2 Button Descriptions
2 Button Descriptions This chapter contains a brief description of the different buttons in Paradise POS. These are covered in more detail in later chapters. In this chapter... 2.1 Login Screen................33-34 2.2 Home Screen................35-40 2.3 Employee Screen..............41-42 2.4 Manager Screen...............43-44 2.5 Admin Screen................45-46... -
Page 33: Button Descriptions
Button Descriptions 2.1 Log In Screen When you open Paradise, this is the first screen that will appear. This is the page you will use to clock in, log in, update, and take breaks. Update Button Login Message Keypad Device Name Software Version • Login Message: A message that appears on the top of the login screen that you can set in Admin -> Company Settings -> General. • Update: Use this button to update your software version. The version you are currently on is listed at the bottom right. The latest version will often come with bug fixes and new features so keeping up-to-date on your software will keep your business running smoothly. • Keypad: This is where employees will use their number to clock in and out and to log into the system. • Device Name: This will display the name of the device you are on and reflects the name set in the iPad’s settings. This will typically be a station number. - Page 34 Button Descriptions • Request Support: When you speak to tech support, they may need to see your screen to diagnose your issue. When they ask, select this button to send a Team- Viewer request to tech support that will allow them to access your screen. Only use this when asked by tech support. • Swipe: This is used if you are using swipe cards to log in rather than a number. When you select swipe, you will have to swipe the card on the credit card termi- nal that is connected to the device. • Start & End Break: Use these to have employees take breaks. If these buttons are used to take breaks, they do not track hours so only use them for unpaid breaks. • Software Version: This displays the software version of the device you are on. Make sure that all of your stations display the same software version. Different versions of the software can cause operating issues.
-
Page 35: Home Screen
Button Descriptions 2.2 Home Screen The Home Screen populates your menu or inventory and allows you switch be- tween the Home, Employee, Manager, and Admins screens as well as log back out to the login screen. There are three different modes of Paradise that change the way this screen can look. They are Restaurant, Retail, and Register mode and are described below. Restaurant Mode This mode is used primarily in places that will need to send orders to a kitchen printer as this screen offers the ability to modify food orders and send tickets to a printer. Search Bar Tables Ticket Field Items Categories Modifier Groups Sending Options Ticket Options... - Page 36 Button Descriptions • Ticket Field: This field is where you will ring up items. This includes all modifiers on those items as well. When items are on the ticket field, they can be modified, deleted, transferred, or held. This field also shows discounts applied to items and seats on the ticket. • Search Bar: This can be used to locate and ring up an item quickly without hav- ing to find the actual button. • Items: Items are sorted into different categories. When selected, they ring up on the ticket field. • Tables: Allows you to switch to your table layout in order to select the table a ticket will be rang up on. • Categories: Categories contain items that can be selected. There are mulitiple reports that can be ran based on categories so it is a good idea to keep these organized. • Modifier Groups: This is where modifier groups attached to items will be locat- ed when an item that has modifiers is selected. Simply tap the item rang up on the ticket field so that it is highlighted in green to see what modifiers are on the item. • Ticket Options: This section contains the main Pay button along with options that allow you to easily change the quantity of items, add discounts, and void tickets. • Sending Options: This section contains multiple ways of sending a ticket as well as commands for the ticket.
- Page 37 Button Descriptions Retail Mode This mode is used in stores that won’t have to send any orders to a kitchen printer and will be tracking inventory. Search Bar Items Ticket Field Categories Inventory Options Ticket Options...
- Page 38 Button Descriptions • Ticket Field: This field is where you will ring up items. When items are on the ticket field, they can be deleted, transferred, or held. This field also shows dis- counts applied to items. • Search Bar: This can be used to locate and ring up an item quickly without hav- ing to find the actual button. If using barcodes, the barcode number can also be typed here to find the item. • Items: Items are sorted into different categories. When selected, they ring up on the ticket field. • Categories: Categories contain items that can be selected. There are mulitiple reports that can be ran based on categories so it is a good idea to keep these organized. • Inventory Options: The inventory options allow you to see the current count of the item selected on the ticket field. This will let you mark the item for reorder and at the bottom gives you options for discounts on the currently selected item and the ability to comp the item. • Ticket Options: This section contains the main Pay button along with options that allow you to easily change the quantity of items, add redemptions, and void tickets.
- Page 39 Button Descriptions Register Mode This mode is used in stores that won’t have to send any orders to a kitchen printer and want a system closer to a standard register set-up. This will allow you to type in an item’s cost rather than select for a particular item. This can be set up to either display the Inventory Options or Categories by default. Search Bar Items Ticket Field Keypad Categories Inventory Options Ticket Options...
- Page 40 Button Descriptions • Ticket Field: This field is where you will ring up items. When items are on the ticket field, they can be deleted, transferred, or held. This field also shows dis- counts applied to items. • Search Bar: This can be used to locate and ring up an item quickly without hav- ing to find the actual button. If using barcodes, the barcode number can also be typed here to find the item. • Items: Items are sorted into different categories. When selected, they ring up on the ticket field. • Categories: Categories contain items that can be selected. There are mulitiple reports that can be ran based on categories so it is a good idea to keep these or- ganized. In this mode, categories can be reached by swiping down on the middle section, where the Inventory Options appear by default. You can swipe up to go back to Inventory Options. • Inventory Options: The inventory options allow you to see the current count of the item selected on the ticket field. This will let you mark the item for reorder and at the bottom gives you options for discounts on the currently selected item and the ability to comp the item. It can be swiped down to reveal the categories and swiped down to go back. • Ticket Options: This section contains the main Pay button along with options that allow you to easily change the quantity of items, add redemptions, and void tickets. • Keypad: This allows you to type in the cost you would like to make an item for and once you select the item, rings it up on the ticket field for the cost you as- signed to it.
-
Page 41: Employee Screen
Button Descriptions 2.3 Employee Screen This screen allows employees to do specific functions that they may be required to do, depending on their role in the business. Servers and cashiers will come to this page to close opened tickets and open or close a cash drawer. Other things, such as accessing your customer database, can be done on this screen. The left of the screen stays on the payment option, allowing you to keep tickets open or open existing ones to edit or pay them out from here. Options Ticket Field Employee Hours Opened & Closed Tickets Ticket Options... -
Page 42: Employee Screen
Button Descriptions • Ticket Field: While on the employee screen, this field will show you tickets that you reopen from the open or close tickets section and a few of the editing op- tions will rely on you having the correct ticket pulled up on the ticket field be- fore you can edit them. • Options: These buttons contain various options that an employee may use such as opening a cash drawer, splitting their tickets, or adjusting tips. • Opened & Closed Tickets: The Open Tickets sections allows you to view all tick- ets that are currently rang up under the logged-in employee. By selecting Closed Tickets, you can view all tickets that have been closed out under the logged-in employee. Selecting a ticket in either of these places will pull the ticket up in the Ticket Field, allowing you to edit the ticket or pay the ticket out. • Ticket Options: This section contains the main Pay button along with options that allow you to easily change the quantity of items, add redemptions, and void tickets. By keeping this section on the Employee Screen, it allows you to go back to previous tickets and edit them from the same page. • Employee Hours: This section details the logged-in employees shifts and total hours that they have worked in the past week. However, this can be turned off by going to Admin -> Company Settings -> and checking the Hide Weekly Hours checkbox. This section will then display the Paradise POS logo instead. -
Page 43: Manager S Creen
Button Descriptions 2.4 Manager Screen This screen allows managers to access things they will need to keep business run- ning, such as reporting, ticket recall, and shift maintenance. It is best to keep per- missions to this page limited as there are a lot of changes that can be done here that affect the reports the system creates. The left of the screen stays on the pay- ment option, allowing you to keep tickets open or open existing ones to edit or pay them out from here. Options Ticket Field Clocked In/Out Employees Opened & Closed Tickets Ticket Options... -
Page 44: Manager S Creen
Button Descriptions • Ticket Field: While on the manager screen, this field will show you tickets that you reopen from the open or close tickets section and a few of the editing op- tions will rely on you having the correct ticket pulled up on the ticket field be- fore you can edit them. • Options: These buttons contain various options that a manager will use often, such as shift maintenance for changing hours, hourly overview for checking sales during shifts, and reports. • Opened & Closed Tickets: The Open Tickets sections allows you to view all tick- ets that are currently rang up in the entire system even if they were not opened by the person logged in. By selecting Closed Tickets, you can view all tickets that have been closed out in the system. Selecting a ticket in either of these places will pull the ticket up in the Ticket Field, allowing you to edit the ticket or pay the ticket out. Having all the tickets in the system show here allows managers to pull up an employee’s tickets to edit or void it if needed. • Ticket Options: This section contains the main Pay button along with options that allow you to easily change the quantity of items, add redemptions, and void tickets. By keeping this section on the Manager Screen, it allows you to go back to previous tickets and edit them from the same page, along with void the tick- • Clocked In/Out Employees: The Clocked In tab shows all employees that are currently clocked in. If the employee doesn’t have any adjusted tips or owe the restaurant money, their name will be listed normally. If the employee is high- lighted with red, the employee has a shift report available, meaning they have received a credit card tip that they have adjusted or they have taken a cash sale while not using a cash drawer (usually in the instance that the employee is us- ing a server bank to take payments). If the employee is highlighted in green, it means the employee has ran their shift report and should be ready to tip in/out... -
Page 45: Admin Screen
Button Descriptions 2.5 Admin Screen This screen allows you to change multiple settings in the system in order for it to work best for your business. It is best to keep permissions to this page limited as there are a lot of changes that can be done here that affect the way the system functions. The left of the screen stays on the payment option, allowing you to keep tickets open or open existing ones to edit or pay them out from here. Options Ticket Field Terminal Status Opened & Closed Print Jobs Ticket Options Printer Status... -
Page 46: Admin Screen
Button Descriptions • Ticket Field: While on the manager screen, this field will show you tickets that you reopen from the open or close tickets section and a few of the editing op- tions will rely on you having the correct ticket pulled up on the ticket field be- fore you can edit them. • Options: These buttons contain various options that a manager or business owner will use often to edit the way the system functions. There are a lot of menu editing options here as well as the ability to change tax rates and the look of the system with color scheme maintenance. • Opened & Closed Print Jobs: The Open Print Jobs sections shows any print jobs that haven’t yet made it to their printer yet. Sometimes, a printer may be turned off or be without paper. The job will go through after the printer is operational again so be sure to clear this out if a printer has been offline a while. • Ticket Options: This section contains the main Pay button along with options that allow you to easily change the quantity of items, add redemptions, and void tickets. By keeping this section on the Admin Screen, it allows you to go back to previous tickets and edit them from the same page, along with void the ticket • Terminal Status: This section will show you the status of the station’s credit card terminal. It can appear different depending on the type of terminal you have. If the terminal is hardwired through an internet connection, you will have an IP listed and a status displayed. Checking the conncection will often reconnect a terminal that may have been turned off and back on or gone offline for some reason. A bluetooth terminal will not display an IP address and will simply say Label as its status. •... -
Page 47: Home Screen Features
3 Home Screen Features In this chapter... 3.1 Creating Categories..............48-49 3.2 Creating Menu Items..............50-52 3.3 Creating Inventory With a Scanner..........53 3.4 Different Ways to Send a Ticket.............54 3.5 Adding Items to a Ticket............55-56 3.6 Holding and Transferring Tickets and Items........57 3.7 Paying Out a Ticket..............58-60 3.8 Voiding or Comping a Ticket.............61-62 3.9 Adding Seats, Repeat Item, and Quantity........63 3.10 Double and Recipe.................64 3.11 Commands on a Ticket..............65... -
Page 48: Creating Categories
Home Screen Features 3.1 Creating Categories To create a new category in Paradise POS, simply find a currently unoccupied space where your categories generate in the Home tab and press and hold your fin- ger until you get the New Category prompt. This will generate a prompt, allowing you to name your new category. You’ll notice that the category automati- cally takes the first default color in your set color scheme. To easily change this, press and hold your finger down on this new cat- egory. - Page 49 Home Screen Features An editing prompt will appear to the left. From here you can change the name of the category or color of the button. You can also delete a category using this editing feature but all the items contained in that category will still exist in the system under Item Maintenance in the Admin tab. You will have to manually assign it a different category in this section in order to have it reappear as an item on the Home screen.
-
Page 50: Creating Menu Items
Home Screen Features 3.2 Creating Menu Items To create new items, simply select the category you want the new item to appear in. Above, where your different menu/inventory items are located, find an empty space. Press and hold your finger on the empty space which should prompt a selection. This prompt gives you two different options, creating a New Item or an Existing Item. Selecting New Item will allow you to create an item not already in your inventory. Selecting Exist- ing Item will let you add an item to this category that has already been assigned a category. - Page 51 Home Screen Features Selecting New Item will bring up the Item Maintenance screen for this new item. Here you will be able to assign a name, price, and department for the new item. Within the Item Maintenance screen are many different options that may help you and your business that will be covered more in depth in the Admin Fea- tures chapter, section 7.5. To quickly create a new item, the only requirements are that it has a name, a department, and a category. It will automatically fill in the cat- egory name of the one you were in when you began creating the item. Don’t forget to include a price for your new item.
- Page 52 Home Screen Features Selecting Existing Item will allow you to choose an item you have that is al- ready in your database. You can use this function to change the category of multi- ple items at once or include some items in multiple categories. Simply tap multiple items on the left and the item will automatically move to the right of the page. If you make a mistake, swipe left on the item to bring up the de- lete function. Deleting it will only take it off the items you are moving to the cate- gory. When you are finished, select Confirm at the top right to move all the select- ed items. When you run a report on an item in multiple categories, it will show up in the category it was rang up in. If this will mess up your reporting, please limit your items to one category each.
-
Page 53: Creating Inventory With A Scanner
Home Screen Features 3.3 Creating Inventory With a Scanner The quickest and easiest way to create inventory with a scanner is to scan a new item’s barcode while on the Home tab. This will bring up a prompt for a new item for you to fill out. It will automatically fill in the category under Quick Create. If you do not change this, it will add the item to this new category. If you would like more options while creating this new item, select More Options and it will open the item maintenance screen, allowing you to edit this new item further. -
Page 54: Different Ways To Send A Ticket
Home Screen Features 3.4 Different Ways to Send a Ticket There are multiple ways to send a ticket, depending on what you are trying to accomplish. When you ‘send’ a ticket, you are sending the order to the kitchen. Here we will go over the different ways you can send an order. • Send: sends unsent items to the kitchen and clears the ticket from the current ticket view. • Quick Pay: bypasses naming a ticket or assigning a ticket to a table and goes straight to the pay screen; note that if you then cancel out of the pay screen you will not have the option to name the ticket again and must find it in your open ticket window under the Employee tab. • Fast Send: sends unsent items to the kitchen without clearing the ticket from the current ticket view, allowing you to continue ringing in items on the tickets; ideal for places with table service ipads, allowing you to send appetizers to the kitchen quickly while continuing to efficiently ring up the rest of your guests’ orders. • Print & Send: prints a receipt to your assigned receipt printer and sends unsent items to the kitchen simultaneously. -
Page 55: Adding Items To A Ticket
Home Screen Features 3.5 Adding Items to a Ticket There are a few ways you can add an item to a ticket; these items will appear on the left of the screen, in the ticket field. The easiest way to ring in an item for a ticket or a table is to find the item and select it. To find it, you can find the item button located in the appropriate category or type it in the search field next to either the Home Tab or the Tables Tab, depending on if you are in Retail or Restau- rant Mode. You can also scan the item. Once you have found the item, selecting it will add the item to the ticket field in red letters. For a restaurant, when the item on the field’s let- ters are red, the item has not yet been sent to the kitchen and swiping it left will allow you to comp or delete the item from the ticket. If using Restaurant Mode, you may instead prefer selecting a table so that you can add items to the table and keep orders separate by seat. In order to do this, start by selecting the Table Tab. On the table diagram, select the appropriate table you would like to assign your ticket to. The system will prompt you to enter in how many seats (guests) are at this table. - Page 56 Home Screen Features After typing in the seat total, the home page will load again but this time, the ticket will load with a table number next to the ticket number, and seats will generate for you, depending on how many you specified when creating the ticket. When you select one of these seats, it will be highlighted in green. Every item you add will be added to this seat number and you can easily switch between which seat you are ordering for.
-
Page 57: Holding And Transferring Tickets And Items
Home Screen Features 3.6 Holding and Transferring Tickets and Items If you slide an item on a ticket from left to right, you will find two more op- tions for your items: Hold and Transfer. Using Hold will allow you to hold the item on an open ticket until you are ready to send the item to the kitchen for restau- rant users. When a ticket or item is on hold and you want to find it again, it will be under your Open Tickets in the Employee Tab. You will remove the hold using the same swiping motion. If you select Transfer, it will bring up a prompt if transferring tickets is allowed under the clocked-in employee’s role. If you select To Employee, a prompt will show you a list of clocked-in employees. Selecting an employee will allow you to transfer the ticket to that employee. Selecting Ticket will allow you to transfer the entire ticket to another ticket but the ticket has to have been sent already. Selecting item will allow you to trans- fer just the item to another ticket but that item will have to have been sent as well. -
Page 58: Paying Out A Ticket
Home Screen Features 3.7 Paying Out a Ticket While a ticket is opened in the ticket field, select the pay prompt at the bot- tom left of the Home screen to pay out a ticket. This will bring up the pay screen. Listed here are your different pay options, along with a few other options. You’ll notice to the left of the screen is the ticket you are trying to pay out. To make a payment you will select one of these options. - Page 59 Home Screen Features • Credit Payment Select this option if your customer will be using a card to pay their bill. They will com- plete the transaction at the card terminal and once finished, the system will automatically print out your receipts. The order your receipts are in and changing this order is covered in the Com- pany Settings section under the Admin Tab Features chapter. • Cash Payment At the far right is a number pad with common bill denominations listed below it. If your customer gives you a cash amount that is larger than their Total Due at the top of the screen, you can type the amount in or use the denominations below. Once you see the total of cash you’ve typed in fill the blank above the number pad, select the Cash payment option. Your drawer will pop open and the next screen will tell you how much change to give the customer back, along with printing options. If your customer gives you exact change, this number will already be filled in on the blank above the number pad. To the right of this is the same amount. This button is to reset the total the customer is paying back to the Total Due if you at some point type in the wrong amount. Select cash and this will display the same prompt as before, without showing change back. • Giftcard Payment If your business uses gift cards, you will select the gift card function to pay their ticket. They will complete the transaction at the card terminal. If their gift card doesn’t cover the entire total of the bill, the screen will display the remainder of their total. You can then select another payment option. • Check Payment When your customer pays with a check, the system will prompt you to type in the check number. Once you’ve done this, select confirm and you will get your different receipt printing options • Layaway The Paradise system has an integrated layaway feature. When you select this option, it will bring up the Customer Database page. You can create a new customer or add this ticket to an existing customer. The customer has to have the Layaway checkbox ticked.
- Page 60 Home Screen Features • House Account This feature is similar to layaway except when you assign a customer a house account, you assign them an amount of credit that they have in your establishment. When you assign a ticket to their house account, they are using some of this credit. • Discount This will discount the entire open ticket by whichever discount you select. You can also remove the tax with this function. • Loyalty The Paradise system has an integrated loyalty program that will track your customer’s purchases and reward them for frequently patronizing your establishment. When you select Loyalty, it will prompt you to choose an option. If you will be creating a new customer or need to look up an existing one, select Look Up. You can also scan the customer’s ID (only available with the Code barcode scanner) if you choose to use this option with your loyalty system. Setting up your loyalty program is covered more in-depth in the Company Settings section under the Admin Tab Features chap- ter. Setting up customers to use the loyalty program will also be covered more in the Customer Database section in the Employee Tab Features chapter. • Commission Will allow you to assign the commission made on this ticket to a different employee. • EBT Cash Benefit/EBT Food Stamps If any items on the ticket are set to allow EBT, which means the value on an EBT card will apply to those items, this option will allow the customer to us their card for this purchase. •Enterprise Gift A feature that when configured with your system, will allow gift cards for a business to be used at any of their locations as long as the gift card was entered into it’s enterprise system. • Room If using the Hotel version of the Paradise software, this allows you to close a ticket to a room to be paid when the room is paid out.
-
Page 61: Voiding Or Comping A Ticket
Home Screen Features 3.8 Voiding or Comping There are multiple ways to either void or comp a ticket and both are tracked in reporting separately. Voids are the items taken off a ticket that were mistakenly made or are created to test. Comps are made on items that have made it to the customer and are typically used for problems with food or service. Creating comp and void reasons can be found under the Admin tab in Company Settings under the Reasons tab. Voiding a Ticket or Item To void an item, select the ticket containing the item you want to void under the Employee tab. The item must be a sent item. Swipe from right to left on the item and where once it said ‘Delete’ it should now say void. Select this and you will be prompted to provide a Void Reason. If you would like to void an entire ticket, you have a few different options. The first way to void a ticket is located at the bottom left of the Home tab where it says Void Ticket. Have the ticket you would like to void open on the ticket field and then select the Void Ticket button. This will prompt you to confirm that you do want to void the entire ticket. Select ‘Yes’ and then it will prompt you to provide a Void Reason. You can also void a ticket from the pay screen. While at the pay screen, at the bottom of the screen select Void Ticket. This will give you a prompt saying it will void your entire ticket. Select void and then provide a Void Reason. - Page 62 Home Screen Features Comping a Ticket or Item Comping works in much the same way that voiding does. To comp an item, select the ticket containing the item you want to comp under the Employee tab. The item does not have to be a sent item. Swipe from right to left on the item and it will give you an option to comp. Select this and you will be prompted to provide a Comp Reason. You can also comp a ticket from the pay screen. While at the pay screen, there is an option to Comp Ticket. This will give you a prompt saying it will comp your entire ticket. Select comp ticket and then provide a Comp Reason.
-
Page 63: Adding Seats, Repeat Item, And Quantity
Home Screen Features 3.9 Adding Seats, Repeat Item, and Quantity Paradise Point of Sale has some additional features on the Home page to speed up employees when they are ringing in orders. Adding seats to tickets will help you keep track of the amount of customers in your restaurant and your aver- age amount of customers per ticket or table. This is incredibly useful for restaurant users. Repeating items and changing the quantity of an item on the ticket will assist with ringing orders in more efficiently. Here, we will go over how to use these. Adding Seats Adding seats to tickets will help you track the amount of customers coming in to your restaurant and will also help separate guest’s orders on the same ticket so that it is easier to split the ticket later and easier to deliver the table’s food order to the correct guest. There are two ways to add seats to a ticket. You can first select a table from the table layout and it will prompt you to provide how many seats you would like to add to a table. When you confirm, this will open a ticket with the amount of seats you provided in the open ticket field. Tapping one of the seats in the open ticket field will highlight it in green. While selected, any item you ring up will be rang up to that seat. To add more seats to a ticket, select the Add Seat button at the bottom left of the screen. Repeat Item To easily repeat an item, select the item on an open ticket. The item doesn’t have to be sent to use this function. Once the item is selected, click on the Repeat Item button at the bottom left of the Home tab. This will repeat the previous item, mods attached and all. Quantity If you need to add a lot of items at a time, select the item you would like to multiply and then select the Quantity button at the bottom left of the screen. This will allow you to set how many of this item is on the ticket. By default, all items are separated on the ticket field. Changing this option is covered in the Company Set- tings section of the Admin Tab chapter. -
Page 64: Double And Recipe
Home Screen Features 3.10 Double and Recipe The Double and Recipe buttons are located on the Home page on the bottom right of the screen if you are in Restaurant Mode, right above your sending options. Their functions are described below. Double The Double button is a hard-coded button in the system that will allow you to double the price of any of your menu items. When you select the Double but- ton and then an item in your menu, it will ring the item up with DOUBLE next to its name and at twice its price. This is particularly useful in a bar setting. If you would like to change how much this button adds to the items you ring up, you will find this setting in the Admin tab under Company Settings in the Bar section. Recipe The Recipe button is only compatible with businesses implementing Paradise POS’s supplementary inventory application, Coconut. When you have a Recipe set up in Coconut with a menu item, selecting the Recipe button and then an item with a recipe attached will cause the system to print out the recipe to your receipt printer. Talk to the Paradise Training Team to see if Coconut might be right for your company. -
Page 65: Commands On A Ticket
Home Screen Features 3.11 Commands on a Ticket The Commands button is located on the Home page on the bottom right of the screen if you are in Restaurant Mode, right above your sending options. It’s functions are described below. Different commands can be added to a ticket depending on what you need for your business. If you would like to add a command to a ticket, select Commands and a pop-up will appear. You must have a ticket selected to add a command. This command will print to your kitchen printer, letting your kitchen know what you have specificed on the command. This will print on the bottom of the kitchen tick- There will be two commands pre-loaded in your database: DO NOT MAKE and TOGO. These will print out to the kitchen printer. To delete commands, go to the Admin tab and select Ticket Commands. Swiping left on existing commands will give you the option to delete those you do not want in your system anymore. Selecting New Command at the top right will allow you to create more commands. Some useful commands might be Dine In, Carry Out, etc. - Page 66 4 Employee Tab Features In this chapter... 4.1 Open/Close Cash Drawer and Join Drawer.......67-69 4.2 Pay In/Out..................70 4.3 Gift Card Balance and Price Check..........71 4.4 Tip Adjustment, Shift Report, and Employee Tip Out....72-75 4.5 Customer Database..............76-79 4.6 Split/Combine Ticket..............80-83 4.7 Resend Ticket.................84 4.8 Scheduled Tickets..............84-85 4.9 Delivery and To Go................86 4.10 Rental Tickets.................87 4.11 Redemption...................87...
-
Page 67: Employee Screen Features
Employee Screen Features 4.1 Open/Close Cash Drawer and Join Drawer This button allows you to open a cash drawer manually, swap a cash drawer, or close a cash drawer. Open Cash Drawer When the button says Open Cash Drawer, selecting it will prompt you to count your drawer’s starting cash. You will enter your total cash by denomination. For instance, if you have $100 in twenty-dollar bills, you will select the zero below $20 and fill it in with the number 5. This will tell the system you have 5 twenty-dol- lar bills and the system will do the math for you and fill in $100 on the total above. When the button says Close Cash Drawer, this means you currently have an open drawer on the station. Selecting the button will bring up a prompt with three selections: Cancel, Close, or Swap. It will also remind you that swapping drawer will not require shift reports. Whether you use Close or Swap at this point will depend on if you are changing drawers mid-day or just once at the end of a shift. - Page 68 Employee Screen Features Close Cash Drawer You cannot have any open tickets when you close your last drawer. You will also need to make sure that all shift reports have been ran and any and all tips have been taken out of the drawer properly (this is detailed in the training guide). The system will give you an error message if these requirements aren’t met. When it allows you to close the drawer, it will give you a similar prompt as when you counted your starting cash. Make sure to count ALL the money that is currently in the drawer, including your starting cash. When you confirm this, the system will check that the number you counted matches the number the system thinks you should have. If it does, or is over, the system will close out the drawer and print out a drawer report, along with showing you a quick-view of the report on your iPad screen. If the drawer is short however, the system will request a reason as to why the drawer is short and will display how much the drawer is short at the top left of the prompt. This can either be confirmed or, if there’s a possibility that there was a mistake made when counting the drawer, a manager can come over and make a recount if needed.
- Page 69 Employee Screen Features Swapping Drawers Swapping a drawer is useful when either doing a cash drop on a drawer mid- day, or when closing a morning drawer and opening a night drawer while still keep- ing all tickets open and not having to run any shift reports. After selecting Swap, the drawer will prompt you to close out the first drawer. You will count the entire drawer, same as if you were closing it. After you confirm, a drawer report will print from your receipt printer. Confirm again and the system will prompt you to reopen the drawer with a new starting cash. Once you confirm, you will now have a newly opened drawer to work off of. Be sure that the employees who will be working off of this drawer use the Join Drawer button to be assigned to the drawer. Join/Leave Drawer This button will allow an employee to either join a drawer or leave a draw- er. Joining a drawer means that an employee is assigning themselves to a drawer, meaning that when they take a cash payment, the drawer is tracking that amount as a part of it. If an employee is not joined to a drawer and takes a cash payment, that payment then tracks on that employee instead, as if they had a server bank on them.
-
Page 70: Pay In/Out
Employee Screen Features 4.2 Pay In/Out You must have a drawer open in order to do a pay in or out. When you select this button, a prompt will appear on your screen. At the top of the prompt is the amount you would like to pay into the drawer or pay out of the drawer. Below this is a reason. Here you must type in a message with at least 4 characters. This tells the drawer why you are creating a pay in/out on it. If you are utilizing vendors in your system, you will also be able to select a vendor from your list thereby telling the drawer that you are paying a vendor for product from the money in your drawer or taking money from a vendor and put- ting it in the drawer. -
Page 71: Gift Card Balance And Price Check
Employee Screen Features 4.3 Gift Card Balance and Price Check Gift Card Balance This button will only be used if you are using the gift card system in the point of sale. When you select this button, a prompt will appear and if you have a credit card terminal hooked up to your station, the terminal will ask for a swipe. You can also cancel on the terminal and instead type in the card number if they are hand- written gift certificates with unique codes you created in Paradise. Price Check Selecting price check will allow you to type in an item’s barcode or scan the item. This is incredibly useful for Retail users. The price will display on the Price Check page. -
Page 72: Tip Adjustment, Shift Report, And Employee Tip Out
Employee Screen Features 4.4 Tip Adjustment, Shift Report, and Employee Tip Out For tipped workers, this series of steps is incredibly important for claiming credit tips and taking them out of the drawer. Described below are how to run these three important steps. Tip Adjustment Tip adjustment will allow employees to adjust the tips on their own cred- it card transactions that they have ran. This page will look nearly identical to the Batch Adjustment screen in the Manager tab except the Tip Adjustment page will only show the logged in employee’s credit transactions and won’t have a batch button. To adjust a tip, select the 0.00 blank under the tip column. This will allow you to type in the tip amount on that particular ticket. When finished adjusting all tips, make sure to tap the Save All Tips button on the left. This will cause the system to communicate with the card terminal and adjust the tips on the terminal. - Page 73 Employee Screen Features Shift Report When an employee has taken cash sales to themselves instead of a drawer (for instance: a server with a server bank) or has any credit card tips assigned to them, they will have a shift report available. You can only run one shift report per shift and you should only run a shift re- port after closing or transferring all of your open tickets and after adjusting all credit tips. When you run a shift report, it will give you a pop-up, allowing you to declare additional tips. At the top of the report are Captured Tips, which is the total of the credit tips the employ- ee adjusted. Below this is a blank where the employee can claim any additional tips received. When finished, select Confirm. Once confirmed, the station the employee ran their report on will print out a slip detailing the employee’s sales and their tips. The screen will give you a brief overview as well.
- Page 74 Employee Screen Features Employee Tip Out To run an employee tip in/out, you must first be assigned to the drawer on the station. On the left-hand side of the screen will be a list of the employees clocked in along with whether they have a tip in or out under their name. Next to the ones that do, it will say Has Report in green. Select the employee that has a report and is ready to be tipped in/out.
- Page 75 Employee Screen Features When selected, the right side of the screen will detail if the employee owes the restaurant (the employee took cash sales that were higher than their credit tips) or if the restaurant owes the employee (the employee took more credit tips than cash sales, or only credit tips). In the blank below you will type in the amount that was given to the restaurant/employee, and it should always match the num- ber above. Doing these steps is essentially just telling the drawer how much money you are either taking out of it or adding to it from the employee. If you’ve set up a rec- ommended tip share percentage, that amount will display below. When finished, select Tip Out Employee at the bottom right. The system will have you confirm the amount. It will then tell you that the employee is currently clocked in and ask if you would like to clock the employee out. If you are tipping yourself out, make sure to select no as you should not clock out from here. If you are tipping out an employee that is ready to leave, you can select yes instead.
-
Page 76: Customer Database
Employee Screen Features 4.5 Customer Database If you would like to keep track of your customers, perhaps with the included loyalty system or with house accounts, they will all be located here once created. On the left-hand side of the customer database is a list of all your current custom- ers if you have any saved. At the top right, you can scan the customer’s ID to locate them if you have the appropriate scanner. To the right of this, you can also create a New Customer. When creating a new customer, the only information you need is their First and Last name and at least one of the values highlighted in pink. If you are using the loyalty program, make sure to include on the customer a Loyalty ID. If you don’t want to assign a random number and aren’t using physical loyalty cards, you can also use their phone number as their Loyalty ID. There are a lot of other things you can set here for your customers depending on what you use in your system. They are listed below. - Page 77 Employee Screen Features Loyalty The Paradise system comes with an integrated loyalty system that allows you to assign points to customers based on how much they spend in your establish- ment, which they can then exchange for a gift card or a payment toward their next ticket. Creating the value of these points is covered in more detail in the Company Settings section in the Admin Tab Features. To use the Loyalty program, certain things need to be set up on the customer in the customer database. First, ensure that the Loyalty checkbox is selected for the customer. Next, make sure the employee has a unique Loyalty ID, as described above. Once this is set up for the customer, you can assign the customer on the pay screen or when sending a ticket to the kitchen. To check the customer’s loyalty points, select the customer in the customer database and select Loyalty. From here, if the customer has a reward available, it can be redeemed by selecting Reward Available. Redeeming points will add the dollar value of the points to their balance. If the employee using the system has the permissions, the customer’s loyalty points and balance can be edited from this page as well. Be sure to select save when finished. You can redeem the reward from the pay screen. When you select the cus- tomer with a reward for the ticket, the system will prompt you that the customer has a reward and will allow you to apply the amount to their current ticket or pay it out as a gift card.
- Page 78 Employee Screen Features House Account The Paradise system comes with an integrated House Account system that will allow some of your select customers to have a line of credit in your establishment, which they can use to pay out their tickets at a later date. To enable House Account for a customer, select or create the customer and make sure the House Account box is checked. Also ensure that the customer has a value as- signed in Credit, which will be the maximum amount of credit they can have before being forced to pay off some of their previous tickets. Assign a ticket to a House Account via the pay screen. This will automatically close out the ticket to the account. When a customer is ready to pay out some of their ac- count’s tickets, select the customer in the customer database and select the House Ac- count button. On the right of this next screen are the tickets on this customer’s House Account. To pay out just one of these tickets, select the ticket on the right and then select the Pay Ticket button at the bottom of the page. This will allow you to pay the ticket out as normal. If the customer would like to make a payment to the total that they owe, select Make Payment instead. This will allow a payment to go toward the lump sum of what they owe the store. From this page, you can also re-print the receipt by selecting a ticket and selecting Print at the bottom right of the page. You can also view this as a PDF. This section also al- lows you to View History of the customer’s House Account transactions, or View Invoice, which will only detail what they currently owe on the account.
-
Page 79: Customer Database
Employee Screen Features Layaway Layaway is very similar to House Account except a customer is making pay- ments to a ticket without being given that item. This is most useful for Retail users. Make sure that Layaway is enabled for the customer who will be making a layaway ticket. You can assign a ticket to a customer’s layaway account via the pay screen. This will automatically close out the ticket to their account. When a customer is ready to pay out some of their layaway tickets, select the customer in the customer database and select the Layaway button. On the right of this next screen are the tickets on this customer’s Layaway. To pay out just one of these tickets if they have multiple, select the ticket on the right and then select the Pay Ticket button at the bottom of the page. This will allow you to pay the ticket out as normal. If the customer would like to make a payment to the total that they owe, select Make Payment instead. This will allow a payment to go toward the lump sum of what they owe the store. From this page, you can also re-print the receipt by selecting a ticket and selecting Print at the bottom right of the page. You can also view this as a PDF. This section also allows you to View History of the customer’s Layaway transactions, or View Invoice, which will only detail what they currently owe on their layaway tick- ets. -
Page 80: Split/Combine Ticket
Employee Screen Features 4.6 Split/Combine Ticket You may find the need to split or combine a ticket for customers, especially in a restaurant setting. Both options are covered below. Splitting Tickets In order to split a ticket, first select the ticket so it appears in the ticket field, either by selecting the table the ticket is on or selecting the ticket from the Employee Screen. Once opened, go to the Employee Screen and right above your open tickets, select Split/ Combine Ticket. There are a few ways to split a ticket. The easiest way to split a ticket is to select the Split button at the bottom left of the page. This will create a new, empty ticket to divide the current items on the first ticket to. In order to move items to this new ticket, select it on the left. This will highlight the item in green. Tap once on the new ticket you would like to move the highlighted item to and this will move the item. you can select multiple items as well as split the one item into two halves. - Page 81 Employee Screen Features To split an item, for instance, an appetizer two guests would like to split the cost be- tween them, swipe left on the item while on the Split/Combine Ticket screen. This will give you the option to Split. Once selected, follow the prompts by providing how many the item will be split into and then confirm the change. This will then give you the ability to move the split items to different tickets. Swipe Left...
- Page 82 Employee Screen Features If you have provided seats on your ticket, as long as the correct items are on the correct seats, you can split the ticket by seat, using the option at the bottom of the screen here. If customers would like to split the entire ticket into even parts, you will instead select the Split Evenly option. This will allow you to specify how many splits you will make on the ticket. Finally, you can also make split payments from this page. This keeps the entire ticket together but splits the payment up evenly based on the number of splits you specify. If customers would like to split the entire ticket into even parts, you will instead select the Split Evenly option. This will allow you to specify how many splits you will make on the ticket. Finally, you can also make split payments from this page. This keeps the entire ticket together but splits the payment up evenly based on the number of splits you spec- ify.
- Page 83 Employee Screen Features Combining Tickets In order to combine a ticket, first open the ticket so it is opened on the ticket field, either by selecting the table the ticket is on or selecting the ticket from the Employee Screen. Once opened, go to the Employee Screen and right above your open tickets, se- lect Split/Combine Ticket. There are two ways to combine a ticket. Select Combine at the bottom left of the page while Split/Combine Ticket is open. This will open a new page detailing a list of tick- ets that are currently open under the logged in employee. From here, you can select the appropriate tickets and select Combine or, if you have the ability to scan tickets, select the Scan Tickets option instead to combine your current ticket with the scanned one.
-
Page 84: Resend Ticket
Employee Screen Features 4.7 Resend Ticket This option allows you to resend a ticket to a kitchen printer that has already been sent. To resend a ticket, first select the ticket so that it appears in the ticket field on the left of the page. Next, make sure you are on the Employee Tab and then select Resend Ticket. This function is useful in the event that a printer ran out of paper mid-print and the ticket needs to be printed again or any other event that would cause the printer to stop printing. 4.8 Scheduled Tickets Creating scheduled tickets allows you to make a ticket for a later point in time that you can open on the scheduled date and manually send to the kitchen. To cre- ate a scheduled ticket, select the Scheduled Tickets option in Employee and select Make Scheduled Ticket. Select the date, time, and customer (if applicable) that the ticket needs to be made for. Select confirm. There will now be a new ticket created on the ticket field that will be marked as Scheduled in red. Once the ticket is complete, you will need to close the ticket. To do this, se- lect Pay and on the pay screen select Close Ticket at the bottom. Now this ticket will stay closed until you reopen it on the scheduled day. To have the ticket send to the kitchen on the day it was ordered for, you will again select Scheduled Tickets in the Employee screen but this time select Sched- uled Ticket List. - Page 85 Employee Screen Features This page will allow you to switch between Todays Tickets and All Tickets that are scheduled. From this screen, you can select a ticket and choose from the op- tions at the bottom which will allow you to edit what is on the ticket with Edit Tick- et, change when the ticket needs to be made with Edit Date/Time, or void or print out the ticket. To begin the ticket and send the ticket through to the kitchen, select the tick- et and then tap Begin Ticket(s).
-
Page 86: Delivery And To Go
Employee Screen Features 4.9 Delivery and To Go Delivery The Delivery button will allow you to assign a ticket for delivery to a custom- er in your customer database. This function is useful as it allows the customer’s address and phone numbers on file to print both on the kitchen ticket and on the customer receipt. The receipt will also have a Google Maps QR code that will allow your delivery driver to scan the QR code to load the customer’s address. To create a delivery ticket, select the Delivery button. This will prompt you to choose a customer for the delivery ticket. Either choose or create a new custom- ter here. Once you have the customer selected, the system will show you another screen with that customer’s previous orders. If they want to order the same ticket again for delivery, choose that ticket from the list and select Copy Ticket. If you will be creating a new ticket for the customer, select Back. Now the ticket field on the left will have that customer’s name attached to it and allow you to ring in their or- der. Create the order and then select Pay when you have the customer’s form of payment ready. Select the form of payment and pay out the ticket. To Go The To Go option on the Employee Tab is primarily used when your business charges an upcharge on To Go orders, which can be set by going to Admin -> Com- pany Settings -> Ticket and then creating a To Go fee by either percentage or flat rate. This To Go button is also the same as the one that appears when Send Dia- logue is active on an employee and they send a ticket. Creating a ticket with this option will mark the kitchen ticket with the To Go command and automatically add the upcharge. This upcharge can be seen taking effect when on the pay screen. -
Page 87: Rental Tickets
Employee Screen Features 4.10 Rental Tickets This section allows you to return and pay out rental tickets customers have if you have any rental items. To set these up, refer back to the Rental Maintenance section of the Admin Screen Chapter. When a customer returns their item, they will then have to pay on the addi- tional balance they accrued based on how long they kept the item and the rules you have set for the item’s rental. When you are ready to return the item, go to Employee -> Rental Tickets and the next page that appears will have a list of your open rental tickets. Select the ticket that you would like to return. Select Return Items at the bot- tom of the page. This will return the items to inventory and ring up their remaining total to the ticket for them to pay. You can then finish paying the ticket. 4.11 Redemption This redemption button allows you to add redemptions to tickets that have already been added to the system in the Admin screen. Please refer to the Admin Screen Features chapter if you would like to set up redemptions in your system. The name of this button may have also changed depening on what you have it named in these same settings. When a customer has a redemption that you would like to redeem, you have two options to add it to the ticket. If you are in retail mode, there will be a redemp- tion button at the bottom left with the pay button. You can also use this redemp- tion button on the Employee screen. When you select the button, it will list all of your redemptions. Choose the redemption you would like to apply to your ticket. If you have set that one up to prompt price, a box will appear and allow you to manually type in the amount of the redemption. If not, it will automatically apply the redemption at the price you set when you created it. - Page 88 5 Manager Tab Features In this chapter... 5.1 Ticket Recall................89-92 5.2 Drawer R ecall................93-95 5.3 Inventory...................96-97 5.4 Reports and Hourly Overview............98 5.5 Batch Adjustment................99 5.6 Shift Maintenance..............100-101 5.7 Add G ratuity.................102 5.8 Reset Gift Card................103 5.9 Open Refund................104 5.10 Employee Accounts..............105-106 5.11 Tip S hare................107-109 5.12 Pending Transfers..............110-111 5.13 Combo Group Maintenance..........112-115...
-
Page 89: Manager Screen Features
Manager Screen Features 5.1 Ticket Recall Ticket Recall is a useful function for when you need to go back and check previous tickets that weren’t processed the same day you are looking them up or to refund these tickets. Once Ticket Recall is selected, there are filters that can assist you in finding a particular ticket on the left of the screen. If you have a copy of the ticket, you can search based on any of the information listed on the ticket such as Customer/Tab Name, Ticket ID, or the Em- ployee who rang in the ticket. Perhaps you are looking for tickets closed during a specific time range. You’d list the beginning and end date in the filters provided. You can also search tickets by the price range of the ticket or by the SKU or name of an item that would have been on the ticket. - Page 90 Manager Screen Features To the right you will find a list of tickets. This quick view will show you if the ticket is open or closed and how it was closed. It will also tell you the time that the ticket was opened along with the amount of the ticket and if a tip was applied to the ticket. You will also notice that the tickets have a long ticket number. The first six digits of the number is the date the ticket was opened. The next three letters designate the device that the ticket was created on; each of your devices will have a different three letter designation. The next four numbers assign a number to the ticket. The next two numbers are only used if you split a ticket; a split ticket keeps its original number but changes the last two to keep them separate. Employee on Ticket Ticket Number Ticket Status When you select a ticket, it will pull up the Ticket Admin screen. On the left are the details on the ticket; what was sold, if it was closed, and what the total on the ticket was. In the middle are all discounts that were applied to the ticket. On the right are the pay- ments that were made toward the ticket. From this screen you can Refund Ticket, Force Close, Reopen Ticket, and Print Ticket.
- Page 91 Manager Screen Features • Force Close: This is a backup built into the system to help you close old tickets from the day before that may have been forgotten or left open. When you force close a ticket, it can cause reporting errors so try only doing this as a last resort. • Reopen Ticket: This function can be used to reopen an old ticket. This can be useful for going back over a ticket, changing out the items that were purchased on the ticket (so long as they don’t exceed the amount that was paid on the ticket) or for voiding or closing out the ticket. • Reprint Ticket: Used to reprint the ticket for the customer or if you need another copy of the receipt.
- Page 92 Manager Screen Features • Refund Ticket: When needing to refund a ticket, select this button and the refund screen will appear. If you would like to refund the entire ticket, select Refund Ticket. You will be given two options; Give Gift Card, or Refund All Payments. Depending on your stores policy, one of these options may be more viable than the other. If you se- lect Give Gift Card, the system will prompt you to swipe the gift card you would like to apply the payment to. If you select Refund All Payments, this will refund the payment the customer made; if it was on a card, it will require that the card be swiped to ac- cept the refund. You can also refund specific items on the ticket back to the customer in a similar manner by selecting the item/s you would like to refund on the left and then select Refund Items. You’ll follow the same prompts as above.
-
Page 93: Drawer Recall
Manager Screen Features 5.2 Drawer Recall Drawer Recall allows you to view the drawers you have created on your sys- tem both currently and in the past. This function will allow you to view the cash flow in and out of the drawer which will help you better understand how the draw- er is keeping a running total of what should be in the drawer throughout the day. When you select Drawer Recall, there is a filter on the left that will allow you to filter your drawers by date to make them easier to find. Make sure that the TO date is after the FROM date when search- ing or drawers will not appear on the right of the screen. - Page 94 Manager Screen Features On the right are the drawers you have labeled by the date they were opened, closed, what station it was open on, and the ending or current total of the drawer. Date and Time Drawer Opened and Closed Station Drawer Opened On Drawer Total When you select a drawer on the right, a more in- depth page on the drawer will appear. To the left you have your starting cash, which will indicate what you started this drawer with when you opened it. You can also edit this total if you make a mistake by select- ing the editing symbol. This will allow you to recount your starting total. Below where it shows your starting cash, a list of the cash payments that went toward this drawer will be displayed with the ticket number of that pay- ment. Below this is the the total cash payments that were taken on this drawer. From this same screen you can also reprint the Drawer Report by selecting Print. If you make any changes to the drawer, be sure to select Save when finished. Force Close Drawer should rarely be used, as it can affect reporting negatively and should only be used when unable to close down the drawer by correct means.
- Page 95 Manager Screen Features At the top of the middle column is listed the change that was handed back to customers. Below this will be listed any pay ins or outs you created on the drawer with those totaled below. On the right is your Drawer Total. If the drawer isn’t yet closed, this is the current total of the active drawer. If the drawer is closed, it will be the amount the drawer was closed at, along with any shortages and overages listed below the Drawer Total. There is another recount symbol, allowing you to make a re- count of the drawer, in case there were any mistakes. Due to making sure there is accurate reporting and mistake clarity on the Drawer Report later on, ed- iting this count only edits the ending total and not the bills taken in. This helps management check for mis- takes and stay accountable. Below the Drawer Total are any Tip Ins or Outs that were made on this drawer with them totaled below.
-
Page 96: Inventory
Manager Screen Features 5.3 Inventory This button will be used primarily if you are wanting to keep track of your individual items, print labels, and is mostly used in a retail setting. When you select this button, all of your items in the system will appear on the left of the screen. This includes a searchbar to quickly find the item you’re look- ing for. -
Page 97: Inventory
Manager Screen Features Selecting an item will pull up the item’s screen that contains it’s SKU and Stock count. To add to the item’s Count/Stock, you will type in the amount of prod- uct you received or have of the item and then select the plus sign. If you have less product than the system says you have, then you can also subtract inventory this way. If you select Scan at the bottom left, you can also use your scanner to scan in product the amount of times as needed. For instance, if you have 3 of a given item, you will either scan it 3 times or scan each individual item once. You do not have to save after every Stock edit. Select the next item and con- tinue editing your item’s stock until you have finished your count. You will then select Confirm at the top right when finished. This will show you which items you edited and will also allow you to print labels if you have a compatible label maker. Click Save and your count will have increased or decreased for the edited items. From the same screen as before you can also print labels for specific items. Select the item and then type in the amount of labels you want printed in the Print Labels field. Select Print and it will print to your compatible label printer. -
Page 98: Reports And Hourly Overview
Manager Screen Features 5.4 Reports and Hourly Overview Your reports contain all of your sales data within the past 15 days. Further back than that and you will need to access your online dashboard; please call-in to tech when you are ready to set that up. The online dashboard can be accessed, if you wish, from this reporting tab as well as your local iPad reports by selecting Ad- min -> Company Settings -> Reports and then checking the Use Web Reports box. In the Reports screen, there will be a list of the categories of reports available to you. When you select one of these tabs, a list of the reports within that category will appear. These different types of reports are covered more in-depth in the Reporting chapter. Paradise has included one of the most useful of these reports as it’s own button on the manager tab called Hourly Overview for quick access. This report will detail the day’s sales broken down into an hourly view detailing Seat Averages, La- bor Cost, Ticket Averages, etc. This quick view report is great for merchants looking for a more hands-on management approach to better adjust sales tactics and staff throughout a shift. -
Page 99: Batch Adjustment
Manager Screen Features 5.5 Batch Adjustment The batch adjustment screen is going to look nearly identical to the tip adjust- ment screen with a few main differences specifically for management. Listed on this main screen will be all credit transactions that have been processed on the system that have not yet batched out. Tip adjustments can be edited here as they can in Tip Adjustment, but you can also edit which employee the tip belongs to in case of mistakes. The main feature here is the Batch button at the bottom left of the screen which will batch your credit card terminals. Be sure that if you are manually batching, you have adjusted all tips before running this. If for some reason you batch without the tips being adjusted, you will have to call in to your credit card processor to adjust all the tips on the back end. You will need to have each signe credit slip in order to claim these tips. -
Page 100: Shift Maintenance
Manager Screen Features 5.6 Shift Maintenance From this screen, you will be able to adjust and view shifts. This is useful for editing shifts when people forget to clock in or out or if you need to go back and view their shift details. To adjust a shift, click Shift Maintenance and three options should appear. Click By Employee to view each employee’s individual shifts. The employees are listed on the left of the screen; select one and a list of their shifts will appear. - Page 101 Manager Screen Features On this page, be sure to provide accurate Clock in and Clock out dates and times, when searching for employee’s shifts. You can also create a new shift if an employee forgot to clock in completely by selecting the New Shift button. To edit an existing shift, ensure that it is a closed shift. The same screen will appear as when creating a new shift and you can edit the times to be accurate. To close a shift, simply click on it and you will see a prompt asking you if you’d like to close the shift. This can be useful if an employee has forgotten to clock out. You may also reprint an employee’s shift report if needed by tapping Print Report, shown in the figure below. There are other views available if you’d rather use them, depending on your business needs. Two-week view will display your employees on the left and when you select one, the right side will display their shifts for the past two weeks split into which week their shifts count towards. At the bottom their hours, overtime hours, and breaks are totaled for each week. Utilizing this screen can assist when seeing who is in overtime and how many hours an employee has worked so far. The By-Date view differs in that you will instead be searching a specific date range and the right will display all shifts for all employees within that given time range and total them at the bottom.
-
Page 102: Add Gratuity
Manager Screen Features 5.7 Add Gratuity When selected, this button will give you the option to add a gratuity to your selected ticket by either a percentage or an amount. This can be done from the Manager Screen or from the payment screen. Select the option that you use in your restaurant. Gratuity would be used if, as a restaurant, you tack on an automatic gratuity with parties of a certain size or larger. Tip differs from gratuity in that the customer adds an amount they wish to the ticket total, such as when they sign their credit slip. Once gratuity is added, you will find the applied gratuity right above the total of the ticket. This will display on the printed ticket as well. -
Page 103: Reset Gift Card
Manager Screen Features 5.8 Reset Gift Card This button will allow you to reset an old gift card in the system to zero so that it can be used again. This does not reverse the payment that was made on the gift card. When you select this option, it will request that you swipe the gift card at your terminal. If you cancel on your terminal, you can also manually type the num- ber in on the system. Selecting check next to this card number will display the current total that is assigned to that gift card. You can use the swipe button to re-swipe the gift card. When you are ready to reset the balance of the gift card, ensure that the number in the field is correct and then select Reset Balance. The system will warn you be- fore making this change as it is irreversible. -
Page 104: Open Refund
Manager Screen Features 5.9 Open Refund An open refund will allow you to refund a customer their purchase if they don’t have the receipt with them but you are still okay with refunding them. This option can also be useful for running refunds through the Paradise system on orders that had been paid before you had this POS system. To create an open refund, you will first need to create a ticket that either contains the items they are returning, or items that equal the value you would like to return to your customer. Another easy way to do this is to create an item called Open Item, mak- ing sure that when you create it you check the ‘Prompt for Price’ box. Once you have created a ticket and you and the customer are satisfied with the return total, select the Open Refund button. At the bottom of the ticket you have a few options; typically, you will be selecting the Refund Ticket button and choosing how you would like to refund their purchase. Keep in mind a card refund will require that the cus- tomer have their card ready to swipe or insert at the terminal. -
Page 105: Employee Accounts
Manager Screen Features 5.10 Employee Accounts Employee accounts allow your employees to hold a tab in your establishment. Before you can take payments to a house account, you must first assign a credit limit for that employee. To do this, you will need to go to Admin -> Employee Maintenance. Above their password is a fillable blank for their Credit Limit. This is the amount you will allow your employee to use in your establishment before they have to begin making payments to- ward the balance. - Page 106 Manager Screen Features To assign tickets to an employee account, you will ring the ticket up as normal and then go to the pay screen. Select House Account. At the bottom left, select Employee to switch to your employees instead of customers. Then select the employee who has a balance and it will assign that ticket and amount to them and close out the ticket. Now, to make a payment to the employee account, you will select Employee Ac- counts. Immediately you’ll notice there is an employee with an unpaid balance. Select their name and you can select either Pay All or Pay Amount, depending on what the employee is paying toward their balance. Be sure to select Save at the top right when finished. To see your employee tabs, both open and recently added tickets, go to Manager -> Reports -> Employee and then select Employee Tabs. Paying out an employee account does not run through the cash drawer or card terminal. The totals owed and paid are however stored in reporting under the Employee Tabs report.
-
Page 107: Tip Share
Manager Screen Features 5.11 Tip Share If you have employees that you would like to have a suggested tip out to oth- er employees in your system, you will need to create new Tip Share Departments. This suggested tip share will appear on their shift report. - Page 108 Manager Screen Features To create a new tip share department, click Tip Share and then New at the top right to create a new tip share department. In the name field, it is best to name it the employee you would like the tip out to go to. Below this are Departments and Categories. Here, you can choose either the specific departments or categories the tip share is taken into account for. For instance, if you have a server who needs to tip out to the bartender on all liquor and beer they ring up but not food, you can ei- ther include the liquor and beer departments from the list, or the specific catego- ries in your menu that have these items in them. If you would like the suggested tip percentage to consider everything they ring in, select all departments and then select save. To choose the percentage and what types of employees this will apply to, se- lect Admin -> Edit Roles.
- Page 109 Manager Screen Features Here you will select the employee role of those that will have this suggested tip share on their shift reports. For the example above, you will select server. Once selected, apply the tip share by selecting the Edit Tip Share button on the right of the screen. A pop-up will appear. To the top right of the pop-up is a plus sign. Select this and the Tip Share Department you created will appear, along with any others you have created in the system. This will allow for multiple tip share departments per employee role. Select the tip share department and it will add this to the employ- ee role with a blank percentage next to it. Press and hold your finger on the blank to pull up the keypad. Type in the desired tip out percentage and then select the green check mark. When finished adding all tip share departments, select confirm. Don’t forget to save on the employee role as well. Once this has been added to an employee, the suggested percentages will appear on their shift report with the same title you created for the tip share depar- tement, letting the employee know who to tip out that money to.
-
Page 110: Pending Transfers
Manager Screen Features 5.12 Pending Transfers The Pending Transfers button is useful when you would like employees to have to accept transferred tickets before they will completely transfer. This ensures that employees aren’t transferring tickets to other employees without permission or without the receiving employee knowing about the ticket. To set up the system to require approval for transferred tickets, go to Admin -> Company Settings -> Employee and make sure the Ticket Transfer Needs Approv- al box is checked. Once this is done, every time an employee attempts to transfer a ticket to a different employee, the receiving employee will be notified. Managers can keep track of tickets that are pending approval by checking the Pending Trans- fers button and can change which employee the pending tickets are assigned to. - Page 111 Manager Screen Features When the Ticket Transfer Needs Approval box is checked, an employee will need to accept the ticket the next time they log into the system. When they do, a pop-up will appear after a few moments. The employee will select the ticket(s) they are accepting from another em- ployee. After they have selected the ticket, they can then choose if they want to accept or decline the ticket. This setting prevents tickets from being accidentally transferred to the incorrect employee and keeps employees from transferring tick- ets to others without permission.
-
Page 112: Combo Group Maintenance
Manager Screen Features 5.13 Combo Group Maintenance Combo Groups are a useful tool for merchants who would like to track all items being sold on a ticket separately, but being able to ring them in by using a single combo button. Combo Groups are typically used by restaurant users who have options on their menu where the customer gets a choice of an entree, a side, and drink for the same price. Combo Groups can also be used on items that are assigned to different printers so that they print to the appropriate place. To create a Combo Group, you will first need to have the items already in your system. In the case of the example above, all entrees, sides, and drinks must already be items created in your system or you will have to create them. This is crucial as it is how the system will begin tracking your sides as items in inventory rather than as modifiers. Once you’ve made sure your items are already in the system, open the Com- bo Group Maintenance button. At the top right of the page, select New Combo Group. This will prompt you to give the group a name. The name will be the group of items you would like together; for the example above, you could begin by creat- ing this new combo group as Entrees. - Page 113 Manager Screen Features Now we need to select the items that will belong in this combo group. Do this by selecting the small plus sign next to the items field. This will supply you with a searchable drop-down of all items within your database. Add the appropriate items to this group. Once finished, select save. Make sure to create the rest of your groups in this way. If using the example mentioned above, you would have three different groups when finished, Entrees, Sides, and Drinks.
- Page 114 Manager Screen Features Lastly, you will need to add these groups to the item that will have the spec- ified choices. To do this, leave the Combo Groups page and go to the Home page. Press and hold down on the item you would like to edit and select Edit Item on the left of the screen. On the item maintenance page that appears next, select Page 2 at the bottom left. Select Combo and the Combo Maker will pop up. Tap the small blue plus sign to see all of the options you just created and choose which ones will appear on this item. You can change the order by selecting the small parallel lines to the far right of each group and delete the incorrect group by tapping on the red minus sign to the left of the group. Set the amount of each group item an employee can select by changing the quantity on this screen. If you would like the combo to have default items selected, make sure to have a Default Item set in that combo group. If you have a Default Item set in each com- bo group, you can select the Auto Complete checkbox to have the system order those items to the ticket automatically. This feature is mostly useful for inventory management. If the total of the combo is the same regardless of what sides or entrees a customer chooses, then that is all you have to do on this screen. Select Confirm and save your item. Test the item to make sure it functions as intended.
- Page 115 Manager Screen Features You can also set the combo to discount the total based on what the customer orders. What this will allow you to do is have the system add up the totals for all the items a customer chooses and discount a flat rate from that total. Below is an example of this discount feature. Select the Discount Type chec- box to set the combo to discount and supply an amount in the Discount Amount blank. In the example below, we have added a five dollar discount. When we ring up our three choices from this combo, the original prices are added to the total and five dollars is discounted due to the combo price. These items are normally priced at $12.95, $2.75, and $3.70 equalling $19.40 before the combo discount has been subtracted, giving us instead the $14.40 price after the discount is activated.
- Page 116 6 Admin Tab Features In this chapter... 6.1 Company Settings..............117-134 6.2 Edit Roles - Creating Roles for You and Your Employees..135-138 6.3 Employee Maintenance - Creating Employees.....139-140 6.4 Edit T emplates................141 6.5 Item Maintenance..............142-147 6.6 Modifier M aintenance............148-153 6.7 Edit Departments - Tax Rates in Your System.......154-157 6.8 Ticket Commands................158 6.9 Discount Maintenance............159-164 6.10 Edit Table Diagram - Creating Your Table Layout....165-167 6.11 Color Scheme Maintenance..........168-169 6.12 Edit V endors.................170 6.13 Printer Maintenance..............171 6.14 Printer Routing..............172-173 6.15 Device Maintenance.............174-175 6.16 Open/Closed Print Jobs...............176 6.17 Terminal Status................177...
-
Page 117: Admin Screen Features
Admin Screen Features 6.1 Company Settings Company Settings encompasses many different options that will enable you to customize Paradise POS for your business. When you first select this option in the Admin tab, you will notice a list of features to the left of the page. Here we will break down their functions to help you better understand how these settings can affect you. Company Settings - General Within the General tab of Company Settings you will find the ability to pro- vide your business name and company name. Business name, address lines, and phone number will all show up at the top of ticket receipts. Below this is your Login Message. This is the message that will appear at the top of the login screen when your employees are clocking or logging in. Further toward the bottom of the screen is your Week Start. This will be set to Monday as default. This will primarily effect what your reporting considers the end and beginning of a week for payroll. To the right of this is your Start Time. This dictates when the system will ‘clear out’ the previous day’s tickets and start over on the new day with new ticket num- bers and mark any open shifts as old shifts. THIS IS NOT YOUR BATCH TIME. Do not change the start time from it’s designated 4am unless your non-24-hour business is still conducting business at that time. 24 Hour Mode will not mark open shifts as old shifts and allow employees to stay clocked in indefinitely. This is useful if you won’t be using the payroll abilities of the system. The Software Mode has been set for you, depending on the needs of your business. If you would like to always see your printer status on the login screen, check the box next to Print Queue Status at Login. - Page 118 Admin Screen Features Company Settings - Email & Network Most of this section will have been set up for you. The emailing information at the top has been set up so you have the ability to email receipts to customers. If you have a SendInBlue account, it can be integrated here as long as you have the API Key from SendInBlue. You’ll notice that there are more settings checked for you in the middle of the page. Use WiFi Warnings, when checked, will enable a warning message to appear when you are not on the WiFi specified on WiFi SSID. This can be incred- ibly useful since, for your system to communicate with all of your equipment, it must always be on the correct WiFi. The WiFi Poll Interval will set how much time is between each warning, which is set by default to 15. A cloud warning is a little bit different. This is going to alert you when the WiFi goes out and they system is unable to communicate with the cloud. The Cloud Poll Interval will set how much time is between each cloud warning. A cloud warning is going to prompt you to move your system into Local Mode. Please see the troubleshooting chapter for more information on how to switch between On- line Mode and Local Mode correctly. Company Settings - Checks This section only affects whether your business allows customers to write checks for a higher amount than what is owed on the ticket. If you would like to enable this option, select the checkbox. To use this, simply run a payment as you would normally. On the payment screen, type in the amount the customer would like to write the check out for. Then select check and this will prompt you to take money out of the drawer to hand to the customer as change.
- Page 119 Admin Screen Features Company Settings - Employee There are many options in this section that cover changes you can make in the system for employees that will change how the system funcitons for you. • Ticket Transfer Needs Approval: enables a function in the system that requires approval from the employee that a ticket is being transferred to. • Require PIN: requires that an employee has a PIN, even if they have a swipe card. • Overtime Threshold: sets the overtime threshold in the system for payroll and overtime warnings; set to 40 by default. • Auto Join Drawer: automatically assigns an employee to a drawer if they have cash drawer access; helpful if all employees place cash payments in the drawer and don’t carry a server bank. • Prompt Close Drawer: will prompt the last employee clocking out to close out the drawer. • Print Clock-Out Report: sets whether the system prints a clock-out report when the employee is clocking out; is automatic only if there is a printer set to the de- vice.
- Page 120 Admin Screen Features • Pop Drawer When Not Attached: enables the drawer opening when an employ- ee takes a cash payment, even if they aren’t assigned to a drawer; this does not track those sales in the drawer however. • Must Run Shift Report: requires that all employees, regardless of if they take tips or not, run shift report. • Require Drawer For Payments: enables a requirement to have a drawer started on the station to take any payments; useful to make sure employees don’t for- get to open the drawer. • Shift Report Print Count: sets the amount of copies that will print when an em- ployee runs a shift report. • Include Cash Grat in Tip Out: includes any gratuity made on top of signed tips to the amount the employee tips out at the end of the shift. • Hide Weekly Hours: hides weekly hours from the employee tab. •...
- Page 121 Admin Screen Features Company Settings - Inventory These options are tailored more toward those who want to keep better track- ing of their items in the system. Keep in mind that inventory in Paradise applies to the individual items created in the system and not what goes together to make those items if they are dinner entrees or cocktails. This inventory system is particu- larly useful for those wanting to track retail inventory or know how many of a cer- tain dinner entree or dessert are available. • Refunds Return Inventory: sets a refunded ticket to return the items refunded to inventory; counts do not apply to open refund tickets. • Prompt for Refunds Return Inventory: prompts to set whether or not the items on a ticket are returned to inventory counts. • Default Item Department for Quick Create: when items are created with a scan- ner, they are defaulted to a new category called Quick Create; change this de- fault by selecting a different category already in the system in the blank. • Enable Low Count Alerts: sets the system to alert an employee when they order something that is below par; the item must have Low Count Alert set and an amount above 0 in its Par value.
- Page 122 Admin Screen Features Company Settings - Ticket There are many options in this section that cover changes you can make in the system for employees that will change how the system funcitons for you. • Print Tip Line: prints a tip line on credit slips; checked by default. • Enable Split Ticket Pay Prompt: prompts payment while splitting tickets using the split/combine ticket function. • Enable Threshold for Signature: sets the signature line to only print if the threshold set in Signature Line Threshold is met. • Customer Name on Receipt: when checked, prints out the customer’s name to the ticket if a customer was assigned to it. • Allow Payment Offline: allows multiple forms of payment while the system is without internet except for those that must process through your credit card terminal; to be used in emergencies during internet outtages in tandem with Local Mode. • Calculate Tips Before Discount: calculates tip percentages on tickets before any dis- counts are applied.
- Page 123 Admin Screen Features • Force Tip Selection (on iPad): forces a tip selection on the iPad when Sign Receipt on iPad is enabled. • Do Not Require Comp Reason: bypasses having to select a comp reason. • Do Not Require Void Reason: bypasses having to select a void reason. • Disable Warnings on Transfer: disables warnings when transferring tickets. • Rollup Items on Display: rolls up items there are multiples of on the ticket into one expandable section; saves space and makes the ticket on the ticket field easier to read. • Disable Modifier Toggling: allows you to select a guided modifier multiple times; ex: having two of the same side for a dinner. • Pop Drawer on Credit: pops the cash drawer open for credit payments as well as cash.
- Page 124 Admin Screen Features • Print Logo: prints the Paradise POS logo by default, can change this logo to one of your own if you have the file accessable on the iPad. The logo must be 512 x 288 pixels to be compatible. • Dither Logo: this option is available for certain printers and changes how your logo is printed to make your logo compatible with your printer.
- Page 125 Admin Screen Features Company Settings - Bar The settings in this section mostly deal with bar settings like bar tabs, pre- auths, and doubling. • Use Bar Tab: enables use of the bar tab feature; in order to collect card informa- tion for the tab as well, must have pre-auth set with an amount and turned on. When you have a bar tab with a card saved on the ticket, it allows you to close a ticket without the need to re-swipe the card. • Pre Auth Bar Tab: sets up bar tab to pre auth a card for the amount set; this will allow the card terminal to check that the card ran has at least the funding amount specified by pre auth amount. It will also place a hold for that amount on the account that will clear from their bank account later. • Bar Pre Auth Amount: sets the amount you would like to pre-authorize a card for. • Double Button Modifier: sets the amount the double button on the home page will double an item for; set to 2.00 by default, which exactly doubles the item on the ticket.
- Page 126 Admin Screen Features Company Settings - Printing In this section you can change different settings to better suit your business in regards to how your print jobs are sent to your printers. • Send Voided Items to Kitchen: sends items that are voided to the kitchen print- er, allowing the kitchen staff to see the item has been voided from the ticket; only works on items that are assigned to the kitchen printer. • Use iPad as Print Queue: allows you to make the iPad the print queue in the event that the Orange Pi Print Queue installed with your TP Link router stops working and all troubleshooting of the Orange Pi doesn’t resolve the issue. When iPad as Print Queue is enabled, you must assign an iPad to become the print queue instead. Select one of your devices in the blank for Print Queue iPad. Make sure this device stays on and in the Paradise application or print jobs that rely on a print queue (any ethernet printer) will not go through. You MUST restart the Paradise app on all iPads being used at that location in order for this setting to take effect.
- Page 127 Admin Screen Features • Print Receipts for Payouts: enables the system to print a receipt every time you create a payout using the Pay In/Out function of the system. • Account Balance on Receipts: allow a customer’s account balance to print on the receipt if they have layaway or a house account. • Print Queue iPad: to be used with Use iPad as Print Queue as described above. • Print Queue IP Address: this address should already be set for you before the equipment is shipped to you to 172.17.17.2. This address corresponds to your Orange Pi Print Queue and allows jobs to go through it to be sent to your print- ers. • Print Logo on Credit Receipts: enables your logo to print on credit receipts; must have a logo set up under Company Settings -> Ticket. • Print Barcode on Credit Receipts: prints a barcode on credit receipts that can be scanned with a scanner later for refunds.
- Page 128 Admin Screen Features Company Settings - Printing Order At the bottom of the Printing tab in Company Settings, are two buttons that give you the ability to change the order and what prints when printing tickets and credit receipts. The first of these buttons is Edit General Print Order. By default, it will be set for one Long receipt. For this option, you can only add additional Detail receipts that will print every time you print a cash receipt or reprint a ticket. The second is the Edit Credit Print Order button. This one is much more cus- tomizable as it allows you to set what will print when a customer pays with a credit card. What is set here will always automatically print after the customer pays with credit. By default, it is set to supply a Detail receipt and two Credit receipts. What is on these receipts is supplied in their descriptions. Using the minus and plus signs next to the receipt types will subtract or add them to the order listed on the right. To change the order in which they print, use the three parallel lines on the receipt type already listed on the right to drag them into the desired order.
- Page 129 Admin Screen Features Company Settings - Discounts The Discounts section changes the way discounts function in the system. There are two settings here that can be enabled. • Percent Discount Has Decimal: enables you to have a decimal option when using the Discount by a Percentage discount option; by default you only have whole number options. • Apply Open Discounts After Tax: When applying either the open discounts Discount by a Percentage or Discount by an Amount, will apply the discount selected on top of the total and tax amount.
- Page 130 Admin Screen Features Company Settings - Customer This section primarily controls the loyalty system in Paradise if you choose to uti- lize it. The Guided Loyalty box, when enabled, will force a prompt on the pay screen that asks the person checking a customer out if they are a loyalty customer and will walk them through either assigning the ticket to the customer so they can gain points or guide them through creating a new customer. Below this, the system gives you the ability to pre-auth customer cards. This is used for bar tabs and allows customers to keep a card on file when they come to your establishment. Keep in mind that holding card information on customer accounts only works on specific terminals and if you don’t have one of these, this option won’t work for you. If you would like to set up a Loyalty program, you will have to assign a Dollar Per Point amount. These are the points a customer earns for shopping with you. Every time they spend the amount you specify here, they will earn 1 point. Below you can set reward levels. This sets how many points a customer must reach before they can earn a reward and what dollar amount that reward is. You can set mul- tiple reward levels to incentivize customers to spend more in your store before cashing out their points to either a gift card or to a future transaction. Shown below is an example of a commonly used reward value. This shows that for every ten dollars a customer spends they earn a point and for every ten points a custom- er gets they receive a reward of five dollars. That means the customer spent at least one hundred dollars to receive a five dollar reward.
- Page 131 Admin Screen Features Company Settings - Redemptions Redemptions are primarily used in retail settings and include things some states may allow such as bottle fees, bottle redemptions, and lottery tickets. By using redemp- tions, the system allows you to pay the refund value for an empty beverage container for bottle redemptions or pay out a lottery ticket and track that information in your report- ing. Here we will cover setting up a bottle fee, bottle redemption, and lottery tickets. Setting up a Bottle Fee 1. To create a bottle fee, you must first go to Admin -> Company Settings -> Redemp- tions. Once there, select New at the top right of the list. 2. Name it Bottle Fee. Now, add the price of the fee, which we have added in the exam- ple as ten cents. 3. Now we need to add the Bottle fee to the appropriate item. Find the item that adds the bottle fee and edit the item. Select Page 3 on the item’s maintenance screen and select the blank next to Redemption and assign Bottle Fee to the item. Now when you ring the item in, it will add the fee as a line item on the ticket.
- Page 132 Admin Screen Features Setting up a Bottle Redemption 1. Once you have a bottle fee you can create a redemption so you can track how much you have paid out to redemptions. Creating a redemption is similar to creating the fee. Go to Admin -> Company Settings -> Redemptions. Once there, select New at the top right of the list. 2. Name the redemption. We’ve named ours Bottle Return. Now mark Is Redeemable and Prompt for Price. Having it set as redeemable will allow you to use it to apply a bottle redemption to a ticket. Having it prompt for price will allow you to type in how much you will be redeeming. You can also forgo this in favor of a set price per re- demption. 3. Once you have the redemption made, you can use it. Make sure you have a cash drawer opened for the day. To apply the redemption, you can either choose the re- demption from the Home Page at the bottom left of the screen or Employee -> Re- demption and choose the appropriate redemption.
- Page 133 Admin Screen Features Setting up Lottery Tickets 1. If you would like to track your Lottery Payouts accurately, they must be created as a redemption. Go to Admin -> Company Settings -> Redemptions. Select New at the top right of the list. 2. Name the redemptions. We’ve named ours Lottery PO. 3. Now we need to set the item with Is Redeemable, which will allow you to use the redemption on a ticket. Also set Prompt for Price, which will allow you to set the amount you are redeeming back to the customer for the winning lottery ticket they give you. Lastly, make sure Lottery is checked so the system keeps track of it in report- ing as a lottery payout. 4. Once you have created the Lottery PO redemption, you can use it on a ticket. Make sure you have a cash drawer open for the day. To apply the lottery payout, select either Redemption from the Home Page at the bottom left of the screen or Employee -> Redemption and choose Lottery PO.
-
Page 134: Company Settings
Admin Screen Features Company Settings - Reasons This section allows you to create reasons in the system for when someone runs either a Void or a Comp. These will allow you to more accurately view why these were done in the system in your reports. To create a new Void or Comp rea- son, simply select the small plus sign next to either Void Reasons or Comp Reasons. A prompt will appear that will allow you to type in your new reason. Select Confirm when finished and this will save it for you. Company Settings - Reports This section changes reporting settings in the system. At the top of the page it will allow you to switch the Accounting Type on your reports. You can choose ei- ther Accrual (most typically used and set by default) or Cash-Basis. • Accrual: records revenues and expenses when they are incurred, regardless of when cash is exchanged • Cash-Basis: records revenue when cash is received, and expenses when they are paid in cash. • Show Potential Error Tickets in Reports: displays tickets that may be error tick- ets on your reports to assist in monitoring possible issues a ticket may be hav- ing. • Open Tickets Line on Total Sales: enables tickets that have not yet been paid out yet to be viewable on the Total Sales Report; useful for those running this report mid-day. -
Page 135: Edit Roles - Creating Roles For You And Your Employees
Admin Screen Features 6.2 Edit Roles - Creating Roles for You and Your Employees Before creating your employees, you will have to first create the roles you will give them in the system, which will control their permissions. For this, it is recom- mended that you create the starting role with the permissions that an employee just starting out at that role will have, along with the regular and overtime pay rate they would have if you wish the system to track that in its reporting. To begin, select Admin -> Edit Roles. On the left of the page you should al- ready have the manager role created for you in the system by default. To create a new role, select the New Role button at the top right of the screen. On this new page, first supply the name of the role (e.g. Server, Bartender, Cashier, etc) and then the Regular and Overtime Pay if tracking that in this system. At the bottom of this page are checkboxes that, when checked, will allow this type of employee to do specific things. Anything unchecked they will need to have a manager’s permission to do the function or another employee that has the permis- sion. Below are brief descriptions of what each checkbox does so you can choose what action permissions an employee will need. - Page 136 Admin Screen Features • Keypad Changes Price: used with register mode; allows employees to set item prices with register mode’s keyboard. • Cash Drawer Access: allows the role to have access to the cash drawer; means the employee can open a cash drawer with a starting amount and take sales on a cash drawer if there is one already on the station. Required for cashiers and recommended for servers without server banks. • Override Item Discount: allows the employee to override a discount that is already on an item, normal- ly in the instance of a scheduled discount. • Reopen Ticket: enables the ability to reopen a ticket that has already been closed with a payment. • Move Items: allows those using this role the ability to move items in the system on the Home screen. • Sort Buttons: allows employees to have the ability to use the Sort function on categories and items on the Home screen. • Edit Shifts: lets employees edit shifts in the Shift Maintenence page. • Allow Table Sharing: allows the employee to select other employee’s tables/tickets to add to the ticket and share the table/ticket. • Log Out On Send: logs the user out when they send a ticket. •...
- Page 137 Admin Screen Features • Edit Loyalty Balance: lets the user edit a customer’s loyalty balance in the customer database; this is the amount of money the customer has available to use in your establishment, essentially a store credit. • Refund Ticket: lets the user refund a ticket. • Highlight Tabs: when enabled, highlights any bar tab ticket in the system in blue for that employee under the Employee tab; helpful when searching for a guest’s bar tab quickly. • Close Tabs w/o Swipe: allows the user to close a bar tab without having the card on hand to swipe; must have pre-authing bar tabs set in the system with a pre-auth amount for the system to hold card information on a ticket. • Confirm on Cash: sets a prompt for the user so the ticket doesn’t automatically close to cash if cash is accidentally selected on the pay screen. • Delete Device: a function that should only be enabled on Admin users and is a tech support func- tion. • Allow Tips: lets the user accept credit card tips. • Allow Assigned Tips: allows this user to be selectable if assigning tips to different employees in the Batch Adjustment screen and also on the Pay Screen.
- Page 138 Admin Screen Features Edit Button Permissions After selecting all the action permissions that an employee has access to, you will need to edit their button permissions. Editting button permissions allows you to set exactly which buttons your employees are allowed to use without a manag- er’s permission. To begin, select Edit Button Permissions. A pop-up will appear which will al- low you to select the different screens that are in your system. Select each screen to enable the buttons an employee will be allowed to use. By default, most of the buttons will be red. This means they don’t have access to the button. If you tap the button once, it will turn green. When green, the employ- ee is allowed to select the button while using the system. Go through all the op- tions to decide what you would like your employees to have access to.
-
Page 139: Employee Maintenance - Creating Employees
Admin Screen Features 6.3 Employee Maintenance - Creating Employees Once you have created the various roles needed for your business, you will then need to create your employees in the system. To do so, select the Employee Maintenance button in the Admin tab. On the left are the current employees in the system. If this is you first time in this section, there will be two employees listed, which are set by default: Admin and Manager. The Admin employee is specifically for tech support to access the database during tech issues. The Manager employee starts with the number 1234. It should be the employee you are logged in at the start of using and editing the database to suit your business needs. To create a new employee, start by selecting the New Employee button at the top right of the screen. Begin by supplying the employee’s first and last name. If you would like to keep the following information, such as the SSN, their cell, and their address, feel free to fill that information in. The only information that is re- quired to create an employee is a first and last name, a unique password, and a role. To add a role to and employee, simply select the small plus sign to the right of the Roles section to bring up a drop-down list of all the roles you currently have in the system. Select the appropriate role. Don’t forget to save when finished. - Page 140 Admin Screen Features You may find you need to make additional changes to an employee based on the needs of your business. Listed below are a few explanations for additional features listed for Employee Maintenance. • Credit Limit: sets a credit limit for the employee if you are using the Employee Ac- counts function included with the system. • Active: set by default, when deselected it disables the employee and they can no lon- ger clock in or access the system until set back to active. • Card #: if you would like to use swipe cards for employees instead of or in addition to the password, these can be set here. To set a card to an employee, select the swipe button and the card reader will prompt you to swipe the card to set it to the employ- • Changing a Default Role to Custom: if different employees have different permissions but the same role in the system (e.g. one bartender having more permissions or a pay raise from different bartenders) you can customize them so that only the employee you are selecting has those changes. Select the role that is already on the employee. The system will prompt you that it is changing the default role to custom. It will also prompt that the employee must clock out for the changes to take effect so make sure that the employee is not currently clocked in if you want the changes to take effect immediately. Keep in mind that once a person’s role is customized, changing the original role in Edit Roles will no longer change on that employee.
-
Page 141: Edit Templates
Admin Screen Features 6.4 Edit Templates If you would like certain employee roles to only see certain portions of the menu/ inventory available on the Home screen, you will need to create templates for them. To begin, select Edit Templates on the Admin tab. When the pop up appears, select Add New Template. On the next page, all of your available categories will be listed on the left of screen. At the top, name the type of employee you would like to create this template for. Then, select the categories you would like them to have access to. Once finished selecting these, tap once on the right and all the categories you selected will transfer over to the Selected Categories sections. Select save when finished. Lastly you will have to attach this new template to the proper employee type. To do this, go back to Edit Roles and select the role you would like to attach the new template to. There is a small blank labeled Menu Template. Select this and it will give you your cur- rent template options. Select the correct one and save when finished. -
Page 142: Item Maintenance
Admin Screen Features 6.5 Item Maintenance Within this section are all the items listed in your system, giving you easier ac- cess if you need to edit multiple items quickly. On the left-hand side of the screen are all of your items listed. At the top is a search bar that will allow you to search for a specific item. To the right of this, is a small “i”. If you select this, the pop up that appears will allow you to sort your items by either category or department. When you select an item, this will open the item’s maintenance screen. There is a lot of information here that can help you customize each item in the system. Below we have listed the different features in the Item Maintenance screen so you can choose how to edit your items. - Page 143 Admin Screen Features • Name: name of the item that appears on the selectable button on the home screen. • Kitchen Name: name that sends on a kitchen ticket; if it isn’t filled in, the Name value is what will print to the kitchen. • Price: the item’s price for the customer. • Unit Cost: the total cost for this item; assists various reports for profit reporting. • On Hand: how many of the item you have on hand; useful for keeping track of limited stock or limited food specials in a restaurant. • Par: how many of this item you want to keep in stock at all times as a minimum; having this set in conjunction with the Low Count Alert function in Admin -> Company Settings -> Inventory will give you alerts when stock hits this number or goes below. • Item/Mfg ID: this is where you can supply the manufacturer’s identification number. • SKU: an item’s unique SKU that the scanner scans into the system. Can also key in a custom SKU for printing labels for items without a barcode. • Department: sets the department for the item; these are what supply a tax rate to the item in the system and you can also run reports based on departments. • Categories: assigns a category to the item which will dictate where it will appear in the home screen. • Vendors: allows you to assign a vendor to the item. • Printers: if you would like this item to print to a kitchen or bar printer when sent in the system, you can assign a printer here.
- Page 144 Admin Screen Features • Additional Fields: most useful for retail merchants, allows you to create fields such as size or color that you can then run more detailed reports on. To create a new field, select the plus sign next to Additional Fields and select the Manage Additional Fields option. On this next pop-up you can create different fields by selecting New at the top right. Give this new field a name. For example, we can call this one Size. Beneath Sub Fields, select the plus sign and a blank will ap- pear. Here you can create the different sizes within the Size field, such as small, medium, and large. Select save when finished creating the different options and then back when done creating all additional fields. Now that an additional field is created, select the plus sign again next to Additional Fields. Select the new field. There will then be a small blank, allowing you to add the field that pertains to this item. Item Maintenance Checkboxes On the Item maintenance screen are a series of checkboxes and settings split up between three different tabs. The checkboxes allow for specialized settings that certain items may need due to the way you would like them to function. When you create a new item, some boxes are checked by default. Below is a brief description of what each of these checkboxes do when enabled.
- Page 145 Admin Screen Features Page 1 Settings • Rental: turns the item into a rental item; selecting this will add two more buttons to Page 1: Rental Info and Rates. Setting up a rental item is covered more in-depth in the Rental Maintenance sec- tion in this chapter. • Discountable: allows the item to be discountable; disable if employees can’t apply discounts to it. • Taxable: sets the item to be taxable, regardless of if the department applied to the item would add tax. • Returnable: allows customers to return the item and the system to add it back into inventory. • Measurable Qty: when enabled and the item is selected on the home screen, the system will prompt for an amount of the item. When used with the Use Decimal Qty setting, allows user to in- put a decimal amount, best used in the case of weighed items. Must have Force Item Add enabled on user’s Role Maintenance. • Use Decimal Qty: when enabled with Measurable Qty, allows user to input decimal amounts for quantity totals; cannot be used with Prompt Qty. • Prompt Name: prompts user for item name when enabled. • Low Count Alert: allows the item to display a warning when below Par; must be used in conjunc- tion with the setting Enable Low Count Alerts in Admin -> Company Settings -> Inventory. • Mark For Reorder: allows user to manually mark an item for reorder, which will display the item on the Reorder Report, along with anything else in the system that is below Par.
- Page 146 Admin Screen Features Page 2 Settings • Set Decimals: when enabled, allows you to edit the blank for Qty Decimals be- low Additional Fields. • Prompt for ID: when enabled, the system will prompt an age requirement for the item that can be set to either 18 or 21; when enabled on an item, the sys- tem will request that the customer’s ID passes the age requirement on any tick- et that has this item on it on the pay screen. • Loyalty Exempt: exempts the item from giving any loyalty points to customers if you are using the Loyalty program. • Smart Tax: sets an item for smart tax, which sets the item up to not charge any tax that would normally be applied to it from it’s department unless rang in with items that aren’t smart tax; used mostly in restaurants that only charge tax on liquor unless ordered with food, due to state tax laws. • Limit SKU: limits the SKU to the amount of digits you specify; when used in conjunction with Ignore Last Digits, you can set how many of the last digits the scanner ignores. This is best used with Price from SKU to extract pricing from certain item SKUs. • Price From SKU: allows the item to gain it’s price from the SKU of the item; next to this is a blank that will allow you to set what last SKU digits the system regis- ters as the price. •...
- Page 147 Admin Screen Features Page 3 Settings • Ounces: used with items that have departments that charge additional tax based on weight; this allows you to set that weight. Typically used on items in states that enforce a sugar tax. • Commissionable: sets the item to commissionable; must be used with Commis- sion Rate to add a commission to an employee and that employee must have the Receives Commission box checked in order to receive the commision on their commission report. • Commission Rate: sets the commission rate of commissionable items; must have Commissionable enabled. • Unit of Measure: used in conjunction with the Measurable Qty checkbox on Page 1 Settings; this sets the unit that you are measuring in. • Redemption: allows you to add a redemption set up in Redemptions under Ad- min -> Company Settings -> Redemptions to an item which is covered more in- depth in that section. • Fixed Deposit: used with merchants utilizing the rental and deposit function of Paradise, which is covered more in depth in the Employee Screen Features chap- ter; allows you to set the fixed deposit an item charges. • Prompt Deposit: used with merchants utilizing the rental and deposit function of Paradise, which is covered more in depth in the Employee Screen Features chapter; sets up a prompt when you select the item to set the deposit rate. • Deposit Amount: used with merchants utilizing the rental and deposit function of Paradise, which is covered more in depth in the Employee Screen Features chapter; how much the fixed deposit is.
-
Page 148: Modifier Maintenance
Admin Screen Features 6.6 Modifier Maintenance This button contains the different modifiers and modifier groups within your system. Modifiers are additional buttons that give further instruction or tack on extra charges to a main item. All of these modifiers are contained in different modi- fier groups which can include all sorts of different things, such as: Sandwich or hamburger options that can be added or removed such as lettuce, tomato, cheese; Menu add-ons like sautéed onions, extra cheese, or extra meat and can have a charge applied; Salad options such as different salad dressings or salad meat add-ons; When you select Modifier Maintenance, a small pop-up will appear, giving you three options: Edit Modifiers, Edit Modifier Groups, and Edit Modifier Descriptors. They are described in more detail below. Modifier Group Screen on Item Modifier Group Name Modifiers Modifier Descriptors... - Page 149 Admin Screen Features Edit Modifiers The Edit Modifiers screen contains all of your modifiers listed to the left of the screen. When you select one or create a new one with the New Modifier but- ton at the top right, the details you can change on that modifier are listed on the right. • Name: this is the name of the modifier and how it will appear in the Modifier Group. • Price: if the modifier contains an upcharge, that price can be listed here. • Default Quantity: sets how many are ordered by default, generally kept at 1. • Measurable: changes the default quantity to a measurable amount with decimal places.
- Page 150 Admin Screen Features If you would like, you can also change the color that this modifier is when on the Modifier Group screen. Keep in mind you have to have a color scheme created and set in order for additional options to appear. Below the color selection are two lists, titled Modifier Groups and Sub-Modi- fier Groups. • Modifier Groups: This will display what modifier groups a modifier will appear in. A modifier can be attached to multiple modifier groups. To add more here, select the small plus sign at the top right of the Modifier Groups list and a list of your available modifier groups will appear. If you need to make a new group from this page, you can select Add New Modifier Group from the bottom of this list. • Sub-Modifier Groups: This section allows you to attach a modifier group to a modifier so you can edit a modifier the same way you would an item. A good ex- ample of utilizing this is having a Salad Dressing modifier group attached to the modifier Side Salad. If the Modifier Group you add to the Sub-Modifier Groups is a guided modifier group, it will automatically pop-up when the Side Salad is selected, prompting employees to select an option. Below is an example of how to set this up.
- Page 151 Admin Screen Features Edit Modifier Groups The modifier group screen has two sides. The left of the screen are all of the groups already created in the system. The right side contains the specific modifiers and group rules for the selected group. Each Modifier Group must have a name. If creating a new one, make sure it is one that makes its use easily recognizable. Below the name are three fields called Modifier Group Rules that will help dictate how many of the modifiers within the modifier group can be selected. Modifier Group Rules • Min Modifiers: this is the minimum amount of modifiers an employee will have to select when this group appears on a menu item. If the group is not a guided modifier group, this value can remain at zero. • Max Modifiers: this is the maximum amount of modifiers an employee can select from this group when it appears on a menu item. • Free Modifiers: if the modifiers within this modifier group charge but the customer is al- lowed a certain amount free before they are charged, that amount will be listed here.
- Page 152 Admin Screen Features Below the Modifier Group Rules is a selection for the color this group will appear while on the Home Screen and two checkboxes further down. You can only set a color for the Modifier Group if you have a color scheme created in your system. • Guided: when selected, this modifier group will always automatically appear when the menu item it is attached to is selected. When not guided, the modifier group is only selectable by ringing in the item on the Home page and then selecting the rang up item in the ticket field to edit it. It is best to use a guided modifier group when you want to force a choice on an item, such as what side a customer orders. Unguid- ed modifier groups are best used for special requests/edits to items customers have ordered, such as optional add-ons or groups such as hamburger mods, which would allow the employee to take things off or add things to a hamburger for the kitchen ticket. • Allow Open Modifiers: creates a button within this modifier group that will prompt for name and price, allowing staff to add special instructions to certain items in the system. Allow open modifiers with caution, as employees can use this as a way to give standard modifiers away at no price. On the far right of the screen is a large list that spans the height of the page. At the top of this, you can toggle between Modifiers and Items. • Modifiers: this list will show you what modifiers are currently connected to the mod group you have open. To add more, select the small plus at the top left of this list. An- other list of all the modifiers you currently have in the system will appear. If the mod- ifier you are searching for to add to your modifier group is already on this list, you can select it here. This will highlight it in grey. Highlighting multiples will allow you to add multiples all at once. There is a search bar at the top to help quickly navigate to the modifier you’re looking for. If the modifier doesn’t exist in your system yet, you can scroll to the bottom of this list instead and find the button called Add New Modifier. This will allow you to create the new one you need. • Items: this list will show you what items the modifier group is currently attached to. To add more, select the small plus sign while the Items list is selected to be shown all of the items currently in the system. You can filter this further with the small key button at the top left of this selection screen. This will allow you to filter your items by either category or department. If you select a specific category and would like this modifier group to appear on all the items within it, you can select the Select All but- ton. This will highlight all the items on the list in grey. Clicking the Add Selected but-...
- Page 153 Admin Screen Features Edit Modifier Descriptors Modifier Descriptors are additional options that will appear on every Modi- fier Group screen on the home page. These allow you to set words with rules such as NO, ADD, or EXTRA that can be added to modifers to change what they do. Some may have already been created for you when you receive your system. When you select Edit Modifier Descriptors, the left of the screen will display the descriptors currently in the system. When you select one of these or create a new one with the New Descriptor button, the right side of the screen will display rules that change a modifiers price depending on what is applied. • Add Price: when selected, this descriptor will add the price of the modifier to the selection, even if the modifier group rules state it is free; if the descriptor is used on a modifier that already charges, it will charge double that. • Nullify Price: the descriptor will nullify any charge a modifier may incur; useful when using NO on a modifier that would usually charge. • Subtract Price: the descriptor will subtract any charge a modifier may incur. • Add Value to Price: the descriptor will add the value listed in the blank to the right to the modifier. • Subtract Value From Price: the descriptor will subtract the value listed in the blank to the right to the modifier. • Apply Percentage to Price: the descriptor will apply a certain percentage of the price to the charge of the modifier as listed in the Percentage blank; can be used on a descriptor such as HALF or QUARTER to only charge that percentage of the modifier.
-
Page 154: Edit Departments - Tax Rates In Your System
Admin Screen Features 6.7 Edit Departments - Tax Rates in Your System Departments allow you to set tax rates for different groups of items in your database. This is especially helpful for reporting purposes and for items that may have different tax rates such as Food, Beverages, Wine, Liquor, Etc. Be sure to check your departments before using the system to make sure the correct tax rates have been set up for you. When you select Edit Departments, the left of the screen will display your current departments. When you select a department or create a new one using the New Department button at the top right of the screen, a few options will appear. • Taxable: when enabled, allows the department to tax at the rate provided in Tax Rate. • Track Time: save the time it was sent to the kitchen so that you can store the time it was sent for use in future reporting. • Tax Rate: sets the tax rate of the department. - Page 155 Admin Screen Features Below this is a blank list. This list will allow you to add new Tax Rates to the department if you would, for instance, like to have state and county tax separated, or if you have state taxes that are added per ounce of a product. When you select the small plus sign to the right of this list it will give you the option to Add New Tax Rate. When selected, you will be prompted for a name and a rate percentage. There will also be additional checkboxes to select. • Rollup: rolls this tax rate into the tax rate provided in the Tax Rate already ap- plied to the department and doesn’t separate it on the customer receipt. • Line Detail: shows this new tax rate as a line detail on a customer receipt. • Reporting: this rate doesn’t show up on the ticket; this is only for reporting pur- poses and not for adding a tax rate to they item. • Per Ounce: charges an amount of cents per ounce; when selected, this chang- es the Rate blank from percentage to cents per oz. The item this department is attached to must have ounces set on page 3 of its item maintenance screen.
- Page 156 Admin Screen Features Creating Smart Tax Smart tax is most commonly used in the instance that a state’s tax laws re- quire that alcohol does not charge taxes when not ordered with food. To set this up, you will first have to make sure all the items that need to be taxed this way are in the same departments. Once they are, select Admin -> Edit Departments and choose the department you would like to add smart tax to. Ensure that the correct rate is applied and that it is marked at taxable. This is the rate it is going to add when any item under this department is rang up with a normally taxed item.
- Page 157 Admin Screen Features Now you have to manually set up each item within that department that will need smart tax. To do this, go to Admin -> Item Maintenance and select the appro- priate item. Remember you can filter by department here. Once you have the item selected, choose Page 2 in the settings section. Select Smart Tax to enable it and save the item. Now when this item is ordered by itself it will not charge taxes but when ordered with an item not using smart tax, it will charge tax for both items.
-
Page 158: Ticket Commands
Admin Screen Features 6.8 Ticket Commands Ticket commands are options you can set in the system that will allow you to add the commands to the bottom of kitchen tickets. By default, your system should have one set as DO NOT MAKE and another set as TO GO. These allow you to des- ignate to the kitchen what type of ticket you are sending them so that they plate it correctly. To create a new one, select Ticket Commands on the Admin screen. This will prompt the Command Maintenance page. Select New Command at the top right of the prompt. Name the new command and select save. To use one of your ticket commands, have a ticket created in the ticket field on the home screen and then select Commands at the bottom right of the screen. The system will allow you to add the commands you have in the system to the tick- et and you can select multiples if you need to. When selected, these will show up at the top of the ticket field on your ticket. When sent to the kitchen, it will appear at the bottom of the kitchen ticket. Make sure to add the command before sending to the kitchen. -
Page 159: Discount Maintenance
Admin Screen Features 6.9 Discount Maintenance The Discount Maintenance button contains the different set discounts you have in your system and allows you to create more. When you select Discount Maintenance, three options will appear: • Edit Discounts: contains your default discounts; these must be manually applied to tickets or items. • Scheduled Discounts: this section allows you to attach default discounts to items during specific hours and days of the week; useful when creating happy hour items. • Mix and Match: discounts used to mix and match items of your choice; useful for creating discounts that occur on items when a customer buys multiples. - Page 160 Admin Screen Features Edit Discounts This section will allow you to create and edit your standard discounts in the sys- tem. To create a new one, select New Discount at the top right of the screen. This will allow you to name the discount and add a description. Below these options are check- boxes that allow you to further modify what this discount does. • Active: when enabled, sets the discount as active so that it is a selectable option. • After Tax: sets the discount to apply after tax has already been added. • Ignores Modifiers: discount does not apply to the modifiers that may upcharge on an item. • Disable Doubling: disables doubling a discount on an item that you use the dou- ble button on; helpful when trying to double a happy hour item that the customer doesn’t get a double discount on. Below these checkboxes are options that will dictate what the discount will do when applied. You can set the discount to take a percentage off, to take an amount off, to set the price of the discounted item, or to remove tax. Make sure when doing a per- centage to have the numbers place correctly with the decimal places. For instance, 20% should be input in the system as 20.00%.
- Page 161 Admin Screen Features Scheduled Discounts To create a scheduled discount, you must first have the standard discount created that you will apply to a set amount of items at your specified time and date range. For instance, if you want all draft beer to be 20% off during you restaurant’s happy hour, you will first have to create a standard discount that applies 20% off. Once you have a standard discount created for your scheduled discount, open the Scheduled Discounts page. Select New Discount at the top right of the screen. Name the new scheduled discount and make sure to mark it as active so the system will apply the discount. Next, choose the days of the week the discount will apply to.
- Page 162 Admin Screen Features You will then need to input when the discount is effective from and to. Input the correct time and set the date range. If the discount will go on indefinitely, make sure to select Ignore End Date and the system won’t take into account what date you have set in the To blank. Below these options is a small blank labeled Discount. This is where you will apply a standard discount to the scheduled discount. Select the small plus sign and select from the list or select Add New if you would like to create a new one from this page. Once you have a discount selected, you can begin adding the items that the scheduled discount will be applied to during your set time. Select Edit next to the blank Items list. Your items on the next page will be listed by category first. Choose a category and it will expand, revealing the items it contains. When you tap on an item within the category, it will be highlighted in green. Select all the items you would like to add the scheduled discount to and when you are finished, select Save at the top right of the screen. This will take you back to the Scheduled Discounts editing screen. Don’t forget to select Save once more at the bottom right of the page.
- Page 163 Admin Screen Features Mix and Match A mix and match discount automatically gives customers a discount when they purchase a specific combination of products. This is most notably used in in- stances where a customer purchases items that are on a buy one get one special. For example, a customer purchases a drink and receives the second 50 percent off. Another example would be having a two for $10 special. To begin creating the mix and match discount, name the discount and make sure to mark the active checkbox. Mark the days of the week that you would like the discount to apply. You will then need to input when the discount is effective from and to. Input the correct time and set the date range. If the discount will go on indefinitely, make sure to select Ignore End Date and the system won’t take into account what date you have set in the To blank.
- Page 164 Admin Screen Features Now before selecting the items you would like the mix and match to apply to, you must set the discount levels. Discount levels allow you to set the price that the group of items will become after the discount or how much each item will become after the dis- count. Choose the Set Group Price checkbox to set what the group’s total will be after discount or choose the Set Item Price checkbox to set what the individual items will sell for after discount. Start by setting up Level 1. Set how many of the mix and match product a custom- er has to purchase before receiving a discount. In the case of the first example listed above, set the Quantity for Level 1 to 2. Next, you will need to set up either the Price for All if using the Group Price option or the Price per Item if using the Item Price option. Because of the way the mix and match changes prices, you will need to calculate how much each item becomes after the discount you provide. For instance, if doing a buy one get one free promotion, you will want to calculate what the items would cost if they were 50 percent off each. In the case of a two for $10 special, simply marking the level as a group price and setting the price at $10 sets this for you. If you allow the customer to purchase the special multiple times and it is set to the Group Price option, make sure to set multiple levels to account for this. For the 2 for $10 special, you would set Level 2 to Quantity 4 and Group Price to $20 and so on. In the case of individual prices with the Set Item Price option, setting Level 1 to 2 and Price per Item to the item’s sale price will allow all included items after the second purchased to also be included in the sale.
-
Page 165: Edit Table Diagram - Creating Your Table Layout
Admin Screen Features 6.10 Edit Table Diagram - Creating Your Table Layout Creating a Table Diagram will allow you to have tables to select and add tick- ets to. To make a table diagram, select the Admin -> Edit Table Diagram button. This will take you to the table editing screen. To begin, select the green plus tab at the top left of the page. This will create a new blank diagram. If you would like to pick colors here, make sure you have a color scheme and it is applied to your devic- es. Once a blank diagram is created, press and hold your finger down on the back- ground. Four options will appear: • New Table or Object: allows you to create a new table, which is selectable for tickets, or an object, which is not selectable for tickets. This is covered in more detail below. • Change Background Color: allows you to change the background color; if you have a color scheme enabled, your primary and secondary colors will be your options; otherwise, grey and dark grey are your options. • Rename Section: allows you to rename the current section, by default it will be called Diagram followed by a number. • Delete Section: will delete the entire table section. Use with caution as this may cause open tickets to disappear. - Page 166 Admin Screen Features Creating New Tables or Objects The bulk of creating a table layout will be creating the tables and arranging them between the different diagrams. This section will go over this in more detail. After pressing and holding your finger down on the screen to display the table dia- gram options, select New Table or Object. A new square yellow object will appear. Tap the object once and it will be highlighted in white meaning it is the se- lected table. Once highlighted, you can use your finger to drag it around the screen or use two fingers to expand or shrink the object.
- Page 167 Admin Screen Features Double tap the table for editing options. On this page you can edit what shape the object takes at the top, whether the object is actually a table with the checkbox, what the table is called, and what color the table is. If you would like this object to be selectable by employees to assign tickets to, make sure the Object is Table is selected. After you’ve done that, you can then give the table a name. Save when finished. The table name will display in green if it was successfully created as a select- able table. All object names will be displayed in black. If you have multiple tables that are the same size and shape, this page will also let you duplicate tables. The system will prompt you for how many additional tables you’d like to create with the same specifications. All duplicated tables will populate on top of the original table. Select the ta- ble and drag it away and any additional tables you created along with the original will be below it. Make sure that all tables you create have a unique name or the system will think they are the same table when you assign a ticket to them. !!! Make sure that the checkbox for Object is Table is selected if you want the table to be selectable. Also be sure to give every table a unique name/number. !!!
-
Page 168: Color Scheme Maintenance
Admin Screen Features 6.11 Color Scheme Maintenance To change the default colors the Paradise system came with, open Color Scheme Maintenance in the Admin tab. A color scheme may have been created for you. If so, it will be listed on the left. To create a new color scheme, select New Color Scheme at the top right. Begin by naming the color scheme. Next, at the far right are blank squares below the names Red, Orange, Yellow, and Green. Select the blanks below these to be given a color picking option. Try to keep these colors the same as the name as these four will dictate the colors of important buttons such as Pay, Send, Void Tick- et, etc. - Page 169 Admin Screen Features In the middle of the screen are a Primary and a Secondary color. The Prima- ry color will change the background color of the screen. The Secondary color will change the hardcoded buttons, such as the Home and Employee tabs at the top, and the buttons within the tabs. Below these are nine extra spots for color. The color you choose for number 1 will change the color of all your categories and items in the system. The rest of the options are all there for you to have additional color choices in the system. When choosing a color with the color picker on the Set Color screen, there are two small bubbles, one on the large gradient color block, the other on the small rectangular bar. Sliding the one at the bottom will change the color gradient of the block above. Sliding the one on the gradient color block will change the cur- rent selected color. Play around with these settings until you have colors that work for you. You can have multiple color schemes created to easily switch between as needed as well as add different color schemes to templates.
-
Page 170: Edit Vendors
Admin Screen Features 6.12 Edit Vendors If you would like to keep track of vendors in your system and be able to keep track of what inventory came from which vendors, you will need to create them in the Edit Vendors section. Select this option on the Admin tab. When you have vendors, they will be listed on the left of the screen. To create a new vendor, select New at the top right. From here, you can supply the information you have from the vendor; only the name is necessary when creating a vendor. To attach a vendor to an item, find the item either in item maintenance or on the home screen and open its editing page. On the far right there will be a blank to provide the vendor. Select the small plus sign and the list you currently have in the database will appear. Select the approprite vendor and save the item. -
Page 171: Printer Maintenance
Admin Screen Features 6.13 Printer Maintenance For the most part, your printers will have already been created for you in the printer maintenance screen, depending on if your printers were shipped to you from Paradise or not. On the left will be a list of your current printers and they will normally be labeled as Kitchen Printer or Sta Rec, depending on what they are. Make sure that these settings are left as they are unless directed by tech support otherwise, as the settings here are what enable your printers to function properly. Adding Items to Kitchen Printer You may find that you need to assign items to a kitchen printer so that they print to that printer when sent. To do this, simply select your kitchen printer on this page. In the middle are the options that allow it to function. On the right is a list of all items assigned to the printer. To assign additional items, select the small plus sign at the top left of this list. A list of all the items in the database will appear. To more easily search through this, select the small “i” at the top left of the new item list. This option will allow you to filter your items by either department or category. To easily select everything in whichever option you filter by, choose Select All. This will highlight all items currently filtered on the list. Next, select Add Items to Select- ed Printer. This will move them all to printer’s Assigned Items list. To individually move items, select them on the list to highlight them in grey, then tap on the Assigned Items list to move them. Make sure to save when fin- ished. -
Page 172: Printer Routing
Admin Screen Features 6.14 Printer Routing Printer routing allows you to assign some of your devices to print to different printers based on a schedule. This is a useful feature if you would like for one of your stations to switch to a different printer than it’s usual one without having to change it for those days. This setting allows you to set days when these other print- ers work with the station. To set up printer routing, begin by selecting New Route after opening the Printer Routing page. Name the new route and don’t forget to mark it as active. The active check box is also an easy way to turn the route on and off when you would like. After naming the new route, select the days that you would like the device to route to a different printer. You will then need to input when the route is effective from and to. Input the correct time and set the date range. If the route will go on indefinitely, make sure to select Ignore End Date and the system won’t take into account what date you have set in the To blank. - Page 173 Admin Screen Features Next, select the printer that the device normally prints to that you would like to change in the blank next to From Printer. In the the To Printer section, select the printer you would like it to route to. Lastly, select the Edit button next to the Devices section. This will display a list of the devices in your system, which are your stations. Choose which stations this change will effect. Then save. Don’t forget to test these settings to ensure they work properly.
-
Page 174: Device Maintenance
Admin Screen Features 6.15 Device Maintenance The Device Maintenance screen contains information and settings on each of the devic- es connected to your database. At the left is a list of all iPads on the database if you have more than one. If tech support has assisted you at some point by loading your database, their iPad will also load on this page. The device you are on will be highlighted and the name will display it’s three letter des- ignation and say This Device in parenthesis. The three letter combination keeps the devices separate and lets you know which device is which on things like drawer reports and will let you know which device began a ticket. When you select a device, the device’s options will appear on the right of the page. Ev- erything in grey is something that cannot be changed. - Page 175 Admin Screen Features • Label Printer IP: if you have a label printer, this is where the IP address is sup- plied so the iPad and label printer communicate. This is already set up for you if you ordered a label printer initially with your Paradise order. • Card Terminal: designates which card terminal is used with this device. • Receipt Printer: designates which printer is this device’s default printer. • Printer Exclusions: this is used in rare cases where you are on a station that does not need to print an assigned item to a specific printer; mostly used when on a bar station that you don’t need bar tickets to go to but you do need them to go to printers from other stations. • Sign on iPad: when used with the Sign Receipt on iPad checkbox in Admin -> Company Settings -> Ticket, will allow receipts to be signed for on the iPad rath- er than on physical tickets. • Device Timeout: sets the time in seconds that the system will wait before re- turning to the log in screen. Set to zero to disable timeout. • Scale Type: sets the type of scale if you are using one from the two available; will have already been set up for you if you ordered a scale initially with your Paradise order. • Scale IP: the IP address of your scale; set up for you already if you ordered a scale initially with your Paradise order. •...
-
Page 176: Open/Closed Print Jobs
Admin Screen Features 6.16 Open/Closed Print Jobs Your print jobs are shown in the Admin Screen in the bottom center of the screen; you can switch between your open and closed print jobs by switching be- tween the Open Print Jobs and Closed Print Jobs tabs. Normally if your printers are functioning properly you won’t have any jobs listed in Open Print Jobs but they will sit here until a printer is available. If you find you have a backlog of print jobs and don’t need to reprint them, you can clear them by pressing and holding your finger down on the top print job and dragging your finger down toward the bottom of the page. A red button will appear. Let go and select the red Clear Queue button to clear out the queue. If you have a few jobs backlogged, you may need to do this multiple times. You can also select one of these jobs and the next page will give you the option to reprint the ticket. Drag Down... -
Page 177: Terminal Status
Admin Screen Features 6.17 Terminal Status The terminal status screen is to the right of your open print jobs. This section details the Status, IP, and name of your credit card terminal. Different terminals will look different on the status screen; for instance, some terminals that are bluetooth won’t have an IP address. If you have a card terminal that is hardlined to internet and you notice that it doesn’t seem to be connected, try selecting the Check Con- nection button on this status screen. It should say Available next to status when properly connected. Other terminals such as a bluetooth reader may say Label in the status section instead of saying connected. 6.18 Printer Status At the bottom right of the Admin screen is a section labeled Printer Status. If you have any ethernet printers and are using the Print Queue supplied with your equipment, the ethernet printers will be listed here. This area is to help diagnose printer issues. If the screen says Print Queue Unavailable, then you have an issue with your print queue or internet connection. Check the troubleshooting guide to resolve this issues. While the system is connected to the print queue and the printers are listed, each printer will have a status listed. From here the system will tell you if the print- er is available, unavailable, if the cover is open, etc. -
Page 178: Rental Maintenance
Admin Screen Features 6.19 Rental Maintenance Rental Maintenance allows you to add additional rental rates to items as well as create the rental items. Before you do this however, you must create an item button in the system that will prompt you to select from the rental items you have. Start by going to your Home Screen and creating a new category for your rental items. Now create a new item within that category. Name the item and give it the appro- priate department based on how it needs to be taxed. Now, to have it function as a rental item, check the Rental checkbox on Page 1 at the bottom left of the item’s maintenance page. Two new selections will appear: Rental Info and Rates. Select Rental Info to add the items that you will rent to customers and their rates. A new screen will appear. - Page 179 Admin Screen Features Rental Info This new screen will allow you to set things such as the rate and the deposit amount for the item. • Rate Name: Name of the rate you are creating. • Deposit Amount: The amount a customer has to deposit to receive the rental item. • Rate: The amount of money a customer will pay per additional minute, hour, or day. Set the time increment by selecting the blank next to Per. • Minimum Rental Time Of: Sets the shortest amount of time the customer can rent the item; if the customer brings it back early they will still be charges for the mini- mum rental time. • Max Price Of: Sets the maximum amount the customer can be charged. • Update Charges Every: Updates the charges in the Rental Tickets screen based on what is set here. • Round Up To Next Charge: Sets whether the system charges the customer full price for a time period, even if they only used it for half that time.
- Page 180 Admin Screen Features To add items that will be rented to customers, select the Add button at the far right. Another page will appear that will allow you to create a new Rental Item. Give the item a name and make sure to give the item a serial number. Once you have done this, select Save. Now that you have a new rental item, select Add again, which will give you the option to add the item you just created. You can also add notes about the item here by typing in a note and selecting Add Note.
-
Page 181: Rental Maintenance
Admin Screen Features Setting Additional Rental Rates If you would like to apply a different tax rate to an item for any reason (daily spe- cial, discount, etc) you can create additional rental rates to use on your rental items. To set these, go to Admin -> Rental Maintenance and select Rental Rates. To make a new rate, select New Rental Rate at the top right. From here, you can create new rules for your rental items that you can later apply when you ring the item in for a customer. The rules are explained below, along with an example. Rental Rate Maintenance • Rate Name: Name of the rate you are creating. • Deposit Amount: The amount a customer has to deposit to receive the rental item. • Rate: The amount of money a customer will pay per additional minute, hour, or day. Set the time increment by selecting the blank next to Per. • Minimum Rental Time Of: Sets the shortest amount of time the customer can rent the item; if the customer brings it back early they will still be charges for the mini- mum rental time. • Max Price Of: Sets the maximum amount the customer can be charged. • Update Charges Every: Updates the charges in the Rental Tickets screen based on what is set here. • Round Up To Next Charge: Sets whether the system charges the customer full price for a time period, even if they only used it for half that time. - Page 182 Admin Screen Features Using a Rental Item Once you have created some rental items, you can now ring them up. Select the item and you will get a pop-up of the items you can select to rent. Select the item to highlight it in grey and then tap on the arrows facing the Pending Checkout section. This will move the item to the ticket. If you would like to assign a different rate than what is on it by default, select the item on the Pending Checkout side to hightlight it in grey. Now select the button Assign Rate. This will give you a list of any additional rental rates you may have created. Select the rate to override it’s default rate with the new one. If you make a mistake, you can select the item again and tap Reset Rate. When you’ve finished selecting your item, tap Accept. This item will now be rang up on the ticket with it’s deposit amount. Pay this ticket out to pay the deposit amount and this will close the ticket but will continue to track the amount of time they keep the rental open for. Paying Out a Rental Ticket When a customer returns their item, they will then have to pay on the additional balance they accrued based on how long they kept the item and the rules you have set for the item’s rental. When you are ready to return the item, go to Employee -> Rental Tickets and the next page that appears will have a list of your open rental tickets. Select the ticket that you would like to return. Select Return Items at the bottom of the page. This will return the items to inventory and ring up their remaining total to the ticket for them to pay. You can then finish paying the ticket.
-
Page 183: Reporting - An In-Depth Look
7 Reporting - An In-Depth Look In this chapter... 7.1 Web Reports vs. Local Reports..........184-186 7.2 Sales..................187-209 7.3 Item L evels................210-211 7.4 Inventory................212-216 7.5 Employee................217-220 7.6 Customer................221-224 7.7 Drawer..................225-226 7.8 Daily Logs................227-228 7.9 Modifiers..................229... -
Page 184: Web Reports Vs. Local Reports
Reporting - An In-Depth Look 7.1 Web Reports vs. Local Reports The Paradise application on your iPad only contains fifteen days worth of current data, excluding your Customer Database ticket history and Employee Ac- counts. To see more data, you will need to create an account on the Paradise On- line Dashboard, which will give you access to your web reports. Once you have an account, a tech will need to link the database to your account. Switch to Local Reports Once this has been done, you can now access your web reports and local reports through the iPad. To enable web reports, go to Admin -> Company Settings -> Reports and select the Use Web Reports checkbox. Now when you run your re- ports, you’ll have the option to switch between Web Reports, which will load au- tomatically and allow you access to all of your current data, and Local Reports. The button to switch can be found at the top right corner after opening Reports. Every- thing in this guide will cover how to use and access these local reports but keep in mind that the dashboard works in a very similar way. - Page 185 Reporting - An In-Depth Look How to Run a Report There are many reports in the Paradise system that will allow you to more closely manage your business and keep track of excessive voids, comps, and dis- counts to reduce shrinkage. They are divided up into eight different sections, listed to the left of the screen when you select Reports. Most reports, when selected, will give you the option to select your date range and time range. To change the date, select the current date and a calendar will appear. This will allow you to choose the correct starting and ending date that you would like the report to pull for. Change the time range in the same way, mak- ing sure to correctly add AM or PM based on the time range you are trying to pull. Make sure that your FROM date and FROM TIME are before the TO date and TO TIME respectively.
- Page 186 Reporting - An In-Depth Look At the bottom right of the screen you have three different report options: CSV, Thermal Print, and PDF. The CSV option creates a .csv file that is importable to different programs. When you select this option, it will give you a preview of the file first; if correct, everything will be separated by commas. Select Confirm and the system will allow you to email the file out. Make sure that you have an email address set up on your iPad, that way the system has somewhere to send the email out from. The Thermal Print option will allow you to print to your receipt printer. Keep in mind that some reports are quite large and will use a lot of paper. You may be best off using the PDF option. The PDF option creates a .pdf file that can be viewed on the iPad itself and a few additional options. Once you select PDF, a file will open on the iPad screen. If it doesn’t appear immediately, select the small file at the bottom of the screen to open it. Once open, you can swipe through the pages if there are multiples to view the file. To view the options bar, tap once on the report. At the top right, there is a printer icon. If you have an Air compatible printer on the same network that the iPad is on, you will be able to print this report. Next to this icon is a small envelope if you have an email address connected to the iPad. Select this and the system will allow you to email the file. To leave the page, make sure the options bar is at the top of the screen and select Done. Some reports have additional options you can choose from, such as employ- ees if you would like to specify a particular employee’s report. Then there are yet other reports that have other selectable specifications. Information on a Report At the top of every report is a list of information. The first line tells you what report it is. Below this it has your company name and then the name of the em- ployee who ran the report directly below. Next is the date range, which will detail the date and time range you pulled for the report. Below this is the date and time the report was pulled or printed and what device it was printed or pulled from (EX Sta 1, Sta 2, etc.)
-
Page 187: Sales
Reporting - An In-Depth Look 7.2 Sales This reporting section deals primarily with dividing your sales into different sections such as department, category, or payment details. Learning to read your sales reports is crucial to running your business effectively. This chapter will go over the different types of reports in the Sales section. Sales Summary Report This report includes a ticket summary and payment details and allows you to pull a brief overview of sales for the given time range. The Ticket Summary section will review how many tickets you sold, what the total ticket subtotal is, their tax, and the ticket totals. Below is the payment details section, which separates your payments into their different tender types, with totals at the bottom. • Tickets Sold: The total of tickets sold for all stations, per time frame. • Ticket Sub Total: The total of payments taken for all tickets sold on all stations before tax is applied, per time frame. • Tickets Tax: The tax total on all tickets for all stations, per time frame. • Ticket Total: This total is the Ticket Sub Total and Tickets Tax added together. • Fees: Applies only to merchants on the Cash Discount Program. Lists the fee applied to transactions of different payment types. This fee will be added to all forms of payment and rebated for Cash and Check due to the way the Cash Dis- count Program works. This fee also applies when using Redemptions in states that have laws applying to bottle fees. - Page 188 Reporting - An In-Depth Look • Type: Lists the payment type used. • Sub: The total of payments taken per payment type before tax is applied on all stations, per time frame. • Fees: Applies only to merchants on the Cash Discount Program. Lists the fee applied to transactions of different payment types. This fee will be added to all forms of payment and rebated for Cash and Check due to the way the Cash Dis- count Program works. This fee also applies when using Redemptions in states that have laws applying to bottle fees. • Rbt: Applies only to merchants on the Cash Discount Program. Lists the rebate applied on tickets of different pay types based on what payment method was used. In the case of Cash and Check, these should always have rebates that match the fee applied. This rebate also applies when using Redemptions in states that have laws applying to bottle returns, as those returns are rebates. If using both the Cash Discount Program and Redemptions, the Rebate and Fee may not match in this case. • Tax: The total of tax taken per payment type for all stations, per time frame. • Total: The totals of each payment type for all stations, per time frame. • Tip: The tips that were applied per payment type; normally only the Credit row has a tip amount listed. • QTY: The quantity of payments per payment type for all stations, per time frame.
- Page 189 Reporting - An In-Depth Look All Transactions Report This report will allow you to specify a pay type on the left in addition to the normal parameters. When ran, this report shows a breakdown of each transaction, what time it was ran, what type of payment it was, the amount paid on the tick- et, the tip on the ticket, and the ticket total. This report also allows you to choose which payment types you would like to appear on the report; if you don’t select one, it will pull a report of all payment types.
- Page 190 Reporting - An In-Depth Look • User: The employee that closed the ticket. • Time: Includes the date and time that the ticket was closed. • Type: This is the payment type that was used to pay the ticket. • Amount: The amount paid on the ticket with that payment type. • Tip: The tip amount if a tip was added to the ticket. • Ticket: Lists the ticket number of the closed ticket. • Ticket TTL: Shows the ticket total of the Amount and Tip together.
- Page 191 Reporting - An In-Depth Look Sales by Department Report This report shows your sales by department without taxes, as well as how many items were sold per department. • Name: The name of the department reporting sales. • Total: The total before tax that was taken per department, per time frame. • Qty: The amount of items sold within each different department, per time frame.
- Page 192 Reporting - An In-Depth Look Sales by Category Report This report shows your sales by category without taxes, as well as how many items were sold per department. • Name: The name of the category reporting sales. • Total: The total before tax that was taken per category, per time frame. • Qty: The amount of items sold within each different category, per time frame. By Additional Fields Report If you have created additional fields for items, this report will allow you to run reports on what you sold based on those additional fields. This can be by col- or, size, etc. You can filter this report further by selecting a specific field to run the report with. If ran for all, this report will leave them all in one chart together. • Name: The name of the item with an additional field added to it. • Amount: The total of the items before tax, per time frame. • Qty: The amount of an item that sold in the given time frame.
- Page 193 Reporting - An In-Depth Look Payment Detail Report This report separates your payments into their different tender types, with totals at the bottom. This report is also on both the Sales Summary report and the Total Sales report. • Type: Lists the payment type used. • Sub: The total of payments taken per payment type before tax is applied on all stations, per time frame. • Fees: Applies only to merchants on the Cash Discount Program. Lists the fee applied to transactions of different payment types. This fee will be added to all forms of payment and rebated for Cash and Check due to the way the Cash Dis- count Program works. This fee also applies when using Redemptions in states that have laws applying to bottle fees. • Rbt: Applies only to merchants on the Cash Discount Program. Lists the rebate applied on tickets of different pay types based on what payment method was used. In the case of Cash and Check, these should always have rebates that match the fee applied. This rebate also applies when using Redemptions in states that have laws applying to bottle returns, as those returns are rebates. If using both the Cash Discount Program and Redemptions, the Rebate and Fee may not match in this case. • Tax: The total of tax taken per payment type for all stations, per time frame. • Total: The totals of each payment type for all stations, per time frame. • Tip: The tips that were applied per payment type; normally only the Credit row has a tip amount listed. • QTY: The quantity of payments per payment type for all stations, per time frame.
- Page 194 Reporting - An In-Depth Look Hourly Report This report will give you an hourly breakdown of the day, starting with the hour set as From Time and ends at the hour set as To Time. • Hour: Lists the hours of the day so that the report can break down what sales were made during which hour. • Sale: Total made in sales per hour listed. • Tips: Total tips made per hour listed. • Total: Totals the Sale and Tips columns.
- Page 195 Reporting - An In-Depth Look Credit Transactions Report This report breaks down each card transaction taken in the given time period. • PNRef#: The Payment Network Reference ID (PNREF) field is a unique trans- action identification number. The PNREF is used to identify the transaction for billing and reporting purposes. • Card #: This shows only the last four digits of the credit card used on the trans- action. • Amount: This is the amount billed to the card listed for the transaction.
- Page 196 Reporting - An In-Depth Look Gift Card Report This report will list active gift cards in the system within the given time range and will show how much they were opened for and how much is left on the card. • Card#: Lists the card number of the gift card. • Start Amt: The amount that was added to the gift card when it was first opened. • Balance: This is how much is remaining on the gift card when the report was ran. • Last Paid: This is the amount last paid for with the gift card. • Paid Dt: This is the date that the Last Paid was made. • Created: This is the date the gift card was made. • On Ticket: This is the ticket that the gift card was sold on.
- Page 197 Reporting - An In-Depth Look Discount Report This report will break down your discounts so that you can more easily track which discounts are being used and when. This will show you both scheduled and manually applied discounts. • Type: This breaks down the type of discount into different categories: Sched- uled, Ticket, and Item. Scheduled means the discount is a scheduled discount (automatically applied by the system), typically in the event of happy hour dis- counts for instance. Ticket discounts are discounts that are manually applied to the entire ticket rather than to just one item. Item discounts are discounts that are manually applied to a specific item. • Total: This is the total amount discount per discount type, per time frame. • Qty: This is the total amount of discounts per discount type, per time frame.
- Page 198 Reporting - An In-Depth Look • Type: This displays the type of discount. If it is an item discount, it will display the discount type of Item next to the name of the item that was discounted. If the discount made was toward a full ticket, it will show up a little bit differently. First, the ticket will be listed in Type. It will show a $0 balance as to what was discounted. However, below this it will list all the items that were on the ticket and these are what the discount balance displays on. See example above. • Discount: This will display the name of the discount used on the item or ticket. This helps track what discounts are made and toward what to make sure that employees aren’t using discounts on the wrong things. • Ticket#: This displays the ticket number of the ticket the discount was applied • User: This is the user who added the discount to the ticket if applicable. • Total: This is the total of the amount discounted per ticket. • Discount: This tracks each discount type to better help find out how many of each discount was used in a given time period. If the discount is a manually-add- ed standard discount, the system will total how many times it was used. If it is a manually entered discount that is not a standard, pre-made discount, it will show the discount but not track it under a name. • Qty: Amount of times the discount was used within the given time period. • Total: Total amount that was discounted for the standard discounts.
- Page 199 Reporting - An In-Depth Look Void Report The void report will break down the different types of voids that were made in the system during a given time range, allowing you to more easily track why voids were made and by what employee. • Type: This breaks the voids down into what sort of voids were made. It is first broken down into Ticket and Item, with a Total beneath them. If a void is listed under Ticket it means that the entire ticket was voided. If the void is listed under Item, it means that just an item on the ticket was voided. Below this the voids are separated in the departments the items belonged to that were voided. The total is listed below the departments, totaling the amount that was voided in the different departments. • Sub: The subtotal before tax of the voids that were made. • Tax: The tax that would have applied that was voided along with the subtotal. • Total: This is the total of the Sub and Tax amounts of the amount voided. • Qty: The amount of voids made of each type. • Type: This separates the voids into whether they were item or ticket voids. • Ticket#: The ticket number that the void was made on. • User: This will display a user if the person didn’t have permission to void the item or ticket and was overridden by a manager. • Override: Shows who made an override if one was made on a void. • Reason: Displays the reason given for the void occurring. • Total: Total of the Sub and Tax amounts of the amount voided.
- Page 200 Reporting - An In-Depth Look Comp Report The comp report will break down the different types of comps that were made in the system during a given time range, allowing you to more easily track why comps were made and by who. • Type: This breaks the comps down into what sort of comps were made. It is first broken down into Ticket and Item, with a Total beneath them. If a comp is listed under Ticket it means that the entire ticket was comped. If the comp is listed under Item, it means that just an item on the ticket was comped. Below this the comps are separated in the departments the items belonged to that were comped. The total is listed below the departments, totaling the amount that was comped in the different departments. • Sub: The subtotal before tax of the comps that were made. • Tax: The tax that would have applied that was comped along with the subtotal. • Total: This is the total of the Sub and Tax amounts of the amount comped. • Qty: The amount of comps made of each type.
- Page 201 Reporting - An In-Depth Look • Type: This separates the comps into whether they were item or ticket comps. • Ticket#: The ticket number that the comp was made on. • User: This will display a user if the person didn’t have permission to comp the item or ticket and was overridden by a manager. • Override: Shows who made an override if one was made on a comp. • Reason: Displays the reason given for the comp occurring. • Total: Total of the Sub and Tax amounts of the amount comped. • Reason: This displays the reasons that were used during the time period to make the comps. • Qty: The amount of times the reason was used within the time period. • Sub: Amount of money comped before taxes. • Tax: Amount of tax that would have been collected on the tickets or items had they not been comped. • Total: Total that would have been collected, including taxes, on tickets or items that were comped.
- Page 202 Reporting - An In-Depth Look Total Profit Report This report shows your total income and your total expenses in a specific period of time. It’s an especially useful report for retail merchants and any others tracking cost of inventory in the Paradise system as it displays your profit (or loss) based on your sales and expenses. • Sales: The total sales made in the given time range, which adds together the Sub and Tax amounts. • Tax: Total tax collected in the given time range. • Sub: The total sales made in the given time range before tax has been added. • Cost: If items in the system are given a cost amount, this column totals it. This cost is subtracted from Sales to create the amount listed in Profit. • Comm.: This is only used by merchants using commission; this totals the com- mission made for the given time range, which is subtracted from Sales to create the amount listed in Profit. • Labor: Calculates the cost of clocked in employees for the given time period. • Profit: Calculates the Profit made in the given time period by taking the Subtotal and subtracting Cost, Commission, and Labor.
- Page 203 Reporting - An In-Depth Look Item Profit Report This report is similar to the Total Profit Report except it gives you your total Income and expenses for each item sold in a specific period of time. It’s a useful re- port as it shows the profit that each item makes so that you can keep track of what items are best sellers. • Name: Name of the item sold. • Cost: The total cost of each type of item sold. • Resale Amt: How much the item sells for. • Commission: This is only used by merchants using commission; this is how much commission was made on the item. • Profit: How much profit was made for each type of item.
- Page 204 Reporting - An In-Depth Look Redemptions Report If you use the redemptions feature of the Paradise system, you may need to track how much you are collecting in bottle fees. This report will track the bottle fees you have collected along with the tickets they were applied to and how much was paid on the full ticket. • Ticket #: This displays the ticket number of a ticket that had a redemption fee applied to it; this also totals the amount of tickets redemption fees were collect- ed on at the bottom of the list. • Total: This shows the complete ticket total. • Bottle Fee: This displays the amount collected from any bottle fees on items.
- Page 205 Reporting - An In-Depth Look Multi-Tax Report This report is used for merchants that have applied multiple tax rates on a department in the event that certain items must be taxed with an additional rate due to state tax laws. This helps tracks what you are collecting for these additional tax rates to keep them separate from what you are collecting with normal sales tax. • Name: Name of the tax rate in the system; separated into any additional tax rates that have been created in the system on top of what a department already taxes and Sales Tax. • Rate: The additional tax rate applied to the items on the ticket that have multi- ple tax rates applied to them. Does not display the Sales Tax rate. • Taxable Amount: The cost of the item that the tax rate was added to. • Qty: Amount that the tax rate was used in the given time period. • Taxed: Amount of tax collected on the item from each tax rate applied.
- Page 206 Reporting - An In-Depth Look Hourly Overview Report This report can be accessed from both the reporting section and from Manager-> Hourly Overview. This report displays each hour’s sales, starting with the first hour that begins reporting sales. This report allows you to see your sales and cost and labor every hour to better plan throughout the day. • Hour: Each hour of the sales day, starting with the first hour that began reporting sales. • Total: Total sales made for that hour. • Est. Total: This is the amount of total sales plus the total amount of all currently open tickets, hence the Estimated Total. • Seat Avg: The average amount each customer or seat spent during that hour; this amount takes the Total and divides that by the amount reported in the Seats column. • Seats/Tickets: If using tables with seat counts, this will keep track of how many peo- ple were accounted for vs. how many tickets were created. • Ticket Avg: The average amount each ticket was paid out for during that hour; this amount takes the Total and divides that by the amount reported in the Tickets col- • Labor Hrs: This is the amount of hours being tracked for all employees during that hour. • Labor Cost: Calculates the cost of clocked in employees for the hour. •...
- Page 207 Reporting - An In-Depth Look • Open Ticket Summary: This section provides an overview of all open tickets and their estimated totals. • # of Open Tickets: This calculates how many tickets are still open when this re- port is opened. • Open Tickets Total: This totals the amount owed on the tickets that are still open when this report is opened. • Void/Comp/Discount Summary: This section’s summarizes the voids, comps, and discounts that have been made during the given time period. • Voided Total: The total sales voided for the given time period. • Comped Total: The total sales comped for the given time period. • Discounted Total: The total amount discounted for the given time period.
- Page 208 Reporting - An In-Depth Look • Payment Details: This report separates your payments into their different ten- der types, with totals at the bottom. This report is also on both the Sales Sum- mary report and the Total Sales report. • Type: Lists the payment type used. • Sub: The total of payments taken per payment type before tax is applied on all stations, per time frame. • Fees: Applies only to merchants on the Cash Discount Program. Lists the fee applied to transactions of different payment types. This fee will be added to all forms of payment and rebated for Cash and Check due to the way the Cash Dis- count Program works. This fee also applies when using Redemptions in states that have laws applying to bottle fees. • Rbt: Applies only to merchants on the Cash Discount Program. Lists the rebate applied on tickets of different pay types based on what payment method was used. In the case of Cash and Check, these should always have rebates that match the fee applied. This rebate also applies when using Redemptions in states that have laws applying to bottle returns, as those returns are rebates. If using both the Cash Discount Program and Redemptions, the Rebate and Fee may not match in this case. • Tax: The total of tax taken per payment type for all stations, per time frame. • Total: The totals of each payment type for all stations, per time frame. • Tip: The tips that were applied per payment type; normally only the Credit row has a tip amount listed. • QTY: The quantity of payments per payment type for all stations, per time frame.
- Page 209 Reporting - An In-Depth Look • Department Summaries: Summary of the departments that had sales for the time frame. • Name: The name of the department reporting sales. • Total: The total before tax for each department, per time frame. • Qty: The amount of items sold within each department, per time frame.
-
Page 210: Item Levels
Reporting - An In-Depth Look 7.3 Item Levels The item levels report displays how many of each item has sold in a given time period. This report has multiple filters that will allow you to narrow down what items display on the report. You can filter by departments, categories, and even individual items. If left alone it will display every item that has sold within the time period split into two sections, category and department. If you select just de- partments or just categories, it will only display one section. - Page 211 Reporting - An In-Depth Look • Name: Name of the item. • Item #: If the item has been assigned an item number in item maintenance, it will display here. • Qty: Amount of the item that was sold in the given time range. • Subtotal: The total before tax of how much money was made on the item. • Tax: Amount of tax collected on the items sold. • Total: The Subtotal and Tax totaled for how much money was made on the item. • Cost: The total cost for how many of the item was sold. • Profit: This displays how much profit was made by selling the items; this takes the Total and subtracts Cost to create the amount listed here. • % Profit: How much of what was collected for an item was profit; this column only works if you have given your items a cost.
-
Page 212: Inventory
Reporting - An In-Depth Look 7.4 Inventory This reporting section deals primarily with tracking your inventory, keeping up with product counts, and tracking what needs to be reordered. Learning to read your inventory reports is crucial to running your business effectively. This chapter will go over the different types of reports in the Inventory section. Inventory Summary Report This report is a summary of how much of each item exists in the system. This report is useful for merchants that are keeping track of their inventory and have counts listed for their items. This report cannot be ran for a given time period, it simply counts all the inventory at the time the report is ran. If there are vendors connected to your different inventory items, they will be separated by vendor in this report. - Page 213 Reporting - An In-Depth Look • Name: Name of the item. • SKU: The SKU number that is assigned to this item. • ID: The MFG ID that is assigned to this item. • Par: This amount is set per item and is the minimum amount you would like to have on hand at all times; it is zero by default. • Qty: The amount of the item that is left in the system. This becomes a negative number after the item is sold if not given a positive value beforehand. • Cost: If items in the system are given a cost amount, this column totals it. This cost is subtracted from Sales to create the amount listed in Profit. • Price: The amount the item sells for.
- Page 214 Reporting - An In-Depth Look Below Par Report This report is similar to the Inventory Summary but all this report displays are the items that the system reports as below par. A par level must be set per item in order for this report to be useful. The par level set should be the minimum amount you would like to keep in the store at all times. When set and this report is ran, the system will display a report showing all items that are below the level you set, indicating you will need to order some soon before you run out. This report will separate your inventory by Vendor if you have vendors attached to your items. • Name: Name of items that are below par. • Qty: The inventory counts of the items that are below par.
- Page 215 Reporting - An In-Depth Look Reorder Report This report is similar to the Inventory report except it only displays items that are below par or marked for reorder so that they can be reordered. • Items: Total amount of items that will need to be reordered. • Cost: Total cost of purchasing these items from vendors. • Stock: Total of how much is currently in stock of the items that need to be reordered; can be a negative number if an item was miscounted and still sold, leaving a negative quantity amount. • Name: Name of the items that need to be reordered. • SKU: The SKU number that is assigned to this item. • ID: The MFG ID that is assigned to this item. • Par: This amount is set per item and is the minimum amount you would like to have on hand at all times; it is zero by default. • Qty: The amount of the item that is left in the system. This becomes a negative number after the item is sold if not given a positive value beforehand. • Cost: If items in the system are given a cost amount, this column totals it. This cost is subtracted from Sales to create the amount listed in Profit. • Price: The amount the item sells for.
-
Page 216: Inventory
Reporting - An In-Depth Look Inventory by Additional Field Report If you have created additional fields for items, this report will allow you to run reports on what inventory you have of those additional fields. This can be by col- or, size, etc. You can filter this report further by selecting a specific field to run the report with. If ran for all, this report will leave them all in one chart together. Items must have a vendor attached for this report to count them. • Name: Name of the item. • SKU: The SKU number that is assigned to the item. • ID: The MFG ID that is assigned to the item. • Par: This amount is set per item and is the minimum amount you would like to have on hand at all times; it is zero by default. • Qty: The amount of the item that is left in the system. This becomes a negative number after the item is sold if not given a positive value beforehand. • Cost: If items in the system are given a cost amount, this column totals it. This cost is subtracted from Sales to create the amount listed in Profit. • Price: The amount the item sells multiplied by the quantity of items in stock. -
Page 217: Employee
Reporting - An In-Depth Look 7.5 Employee This reporting section goes over different reports offered in the Employee section such as Payroll and Commission, helping you keep track of your employees hours and pay. Payroll Report This report will allow you to track your employee’s hours as well as their pay if you have assigned them a pay rate in the system. This report is broken into employees list- ed alphabetically, their individul shifts, their role totals, and finally the complete payroll total at the end of the report. • Shift: This details the shift’s date and the time range of the shift. • Reg/OT Rt: This displays the regular pay rate and overtime pay rate of the employee. • Reg/OT Hrs: This separates the amount of regular hours an employee has worked and the amount of hours they’ve earned. • TTL Hrs: This totals the amount of hours an employee has worked; this includes both regu- lar and overtime hours. • Breaks: This totals the breaks an employee may have taken during their shifts; these are unpaid breaks and do not count toward their pay. • Reg/OT Pay: This separates how much pay an employee earned for their regular rate vs. how much they earned during their overtime. - Page 218 Reporting - An In-Depth Look Labor Report This report details your employee’s different shifts broken down into their rates per shift and how much they were paid for those shifts. • Reg Rt: The rate an employee is paid per hour. • OT Rt: The rate an employee is paid if they make overtime. • Pay: The amount of pay the employee earned for the shift based on the pay rates applied. Commission Report If you use commissioned items for your employees, this report will track how much in commission those employees made for the given time period. • Shift: The shift the employee worked when they made the commission. • Pay: The amount the employee earned for their shift for their hourly wage. • Sales: The amount of sales the employee ran. • Comm. Sales: The amount of the employee’s sales that were commissionable. • Comm.: The amount the employee earned in commission from the commissionable sales they took.
- Page 219 Reporting - An In-Depth Look Employee Tabs Report This report will allow you to track what tickets your employees have applied to their tabs and how much they owe. The employee must have a credit limit to have tickets applied to their account. This is similar to how house account works. Open Employee Tabs • User: The employee who has the tab open. • Total: The total that has been applied to their tab. • Unpaid: The amount still remaining on their tab that they owe. • Qty: Amount of tickets that have been closed to their employee tab. Recently Added • Ticket#: The ticket number of the ticket that was recently added to the employ- ee’s tab. • User: The employee that the ticket was closed to. • Ticket Total: The amount on the ticket that was recently added to the employ- ee’s tab. •...
-
Page 220: Employee
Reporting - An In-Depth Look Employee Role Totals Report This report is similar to the payroll report except it only totals the hours for each role rather than for individual employees. • Role: The role the hours were made under. • Reg Hrs: Displays the amount of regular hours clocked in under that role. • OT Hrs: Displays the amount of overtime hours clocked in under that role. • TTL Hrs: This totals the amount of hours an employee has worked; this includes both regu- lar and overtime hours. • Breaks: This totals the breaks an employee may have taken during their shifts; these are unpaid breaks and do not count toward their pay. • Reg Pay: This displays the amount of regular pay earned under that role. • OT Pay: This displays the amount of overtime pay earned under that role. • TTL Pay: This totals the regular and overtime pay earned under that role. •... -
Page 221: Customer
Reporting - An In-Depth Look 7.6 Customer This reporting section goes over different reports offered in the Customer section such as House Accounts and Layaway, which will help you keep track of your customer’s accounts. Customer Overview This report gives you a brief breakdown of all of your customer’s House Account and Layaway tickets. • Ticket#: The ticket applied to the customer. • Amount: The amount of the ticket that was applied to the customer. • Customer: The customer’s name that the account belongs to. - Page 222 Reporting - An In-Depth Look House Account A customer’s house account will detail the tickets that they still owe money on so that you can keep track of their current balance. It also lists what their credit limit is so you can see how much more credit they can use before they can no lon- ger apply tickets to their house account. House Account Summary • Name: The name of the customer who has the house account. • Limit: The credit limit that has been set in their account. • Balance: How much the customer currently owes on their house account. House Account Tickets • Ticket#: Lists the tickets that the customer has applied to their house account. • Amount: The amount the ticket was worth that the customer now owes. • Customer: Customer who has the ticket in their house account.
- Page 223 Reporting - An In-Depth Look Layaway The layaway report will detail the tickets a customer currently has set to lay- away that they are paying off. • Name: The name of the customer with the layaway account. • Tickets: The amount of tickets the customer has on layaway. • Due: How much the customer owes on their layaway tickets. • Ticket#: The ticket that the customer put on layaway. • Amount: The dollar amount of the ticket. • Customer: The name of the customer who the ticket belongs to. Upcoming Events Lists any of your customer’s upcoming events such as birthdays or anniversa- ries. • Customer: The name of the customer with an upcoming event. • Date: The date of the upcoming event. • Event: The type of event.
- Page 224 Reporting - An In-Depth Look Gift Card Report The gift card report tracks the gift cards you have sold in your system and keeps track of which are opened. If your customers are also using your loyalty system, this will also track their loyalty numbers, as those are both classified under gift cards. • Card#: The number of the card or loyalty number/card. • Start Amt: The beginning balance of the card. • Balance: The current balance on the card. • Last Paid: How much was last used on this card. • Paid Dt: The date the card was last used. • Created: When the card was created. • On Ticket: What ticket the card was created on; this will not have a value if the card is a loyalty number/card. Tax Exemptions Report The tax exemptions report will allow you to track the sales you’ve made under cus- tomers that have a tax exemption ID. • Customer: The name of the customer with the tax exemption. •...
-
Page 225: Drawer
Reporting - An In-Depth Look 7.7 Drawer The drawer report allows you to re-run the report that printed when you closed a drawer. This allows you to go back and see the sales that occurred on that drawer as well as note any overages or shortages. When running the report, make sure to select the drawer you would like a report for from your drawer selection on the right of the screen. Once you have the appropriate drawer selected, choose PDF or Thermal Print at the bottom to run the report. - Page 226 Reporting - An In-Depth Look • Starting Cash: The amount of cash the drawer was started with when it was first opened. • Tip Out: The amount of cash that left the drawer as a tip out to an employee. • Tip In: The amount of cash that entered the drawer as a tip in from an employee. • Paid Out: The amount of cash that left the drawer as a pay out. • Paid In: The amount of cash that entered the drawer as a pay in. • Cash Payments: The amount of cash payments made on this drawer/station. • Short/Over: If the amount that the drawer ended on was over or short what the system calculated as correct, this amount will total here; positive numbers are overages, negative numbers are shortages. • Cash Drop: This is how much cash would need to be taken out of the drawer to reset it back to starting cash; this amount is equal to all cash payments plus all tip ins, pay ins and over- ages, minus all tip outs, pay outs and shortages. This amount can be negative depending on what sales occured on the drawer. Bill Counts Drawer was Closed With •...
-
Page 227: Daily Logs
Reporting - An In-Depth Look 7.8 Daily Logs The daily logs report allows you to run reports based on things your employ- ees may have done in the system to help you better track things such as voids, comps, and ticket transfers. This function gives you a summary of a user’s actions and when they did them. It will also track any manager overrides so you can ver- ify who allowed these actions to occur. Simply choose the log type(s) and run the report for those values for the selected time range. - Page 228 Reporting - An In-Depth Look Depending on what you’ve ran the report for, a series of logs will appear on the screen. If you don’t select any, all of them will load. Most of these will display who did the action, what item and/or ticket the action was done on, and what time it occurred. Explore these log types in order to keep track of how your business is functioning.
-
Page 229: Modifiers
Reporting - An In-Depth Look 7.9 Modifiers The Modifiers report allows you to see how many times a modifier has been used in your system in a given time period, along with the amount of money you may have earned from the modifier being used. You can filter by a specific modifi- er, or run the report on all of them. • Name: The name of the modifier. • Qty: The amount the modifier was used in the given time period. • Price: The price of the modifier if it had one. • Total: The total amount of money spent on the modifier if it had a price. - Page 230 8 Tutorials In this chapter... 8.1 Different Opening and Closing Procedures.........231 8.1.1 Restaurant Service w/Server Banks....231-237 8.1.2 Restaurant Service w/Out Server Banks.....238-243 8.1.3 Retail..............244-246 8.2 Short T utorials................247 8.2.1 Opening a Cash Drawer........247-248 8.2.2 Closing a Cash Drawer.........249-250 8.2.3 Adjusting Credit Card Tips.........251 8.2.4 Tipping Out Employees........252-253 8.2.5 Using House Accounts........254-256 8.2.6 Creating and Using the Loyalty System....257-260 8.2.7 Creating and Using Layaway.......261-263...
-
Page 231: Tutorials
Tutorials 8.1 Different Opening and Closing Procedures There are a multitude of combinations you can use to run a day using the Paradise POS software. A few of the most common are covered here but you may find you need to change the process to better fit your business. If it is a more com- plex procedure that you have in mind, work with your trainer to find a solution that works best for you. 8.1.1 Restaurant Service With Server Banks Restaurant Service with Server Banks: Server banks allow each server to maintain their own personal cash bank without having to have a traditional cash drawer like a bartender would have. This can help cut down shrinkage or loss. This means at the end of the shift, the server will need to either tip in or out of the drawer, depending on their credit tips and cash sales. Captured Tips (credit card tips accrued): $100 Cash transactions collected: Restaurant owes employee: -OR- Captured Tips (credit card tips accrued): $100 Cash transactions collected: $150 Employee owes Restaurant: -$50 (negative amount means they owe restaurant $50) Note: The system will account for the fact that the server collected cash for cash sale transactions. Since that money is already included in the server’s total transac- tions for the shift, the difference is what is due. - Page 232 Tutorials 1. The first employee who clocks in that has access to the cash drawer (manager, bar- tender, etc) will be prompted to open the cash drawer with starting cash. If ready to open the cash drawer, the employee can select yes and proceed to opening the cash drawer. If this step is bypassed, the drawer can instead be opened from the Employee tab with the Open Cash Drawer button. 2. Count the drawer by denomination and then select Confirm. The drawer is now open on this station. If an employee is supposed to take sales to this drawer, such as a bartender, make sure they are prompted to join the drawer when clocking in, or select the Join Drawer button on the Employee tab. 3. Servers using a server bank won’t have access to the drawer and won’t be able to Join the drawer. The server will take sales as normal and anytime they receive a cash pay- ment, they will supply change from their own server bank.
- Page 233 Tutorials 4. At the end of a server’s shift, they will begin their close-out procedure. To start, they will need to make sure that all of their tickets are closed or have been transferred to a different employee who will finish taking care of the table. If they are allowed to do so, they will also need to go to Employee -> Tip Adjustment to adjust their credit card tips. If they are not allowed to adjust their credit card tips, they will have to wait until the appropriate employee (bartender or manager) adjusts them before they can do their next step. 5. Once the server’s credit card tips have been adjusted and all tickets closed, they will run their Shift Report, located under the Employee tab. The system will prompt them with their captured tips (adjusted credit card tips) and have them input their addition- al cash tips. This amount is reflected on the payroll report for tax reporting purposes.
- Page 234 Tutorials 6. Once they input this amount and select Confirm, their shift report will print to the appropriate receipt printer. Depending on how much they took in cash transactions vs credit card tips will dictate whether the report states “Restaurant owes employee” or “Employee owes restaurant”.
- Page 235 Tutorials 7. Next, you will have to tell the system how much you are either taking out of the drawer or putting back into the drawer so it records the amount on the drawer and displays in reporting correctly. To do this, you will have to run an Employee Tip Out. The server will need to go to an employee that is assigned to a drawer, such as the manager or bartender. This employee will log in and go to Employee -> Employee Tip Out and a list of employees will appear on the left of the screen. Employees who have already completed their shift reports should have “Has Report” to the right of their name in green. Select the employee ready to leave. 8. Once selected, to the right it will tell you the same information that the shift report printout says. The employee doing the tip out should enter the amount that is either taken or added to the drawer for tips in the blank. As shown in the example above, if the employee took more credit card tips than they took cash sales the shift report will say “Restaurant Owes Employee”. Once finished typing the tip in or out amount, se- lect Tip Out Employee at the bottom right of the screen. Confirm the amount on the next screen if it is correct.
- Page 236 Tutorials 9. This will open the drawer and the person running the tip out can now take or add money to the drawer. The system will also print a tip in/out confirmation slip. The server can then clock out when they are finished with the rest of their closing duties. 10. You may find that you need to swap out drawers midday during shift-change or to do a cash drop. Swapping out a drawer will allow you to keep employees clocked in who have shift reports available and will allow you to keep open tickets while closing the morning drawer and opening the night drawer. If you do not want to swap drawers midday, skip to step 13. When ready to swap the drawer, select Employee -> Close Cash Drawer. The next screen will have two options: Close or Swap. Make sure em- ployees who you would like tipped out of this drawer have done so. 11. Select Swap. The first screen allows you to close out your morning drawer by count- ing all the cash by denomination in the drawer. Select Confirm when done and Con- firm again if that is the correct total. This will print out the morning drawer report. Select Confirm on the screen one more time.
- Page 237 Tutorials 12. Next you will get the screen to open your night drawer. Count the cash of the new drawer by denomination and select Confirm when finished. Once the new drawer is created, make sure the employee reassigns themselves to this new drawer by select- ing Employee -> Join Drawer, or logging out and logging back in. When they log back in, the system should prompt them to join the new drawer. The new sales will now track on this new drawer. 13. At the end of the day and after all tickets have been closed, all shift reports have been completed, and all employees have been tipped out, you will need to close out the drawer. There are two ways to close the drawer. The first is go to Employee -> Close Cash Drawer and select close. From here, count the total cash by denomination and select Confirm. The system will print the drawer report. The employee can then clock out. 14. An alternative method is for the last employee on the drawer to log out and then attempt to clock out with the drawer still open. This will prompt the employee that they have to close the drawer. Select Count Drawer and count the total cash by de- nomination and select Confirm. The system will print the drawer report and clock the employee out.
-
Page 238: Restaurant Service W/Out Server Banks
Tutorials 8.1.2 Restaurant Service Without Server Banks A restaurant that takes orders at the counter and cashes them out immedi- ately or who has servers who use a physical cash drawer will run different opening and closing procedures than a restaurant that has servers with server banks. The steps we show here are based on a system where the cashiers or servers make credit card tips. If yours do not, you can skip those steps. 1. The first employee who clocks in that has access to the cash drawer, including ca- shiers, will be prompted to open the cash drawer with starting cash. If ready to open the cash drawer, the employee can select yes and proceed to opening the cash draw- er. If this step is bypassed, the drawer can instead be opened from the Employee tab with the Open Cash Drawer button. Count the drawer by denomination and then select Confirm. The drawer is now open on this station. - Page 239 Tutorials 2. If an additional employee is using the same drawer while clocked in, make sure that they are prompted to join the drawer when they clock in or have it set in your system to automatically join the drawer, which can be set by going to Admin -> Company Cashiers will now be Settings -> Employee and checking the Auto Join Drawer box. able to take sales and when they take a cash sale, it will go towards the drawer’s totals. 3. If the cashier takes credit card tips, they will need to begin their close-out pro- cedure at the end of their shift. Since they take orders that are paid out at the counter, most of their tickets will already be closed. They can check to make sure by selecting the Employee tab to see if there are any open tickets under their name. 4. Next, if they are allowed to do so, they will also need to go to Employee -> Tip Adjustment to adjust their credit card tips. If they are not allowed to adjust their credit card tips, they will have to wait until the appropriate employee, such as a manager, adjusts them before they can do their next step.
- Page 240 Tutorials 5. Once the cashier’s credit card tips have been adjusted and all tickets closed, they will run their Shift Report, located under the Employee tab. The system will prompt them with their captured tips (adjusted credit card tips) and have them input their addition- al cash tips. This amount is reflected on the payroll report for tax reporting purposes. Once they input this amount and select Confirm, their shift report will print to the appropriate receipt printer. Using this method, the shift report should only ever state “Restaurant Owes Employee” since the cashier should never cash sales out without a drawer.
- Page 241 Tutorials 6. Next, we will have to tell the system how much we are taking out of the drawer so it records the amount on the drawer and displays in reporting correctly. To do this, we will have to run an Employee Tip Out. The server will need to go to an employee that is assigned to a drawer, such as the manager if they are not allowed to tip themselves out. In either case, whoever is running the tip out will go to Employee -> Employee Tip Out and a list of employees will appear on the left of the screen. Employees who have already completed their shift reports should have “Has Report” to the right of their name in green. Select the employee ready to leave. 7. Once selected, to the right it will tell you the same information that the shift report printout says. The employee doing the tip out should enter the amount that is taken from the drawer for tips in the blank which will match what they made in credit card tips. Once finished typing the tip in or out amount, select Tip Out Employee at the bottom right of the screen. Confirm the amount on the next screen if it is correct.
- Page 242 Tutorials 8. This will open the drawer and the person running the tip out can now take the tip out of the drawer. The cashier can then clock out when they are finished with the rest of their closing duties. 9. You may find that you need to swap out drawers midday during shift-change or do a cash drop. Swapping out a drawer will allow you to keep employees clocked in who have shift reports available and will allow you to keep open tickets while closing the morning drawer and opening the night drawer. If you do not want to swap drawers midday, skip to step 12. When ready to swap the drawer, select Employee -> Close Cash Drawer. The next screen will have two options: Close or Swap. Make sure em- ployees who you would like tipped out of this drawer have done so. 10. Select Swap. The first screen allows you to close out your morning drawer by count- ing all the cash by denomination in the drawer. Select Confirm when done and Con- firm again if that is the correct total. This will print out the morning drawer report. Select Confirm on the screen one more time.
- Page 243 Tutorials 11. Next you will get the screen to open your night drawer. Count the cash of the new drawer by denomination and select Confirm when finished. Once the new drawer is created, make sure the employee reassigns themselves to this new drawer by select- ing Employee -> Join Drawer, or logging out and logging back in. When they log back in, the system should prompt them to join the new drawer. The new sales will now track on this new drawer. 12. At the end of the day and after all tickets have been closed, all shift reports have been completed, and all employees have been tipped out, you will need to close out the drawer. There are two ways to close the drawer. The first is go to Employee -> Close Cash Drawer and select close. From here, count the total cash by denomination and select Confirm. The system will print the drawer report. The employee can then clock out. 13. An alternative method is for the last employee on the drawer to log out and then attempt to clock out with the drawer still open. This will prompt the employee that they have to close the drawer. Select Count Drawer and count the total cash by de- nomination and select Confirm. The system will print the drawer report and clock the employee out.
-
Page 244: Retail
Tutorials 8.1.3 Retail If you have a retail store or a setup where employees are simply cashiers and don’t make tips, this short walkthrough should work best for your business. 1. The first employee who clocks in that has access to the cash drawer, including cashiers, will be prompted to open the cash drawer with starting cash. If ready to open the cash drawer, the employee can select yes and proceed to opening the cash drawer. If this step is bypassed, the drawer can instead be opened from the Employee tab with the Open Cash Drawer button. Count the drawer by de- nomination and then select Confirm. The drawer is now open on this station. - Page 245 Tutorials 2. If an additional employee is using the same drawer, make sure that they are prompted to join the drawer when they clock in. Cashiers will now be able to take sales and when they take a cash sale, it will go towards the drawer’s totals. Until they are ready to clock out, they will take sales as normal. 3. You may find that you need to change out drawers midday or during shift change to take a cash drop. For businesses without credit card tips or tickets that stay open as in a restaurant, closing the drawer completely and opening a new drawer is the best and easiest procedure. To begin, select Close Cash Draw- er in the Employee tab. On the next prompt, select Close.
- Page 246 Tutorials 4. The system will then prompt the drawer count screen to count down your first drawer. Type in the cash totals by denomination and Confirm when finished. Select Confirm when done and Confirm again if that is the correct total. This will print out the first drawer report. Select Confirm on the screen one more time. 5. Now you can open your second drawer with the same step you used when you first opened. Count this drawer with its starting cash. When other employees log in or clock in that have access to the drawer, it will prompt them to be added to the drawer. 6. The cashiers can again take sales as normal, with all their cash sales going to- ward the new drawer. At the end of the day, they can run through the Close Cash Drawer procedure again and all employees can clock out when ready to leave.
-
Page 247: Short Tutorials
Tutorials 8.2 Short Tutorials This section will go over how to do common procedures in the Paradise sys- tem. These include opening and closing a cash drawer, along with tipping out em- ployees and creating House Accounts and a Loyalty system. 8.2.1 Opening a Cash Drawer 1. There are two ways to open a cash drawer with starting cash. If you are the first per- son clocking-in on a station that has a drawer, the system will prompt you by asking if you would like to open a drawer. 2. After selecting ‘Yes’, a prompt will appear, allowing you to count your drawer’s start- ing cash. The drawer requires you to enter your total cash by denomination. For ex- ample, if you have $100 in twenty-dollar bills, you’d select the blank below $20 and type 5, since you have five twenty-dollar bills. - Page 248 Tutorials 3. Once you have counted your starting cash, select Confirm. You have now clocked-in and started the drawer with starting cash. 4. If you instead select ‘No’ when the prompt appears after clocking in or the prompt doesn’t appear for you, you can still open the cash drawer from the system. After clocking in, log in and go to the Employee Screen. 5. Once here, select Open Cash Drawer. Follow the same prompts as above to start your drawer.
-
Page 249: Closing A Cash Drawer
Tutorials 8.2.2 Closing a Cash Drawer 1. To completely close a cash drawer, make sure that all tickets have been closed and all shift reports completed. Then go to Employee -> Close Cash Drawer. 2. The system will prompt asking if you would like to close or swap the drawer. For this series of steps, we will choose ‘Close’. 3. Once you’ve selected close, the prompt will appear allowing you to count the full total cash that remains in the drawer. The system will give you an error message if not all tickets are closed or not all shift reports complete. 4. After counting the cash by denomination, select ‘Confirm. The system will prompt you once more to be sure you’ve entered the correct total. Check the total and select ‘Confirm’ if correct. - Page 250 Tutorials 5. If the drawer is short, the system will ask for a reason for the shortage. This screen also offers the ability for a manager to come over and do a recount. 5. Once the drawer is closed a pop-up will prompt, detailing what occurred on the draw- er. A drawer report will also print from the printer. 7. Select ‘Confirm’ one last time to complete the drawer. The cash drawer has now been closed and is ready for the next day or shift.
-
Page 251: Adjusting Credit Card Tips
Tutorials 8.2.3 Adjusting Credit Card Tips 1. Once you have a credit card tip to adjust, go to Employee -> Tip Adjustment. This screen will list all credit card transactions that have been processed under the logged-in employee. 2. Find the ticket you would like to adjust the tip for. Select the ticket and a num- ber pad will appear. Type in the tip amount here. 3. When you are finished adjusting all tips, select the Save All Tips button. The system will take a moment as it is communicating to the credit card reader to adjust the tips. -
Page 252: Tipping Out Employees
Tutorials 8.2.4 Tipping Out Employees 1. When an employee is ready to leave and all of their tips have been adjusted and all open tickets closed or transferred, they will log in and go to Employee -> Shift Report. 2. A report will print out on the station’s receipt printer. This report will detail the employee’s shift. If the employee is using a server bank (doesn’t use the cash drawer to take payments) this report will list the payments and sales they took. If the employee is using the cash drawer to take payments, this information will be blank. At the top of this report it will detail whether the Employee Owes Restaurant or Restaurant Owes Employee. This amount will need to be tipped-in or out of the drawer. 3. If the employee is allowed to tip themselves in/out, they will then go to Employ- ee -> Employee Tip Out. If not, they will bring their shift report to an employee who is allowed to tip them in/out. 4. Employees will be listed on the left of the page. Any employee who has ran their shift report and has tips to take from the drawer will be listed with ‘Has Report’ next to their name. Select the appropriate employee. - Page 253 Tutorials 5. Once selected, the right of the screen will display whether the Employee Owes Restaurant or Restaurant Owes Employee and will match what was printed on their shift report. Match this amount in the blank provided. 6. Tap ‘Tip Out Employee’. Confirm on the next prompt if you’re sure you entered the correct total. The station’s drawer will then pop open and a slip will print with spaces for both the employee and manager to sign if required. 7. The system will then prompt you to clock the employee out. If they are finished with their shift, you may clock them out. Otherwise, select ‘No’ and they can clock out when they are finished.
-
Page 254: Using House Accounts
Tutorials 8.2.5 Using House Accounts A house account gives you the ability to assign a line of credit to a customer in your customer database. The customer may then use this line of credit to pay for their tickets and pay it off later. 1. To create a House Account, you must first create the customer if they do not already exist. Go to Employee -> Customer Database. 2. Select New Customer at the top right of the screen. This will give you a blank ed- iting screen to create a new customer from. Make sure to assign a first and last name and assign a value to one of the fields highlighted in pink in the system. 3. To give this customer the ability to have a house account, make sure to select the House Account checkbox. The customer will also need a credit limit which can be set in the Credit section. Also make sure the Active checkbox is set. Save when finished. - Page 255 Tutorials 4. Using a House Account, once created, is as easy as taking a form of tender. Once at the Pay screen for the customer’s order, select House Account. This will prompt you to choose a customer from your database, if you didn’t assign a cus- tomer when you first created the ticket. 5. Once you’ve assigned a customer the system will automatically pay the ticket out to that account. 6. To pay a ticket or balance on a House Account, simply go to Employee -> Cus- tomer Database and find the customer from your list on the left. Then select the House Account button. 7. This will list all of the customer’s tickets that they have placed on their House Account along with their Total Due, Credit Limit, and Remaining Credit on the left of the screen.
- Page 256 Tutorials 8. To pay out a specific ticket on the account, select the ticket from the list and select ‘Pay Ticket’. This will take you to the payment screen and you can pay the ticket out normally. 9. To pay out the balance or part of it, select ‘Make Payment’ instead. You can now make a payment or pay out the full balance as you would normally pay out a ticket.
-
Page 257: Creating And Using The Loyalty System
Tutorials 8.2.6 Creating and Using the Loyalty System Having a loyalty system set up will allow you to reward repeat customers the more often they come in and spend money. The loyalty system with Paradise al- lows you to give customers a certain amount of points for every dollar they spend. You can then set reward levels that will allow you to give your loyalty customers a gift card of a value you set for collecting points. Setting up the Loyalty System Rules 1. To create a loyalty system you must first set up the rules that it runs on. Start by going to Admin -> Company Settings -> Customer. From this page, you can set the Dollars Per Point amount. This amount shows how much money they have to spend on a transaction before they can earn a point. In the example below, for every $10 a customer spends, they earn a point. Tailor this value to your business. - Page 258 Tutorials 2. Now we need to set reward levels for customers. Select the small plus sign to the right of the Reward Levels box. The system will display a pop up. From here you can set how many points a customer has to earn before they can redeem a monetary reward, which you also set on this screen. In the example provided, we have set it to where the customer must earn 10 points, which they can then redeem for either a $5 gift card or $5 towards their next purchase. Based on what we have set up, this means that the customer must spend at least $100 before they can receive a reward of $5. 3. Once you have the loyalty rules set, you can also select whether or not you would like a pop-up on your pay screen that prompts assigning customers to tickets or prompts you to create a new customer. To have this prompt, make sure Guided Loyalty is selected. Don’t forget to save your changes. Setting up a Loyalty Customer 1. There are a few different places you can go to set up a loyalty customer. You can do so when prompted by Guided Loyalty at the pay screen, you can use the Cus- tomer option while sending a ticket from the pay screen, or you can manually enter them from Employee-> Customer Database. We will be going over creat- ing them from Employee -> Customer Database. 2. When in the Customer Database page, select New Customer at the top right or an existing customer you would like to make a Loyalty customer. 3. Fill in the required fields if not already done and make sure to mark the check- box for Loyalty on the customer. Since they will be a loyalty customer, they must also have either a loyalty card number or a unique number set for their Loyalty ID. This is incredibly important as this is what ties their loyalty value to them. A loyalty card number will be similar to a gift card they can swipe every time they shop with you. These cards can be purchased through your agent. If you prefer not to have physical cards, you can either make up a number for their Loyalty ID or use their phone number.
- Page 259 Tutorials Assigning a Customer to a Ticket There are multiple ways to assign a customer to a ticket. If using the restau- rant mode of Paradise and you have Prompt Name on Ticket set for employees so they get the Send Dialogue screen, you can send a ticket and select the Customer option. If at the pay screen, you can select Customer at the top of the screen and assign a customer here. Lastly, you can have Guided Loyalty set in Admin -> Com- pany Settings -> Customer which will prompt employees at the pay screen to assign a loyalty customer if applicable.
- Page 260 Tutorials Turning Loyalty Points Into a Reward There are two ways to give your customers the rewards they have earned. Follow these steps to reward your customer to their Loyalty ID number, which will give them credit in your store. 1. Go to Employee -> Customer Database and find the customer who has a pend- ing reward. Once selected, tap the Loyalty button. 2. This will display their Loyalty Overview. If their point count meets or exceeds the amount they need to earn a reward, there will be a Reward Available button. Select this to redeem their points. A pop-up will appear. 3. This page will display their reward and allow you to Redeem Points to Card. Once you redeem the value, the amount will go toward their Loyalty Balance. The customer can then use this balance on transactions. You can also give your customer their reward from the pay screen. 1. When your customer with a reward available is ready to check out and you have assigned them to the ticket, the payment screen will prompt you by letting you know how much of a reward they have available. You can choose to either Re- deem Points to Card or Pay with Loyalty. 2. If select Redeem Points to Card, the system will prompt you to add a gift card. If you would like to reward the points to their Loyalty Card, you can swipe that card or use their Loyalty ID number. If they would prefer a gift card, swipe the gift card to assign the reward to it. 3. You can also Pay with Loyalty instead. What this does is allows you to use the value of those points to go toward their current purchase. Select this option and the value they accrued will be used toward the ticket. If they had more loyalty value than the ticket was worth, the rest of the loyalty will be credited to their account.
-
Page 261: Creating And Using Layaway
Tutorials 8.2.7 Creating and Using Layaway The Layaway function in Paradise will allow you to hold tickets with items on customers accounts so that they can pay an item off over time. 1. To create a customer with layaway capabilities, you must first create the custom- er if they do not already exist. Go to Employee -> Customer Database. 2. Select New Customer at the top right of the screen. This will give you a blank ed- iting screen to create a new customer from. Make sure to assign a first and last name and assign a value to one of the fields highlighted in pink in the system. 3. To give this customer the ability to use layaway, make sure to select the Layaway checkbox. Make sure the Active checkbox is set and save when finished. - Page 262 Tutorials 4. Using a layaway account, once created, is as easy as taking a form of ten- der. Once at the Pay screen for the customer’s order, select Layaway. This will prompt you to choose a customer from your database, if you didn’t assign a customer when you first created the ticket. 5. Once you’ve assigned a customer the system will automatically assign that ticket to the customer. 6. To pay a ticket or balance on a customer’s layaway, simply go to Employee -> Customer Database and find the customer from your list on the left. Then select the Layaway button. 7. This will list all of the customer’s tickets that they have placed on their Lay- away account along with their Total Due and Remaining Credit on the left of the screen.
- Page 263 Tutorials 8. To pay out a specific ticket on the account, select the ticket from the list and select ‘Pay Ticket’. This will take you to the payment screen and you can pay the ticket out normally. 9. To pay out the balance or part of it, select ‘Make Payment’ instead. You can now make a payment or pay out the full balance as you would normally pay out a ticket.
-
Page 264: Troubleshooting
9 Troubleshooting This chapter walks you through various troubleshooting steps to take before contacting tech support. If you have followed all steps and your equipment still isn’t working, it may require ex- tra troubleshooting. Please contact Paradise Tech Support for further assistance at (877) 777-5530. In this chapter... 9.1 Restarting the Paradise Application or iPad........265 9.2 Cash Drawer Not Opening............266 9.3 Bluetooth Receipt Printer Not Printing........267 9.4 Ethernet Receipt Printer Not Printing..........268 9.5 USB Receipt Printer Not Printing..........269 9.6 Kitchen Printer Not Printing............270 9.7 Credit Card Terminal Issues (Bluetooth)........271 9.8 Credit Card Terminal Issues (Ethernet)........272 9.9 Restarting the TP-LINK Router and Orange Pi......273 9.10 Switching to Local Mode.............274... -
Page 265: Restarting The Paradise Application Or Ipad
Troubleshooting 9.1 Restarting the Paradise Application or iPad Sometimes restarting the Paradise application or the iPad itself will help re- solve an issue you might have. If it seems the application has frozen or has had some error, you may want to close the app or may be instructed by technical sup- port to close it. Follow the steps below to close the application. 1. Double-click on the iPad’s Home button. This is the small circle button on the front of the iPad, just above the charging port. 2. Find the Paradise app in the app switcher. This app switcher screen will display all apps you currently have open, quite small on your page. 3. Swipe up on the Paradise app to close it. Sometimes restarting the entire iPad can help resolve an issue. Follow the steps below to turn an iPad off and back on to restart it. 1. Press and hold the Power button until the Power Off slider appears. 2. Drag the slider to turn the device off completely. 3. After the iPad turns off, press and hold the Power button again until you see the Apple logo. The iPad should now reboot. -
Page 266: Cash Drawer Not Opening
Troubleshooting 9.2 Cash Drawer Not Opening There are a few reasons as to why a cash drawer won’t open. First, check that the drawer isn’t locked. If the drawer still makes a clicking sound when you try and open from the Paradise application, it is likely the drawer is either locked or jammed. If it doesn’t click, check to ensure your receipt printer is on and working. The Paradise application ‘speaks’ to the cash drawer through the receipt printer so if the printer isn’t working, the cash drawer will not work. If the printer is working and you are able to print receipts to it but not open the drawer, the last thing to check is the cord that runs from the receipt printer to the cash drawer. This cord will usually have two labels, one on either end: Cash Drawer and Printer. Make sure the one that is labeled Cash Drawer is inserted in the bottom of the drawer and the one labeled Printer is in the back of the receipt printer. If the cash drawer opens when you select Open Drawer in the app but not when you take a cash payment, it is likely a drawer was not opened when the sta- tion was first used at the start of the day. Go to the Employee screen. If the Open/Close Cash Drawer button says Open Cash Drawer, there isn’t an active drawer on the system and one will need to be created. Keep in mind that af- ter creating one, all cash payments taken before opening it will have been tracked on the employee who took the payment and not the drawer and the system will think the employee owes the restaurant money. -
Page 267: Bluetooth Receipt Printer Not Printing
Troubleshooting 9.3 Bluetooth Receipt Printer Not Printing If your Bluetooth receipt printer isn’t printing, try turning the device off and on again. Check to ensure all cables are correctly placed and secure, as well as the paper in the paper tray. A good way to test the paper is to select the Feed button on the front to see if paper feeds through. If this does not resolve the issue, follow the steps below to resolve a connection issue. Confirm Connection to the iPad 1. Confirm that the power cord is connected and the power switch is turned on. You should have a steady light on the front of the device. 2. On the iPad’s home screen (not the Paradise app’s home screen), tap on the Set- tings icon, then select the Bluetooth menu. 3. Confirm that the Bluetooth toggle switch is on. 4. If the device shows Not Connected on this menu under My Devices, select the device. If it says Connected afterwards, it should begin working. If not, follow on to the next step. 5. If the device does not connect but remains in the My Devices section, select the small ‘i’ icon and choose Forget This Device. If it isn’t listed anywhere on this screen, skip this step. 6. With the printer powered on, press and hold the red Pair button on the back of the printer until the indicator light begins to flash. Release the Pair button. 7. Back on the iPad, the device should display under My Devices after about 30 seconds. Tap the device when it appears. 8. Confirm the indicator light on the back of the printer changed to blue, indicating successful pairing. -
Page 268: Ethernet Receipt Printer Not Printing
Troubleshooting 9.4 Ethernet Receipt Printer Not Printing There are mulitiple reasons that your ethernet receipt printer may not be printing. Follow the steps below to troubleshoot the printer. 1. Ensure that the iPads are all on the correct network. In most cases, you should be on the network that was installed with your equipment and will be labeled POS - ‘Your Company Name’. Test that you have an internet connection by load- ing a webpage in Safari. If the page doesn’t load, follow the steps in section 7.9 in this chapter to restart your router and pi. 2. Check the paper tray to clear any paper jams and make sure the paper is insert- ed according to the directions in the printer. Close the paper tray and hold the feed button down to make sure paper feeds through. 3. Check the back of the printer and make sure all cords are secure. Turn the print- er off and back on again. Make sure the light on the front is steady and does not read an error. 4. If the error light is on, the printer may not be on the network. Follow the ether- net cord from the printer to the router and make sure it hasn’t been unplugged. 5. Check that Print Queue is active. In the Paradise application on the iPad, check the top of the screen where there is a small marker labeled PQ. It will be either red or green. If it is red, follow the steps in section 7.9 to restart your pi, which controls the jobs going to your printer. 6. Lastly, if all the above work but the printer still isn’t working, the printer may have changed IP addresses. To check the IP address of the printer, turn the print- er off. Hold down the feed button and while holding the feed button down, turn the printer back on. Continue holding the feed button for about 10 seconds the printer will print out a slip of paper listing its IP address. Check that this ad- dress matches the one assigned to the printer in the Paradise app. This can be checked by going to Admin -> Printer Maintenance -> and select the printer. -
Page 269: Usb Receipt Printer Not Printing
Troubleshooting 9.5 USB Receipt Printer Not Printing If your USB Receipt Printer isn’t working, first ensure that the cord from the iPad (must be an Apple charging cord, not off-brand) is connected to both the iPad and the printer. This connection both charges the iPad through the printer and al- lows the iPad to ‘speak’ to the printer. Next, make sure the printer is turned on. There is a blue indication light on the front when it is turned on. If the printer is on, open the paper tray and ensure that there are no paper jams and that the paper is inserted according to the direc- tions in the printer. Close the paper tray and press the feed button to ensure that the paper feeds through properly. If the printer still isn’t working after these steps, someone may have changed the settings in the Paradise application. In the Paradise app, go to Admin -> Device Maintenance and select This Device, highlighted in yellow on the left. Make sure the correct printer is still selected as the Receipt Printer. If set, go to Admin -> Printer Maintenance and select the printer on the left. Check to make sure the settings are similar to the picture below. -
Page 270: Kitchen Printer Not Printing
Troubleshooting 9.6 Kitchen Printer Not Printing There are mulitiple reasons that your ethernet kitchen printer may not be printing. Follow the steps below to troubleshoot the printer. 1. Ensure that the iPads are all on the correct network. In most cases, you should be on the network that was installed with your equipment and will be labeled POS - ‘Your Company Name’. Test that you have an internet connection by load- ing a webpage in Safari. If the page doesn’t load, follow the steps in section 7.9 in this chapter to restart your router and pi. 2. Check the paper tray to clear any paper jams and make sure the paper is insert- ed according to the directions in the printer. Close the paper tray and hold the feed button down to make sure paper feeds through. 3. Check the back of the printer and make sure all cords are secure. Turn the print- er off and back on again. Make sure the light on the front is steady and does not read an error. 4. If the error light is on, the printer may not be on the network. Follow the ether- net cord from the printer to the router and make sure it hasn’t been unplugged. 5. Check that Print Queue is active. In the Paradise application on the iPad, check the top of the screen where there is a small marker labeled PQ. It will be either red or green. If it is red, follow the steps in section 7.9 to restart your pi, which controls the jobs going to your printer. 6. Lastly, if all the above work but the printer still isn’t working, the printer may have changed IP addresses. To check the IP address of the printer, turn the print- er off. Hold down the feed button and while holding the feed button down, turn the printer back on. Continue holding the feed button for about 10 seconds the printer will print out a slip of paper listing its IP address. Check that this ad- dress matches the one assigned to the printer in the Paradise app. This can be checked by going to Admin -> Printer Maintenance -> and select the printer. -
Page 271: Credit Card Terminal Issues (Bluetooth)
Troubleshooting 9.7 Credit Card Terminal Issues (Bluetooth) Most Bluetooth credit card terminal issues arrise from becoming disconnect- ed in Bluetooth settings on the iPad. This section will cover the MP200L, as it is currently our only supported Bluetooth terminal. Connecting the MP200L to Bluetooth 1. Begin by opening your Bluetooth settings on the iPad. This can be found by leav- ing the Paradise app (clicking the Home key on the front of the iPad once) and selecting the Settings app. Once opened, find Bluetooth and select it. Use the toggle to turn Bluetooth off and back on. 2. Check to see if the MP200L is connected. If it says Not Connected, select the device. It will either now say Connected or will give you a Bluetooth error. In the case of an error or the terminal is still not working even when it says connected, follow the next steps. 3. We will need to forget the device on the iPad in order to reconnect it. While still in the Bluetooth section of the Settings application, find the MP200L again. There should be a small blue ‘i’ next to it. Select this and on the next page, tap Forget This Device. 4. Once the device is disconnected, we can attempt to reconnect the device. On the credit card terminal, there is a button that has a Bluetooth symbol on it. Press and hold this button until the device asks you to enter a BT pairing pin. 5. Go back to the iPad’s Bluetooth settings. If the device does not appear in Other Devices in about twenty seconds, turn Bluetooth off and back on again. Once the device appears, select it. 6. The iPad will prompt you with a six digit pairing pin. Type this pin into the MP200L terminal. If you have typed the digits correctly, the iPad will now have the device listed as Connected and the MP200L will go back to it’s ‘Welcome’... -
Page 272: Credit Card Terminal Issues (Ethernet)
Troubleshooting 9.8 Credit Card Terminal Issues (Ethernet) Most connectivity issues that arrise when using an ethernet credit card ter- minal are due to the device either being offline or connected to the incorrect net- work. If you are getting a DHCP error, the device is offline. Follow the ethernet connection and make sure it is still connected to your TP-Link router. Changing cords and ports can also help. Turn the device off and on after switching any cables around. If the device still has a DHCP error when turning on, make sure you still have internet at your TP-Link router. Remember restarting your modem and router may restore connectivity. If you do not have a DHCP error but you are still unable to connect to the device and the iPad says the device is Unavailable in the Admin Screen, follow the steps below. Checking an Ethernet Terminal’s IP Address 1. Make sure your iPad is on the correct network. Check this by leaving the Par- adise application and open the Settings application and switch to Wi-Fi. In the Paradise app go to Admin and tap Check Connection under Terminal Status. 2. If you are connected to the right Wi-Fi and still are unable to connect the device, the device may be on the wrong network or may have changed it’s IP address. Finding the IP address of your terminal varies per model but they generally fol- low these steps. 3. Select the menu or function key on your terminal. It may ask you for a password. This password will either be 1234, today’s date, or tomorrow’s date. If a date, it will be in this format: 09082018. 4. Once on the first page, we are looking for the Communications option. Once selected, find LAN Parameters. Now find and select IP Address. -
Page 273: Restarting The Tp-Link Router And Orange Pi
Troubleshooting 9.9 Restarting the TP-LINK Router and Orange Pi If you are having network issues or your ethernet printers aren’t printing from the iPads but don’t have error lights, you may need to restart your router and pi that Paradise has provided to you. If the steps below do not help with your networking issues and your iPads remain offline, your internet may be out and you may need to call your internet provider. 1. Ensure that the iPads are all on the correct network. In most cases, you should be on the network that was installed with your equipment and will be labeled POS - ‘Your Company Name’. Test that you have an internet connection by load- ing a webpage in Safari. If the page doesn’t load, find your TP-Link router, which was first installed when you received your equipment. 2. Unplug the pi (small clear device connected to your router) from power. The lights inside will turn off. 3. Unplug the TP-Link router from power or click the power button on the back. Make sure you do not touch the Reset button or your router will be complete- ly reset and Paradise tech support will have to assist you in setting it back up before it is usable again. -
Page 274: Switching To Local Mode
Troubleshooting 9.10 Switching to Local Mode There may be instances where your internet provider’s network is down in the middle of a business day. To ensure that you are still able to send orders to your kitchen printers and that your devices continue communicating with each other during this time, you will need to enter Local Mode. Local Mode allows all of your devices that are still connected to the TP-Link router to communicate over a local connection, even without internet. When you switch to local mode, all of your iPads will take two minutes to form a mesh network, where they all rely on each other to stay connected. This means that once you switch to the mode, your iPads can no longer leave the Paradise application or they will break this connection. If this connection is broken, the iPads that are still connected will have to take an- other two minutes to reform this connection so it is crucial your employees stay in the Paradise application on all iPads. You will know you should switch to this mode when all of your devices alert you to being offline and losing connection to the cloud. The symbols at the top of the screen will also turn red to indicate a disconnection. When this occurs, select Dismiss so that we can switch to local mode manually. Make sure all iPads get switched to this mode. To do this manually, go to Admin -> Company Settings -> Email & Network. Check the Enable Local Mode (P2P) checkbox and uncheck Auto Resolve Connection to Cloud. The system will warn you that this may cause some slowdowns. Select Save to set the iPad to Local Mode. Restart the app on all iPads. ALL Paradise applications MUST be restarted for this to take effect. The iPads will take two minutes to go back into the Paradise app. You are now in local mode. When possible, switch back to online mode. Do this by going to Admin -> Company Settings -> Email & Network. Reverse the settings back to having Auto Resolve Connection to Cloud checked and Enable Local Mode (P2P) unchecked. Make sure to save and restart all iP- ads. If some of your iPads are in local mode and some are online, you will have communication errors. It is not necessary to go back into Online Mode as replication works perfectly within Local Mode and still utilizes the internet to run cards when needed. Just make sure all devices stay in the same mode.
Need help?
Do you have a question about the Star TSP650ii and is the answer not in the manual?
Questions and answers