Table of Contents
Advertisement
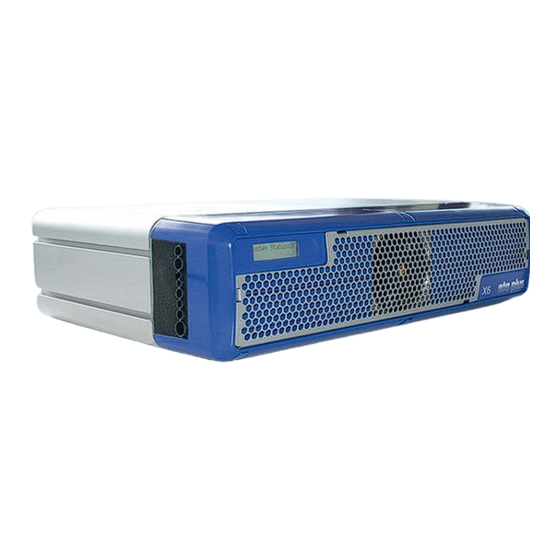
our name is our principle
UV-
TECHNOLOGY
Technical Documentation
®
ELC
X-Series
GB
eta plus electronic gmbh
Lauterstraße 29, D-72622 Nürtingen, Telefon +49 (0) 70 22 - 60 02-80, Fax +49 (0) 70 22 – 6 58 54
Postfach 1411, D-72604 Nürtingen, e-mail: info@eta-uv.de
eta plus electronic gmbh
––––––––––––––––––––––––––––
Lauterstraße 29, 72622 Nürtingen, Telefon +49 7022 6002-80, Fax +49 7022 65854, E-mail: info@eta-uv.de, www.eta-uv.de
Eingetragen unter HRB 724321 AG Stuttgart, USt.-Id.-Nr. DE 146267800
Eingetragen unter HRB 724321 AG Stuttgart, USt.-Id.-Nr. DE 146267800, Geschäftsleitung: Uwe Uhlemann, Dr. Markus Roth
Geschäftsführer: Dr. Peter Schwarz-Kiene
Advertisement
Table of Contents

Summary of Contents for Metz eta plus ELC X4B-40
- Page 1 our name is our principle TECHNOLOGY Technical Documentation ® X-Series eta plus electronic gmbh Lauterstraße 29, D-72622 Nürtingen, Telefon +49 (0) 70 22 - 60 02-80, Fax +49 (0) 70 22 – 6 58 54 Postfach 1411, D-72604 Nürtingen, e-mail: info@eta-uv.de eta plus electronic gmbh ––––––––––––––––––––––––––––...
- Page 2 ® („Electronic Lamp Control“) registered trademark IST Metz GmbH. ELC X-Series-V1.3-09.16-GB subject to technical alterations...
-
Page 3: Table Of Contents
Contents page I Contents 1 Safety ....................1 1.1 Definition of symbols ................. 1 1.2 Safety advice ....................1 1.3 Correct operation ..................2 1.4 Extended use ....................2 2 Description of functions ..............3 3 Installation ..................4 3.1 Mounting of casing ..................4 3.1.1 Mounting of single ELC ................. - Page 4 Contents page II 4.2 Switching on the ELC ................31 4.3 Activating the safety circuits ..............31 4.4 Switching on the lamp ................32 4.5 Dimming operation ................... 34 4.6 Switching off the lamp................34 5 Monitoring, warning, error, repair ..........35 5.1 Mains voltage monitoring ................
-
Page 5: Safety
Safety page 1 1 Safety 1.1 Definition of symbols Stop (Stop Danger). This symbol warns of serious danger of severe injury to persons. It must be strictly observed. Attention (Warning). This symbol indicates information the non-observance of which can lead to extensive damage to property. The safety warning must be strictly observed. -
Page 6: Correct Operation
Safety page 2 The ELC causes a leakage current given in chapter 6. Safeguarding by means of leakage current protection type A and type AC according to IEC 60755 is not permitted! The ELC operates in principle as a frequency converter and is equipped with a mains filter whose leakage current could trip the earth leakage detector RCD. -
Page 7: Description Of Functions
Description of functions page 3 2 Description of functions The electronic ballast ELC is designed to operate medium pressure discharge lamps as described in chapter 6. In contrast to conventional ballasts (inductive lamp ballast or transformer or transformer with transductor), with an ELC the lamp is operated with high frequency (approx. 100 kHz). The lamp does not flicker and dimming is infinitely adjustable within a wide power range (see chapter 6). -
Page 8: Installation
Installation page 4 3 Installation 3.1 Mounting of casing The ELC may only be installed as described in 3.1.1 and in 3.1.2, allowing for at ☞ least minimum spacing shown Fig. Horizontal mounting upside down is not allowed. All vertical mounting orientations are possible. -
Page 9: Mounting In A Stack
Installation page 5 Fig. 2: Mounting of the ELC, horizontal orientation 3.1.2 Mounting in a stack Up to 12 ELC may be mounted on top of each other. To fasten the ballasts onto each other a custom-built connector has to be used (available as accessories): Fig. -
Page 10: Connection
Installation page 6 3.2 Connection To gain access to the electrical contacts the front hood has to be removed. Loosen the screwing (6 x TX20-screw) and detach the front hood. The following paragraphs describe the electrical connections. 3.2.1 Ballast types X4–X8 Cable gasket X600 X806... -
Page 11: Overview Profile Of The Cable Gasket X4-X8
Installation page 7 3.2.2 Overview profile of the cable gasket X4-X8 The IP protection level given in chapter 6 is only guaranteed if every cable’s lead-in is completely sealed. It is therefore necessary to use cables of the nominal diameters given in the table below. -
Page 12: Overview Power Connections X4-X8
Installation page 8 3.2.3 Overview power connections X4-X8 Fig. 5: Power connection X4-X8 Fig. 5 shows the electrical wiring. Please consider the following aspects: Voltage balancing: on installing several ELCs the ballasts have to be equally distributed on all phases (e.g. 1 ballast L1/L2, 2 ballast L2/L3, 3 ballast L3/L1 etc.). -
Page 13: Ballast Types X12-X24
Installation page 9 3.2.4 Ballast types X12-X24 Cable gasket Lamp connection Control connections Mains connection Fig. 6: Overview of electrical connections X4-X8 Cable gasket: Place the cables into the rubber surrounds and fix them onto the clamp with cable straps. ELC X-Series-V1.3-09.16-GB subject to technical alterations... -
Page 14: Overview Profile Of The Cable Gasket X12-X24
Installation page 10 3.2.5 Overview profile of the cable gasket X12-X24 The IP protection level given in chapter 6 is only guaranteed if every cable’s lead-in is completely sealed. It is therefore necessary to use cables of the nominal diameters given in the table below. -
Page 15: Overview Power Connections X12
Installation page 11 3.2.6 Overview power connections X12 Fig. 7: Power connection X12 Please consider the following aspects: Voltage balancing: on installing several ELCs the ballasts have to be equally distributed on all phases (e.g. 1 ballast L1/L2, 2 ballast L2/L3, 3 ballast L3/L1 etc.). -
Page 16: Overview Power Connections X24
Installation page 12 3.2.7 Overview power connections X24 Fig. 8: Power connections X24 Please consider the following aspects: Connecting the lines: The Slave Modul has only to be connected to power supply and one PE-line on X100. The Master Modul has to be connected to power supply and one PE-line on X100, and additionally to all bus-, control- and lamp cables. -
Page 17: X100: Mains Connection
Installation page 13 Shielding: The lamp feeder cable shielding must be connected to the ELC at the designated ☞ shield clamp, see chapter 3.2.9. If desired, the shielding can also be connected to the lamp unit. 3.2.8 X100: Mains connection X4-X8: Fix the mains connection cables within the cable holder beneath the heat sink with cable straps. -
Page 18: X600: Connecting The Lamp Feeder Cable
Installation page 14 3.2.9 X600: Connecting the lamp feeder cable The lamp feeder cable must correspond with the cable parameters described in ☞ chapter 6. PE may be collected of pin 2 of the connector in order to earth the lamp housing. -
Page 19: Overview Of Control And Bus Connections
Installation page 15 3.2.10 Overview of control and bus connections The control cables are connected by means of the plug connections available as accessories. All control circuits must be earthed upon installation. The connector positions are shown in Fig. 9 or Fig. 10 and will be explained in the following tables. -
Page 20: X1 / X2: Profibus
Installation page 16 3.2.11 X1 / X2: PROFIBUS To ensure secure data transmission the use of a PROFIBUS-specific cable is ☞ recommended. Connector pin assignment: Fig. 11: Termination of PROFIBUS The shield has to be put on Pin 1 = BUS GND. Isolate with shrunk-on sleeve. The PROFIBUS contacts of X1 and X2 are internally connected. -
Page 21: X3: Profibus T-Coupler
Installation page 17 3.2.12 X3: PROFIBUS T-coupler The shield has to be put on Pin 1 = BUS GND. Connector pin assignment: Isolate with shrunk-on sleeve. Pin assignment X3: Designation Number Description technical BUS GND X3.1 GND isolated for PROFIBUS Shield connection PROFIBUS BUS A X3.2... -
Page 22: X805 And X806: Control Cables
Installation page 18 3.2.13 X805 and X806: Control cables Fig. 13 on page 21 shows the interconnection of X805 and X806. Comments on the wiring are given in the following tables. X806: Connector pin assignment: Connection torque: min. 0.22 Nm max. - Page 23 Installation page 19 X805: Connector pin assignment: Connection torque: min. 0.22 Nm max. 0.25 Nm PIN-assignment X805: Designation Number Description technical Interconnection X805.1 Continuous contact, connected max. 1A, 24V to X806.1 Safety NC 1 X805.2 Feedback contact 1 safety relay Normally closed contact 24V / 1A Safety NC 2 X805.3...
-
Page 24: X808/X300: Service Interface
Installation page 20 NB: X805.8 to X805.11: the contacts which are normally open (cp. Fig. 13) will be closed as soon as the corresponding bit is set in Register [Lamp Control] of the PROFIBUS output-data (cp. paragraph 3.4). Bit 6 closes UV Select, Bit 7 closes UV Ready. Use if required, not essential for operating the ELC. - Page 25 Installation page 21 Fig. 13: Circuit diagram of the control connectors X805 and X806 ELC X-Series-V1.3-09.16-GB subject to technical alterations...
-
Page 26: Comments On The Safety Functions Of The Elc
Installation page 22 3.3 Comments on the safety functions of the ELC In addition to the safety functions included in all previous ELC-types such as earth fault detection, temperature limit, safe operation in both short-circuit and open circuit at the lamp output, the ELC X-Series includes an additional function in the form of the definite lamp shutdown. -
Page 27: Initialisation Signal
Installation page 23 3.3.2 Initialisation signal Furthermore lamp operation will not be allowed unless +24V are applied to pin X806.3. This is an additional monitoring function for the safe operation of the installation. The status of pin X806.3 is visualized in the [Warning Register] of the PROFIBUS-input-data (see below and paragraph 5.3: Bit 7 {Init Signal Ok}). -
Page 28: Setting Up The Profibus Address
Installation page 24 3.4.1 Setting up the PROFIBUS address To set up the address the display and the pertaining SET button are used. The address space extends from 01 to 7D (corresponding to 1 to 125). Each address may be used only once per installation. -
Page 29: Checking The Profibus Connection And Error Indication
Installation page 25 3.4.2 Checking the PROFIBUS connection and error indication The display may be used to check the successful connection of ELC and Master and furthermore the existence of an error (ELC not ready for operation). It is also possible to read out error messages within the [Error Register] see paragraph 5.4.1 (detailed explanations may be found there). -
Page 30: Setting Lamp Power Via Profibus
Installation page 26 3.4.3 Setting lamp power via PROFIBUS → PROFIBUS-output-data (Master ELC) Byte- [Installed [Lamp [Reserved] Name [Power Lamp Control] Value] Power] The set value for lamp power has to be written into the register [Power Set Value]. The ELC’s output power is defined by the control characteristic of Fig. - Page 31 Installation page 27 → PROFIBUS-output-data (Master ELC) Byte- Name [Power [Installed [Lamp [Reserved] Control] Lamp Value] Power] To limit the maximum output power, use the register [Installed Lamp Power] (see Fig. 15). This function is appropriate if the nominal power of the lamp is lower than the nominal power of the ELC.
-
Page 32: Extended Temperature And Power Range
Installation page 28 3.4.4 Extended temperature and power range The ambient temperature range for standard operation is T = 5°C to 45°C. At a temperature of 47°C the lamp is switched off automatically. → PROFIBUS-output-data (Master ELC) Byte- Name [Power [Installed [Lamp [Reserved]... - Page 33 Installation page 29 X8: Mains voltage X8: Temp. dependant derating dependant power 80 W /°C reduction 20 W / V 45°C 8,8 kW 55°C 8,0 kW 7,2 kW 6,4 kW 55°C 45°C 6,0 kW 5,6 kW X6: Mains voltage dependant power 4,8 kW reduction 18 W / V 4,0 kW...
-
Page 34: To Read Out Elc Serial Number And Software Version
Installation page 30 3.4.5 To read out ELC serial number and software version These data may be accessed via display or PROFIBUS and may be of interest e.g. for service and in case of a defect. 1. Display ELC ready Bus connected Shortly press the SET-button to reach the next menu Drücken <... -
Page 35: Operation Of The Elc
Operation of the ELC page 31 4 Operation of the ELC 4.1 Initial operation The operative parameters of the ELC, such as the scope of the trigger pulse when • switching on the lamp, are set by the manufacturer. You must always ensure that the correct lamp type is used (see chapter 6) and that all •... -
Page 36: Switching On The Lamp
Operation of the ELC page 32 4.4 Switching on the lamp → PROFIBUS-output-data (Master ELC) Byte- Name [Power [Installed [Lamp [Reserved] Lamp Control] Value] Power] ↓ Name Extended Clear Start Ready Select Range Error Lamp Before starting the lamp it is necessary to write the desired lamp power into the register •... - Page 37 Operation of the ELC page 33 1. Display ELC ready Bus connected Shortly press the SET-button to get the lamp Press < 5sec operation data. Lamp operation data on display: PLamp: 5200 W [Actual Power]: actual power in Watts • PSet: 5200 W [Power Set Value]: required power in Watts •...
-
Page 38: Dimming Operation
Operation of the ELC page 34 4.5 Dimming operation After having reached nominal operation the desired lamp power can be infinitely adjusted within the dimming range given in chapter 6. • Enter the desired power in Watts in register [Power Set Value]. A set value of less than the minimum dimming range will automatically be ☞... -
Page 39: Monitoring, Warning, Error, Repair
Monitoring, warning, error, repair page 35 5 Monitoring, warning, error, repair 5.1 Mains voltage monitoring The mains voltage (L1, L2 of connector X100) is monitored during lamp operation. In case of continuous input undervoltage the lamp power is reduced by the ELC ☞... - Page 40 Monitoring, warning, error, repair page 36 → PROFIBUS input data (ELC Master) Byte- Name [ELC [Software [ELC [Error [Warning [Lamp [Actual [Actual [Actual [Reserved] Serial Version] Nominal Register] Status] Power] Voltage] Current] Register] Number] Power] ↓ Byte Name Lamp Supply Earth Measurement Overcurrent...
-
Page 41: Warning Messages
Monitoring, warning, error, repair page 37 5.3 Warning messages The bits in the [Warning Register] are divided into two groups: Group1-Nibble: the bits 0-3 represent critical operating conditions of the lamp. However • they won’t shut down the lamp. Group2-Nibble: If a bit in the Group2-nibble (bits 4-7) is set, the lamp cannot be started •... - Page 42 Monitoring, warning, error, repair page 38 The {Safety Relay Open} bit is set if the safety relay is not closed (e.g. on Bit 4: emergency shutdown). There are two different cases: If in register [Lamp Control] {Start Lamp} bit is 0, the {Safety Relay Open} •...
-
Page 43: Error
Monitoring, warning, error, repair page 39 5.4 Error 5.4.1 Error messages Effects of an error: The lamp will be immediately shut down, • In case of an error the display is blinking and the error is shown in clear text. In case of •... - Page 44 Monitoring, warning, error, repair page 40 The detection of a short peak {Overvoltage} on the lamp output might be due Bit 6: to an internal problem of the ELC or damaged cables on lamp circuitry. If the actual voltage of the lamp is too high the {Lamp Voltage High} bit is set. Bit 7: Usually the lamp type is not correct.
-
Page 45: Display Messages And Trouble Shooting
Monitoring, warning, error, repair page 41 5.4.2 Display messages and trouble shooting Display message Bit set in Error Description Corrective action register ELC ready ballast is ready for operation Display is off no 24V supply or display defect Check 24V supply, switch off and on again. Check fuses •... - Page 46 Monitoring, warning, error, repair page 42 Display message Bit set in Error Description Corrective action register Bit 14 Slave Error detected in Slave ballast. Check internal wiring. (0x4000) Bit 15 Faulty connection between Master and CanIntern Check internal wiring. (0x8000) Slave.
-
Page 47: Resetting The Error Register
Monitoring, warning, error, repair page 43 5.4.3 Resetting the error register Each error has to be acknowledged by setting the {Clear Error} bit in register [Lamp Control] to “1”. First of all set the {Start Lamp} bit in register [Lamp Control] to 0. Then only the transgression of the {Clear Error} bit from “0”... -
Page 48: Technical Data
Technical Data page 44 6 Technical Data 6.1 ELC X4, X4B Output power characteristics Type ELC X4-40 ELC X4B-40 Power factor Typ. 0.97 Typ. 0.97 Power efficiency > 0.94 > 0.94 Nominal power range 800 W – 4000 W 800 W – 4000 W Electrical characteristics Type ELC X4-40... - Page 49 Technical Data page 45 Lamp feeder cable: approved types and lengths The use of cable types which have not been approved by the manufacturer ☞ can lead to malfunction. The possibility of damage to the electronic ballast cannot be excluded. Type ELC X4-40 ELC X4B-40...
- Page 50 Technical Data page 46 Control characteristics Type ELC X4-40 ELC X4B-40 2.2A max. for ELC control circuitry Current requirement of 24V- supply (X805.5) Output currents of X806 Pins 5 + 6 have to be added PROFIBUS: 500kBit Baud rate MODBUS: Baud rate 19200, 8 Databits, Even parity, 1 Start/Stop Bit Ambient conditions Type ELC X4-40...
-
Page 51: Elc X6, X6B, X6I
Technical Data page 47 6.2 ELC X6, X6B, X6i Output power characteristics Type ELC X6-60 ELC X6B-60 ELC X6i-60 Power factor Typ. 0.97 Typ. 0.97 Typ. 0.97 Power efficiency > 0.94 > 0.94 > 0.94 Nominal power range 840 W – 6050 W 840 W –... - Page 52 Technical Data page 48 Lamp feeder cable: approved types and lengths The use of cable types which have not been approved by the manufacturer ☞ can lead to malfunction. The possibility of damage to the electronic ballast cannot be excluded. Type ELC X6-60 ELC X6B-60...
- Page 53 Technical Data page 49 Control characteristics Type ELC X6-60 ELC X6B-60 ELC X6i-60 2.2A max. for ELC control circuitry 2.7A Current requirement of 24V- Output currents of X806 Pins 5 + 6 have to be Output currents of X806 supply (X805.5) added Pins 5 + 6 have to be added...
-
Page 54: Elc X8, X8B, X8 Extended Range
Technical Data page 50 6.3 ELC X8, X8B, X8 extended range Output power characteristics ELC X8-80 extended Type ELC X8-80 ELC X8B-80 range Power factor Typ. 0.97 Typ. 0.97 Typ. 0.97 Power efficiency > 0.94 > 0.94 > 0.94 Nominal power range 1600 W –... - Page 55 Technical Data page 51 Lamp feeder cable: approved types and lengths The use of cable types which have not been approved by the manufacturer ☞ can lead to malfunction. The possibility of damage to the electronic ballast cannot be excluded. ELC X8-80 Type ELC X8-80...
- Page 56 Technical Data page 52 Control characteristics ELC X8-80 Type ELC X8-80 ELC X8B-80 extended range 2.2A max. for ELC control circuitry (X8i 2,7A) Current requirement of 24V- supply (X805.5) Output currents of X806 Pins 5 + 6 have to be added PROFIBUS: 500kBit Baud rate MODBUS: Baud rate 19200, 8 Databits, Even parity, 1 Start/Stop Bit...
-
Page 57: Elc X12, X12I, X12B
Technical Data page 53 6.4 ELC X12, X12i, X12B Output power characteristics Type ELC X12-110 ELC X12i-110 ELC X12B-110 Power factor Typ. 0.99 Typ. 0.99 Typ. 0.99 Power efficiency > 0.96 > 0.96 > 0.96 Nominal power range 2400 W – 12000 W 2400 W –... - Page 58 Technical Data page 54 Lamp feeder cable: approved types and lengths The use of cable types which have not been approved by the manufacturer ☞ can lead to malfunction. The possibility of damage to the electronic ballast cannot be excluded. Type ELC X12-110 ELC X12i-110...
- Page 59 Technical Data page 55 Control characteristics Type ELC X12-110 ELC X12i-110 ELC X12B-110 2.2A max. for ELC 2.7A max. for ELC 2.2A max. for ELC control circuitry control circuitry control circuitry Current requirement of 24V- Output currents of Output currents of Output currents of supply (X805.5) X806 Pins 5 + 6 have...
-
Page 60: Elc X24, X24I, X24B
Technical Data page 56 6.5 ELC X24, X24i, X24B Output power characteristics Type ELC X24-210 ELC X24i-210 ELC X24B-210 Power factor Typ. 0.99 Typ. 0.99 Typ. 0.99 > 0.96 > 0.96 > 0.96 Power efficiency Nominal power range 4800 W – 24000 W 4800 W –... - Page 61 Technical Data page 57 Lamp feeder cable: approved types and lengths The use of cable types which have not been approved by the manufacturer ☞ can lead to malfunction. The possibility of damage to the electronic ballast cannot be excluded. ELC X24-210 ELC X24i-210 ELC X24B-210...
- Page 62 Technical Data page 58 Ambient conditions Type ELC X24-210 ELC X24i-210 ELC X24B-210 Max. 85%, non- Max. 85%, non- Humidity condensing condensing 5°C to +45°C 5°C to +45°C Ambient operation temperature -20°C to +70°C during storage and transportation, before initial operation Ambient storage temperature leave at least 4 hrs at room temperature 2 years (also see chapter 4.2)
Need help?
Do you have a question about the eta plus ELC X4B-40 and is the answer not in the manual?
Questions and answers