Table of Contents
Advertisement
Advertisement
Table of Contents

Summary of Contents for Parata Systems AccuCount II
- Page 1 AccuCount II User Guide 120-0313 Rev 04 The information in this document is proprietary and confidential to Parata Systems, LLC. Content may be changed at any time and without notice. Parata Systems, LLC 2600 Meridian Parkway Durham, NC 27713 www.parata.com...
- Page 2 No part of this documentation or the associated product may be reproduced, processed, duplicated or published in any form by photocopying, microfilming, reprinting or other process, in particular electronic means, without the written agreement of Parata Systems, LLC. Trademarks AccuCount, AccuMed, APM, Automated Will Call, AutoScript III, Baker Cassette, Baker Cell,...
- Page 3 Usage Disclaimer The AccuCount II scale is a tool, but not a replacement of the Pharmacist, who remains the final responsible party with respect to the handling, storing, dispensing, packaging and administering of medications and supplies to patients or other third parties through or related to the use of the AccuCount II scale.
- Page 4 The AccuCount II operates on 110VAC electrical voltage. The AccuCount II must only be used with the power adapter supplied exclusively for use with the AccuCount II. Be sure to hold the plug, not the cable, when disconnecting the device from an electrical outlet.
-
Page 5: Table Of Contents
2.2 About the AccuCount II drug library ........ - Page 6 AccuCount II User Guide Chapter 3 – Operations 3.1 Powering on the scale ........... . . 3-1 3.2 Home screen .
- Page 7 Contents Chapter 5 – Maintenance 5.1 Cleaning ..............5-1 5.2 Updating the drug database .
- Page 8 AccuCount II User Guide viii 120-0313 Rev 04...
-
Page 9: Chapter 1 - Installation
This chapter provides information about unpacking, installing, leveling, and calibrating an AccuCount II scale. 1.1 Parts included Table 1-1 shows the items that should be included with your AccuCount II scale. No tools are required for assembly. Table 1-1: Parts included with your AccuCount II scale kit... -
Page 10: Inspection And Assembly
AccuCount II User Guide 1.2 Inspection and assembly When you receive your AccuCount II, be sure to confirm that all parts and accessories are supplied, per Table 1-1. This section details how to unpack and assemble the scale. 1.2.1 Unpacking the scale The scale is delivered in an environmentally-friendly package, specifically developed for protection during transportation. -
Page 11: Transport, Shipping, And Storage
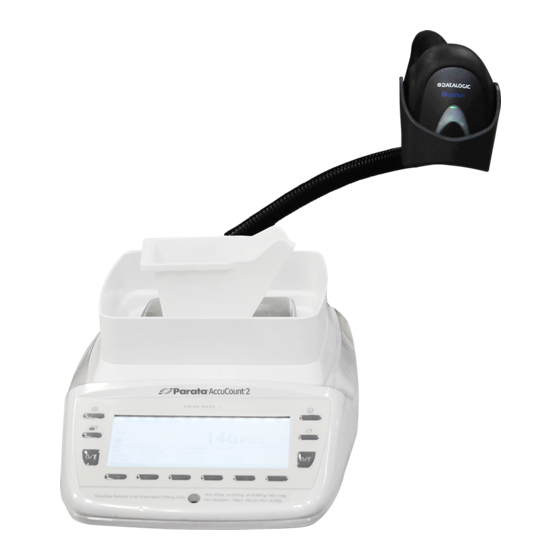
1.2.4 Installing the scale The AccuCount II scale is designed to work standalone, or you can use it in conjunction with the included Datalogic Gryphon USB bar code scanner, an optional USB keyboard (not included), or an optional Dymo SE450 USB Label Writer printer (not included). - Page 12 AccuCount II User Guide a. Screw the bar code scanner cradle into the gooseneck. Hold the metal core of the gooseneck as you screw on the cradle, to prevent it from spinning within the black flexible tubing. b. Screw the gooseneck onto the threaded post at the back of the scale.
- Page 13 Chapter 1 – Installation Place the weighing pan support onto the scale so that its centering bolt goes into the center, square hole over the scale mechanism. Do one of the following: If you are going to use the compounding plate, set the draft shield aside or store it. ...
- Page 14 AccuCount II User Guide NOTE Ensure that the two black rings on the bottom of the weighing pan center over their respective black bumpers on the weighing pan support. If you are going to use the compounding plate, center it on top of the weighing pan.
- Page 15 The scale must be operated with the supplied power adapter only. Before you connect the power adapter to the outlet, check that the operating voltage on the power adapter matches the local outlet voltage. If it does not, contact Parata Systems Customer Care. 120-0313 Rev 04...
-
Page 16: Leveling And Calibration
AccuCount II User Guide 1.3 Leveling and calibration The AccuCount II has a high-precision balance which must be leveled and calibrated for the scale to function properly. When you first install the scale and any time that the scale is physically moved, perform the leveling and calibration functions in this section. - Page 17 Chapter 1 – Installation There are five calibration settings: • Off – no calibration available • Internal calibration – (default, recommended) using the scale’s internal weights • External – using the Parata-supplied 200-gram weight (part number 601495.00) • External user defined – using a user-supplied, specified weight •...
- Page 18 AccuCount II User Guide 1.3.2.b Automatic calibration You can set the AccuCount II to calibrate automatically at a particular time of day, when the ambient temperature changes by a set amount, or both. Automatic calibration performs an internal calibration based on those settings (see “Calibration”...
- Page 19 1.3.2.e Sealing the scale The AccuCount II scale can be sealed with security seals for your locality, to conform to National Institute of Standards and Technology (NIST) Handbook 44 requirements. NOTE It will not be possible to perform external calibrations once the scale is sealed (see “Calibration”...
- Page 20 AccuCount II User Guide NOTE The screw hole is on the bottom-right near the front, when the scale is upright. The scale switches into Service mode, whose display is similar to the Weighing application. Slide the scale back onto the surface and level it (see “Leveling” on page 1-8).
- Page 21 Chapter 1 – Installation 12 Wait for the first internal calibration to complete. The display indicates that the weight on the pan is less than the expected weight of at least 200 grams. 13 Place a weight between 200 and 600 grams on the center of the weighing pan. The scale continues with external calibration.
- Page 22 AccuCount II User Guide 16 Press the Yes soft key to confirm that you want to seal the scale. The scale displays the Apply seal to finish sealing ! prompt. 17 Press the OK soft key. 18 Disconnect the power adapter from the outlet and from the rear of the scale.
- Page 23 Chapter 1 – Installation b. Turn the scale upright; and then place a self-destructive seal over the seam of the body of the scale, under the dust shield. c. Affix a wire seal to the white tab on the back of the scale to prevent access to its interior. 22 Install the draft shield (if it was in use before step 1), the weighing pan support, and the weighing pan (see steps 4 through 6 in “Installing the scale”...
- Page 24 AccuCount II User Guide Installation notes 1–16 120-0313 Rev 04...
-
Page 25: Chapter 2 - Overview
500,000 drugs, and support for USB connection to a PC for software and drug database updates. The AccuCount II scale supports up to two of the following peripherals at a time: • Standard USB keyboard •... -
Page 26: About The Accucount Ii Drug Library
AccuCount II User Guide 2.2 About the AccuCount II drug library The AccuCount II scale’s internal drug library can hold up to 500,000 drugs. This library allows users to quickly compare the weight of known pills, to provide a quantity when using the Rx-Check or Non-Rx-Check applications. -
Page 27: Functions
Chapter 2 – Overview 2.3 Functions In order to complete any of the functions with the AccuCount II, you must first understand the Twelve-Key Control Panel (Figure 2-1) and the key functions (Table 2-1). Each button is referred to throughout the manual. - Page 28 AccuCount II User Guide Table 2-1: Key functions (cont’d) Key(s) Function(s) in an application Function(s) in a menu Press to re-zero the scale. Not functional. Press to tare the scale. Press and hold to bring up the Tare keys calibration menu. This menu...
-
Page 29: Display
Chapter 2 – Overview 2.4 Display The AccuCount II display is divided into sections, as shown in Figure 2-2: Figure 2-2: AccuCount II display sections Section Name Description Headline Displays the running application. Displays the capacity indicator when weighing in the Rx-Check and Non-Rx-Check applications. -
Page 30: Application Screens
AccuCount II User Guide 2.4.1 Application screens Once you are weighing items in an application, the main display area shows more information, as shown in sections 2.4.1.a through 2.4.1.c below. 2.4.1.a Weighing application details Figure 2-3: Details displayed while weighing in the Weighing application... - Page 31 Chapter 2 – Overview 2.4.1.b Piece Counting application details Figure 2-4: Details displayed while weighing in the Piece Counting application Area Name Description Weight The exact net weight that the scale is currently reading. Rotate key symbol Indicates that you can press the Rotate key to swap the main display (pieces) with the secondary display (weight).
- Page 32 AccuCount II User Guide 2.4.1.c Rx-Check and Non-Rx-Check application details Figure 2-5: Details displayed while weighing in the Rx-Check and Non-Rx-Check applications Area Name Description Capacity indicator Shows the percentage of the scale’s capacity that is used by the pills that you are currently weighing.
-
Page 33: Info Screens
Chapter 2 – Overview 2.4.2 Info screens Info screens are used to display large amounts of text on the screen. If necessary, press the and soft keys to scroll through the information. A scroll bar on the right of the screen indicates your current place in the text. You can press the Print key at any time to send the contents of an info screen to an attached peripheral. -
Page 34: Alphanumeric Input
AccuCount II User Guide 2.6 Alphanumeric input Certain situations require you to enter a text or numeric value of some kind. In these cases, the soft keys are used for alphanumeric input. Each soft key displays a string of numbers, letters, or symbols (e.g., 12345, ABCDEF, +-*/=&%) or displays a special control key (e.g., escape, space, and cursor movement keys). -
Page 35: Number And Character Entry
Chapter 2 – Overview 2.6.2 Number and character entry Enter letters, numbers, and symbols much like you would enter letters using the numeric keypad of a telephone. To enter an alphanumeric value using the soft keys Repeatedly press the appropriate soft key until the desired letter, number, or symbol appears. If the next character that you want to enter is on the same soft key, wait for the cursor to move over one space and then repeat step 1 for the next character. -
Page 36: Product Specifications
AccuCount II User Guide 2.7 Product specifications Model Parata AccuCount II Measurement Capacity 620 grams Readability 1 mg Repeatability 1 mg Linearity 1.5 mg Response Time 1.5 seconds Calibration System Internal, self-calibrating; Automatic by time or temperature; External with an optional Parata-provided weight; and... -
Page 37: Chapter 3 - Operations
AccuCount II. 3.1 Powering on the scale Press the On/Off key to power on the AccuCount II. During the start-up sequence the scale executes a self check routine and, after a few seconds, resumes the same application that it was running when it was powered off. -
Page 38: Home Screen
AccuCount II User Guide 3.2 Home screen The Home screen provides access to the various top-level menus of the scale, which are listed in the white headline: • Applications • User • Settings NOTE The currently selected menu is highlighted in black. -
Page 39: Applications Menu
3.3.1 Weighing application In the Weighing application, the AccuCount II acts as a basic scale. It does not count items, though it can perform statistical sampling and weight checking, print results, and show Weighing application properties (see “Weighing menu” on page 4-31). - Page 40 AccuCount II User Guide 3.3.1.b Weighing To use the Weighing application Select Weighing from the Applications menu. Place the empty scoop, vial, or compounding plate on the pan. Press the Tare key momentarily until the display reads 0.000g NET. Notice that NET is on the display.
-
Page 41: Piece Counting Application
Chapter 3 – Operations 3.3.2 Piece Counting application Use the Piece Counting application to count items of uniform weight (e.g., pills, vitamin capsules, screws). For this function to work properly, you must first weigh a number of the desired items to obtain a reference weight. To use the Piece Counting application Select Piece Counting from the Applications menu. - Page 42 Tare key, and repeat step 7. WARNING! The previously calculated item weight remains in the AccuCount II memory until you enter a new sample piece count, press the Clr Pcs soft key, or quit the application. If the scale is...
-
Page 43: Rx-Check Application
Chapter 3 – Operations When counting the same type of item into different scoops or vials, the AccuCount II must be tared with each new scoop or vial placed on the pan (step 3, above). The programmed piece weight will remain set and the scale will be ready to count. - Page 44 the RxCheck will start over; return to step 3. If the bar codes match, the AccuCount II attempts to find the specified drug in its library. If it finds the drug, skip ahead to step 14; otherwise, proceed to step 5.
- Page 45 Chapter 3 – Operations Press OK to confirm the count; or press Back to return to the previous step and choose a different count. Pour out the pills that you used to take the sample, to prevent the scale from automatically taring their weight after you edit the drug information (below).
- Page 46 Use the and soft keys to indicate the correct drug, and then press Select. 16 Add pills to the scoop on the pan. The AccuCount II counts the number of pills in the scoop by piece weight. WARNING! Always follow the above steps in order to ensure that the scale starts at 0 and that the count is accurate.
-
Page 47: Non-Rx-Check Application
3.3.4 Non-Rx-Check Application The Non-Rx-Check mode automatically prepares the AccuCount II to count the drug when only the stock bottle UPC bar code is scanned and the programmed piece weight is found. It does not ask you to scan a prescription NDC bar code. Otherwise, it functions in the same manner as the Rx-Check application. - Page 48 AccuCount II User Guide On the weighing screen that appears, count out a number of pills equal to one of the values under the soft keys. Press the soft key that corresponds to the number of pills that you counted;...
- Page 49 Chapter 3 – Operations 11 Press the ESC soft key to save your changes. The message Drug Information ok? appears, showing the drug information. 12 Respond with one of the following: If the information is all correct, press the OK soft key. The scale will return to the Scan stock ...
- Page 50 AccuCount II User Guide 14 Add pills to the scoop on the pan. The AccuCount II counts the number of pills in the scoop by piece weight. WARNING! Always follow the above steps in order to ensure that the scale starts at 0 and that the count is accurate.
- Page 51 Chapter 3 – Operations e. On the verification screen, press OK. The new drug’s piece weight is stored in the user database. Proceed to step 5. If the drug is in the library, take the following actions: a. Manually count the reference quantity (100 pieces or the entire contents of the stock bottle, if within scale capacity).
-
Page 52: User Menu
Once you log on to a user profile, the scale returns to the last application that user was using. See “Administrator submenu” on page 4-2 for more information about defining user profiles on the AccuCount II. 3–16 120-0313 Rev 04... -
Page 53: Settings Menu
Chapter 3 – Operations 3.5 Settings menu The Settings menu allows you to access submenus on which you can adjust all of the functionality of the AccuCount II scale: • Create and modify administrator and user profiles • Define a theft protection password •... - Page 54 AccuCount II User Guide Operations notes 3–18 120-0313 Rev 04...
-
Page 55: Chapter 4 - Customization
Customization This chapter provides additional information about customizing the configuration of your AccuCount II scale. You can customize the basic functionality of the scale, individual application options, and user profiles. If you are logged into the scale as the Administrator, then you can adjust any option on the scale;... -
Page 56: Administrator Submenu
AccuCount II User Guide 4.1 Administrator submenu The Administrator submenu allows you to define one administrator user profile and up to seven normal user profiles. It also allows you to define a theft-protection password or reset the scale settings to the factory defaults. - Page 57 Chapter 4 – Customization Table 4-1: Administrator submenu overview (cont’d) Setting Function Set factory settings To restore the factory default configuration: Press the Enter soft key to select Set. The scale displays the Set factory settings? prompt. Press the Yes soft key to confirm the reset; or press the Cancel soft key to back out.
-
Page 58: Define User Submenu
AccuCount II User Guide 4.1.1 Define user submenu The Define user submenu allows the administrator to manage the entire user list. Figure 4-2: Define user submenu screen Table 4-2 provides an overview of the Define user submenu item and explains how to use its functions. - Page 59 Chapter 4 – Customization Table 4-2: Define user overview and procedures (cont’d) Setting Function Copy user profile To copy one user profile to another: Press the Enter soft key to select Set. The scale displays the Copy user profile dialog. Press the Source soft key to select the user profile settings to copy.
-
Page 60: User 1|2|3|4|5|6|7
AccuCount II User Guide 4.1.2 User 1|2|3|4|5|6|7 Table 4-3 provides an overview of the User 1, 2, 3, 4, 5, 6, and 7 submenu and an explanation of the User function and options, including all possible values for the option[s] (default settings are shown in bold text). - Page 61 Chapter 4 – Customization 4.1.2.a User Protection submenu Table 4-4 provides an explanation of each User Protection option with all possible values (default settings are shown in bold text). Table 4-4: User Protection settings Setting Function Login at startup [ Off, On ] Enables automatic prompting to login this user profile when the scale starts up.
-
Page 62: Define Administrator
AccuCount II User Guide 4.1.3 Define administrator Table 4-5 provides an overview of the Define administrator submenus and an explanation of the Administrator options, including all possible values for the options (default settings are shown in bold text). Table 4-5: Define administrator overview settings... -
Page 63: Theft Protection
Chapter 4 – Customization 4.1.3.a Administrator Protection Table 4-6 provides an explanation of each Administrator Protection option with all possible values (default settings are shown in bold text). Table 4-6: Administrator Protection settings Setting Function Login at startup [ Off, On ] Enables automatic prompting to login the administrator profile when the scale starts up. - Page 64 WARNING! After seven consecutive incorrect entries, the display reads NO ACCESS, CALL SERVICE. In this situation, only Parata Systems Customer Care can unlock the instrument again. Table 4-7 provides an explanation of each Theft protection option with all possible values (default settings are shown in bold text)
-
Page 65: Configuration Submenu
Chapter 4 – Customization 4.2 Configuration submenu The Configuration submenu allows you to adjust the basic behavior, operation, and appearance of the AccuCount II. Figure 4-3: Configuration submenu screens Table 4-8 provides a brief overview of each Configuration submenu item. -
Page 66: Weighing Parameters
AccuCount II User Guide Table 4-8: Configuration overview (cont’d) Setting Function Date/Time General settings for the date and time. See “Date/Time” on page 4-27. Min. sample weight General settings for the minimum sample weight that will register during weighing. See “Min. sample weight” on page 4-28. -
Page 67: Calibration
Chapter 4 – Customization Table 4-9: Weighing parameters settings (cont’d) Setting Function Refresh rate [ fast, normal, slow, extra slow ] The frequency that measurement is checked and displayed. The scale location has the biggest impact on this value: an unstable location requires a slower refresh rate, while an ideal location may use the fast rate. - Page 68 AccuCount II User Guide The Calibration submenu allows you to set the calibration mode that the scale will use when you request it (or when it occurs automatically; see below). Table 4-10 on page 4-14 provides an explanation of each Calibration option with all possible values (default settings are shown in bold text).
- Page 69 Chapter 4 – Customization Table 4-10: Calibration settings (cont’d) Setting Function Time [ 06:00:00am, hh:mm:ss am/pm ], where: Two-digit hour value, with leading zero Two-digit minute value Two-digit second value Defines the time of day to trigger automatic calibration with the internal weight.
-
Page 70: Protocol
AccuCount II User Guide 4.2.3 Protocol Pressing the Print key transmits the current measuring result to peripherals, based on a number of variables: • Required conditions for a printout to occur • Format of the value (measuring result) in the printout •... - Page 71 Chapter 4 – Customization 4.2.3.a Protocol - Autostart Table 4-12: Protocol - Autostart settings Setting Function Autostart [ Off, On ] If enabled, starts the printout automatically when the conditions in Protocol - Mode settings are met. Delay [ 0.0 s, n.n s ] Number of seconds to delay before starting the automatic printout.
- Page 72 AccuCount II User Guide 4.2.3.b Protocol - Mode Table 4-13: Protocol - Mode settings Setting Function Mode [ Unstable, Stable, Load or value change, Continuous, Time interval, Off ] Unstable Individual printout of each value at any time Stable Individual printout of stable value...
- Page 73 Chapter 4 – Customization Table 4-13: Protocol - Mode settings (cont’d) Setting Function Delay [ 1.0 s, n.n s ] Time interval at which automatic printout occurs. NOTE: Only available in Time interval mode. 4.2.3.c Protocol - Header/Footer (common items) This section covers both Header and Footer menus, as the only difference is the Position options that are available in the Header or Footer.
- Page 74 Table 4-15: Protocol - Header/Footer - Free text lines settings Setting Function Text line 1|2|3|4|5 [ (none), any text string up to 22 characters Defines free text line 1, 2, 3, 4, or 5 (e.g., “Parata Systems, LLC”) 4–20 120-0313 Rev 04...
- Page 75 Chapter 4 – Customization Protocol - Header/Footer - Free HEX lines While a HEX line containing ASCII hexadecimal values can send normal characters (e.g., “41” sends the letter “A”), they are typically used to send control characters to the output device. For example, a “0A” in hexadecimal sends the LF (line feed) character to the printer, and “0D”...
- Page 76 AccuCount II User Guide Protocol - Header/Footer - Position Table 4-17: Protocol - Header/Footer - Position settings and procedures Setting Function Position 1 [ HEX line 1, Table 4-18 ] any option as shown in Defines the information to output on position1.
- Page 77 Chapter 4 – Customization Table 4-17: Protocol - Header/Footer - Position settings and procedures (cont’d) Setting Function All positions OFF To set all of the positions in the Header or Footer to Off: Press the Enter soft key to select Set. The scale displays the Set all Positions off? prompt.
-
Page 78: Interface Rj45
AccuCount II User Guide Table 4-18: Protocol - Header/Footer - Position option definitions and applicability (cont’d) Option Header? Footer? Function Signature Outputs a labels and blank line for a handwritten signature. Text line 1|2|3|4|5 Outputs the defined text of the chosen text line (see “Protocol - Header/Footer - Free... -
Page 79: Device Settings
Chapter 4 – Customization Table 4-19: Interface RJ45 settings (cont’d) Setting Function Handshake [ None ] Communications-initiation handshake for the RS232/V24 interface (must be None). Character set [ ASCII, Unicode ] ASCII Use the ASCCI character set, which is limited to the first 96 printable characters and 33 control characters. - Page 80 [ Off, On ] Enables sounding a tone when an alert or message is displayed. The AccuCount II only sounds an alert when communicating with a PC and there is some kind of delay; in that case, the message Data transmisson timeout! displays.
-
Page 81: Date/Time
Chapter 4 – Customization 4.2.6 Date/Time Table 4-21 provides an explanation of each Date/Time option with all possible values (default settings are shown in bold text). Table 4-21: Date/Time settings Setting Function Date format [ DD.MM.YY, DD.MM.YYYY, MM.DD.YY, MM.DD.YYYY ], where: Two-digit, leading-zero date Two-digit, leading-zero number of month Two-digit, leading-zero year... -
Page 82: Min. Sample Weight
Defines the current clock time. NOTE If the AccuCount II loses power, the clock should continue to maintain the time and date. Upon restoring power to the scale, if the clock must be reset, then the internal backup battery has expired and must be replaced by Parata Systems Customer Care. -
Page 83: Properties
Chapter 4 – Customization Table 4-22 provides an overview of each Minimal sample weight option with all possible values (default settings are shown in bold text). Table 4-22: Minimal sample weight settings Setting Function Tare range 1|2|3 (Max.) [ 0.000 g, nnn.nnn g ], where: nnn.nnn Any decimal value between 0.000 and 620.000, in grams... -
Page 84: Balance Information
AccuCount II User Guide 4.2.9 Balance information Select the Balance information configuration item to display additional, hardware-related information about the scale (e.g., languages installed, slide-in module software version, drug library database file name, and so forth) in an info screen. -
Page 85: Application Options
Chapter 4 – Customization 4.3 Application options You can customize every application on the AccuCount II scale, though the Rx-Check and Non-Rx-Check applications have few options compared to the Weighing and Piece Counting applications. To access the options for the Weighing and Piece Checking applications Start the application, as described in “To select an application”... - Page 86 AccuCount II User Guide Table 4-23 provides an overview of the Weighing menu items and explains how to use its function. Table 4-23: Weighing menu overview Setting Function CheckWeigher Defines a static weight for which you can set the scale to verify each time you weigh an item.
- Page 87 Chapter 4 – Customization 4.3.1.a Weighing CheckWeigher The CheckWeigher submenu of the Weighing menu allows you to define a static weight. You can then set the scale to verify each time that you weigh an item of that weight. For example, you could set the scale to assume that you are always weighing 100-gram prepacks, and the display changes to show a more-useful interface for checking that weight: Table 4-24 provides an explanation of each Weighing CheckWeigher option with all...
- Page 88 AccuCount II User Guide Table 4-24: Weighing CheckWeigher settings (cont’d) Setting Function [ 2.50 %, nn.nn %] where: nn.nn Decimal value between 0.01 and 50.00 percent –OR– [ 120.000 g, nnn.nnn %] where: nnn.nnn Decimal value between Nominal and 620 grams Defines the overweight tolerance (TO) for use with the IN equivalence scale on the left of the CheckWeigher screen.
- Page 89 Chapter 4 – Customization 4.3.1.b Weighing Properties Select the Properties Weighing item to display all software settings for the Weighing application in an info screen. See “Info screens” on page 2-9 for more information about using this screen. 120-0313 Rev 04 4–35...
-
Page 90: Piece Counting Menu
AccuCount II User Guide 4.3.2 Piece Counting menu The Piece Counting application menu allows you to customize and view settings within the application. Many of the Piece Counting application options work the same as with the Weighing application options. The two applications do not share settings; each application has its own settings. - Page 91 Chapter 4 – Customization Table 4-25 provides an overview of the Piece Counting menu items and explains how to use its function. Table 4-25: Piece Counting menu overview Setting Function FixPCs1|2|3|4 [ 10|30|60|100, nnn ]; where: Whole number between 10 and 9999 Define the fixed piece counts that can be made visible on the soft keys (see “Soft keys”...
- Page 92 AccuCount II User Guide Table 4-25: Piece Counting menu overview (cont’d) Setting Function Properties Display and print all Piece Counting application settings. See “Piece Counting Properties” on page 4-40. 4.3.2.a Piece Counting CheckWeigher Defines a static piece count that you can set the scale to verify each time you weigh pieces of a predefined weight.
- Page 93 Chapter 4 – Customization Table 4-26 provides an explanation of each Piece Counting CheckWeigher option with all possible values (default settings are shown in bold text). Table 4-26: Piece Counting CheckWeigher settings Setting Function CheckWeigher [ Off, On ] Enables the Piece Counting CheckWeigher functionality. Nominal [ 100 PCS, nnnnnn PCS ], where: nnnnnn...
-
Page 94: Submenus Common To Weighing And Piece Counting
Enables a “negative” feedback tone when the checked count or weight is outside of the IN equivalence scale and a “positive” feedback tone when the checked count or weight is between TO and TU. Contact Parata Systems Customer Care if you require assistance configuring CheckWeigher. 4.3.2.b... - Page 95 Chapter 4 – Customization 4.3.3.a Statistics The Statistics submenu of an application allows you to enable statistical analysis of samples that you take while weighing. For example, you might want to determine the deviation in weight from a sample of 100 items, to determine the amount of manufacturing deviation for which you need to account when weighing smaller counts of the item.
- Page 96 AccuCount II User Guide Table 4-27: Statistics overview and settings (cont’d) Setting Function Recording [ Manual, Time interval, Loadchange, Loadchange+SampRange ] Manual Sample only taken when you press the STORE n soft key. Time interval The scale automatically takes a sample every nnn.n seconds, defined in “Time”...
- Page 97 Chapter 4 – Customization Statistics - Protocol submenu The Statistics - Protocol submenu allows you to enable or disable automatic printout of statistical sample data and to define the printout format for statistical sampling, including what to sample and what to output to the attached device or printer. Table 4-28 provides an overview of the Statistics - Protocol submenus and an explanation of its option, including all possible values for the option (default settings are shown in bold text).
- Page 98 AccuCount II User Guide Statistics - Protocol - Sample submenu Table 4-29: Statistic - Protocol - Sample options Setting Function Sample [ Off, On ] If enabled, every single sample in the current sample set is listed in the statistics log.
- Page 99 Chapter 4 – Customization Statistics - Protocol - Result submenu Table 4-30 provides an explanation of each Statistics - Protocol - Result function and option (default settings are shown in bold text). Table 4-30: Statistics - Protocol - Result settings and procedures Setting Function Position 1...
- Page 100 AccuCount II User Guide Table 4-30: Statistics - Protocol - Result settings and procedures (cont’d) Setting Function Position 3 [ Total, Table 4-31 ] any option as shown in Defines the information to output on position 3. Position 4 [ Mean,...
- Page 101 Chapter 4 – Customization Each of the 15 positions in Statistics - Protocol - Result may be assigned one of the options shown in Table 4-31. Table 4-31: Statistics - Protocol - Result Position option definitions Option Function Position not used (i.e., no output). Number of samples Outputs the number of samples that were taken at the time the Print key was pressed (which might not necessary be Max.
- Page 102 AccuCount II User Guide 4.3.3.b Min. sample weight The Min sample weight setting allows you activate the minimum sample weight restrictions in the scale’s Configuration menu for the application. Table 4-32 provides an explanation of the Min. sample weight option with all possible values (default setting is shown in bold text).
- Page 103 Chapter 4 – Customization 4.3.3.c Identification The Identification submenu allows you to define custom fields for the label that is printed when packaging items. For example, you might want to define an ID as “Compound Name” so that you can input it by pressing a soft key (see “Soft keys” on page 4-52).
- Page 104 (Electrically Erasable Programmable Read-Only Memory), which preserves the data even if the power adapter is disconnected from the scale. Contact Parata Systems Customer Care if you require assistance configuring the identification options. ID 1|2|3|4|5|6 ID 1, 2, 3, 4, 5, and 6 are custom fields that you can define and which will prompt you to provide values for print out.
- Page 105 Chapter 4 – Customization Table 4-34: Identification IDs settings (cont’d) Setting Function Data type [ Numeric, Alphanumeric ] Numeric The field can contain numbers only. Alphanumeric The field can contain letters and numbers. 120-0313 Rev 04 4–51...
- Page 106 AccuCount II User Guide 4.3.3.d Soft keys Figure 4-6: Soft keys common to the Weighing and Piece Counting applications 4–52 120-0313 Rev 04...
- Page 107 Chapter 4 – Customization Figure 4-7: Soft keys unique to the Piece Counting application You can assign soft key functions to any of 24 soft key positions, or you can set any of them to Off to remove them from a soft key assignment. If you skip a position, the scale software ignores it rather than making a blank soft key in the application.
- Page 108 AccuCount II User Guide Table 4-35: Soft keys functions (cont’d) Setting Function Clr Pcs Assigns the Clr Pcs button to the soft key, which allows you to clear your piece weight sample, to take another sample (e.g., to piece count a different item).
- Page 109 Chapter 4 – Customization Table 4-35: Soft keys functions (cont’d) Setting Function Placeholder 1|2|3|4|5 Assigns an empty space to the soft key (e.g., if you want one soft key on the left and one on the right and none in the middle four positions, then you assign placeholders 1, 2, 3, and 4 to soft keys 2, 3, 4, and 5).
- Page 110 AccuCount II User Guide 4.3.3.e Info fields You can define up to six pages of Info fields, which display under the capacity indicator. Table 4-36 provides an explanation of each Info field screen option and function. Table 4-36: Info fields settings and functions...
- Page 111 Chapter 4 – Customization Table 4-36: Info fields settings and functions (cont’d) Setting Function Clear page 1|2|3|4|5|6 To set all information fields on page 1, 2, 3, 4, 5, or 6 to Off: Press the Enter soft key to select Set. The scale displays the Clear page ? prompt.
- Page 112 AccuCount II User Guide Table 4-37: Info fields page position options (cont’d) Setting Function RefPcs Display the initial sample size that the user selected (i.e., 100). NOTE: Only available for the Piece Counting application. Tare Display the weight of the current tare, in grams.
- Page 113 Chapter 4 – Customization Table 4-37: Info fields page position options (cont’d) Setting Function Stat. Value n-3 Displays the value sampled and stored prior to “Stat. Value n-2” above. Min. sample weight Displays the minimal sample weight as defined in the scale’s Configuration.
- Page 114 AccuCount II User Guide 4.3.3.f Protocol The application’s Protocol allows you to define what information is output to up to 24 positions when you press the Print key. Part of that information, further, can come from Free HEX Lines that are defined only for the application in which you define them (i.e., when you select one to be in a Protocol position, it won’t use the...
- Page 115 Chapter 4 – Customization Table 4-38: Protocol settings and procedures (cont’d) Setting Function All positions OFF To set all of the positions in the application’s Protocol to Off: Press the Enter soft key to select Set. The scale displays the Set all Positions off? prompt. Press the Yes soft key to confirm the reset;...
-
Page 116: Rx-Check And Non-Rx-Check Settings
AccuCount II User Guide Table 4-39: Protocol Position option definitions (cont’d) Option Function ...: Net / App.Unit Outputs the number of items being weighed and the unit in use (PCS). NOTE: Only available for the Piece Counting application..: CheckW. Nom. - Page 117 Chapter 4 – Customization Table 4-40 provides an overview of the Main settings submenu and an explanation of its options, including all possible values for the options (default settings are shown in bold text). Table 4-40: Main settings overview and settings Setting Function Calibration interval...
- Page 118 AccuCount II User Guide 4.3.4.a Rx-Check and Non-Rx-Check Protocol The application’s Protocol allows you to define what information is output to up to 24 positions when you press the Print key. Part of that information, further, can come from Free HEX Lines that are defined only for the application in which you define them (i.e., when you select one to be in a Protocol position, it won’t use the...
- Page 119 Chapter 4 – Customization Table 4-41 provides an explanation of each Protocol function and option (default settings are shown in bold text). Table 4-41: Rx-Check and Non-Rx-Check Protocol settings and procedures Setting Function Position 1 [ Current value, Table 4-42 ] any option as shown in Defines the information to output on position 1.
- Page 120 AccuCount II User Guide Table 4-41: Rx-Check and Non-Rx-Check Protocol settings and procedures (cont’d) Setting Function Free HEX lines Defines the hexadecimal lines for use only with the application. Free HEX lines work the same as those described in “Protocol - Header/Footer - Free HEX lines”...
- Page 121 Chapter 4 – Customization Table 4-42: Rx-Check and Non-Rx-Check Protocol Position option definitions (cont’d) Option Function ID - ID 1|2|3|4|5|6 Outputs the (alpha)numeric value of identification 1, 2, 3, 4, 5, or 6. See “ID 1|2|3|4|5|6” on page 4-50..: Item counter Outputs the number of printouts that have been made (or the value that you have specified with the Set No.
- Page 122 AccuCount II User Guide Customization notes 4–68 120-0313 Rev 04...
-
Page 123: Chapter 5 - Maintenance
If liquid is spilled on the scale, the scale must immediately be disconnected from the electricity supply. The scale must be checked by Parata Systems Customer Care before you use it again. 5.1 Cleaning The scale must be treated carefully and cleaned regularly as it is a precision instrument. -
Page 124: Updating The Drug Database
AccuCount II drug database. To install the Drug Info Download tool Insert the AccuCount II Upload/Download Utilities CD into the optical drive of the PC from which you want to perform the update. Navigate to the Universal Download tool folder on the CD and double-click the 415-nnnn_nn DrugInfoDownload Installer.exe file to start the install process. - Page 125 Chapter 5 – Maintenance Optional: On the Select Start Menu Folder screen, click Browse to select a Start Menu folder in which to create shortcuts. Click Next. Optional: On the Select Additional Tasks screen, check Create desktop icon. Click Next. 120-0313 Rev 04 5–3...
- Page 126 AccuCount II User Guide 10 On the Ready to Install screen, verify your choices and then click Install. If you need to correct something, click the Back button to return to the appropriate screen and make changes. 11 Wait for the installation to complete.
-
Page 127: Preparing The Scale For The Drug Database Update
Preparing the scale for the drug database update You must connect the AccuCount II scale to a PC using the USB Type-A to USB Type-B cable that is provided with your scale before you can transfer a database to or from the scale. - Page 128 AccuCount II User Guide Expand the three drop-down lists to set the following interface parameters as described below: 1st: COM port of USB Serial Port (refer your PC’s Device Manager > Ports; or choose the highest-value COM port) 2nd: ...
- Page 129 Chapter 5 – Maintenance Click the Start transaction (“blue triangle”) button to begin loading the new database file onto the AccuCount II scale. The Drug Info Download tool begins to copy the new drug database to the scale. When the File transfer complete message appears, click OK.
-
Page 130: Backing Up The Drug Database To A Pc
AccuCount II User Guide 5.3 Backing up the drug database to a PC Another function included in the Drug Info Download tool is transferring the database stored in the scale back to a connected PC. In this way, a backup can be made at any time, of either the User or Standard libraries. - Page 131 Chapter 5 – Maintenance Expand the three drop-down lists to set the following interface parameters as described below: 1st: COM port of USB Serial Port (refer your PC’s Device Manager > Ports; or choose the highest-value COM port) 2nd: ...
-
Page 132: Restoring A Drug Database From A Pc
AccuCount II User Guide Click the Start transaction (“blue triangle”) button to begin saving the library to the PC. The Drug Info Download tool begins to copy the drug database from the scale. When the File transfer complete message appears, click OK. -
Page 133: Updating The Firmware
AccuCount II firmware. To install the Universal Download tool Insert the AccuCount II Upload/Download Utilities CD into the optical drive of the PC from which you want to perform the update. Navigate to the Universal Download tool folder on the CD and double-click the 415-nnnn_nn UniversalDownload Installer.exe file to start the install process. - Page 134 AccuCount II User Guide Optional: On the Select Destination Location screen, click Browse to select the path where you want to install the program. Click Next. Optional: On the Select Start Menu Folder screen, click Browse to select a Start Menu folder in which to create shortcuts.
- Page 135 Chapter 5 – Maintenance Optional: On the Select Additional Tasks screen, check Create desktop icon. 10 Click Next. 11 On the Ready to Install screen, verify your choices and then click Install. If you need to correct something, click the Back button to return to the appropriate screen and make changes.
-
Page 136: Preparing The Scale For The Firmware Update
5.5.2 Preparing the scale for the firmware update You must connect the AccuCount II scale to a PC using the USB Type-A to USB Type-B cable that is provided with your scale before you can update the firmware on the scale. -
Page 137: Installing The New Firmware On The Scale
Installing the new firmware on the scale Once the scale is connected to a PC that has the Universal Download tool, you can install the new firmware on the AccuCount II. To install new firmware to the scale On the PC, double-click the Universal Download tool icon on the Desktop or on the Start Menu. - Page 138 AccuCount II User Guide Select EP from the Select Device list. Click the Open Interface Settings Dialog (“gears”) button at the bottom of the Interface panel; then set the following interface parameters as described below: • Port: COM port of USB Serial Port •...
- Page 139 Chapter 5 – Maintenance Verify that the interface is working by typing BID in the Input field and pressing Enter. The scale should respond as shown in the Output field, below: Click OK to return to the Choose Device screen; then click the Switch to next Tab (“right arrow”) button to go to the next screen.
- Page 140 AccuCount II User Guide Click the Open or select a File (“folder with green arrow”) button. Navigate to the location of the new firmware, select the file, and then click Open. The Update EP section displays the file name, its size, and its location.
- Page 141 The scale’s display turns off during the download process. CAUTION Do not interrupt the tool and do not interrupt power to the scale during this process, or you will have to contact Parata Systems Customer Care to repair the scale! 120-0313 Rev 04...
- Page 142 12 On the Download Finished dialog, click the Go to the first tab button. 13 Close the Universal Download tool. NOTE Contact Parata Systems Customer Care, if you need to update the slide-in module or the languages file. 5–20 120-0313 Rev 04...
-
Page 143: Programming The Handheld Bar Code Scanner
5.6 Programming the handheld bar code scanner The included handheld bar code scanner comes preprogrammed for use with your AccuCount II. If the scanner should ever require reprogramming, however, you can follow the procedures in this section to reprogram it and test it. - Page 144 1234567890128 Close Notepad (don’t save changes). Once you have verified that the bar code scanner works correctly, disconnect it from your PC. Connect the bar code scanner to a USB port on the AccuCount II scale 5–22 120-0313 Rev 04...
- Page 145 Chapter 5 – Maintenance Maintenance notes 120-0313 Rev 04 5–23...
- Page 146 AccuCount II User Guide 5–24 120-0313 Rev 04...
-
Page 147: Chapter 6 - Troubleshooting
Chapter Troubleshooting This chapter provide symptoms and causes of common problems with the Parata AccuCount II scale, along with possible solutions. Symptom Possible causes and solutions Weight display does not light. Scale is not switched on. • Press the On/Off key Connection to power adapter interrupted. - Page 148 AccuCount II User Guide Symptom Possible causes and solutions Weight display fluctuates continuously. The draft is too strong at the scale location. • Remove the source of the draft. The surface on which the scale is standing is vibrating or varying.
- Page 149 Chapter 6 – Troubleshooting Symptom Possible causes and solutions The display flashes continuously during The draft is too strong at the scale location. calibration. • Place the compounding plate on top of the draft shield while calibrating, to minimize the effects of the draft.
- Page 150 AccuCount II User Guide Troubleshooting notes 6–4 120-0313 Rev 04...
Need help?
Do you have a question about the AccuCount II and is the answer not in the manual?
Questions and answers
showing- no slide in manual
What does no slide in module error message mean?
where can i purchase an attachable scanner