
Subscribe to Our Youtube Channel
Summary of Contents for Metz moover
- Page 1 Metz moover Metz moover Original-Betriebsanleitung Original operating manual www.metz-moover.de www.metz-moover.de...
- Page 2 Metz moover. To begin with, we would like to provide you with some important informa- tion on your new Metz moover. This will help you use the technology better The instructions apply to the Metz moover indicated on the envelope that and avoid risks.
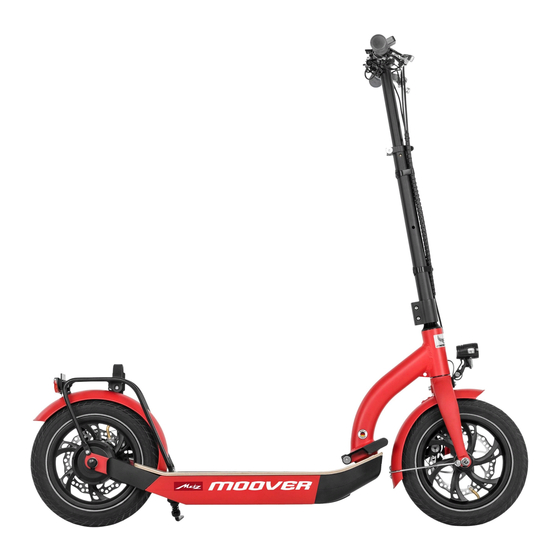
- Page 3 If you unfolded this page while reading, you will recognise the component that you are currently gathering information about. Components Handlebar unit (see zoom on next image) Brake lever rear- wheel brake Steering column clamp with quick clamp Bell Steering column Brake lever front- Brake lever front- wheel brake...
- Page 4 Metz moover. Protect yourself and others by driving in a safe and responsible manner. Please note that with a Metz moover you are signi cantly faster than with a scooter without an electric drive. Other road uses may judge this incorrect- ly.
-
Page 5: Table Of Contents
(whether in whole Folding mechanism or in part, in print or by electronic means) is Replacement of components Folding the Metz moover together only permitted with the prior written permis- Ban on tuning sion of the Veidt Anleitungen company. -
Page 6: Safety Instructions
The correct tightening Before your rst ride on the Metz moover, it is im- instructions that you should pay torque is either illustrated on the perative that you read through the chapters on particular attention to. -
Page 7: Information On Electrics And Electronics
Remove all packaging. cal system. 2. Loosen the hook-and-loop fastener of the transport safety device. If your Metz moover does drive o immediately although an error mes- sage was not displayed, check whether both brake levers are in the home... - Page 8 To start the system, press the button until A = B the moover switches on. This is located on the frame to the le above the front wheel. 11. Tighten both of the other screws uni- formly and alternately with a torque...
-
Page 9: Before The Rst Ride
Before the rst ride Ensure that you Metz moover is ready for operation Carefully read through all warnings and check the following points: and information in these operating • The height, fastening, alignment and maximum instructions prior to operating the pullout of the handlebar column Metz moover. -
Page 10: Before Every Ride
If you have fallen Check the tyres and rims. Look for damages, tears Regularly check the basic function of your Metz Check the entire Metz moover for changes a er a and deformations, penetrated foreign objects, e.g. moover (see page 5 “Before your rst jour- fall. -
Page 11: Statutory Provisions
The minimum age to drive a Metz operating an electrically-assisted scooter. moover is 14. The Metz moover can only be used on public roads if it corresponds to the respectively applicable requirements and if the driver has the necessary driver’s licence. -
Page 12: Initial Start-Up
. • Check the correct t of the quick clamp, even if the Metz moover was parked unattended even for a short period. • In a closed condition, the quick-release lever must lie as close as possible to the steering column. -
Page 13: Maximum Pullout Height
Maximum pullout height Minimum pullout height Only pull the steering column up- The lowest position is achieved once wards until the safety bolts click into the safety bolts snap into place in Using the quick clamp to adjust the handlebar height place in the stop position. -
Page 14: Folding Mechanism
Folding mechanism Stand in front of the Metz moover and open the quick clamp on the steering column 2. Press the safety bolts in and push the steer- The Metz moover can be folded to- ing column downwards into the lower stop gether for storage and better trans- position. - Page 15 Stand in front of the Metz moover and open the quick clamp on the steering column 2. Press the safety bolts in and push the steer-...
-
Page 16: Unfolding The Metz Moover
5. Hold the steering column of the Metz moover. Tilt the steering column towards the rear wheel Unfolding the Metz moover Pull and hold the cover of the clamping lever until it is positioned on the luggage rack. in the direction of the front tyres. By do-... - Page 17 2. Place it near your Metz moover. Pull the steer- 3. Pull the clamping lever forward without ap- ing column foward/up until the front wheel plying much force until just before its end po- is positioned rmly on the ground and the sition.
-
Page 18: Electrical System
Electrical system Display The following components make up the electrical system: • Display Switching the display on and o • Battery and charger • Motor The display is automatically started Switching on the electrical system once the electrical system has been switched on. -
Page 19: Battery
• Avoid a total discharge of the battery. This can escaping the battery, re and explosion. Shows the battery charge status. • Do not apply excessive force on to the moover. If result in irreversible cell damage. 10 bars = battery is fully charged the battery is deformed, it may damage the inte- •... -
Page 20: Battery Charger
• Switch the electrical system o prior to charging moover with a charger status of 40 – 60%. This re- the battery. Please note that in the event of a sults in a slower ageing of the battery than if it is •... -
Page 21: Motor
3 km/h, the drive will be activated. The degree of The motor of the Metz moover is integrated in the support depends on the position of the hand rear wheel. It is a brushless direct current motor pedal. -
Page 22: Start-Up
Start-up Switching the driving modes Indicating the change of direction Switch on the moover. Get it ready to start. The • Hold both grips and pull the brake lever. normal driving display must be visible. The • First of all, only place the foot of your standing display must show 0 km/h. -
Page 23: Safe Steering
Never lean too far into the corner. There is a risk at least 3 km/h in the standard mode that the Metz moover may lose grip and the rear Carefully increase the speed. First or 2 km/h in the walking pace mode. If it is wheel breaks away. -
Page 24: Parking
The Metz moover has integrated parking support. The spotlight must be set so that the centre of the www.metz-moover.de. The moover can be parked by easily folding it in light cone is 5 metres in front of the outlet from the and out with your foot. -
Page 25: Service And Maintenance
• If you clean the Metz moover, make sure that lection. Never repair the vehicle yourself. you do not touch or connect to any of the con- Screws and torque wrench tacts as a result of it. -
Page 26: Bolted Connections
Knurled quick clamp screw 23.0 32.0 39.0 Regularly examine the tyres of your easily Metz moover as well. The permissible hand-tight M 10 46.0 64.0 77.0 minimum and maximum pressure is (quick indicated on the side of the tyres. Please com-... -
Page 27: Brakes
This re- function and compliance with warranty claims: quired specialised knowledge and special • Clean your Metz moover a er each journey and tools. Allow a specialist dealer to perform all check it for damages. necessary work on your Metz moover. Work •... - Page 28 Up to/ a er 200 1st year 2nd year 3rd year annually annually annually annually annually annually annually Functional test of the lighting and bell, replace if necessary Functional test of all switches and levers Functional test of the display including the readouts Test the handles for tight t and damages, replace if necessary...
- Page 29 Up to/ a er 200 1st year 2nd year 3rd year annually annually annually annually annually annually annually Check cable harness and cabling for damage Check battery charger for function Check checking function Check frame for damage (e.g. tears) Check anti-slip strips on the step Check tight t and wear and tear of the folding mechanism;...
-
Page 30: Transport
With the car Please note that the components of the Metz You can transport your Metz moover with moover are subject to a higher degree of wear and Working on the Metz moover re- the car. Thanks to the folding mechanism,... -
Page 31: Replacement Of Components
Mudguard, front Metz according to Category 1/2 components colour Category 1 The following components of the Metz moover can only be replaced with original components. All Mudguard, rear Metz according to Component that may only be replaced following the approval of the vehicle manufacturer/system provider components can be purchased directly at Metz. -
Page 32: Ban On Tuning
Possible legal consequences: and dynamic cornering require tyres that are • Stands • The Metz moover may become liable to manda- • Handles with screw clamping approved for use for the e-bike. In doing so, it tory registration and insurance. All legal require-... -
Page 33: Technical Data
6. We ask you to return defective devices togeth- er with the purchase receipt either via the spe- Range: cialist dealer or directly to the company Metz 15 – 20 km / with a driver’s weight of 85 kg and a mecatech GmbH - Central Customer Services new, fully charged battery - Ohmstraße 55, 90513 Zirndorf, Germany in... -
Page 34: Environmental Tips
General care and cleaning agents 8. Improper handling and interventions by the buyer or third parties cause warranty obliga- During the care and cleaning of your Metz moover tions and all other claims to expire. The war- please make sure your protect the environment. -
Page 35: Inspections
Inspections Service intervals _____________________________________________________________________________________________________________________ Handover inspection: Inspection (up to/a er 200 km) Inspection (1st year) Completed on: Completed on: Completed on: ___________________________________ ___________________________________ ___________________________________ Mileage: Mileage: ___________________________________ ___________________________________ ___________________________________ ___________________________________ ___________________________________ Date, signature Merchant stamp Date, signature Merchant stamp Date, signature Merchant stamp Inspection (2nd year) Inspection (3rd year) - Page 36 Inspection (annual) Inspection (annual) Inspection (annual) Completed on: Completed on: Completed on: ___________________________________ ___________________________________ ___________________________________ Mileage: Mileage: Mileage: ___________________________________ ___________________________________ ___________________________________ ___________________________________ ___________________________________ ___________________________________ Date, signature Merchant stamp Date, signature Merchant stamp Date, signature Merchant stamp Inspection (annual) Inspection (annual) Inspection (annual) Completed on: Completed on:...
-
Page 37: Handover Documentation C5
Handover documentation You Metz moover can be handed over in di erent assembly conditions. c Test drive of the mechanic/acceptance c Instructing the customer about the moover Depending on where you purchases it, it is important to rst carry out the as- sembly and adjusting work. -
Page 38: Metz Moover Identi Cation C6
Metz moover identi cation Manufacturer Metz mecatech Brand Metz Model moover Colour _______________________ Frame number _______________________ Special equipment _______________________ _______________________... - Page 39 Own comments Please unfold! Observe the Metz moover identi cation and hando- ver document...
- Page 40 Product identi cation sticker Metz mecatech GmbH Ohmstraße 55 90513 Zirndorf Germany Tel.: +49-911-9706-175...
Need help?
Do you have a question about the moover and is the answer not in the manual?
Questions and answers