
Summary of Contents for EUROIMMUN Medizinische Labordiagnostika AG MERGITE!
- Page 1 Instructions for use MERGITE! Wash system for Titerplane slides MERGITE! 10, MERGITE! 50 EUROIMMUN Medizinische Labordiagnostika AG • 23560 Lübeck (Germany) • Seekamp 31 • Tel. +49 451 5855 -0 • Fax +49 451 5855 -591...
- Page 3 The MERGITE! system provides you with efficient support for processing IFA incubations using the Titerplane technique. MERGITE! automatically performs the necessary washing processes on the slides. Up to 50 substrate fields are washed simultaneously but separately. This ensures a quick washing process without risk of cross-contamination.
- Page 5 Document number ......... YG_0064_A_UK_C04 Version ................01/08/2018 Software version ..............4.5.0.X Translation of the original instructions for use Print format: DIN A4 Issued by: EUROIMMUN Medizinische Labordiagnostika AG Seekamp 31 D-23560 Lübeck Phone: +49 (0) 451 5855-0 Fax: +49 (0) 451 5855-591 Internet: www.euroimmun.de...
-
Page 7: Table Of Contents
Contents Contents Introduction ........... 12 About these instructions for use ........... 12 Changes to this manual ..............12 Meaning of the safety information indicated ........ 13 Symbols ................... 14 Guidelines, laws, standards ............17 Warranty ..................17 Limitation of liability ............... 17 Transport and storage requirements .......... - Page 8 Contents Layout of the safety labels on the product ........24 In the event of danger ..............24 Foreseeable incorrect use ............. 24 Environmentally hazardous substances/materials ...... 25 Delivery contents and accessories ....26 MERGITE! 10 ................26 3.1.1 Scope of delivery MERGITE! 10 ..........26 3.1.2 Accessories MERGITE! 10 ............
- Page 9 Contents Installation and start-up ........ 36 Operation ............37 Preparing for washing ..............37 Preparing the containers ............37 Switching the device on ............38 Washing ................... 39 Washing Titerplane slides ............40 Supporting the Titerplane incubation technique with MERGITE! ..................45 Carrying out Titerplane incubation with MERGITE! ....
- Page 10 Contents Exporting an assay ..............60 Deleting an assay ..............60 Draining MERGITE! ................. 62 Draining the liquid system of the device ........62 Maintenance ..........63 Maintenance overview ..............65 8.1.1 Maintenance at the start of work ..........65 8.1.2 Maintenance at the end of work ..........
- Page 11 Contents Troubleshooting ..........74 Switching on the device ..............74 Liquid system .................. 74 Power failure ................... 76 10 Technical data ..........77 10.1 Mechanical data ................77 10.2 Environmental conditions .............. 77 10.3 Electrical and operating data ............78 11 Glossary ............
-
Page 12: Introduction
1 Introduction 1 Introduction The present instructions for use are intended for the user and support safe and efficient operation of MERGITE!. This document applies for all model versions, is part of the system and must therefore be stored for the user in its operating environment. -
Page 13: Meaning Of The Safety Information Indicated
1 Introduction 1.3 Meaning of the safety information indicated The safety information in this document are clearly highlighted. W ARNI N G TYPE AND/OR SOURCE OF HAZARD Possible consequences if the instructions are not observed. Avoidance of hazard. > WARNING – TYPE OF HAZARD ALTERNATIVE: TYPE OF HAZARD Possible consequences if the instructions are not observed. -
Page 14: Symbols
1 Introduction 1.4 Symbols Various symbols can be found on the device, packaging, in the software and in the instructions for use. Warning symbols Warning symbols warn you of hazards. Please observe the associated safety information. Symbol Explanation General hazard sign Warning of dangerous biological substances Warning of dangerous electric voltage Tab. - Page 15 1 Introduction Symbols on the device and the packaging Symbol Explanation On/Off switch device Manufacturer Protect from moisture Fragile Permissible temperature range for storage and transport Chapter 10.2 Environmental conditions, p. 77 Permissible humidity for storage and transport Chapter 10.2 Environmental conditions, p. 77 storage This side up Tab.
- Page 16 1 Introduction Symbols on the type plate The type plate is located on the back of the device. Fig. 1 Type plate (exemple) Symbol Explanation Manufacturing date Manufacturer Main fuse CE marking (declaration of conformity that the product complies with the applicable European guidelines) CSA marking (declaration of conformity that the product complies with the applicable guidelines in Canada and the US)
-
Page 17: Guidelines, Laws, Standards
1 Introduction 1.5 Guidelines, laws, standards Information on complying with the regulations on device safety pursuant to the EC declaration of conformity. MERGITE! was developed and manufactured for in vitro diagnostics in accordance with the current state of the art in compliance with the requirements in EC Directive 98/79/EC The product has been tested for compliance with the relevant standards for IVD laboratory devices, EN 61010-1 (IEC 61010-1) and... -
Page 18: Transport And Storage Requirements
1 Introduction This liability limitation does not apply to damages arising from death, physical injury or damage to health, if a defect is fraudulently concealed, if a guarantee of quality is not observed, or to liability according to the Product Liability Act. EUROIMMUN AG is not liable for consequential damages, lost profit, interruption of operation or loss of programs or electronic data. -
Page 19: Disposal
1 Introduction 1.9 Disposal EU guideline on Waste Electrical and Electronic Equipment – (WEEE) 2012/19/EC The device may not be disposed of with standard household rubbish. Please contact EUROIMMUN AG in order to dispose of the device. RoHS/Reach The products and processes of EUROIMMUN comply with the following guidelines with regard to the labelling of substances as well as the restriction of use of certain hazardous substances: ... -
Page 20: Safety
2 Safety 2 Safety 2.1 Intended purpose MERGITE! is an in vitro diagnostic device that standardizes and automates the washing processes of indirect immunofluorescence ™ tests using the Titerplane technique. Carriers support the handling of primary samples on glass plates, the incubation and the mounting of the slides. -
Page 21: Prerequisites For The Safe Use Of The Device
2 Safety Please observe all the safety instructions, warnings and precautionary measures included on the device and in these instructions for use. Pay attention to all warning symbols on the device and accessories. The device must only be used in accordance with its intended use. - Page 22 2 Safety Biological safety The device uses biological substances and reagents. W ARNI N G BIOLOGICAL SUBSTANCES AND REAGENTS Potential risk of infection/skin irritation Avoid skin/mucous membrane contact with the biological > substances and reagents used. Wear suitable protective clothing (protective gown, protective >...
-
Page 23: Instructions For Reliable Operation Of The Device
2 Safety Fig. 2 Slide carrier on carrier plate for storing 2.3.4 Instructions for reliable operation of the device Note The device must be placed on a stable and level surface. > Always set up the containers for distilled water and wash buffer >... -
Page 24: Layout Of The Safety Labels On The Product
2 Safety 2.5 Layout of the safety labels on the product The warning symbols on the device refer to a hazard. Replace damaged or lost warning symbols. Fig. 3 Safety indicators Symbol Description Biohazard 2.6 In the event of danger In the event of danger, unplug the mains plug in order to disconnect the device from the power supply. -
Page 25: Environmentally Hazardous Substances/Materials
2 Safety 2.8 Environmentally hazardous substances/materials Dispose of the used materials, e.g. slides, glass plates or cover glasses and the waste liquid in accordance with the statutory regulations for hazardous biological substances. The glass plates are suitable for multiple use. For the disinfection, cleaning and regeneration of the glass plates properties, please refer to the instructions for use General Instructions for EUROIMMUN indirect immunofluorescence tests (FI_0001_A_UK_CXX). -
Page 26: Delivery Contents And Accessories
3 Delivery contents and accessories 3 Delivery contents and accessories The actual delivery contents can deviate from the information described here in the case of special models, additional ordering options having been used, or due to the latest technical changes. 3.1 MERGITE! 10 3.1.1 Scope of delivery MERGITE! 10 Number... -
Page 27: Accessories Mergite! 10
3 Delivery contents and accessories 3.1.2 Accessories MERGITE! 10 Order no. Article ZZ 9999-0101-18 Titerplane set for the incubation of slides with 10 fields The set includes 1 x MERGITE! slide carrier 1 x MERGITE! cover glass carrier 1 x MERGITE! carrier plate ZG 085e-0101-004 Liquid container, 5 litres Universal 5 litre container, accessory for MERGITE! -
Page 28: Accessories Mergite! 50
3 Delivery contents and accessories 3.2.2 Accessories MERGITE! 50 Order no. Article ZZ 9999-0101-19 Titerplane set for the incubation of slides with 50 fields The set includes 1 x MERGITE! slide carrier 1 x MERGITE! cover glass carrier 1 x MERGITE! carrier plate ZG 085e-0101-004 Liquid container, 5 litres Universal 5 litre container, accessory for MERGITE! -
Page 29: Supplies
3 Delivery contents and accessories 3.4 Supplies Order no. Article Wash buffer ZF 1100-1000 Salt for PBS, pH 7.2 (package) (dissolve in 1 litre distilled water) ZF 1110-0102 Tween 20 (2 ml as addition to 1 litre PBS) ZF 1110-0120 Tween 20 (20 ml as addition to 10 litres PBS) ZF 1110-0140... -
Page 30: Design And Function
4 Design and function 4 Design and function 4.1 Description of the functions Fig. 4 Schematic representation of the washing process Number Description Substrate field on the slide Directed liquid flow (wash buffer) Slide Wash basin washing column The MERGITE! washing technology allows for simultaneous and self- contained washing of up to 50 substrate fields on a Titerplane slide. -
Page 31: Device Overview
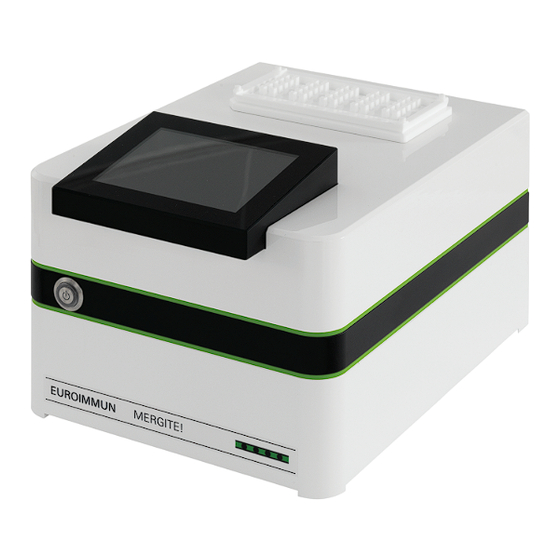
4 Design and function 4.2 Device overview Fig. 5 Device overview (Example MERGITE! 10) Number Description Wash basin cover On/Off switch The On/Off switch switches the device to the operating state or idle state. Touch display The device is operated via the touch display. Wash basin The wash basin is for washing the slides. -
Page 32: Connection Panel
4 Design and function 4.2.1 Connection panel Fig. 6 Connection panel MERGITE! Number Description Hose connector for waste liquid container (Out) Sensor connector for waste liquid container (Out) Hose connector for container with distilled water (In 1) Sensor connector for container with distilled water (In 1) Hose connector for wash buffer container (In 2) Sensor connector for wash buffer container (In 2) Connector Service (USB‑B) for Technical Service... -
Page 33: Container With Fill Level Monitoring
4 Design and function 4.2.2 Container with fill level monitoring Each container is equipped with a level detection system which monitors the fill level in the container. Before starting a washing or rinsing process, check that there is sufficient wash buffer, distilled water and capacity in the container for waste liquid. -
Page 34: Carriers
4 Design and function 4.2.3 Carriers Carrier plate The carrier plate takes up a glass plate. Carrier plates are available in 10-field or 50-field format. A carrier plate that is assembled with a glass plate is called a reagent tray. Fig. -
Page 35: Cover Glass Carrier
4 Design and function Number Description Positioning aid for placement on the reagent tray or cover glass carrier Anti-twist protection for placement on the reagent tray or cover glass carrier Position number Cover glass carrier The cover glass carrier takes up the cover glasses. Cover glass carriers are available in 10-field or 50-field format. -
Page 36: Installation And Start-Up
5 Installation and start-up 5 Installation and start-up The MERGITE! system is installed and started up by EUROIMMUN AG Technical Customer Support. The following figure shows you the correct connection of the system components. Fig. 11 Connection diagram Number Description Connector for waste liquid container Connector for container with distilled water Connector for wash buffer container... -
Page 37: Operation
6 Operation 6 Operation 6.1 Preparing for washing These instructions describe the steps to be taken before you can use the device to wash the slides. Prerequisite: Chapter 5 Installation and start-up, p. 36 Preparing the containers Fig. 12 Level of the containers 1) Fill a cleaned container with distilled water. -
Page 38: Switching The Device On
6 Operation Note Always set up the containers on the same level as MERGITE! > Fig. 12, p. 37). Always screw the container cap completely onto the container so > that the fill level detection is not impaired. Make sure that the container labels are clearly visible at the >... -
Page 39: Washing
6 Operation Fig. 14 Start the rinsing process 5) Rinse the device by pressing START 6) Wait until the rinsing process is completed. You can repeat the rinsing process if needed. Pressing activates the START NO view ( Fig. -
Page 40: Washing Titerplane Slides
6 Operation Washing Titerplane slides Fig. 15 START view 7) Press WASH Note Before use of the wash buffer, the device checks whether its standing time in the liquid system has been exceeded Chapter 6.5 Rinsing with the wash buffer, p. 51). In this case you will be prompted to rinse the liquid system again. - Page 41 6 Operation 9) Place the loaded slide carrier on the wash basin. Fig. 17 Place slide carrier on the wash basin Note Make sure that the slide carrier is placed correctly on the wash > basin. Slides with 10 substrate fields are always placed on the slide >...
- Page 42 6 Operation 11) Press START Note The device automatically checks the fill level of the container. If the fill levels are not sufficient for the washing process, you are automatically prompted to change or refill the corresponding container. Chapter 6.4 Filling or draining the containers, p. 49 The washing of the slides begins.
- Page 43 6 Operation Fig. 20 Aspiration is carried out A message about the completion of the wash process appears. Fig. 21 Remove slide carrier 13) Remove the slide carrier from the wash basin. Note A washing process that is not performed according to the assay >...
- Page 44 6 Operation Fig. 22 Remove slide carrier from the wash basin The wash basin is rinsed automatically and the wash columns are refilled with wash buffer. Fig. 23 Post rinse The assay selection view appears. 44/84 Instructions for use • MERGITE!
-
Page 45: Supporting The Titerplane Incubation Technique With Mergite
6 Operation Fig. 24 View for selecting an assay (example) MERGITE! is ready for the next wash process. 6.3 Supporting the Titerplane incubation technique with MERGITE! In addition to an automated washing process, the MERGITE! system provides different carriers that support you in handling slides, glass plates and the mounting steps. - Page 46 INCORRECT INCUBATION The use of the wrong type of glass plates leads to faulty incubations, which can lead to incorrect analysis results. Use only the unframed MERGITE!Titerplane glass plates. > Fig. 25 Insert glass plate into carrier plate 2) Label the slides accordingly (e.g. 1 - 5).
- Page 47 6 Operation Fig. 28 Place the slide carrier on the reagent tray The simultaneous reaction of the substrate fields on the slides begins. 6) Prepare a second glass plate in a carrier plate during the incubation period, and drop the fluorescence marker (FITC) onto the fields.
- Page 48 6 Operation Fig. 30 Place the slide carrier on the reagent tray The simultaneous reaction of the substrate fields on the slides begins. 9) During the incubation period, place the cover glasses in the cover glass carrier. Fig. 31 Place the cover glasses in the cover glass carrier 10) Drop the mounting medium onto the cover glasses in the cover glass carrier.
-
Page 49: Filling Or Draining The Containers
6 Operation Fig. 33 Place the slide carrier on the cover glass carrier The cover glasses adhere to the slides. 13) Remove the slide carrier from the cover glass carrier. 14) Remove the slides from the slide carrier. 15) Dry off the back and all 4 edges of the slides with a paper towel. 16) Check the correct position of the cover glasses on the slides. -
Page 50: Filling The Container For Distilled Water
6 Operation WARNING – PRESSURE COMPENSATION HOLE The caps of the containers have a pressure compensation hole. Excess pressure in the waste liquid container may impair the discharge of the waste liquid. Do not seal the pressure compensation hole. > 1) Place a paper towel at the ready to mop up any dripping liquid residues. -
Page 51: Rinsing With The Wash Buffer
6 Operation Note The wash buffer used in the container should not be used for > more than 1 week. We recommend producing new wash buffer at the start of the working week. Ensure that as little air as possible is introduced into the wash >... - Page 52 6 Operation Fig. 34 RINSE view 3) Press , to rinse with wash buffer. START The rinsing process begins. Fig. 35 Rinsing is carried out 4) Afterwards you will be asked if you want to repeat the rinsing. 52/84 Instructions for use •...
- Page 53 6 Operation Fig. 36 Rinsing completed Repeat the rinse by pressing , as long as foam build-up YES can be seen on the wash columns. Press , to end the rinsing. The liquid system has been rinsed with wash buffer. Instructions for use •...
-
Page 54: Aspirating Wash Buffer Residue
6 Operation 6.6 Aspirating wash buffer residue If needed, you can manually aspirate the wash buffer residue from the wash basin. Aspirating wash buffer residue 1) Open the PURGE view. START > > MAINTENANCE PURGE Fig. 37 PURGE view 2) Press , to aspirate the wash buffer. -
Page 55: Switching The Device Off
6 Operation 6.7 Switching the device off Switching the device off Turn off the device if you will not use it for an extended time (e.g. at the end of the work day). In the switching-off process, the liquid system is automatically rinsed and filled with distilled water in order to prevent salt deposits. -
Page 56: Administration
7 Administration 7 Administration Menu DEVICE MANAGER: Start > Fig. 39 DEVICE MANAGER view Function Description LANGUAGE Set system language (German, English or Chinese) SOUND Settings for audio signals of the device: Volume for audio signals • • Playing a test audio signal •... -
Page 57: Information About The Device
7 Administration 7.1 Information about the device Fig. 40 DEVICE INFO view The colours are defined in the following table. Title Description Firmware Version number of the installed firmware. Monthly Monthly maintenance performed in the last 30 days. Maintenance Monthly maintenance must be performed. The number of days since the last maintenance is indicated. -
Page 58: Assay Manager
7 Administration 7.2 Assay Manager In the ASSAY MANAGER you manage the washing programs. You can save up to 6 washing programs (assays) on the device. Fig. 41 ASSAY MANAGER view Function Description IMPORT Save assays from the flash drive on the device. EXPORT Save assays from the device on the flash drive. -
Page 59: Importing An Assay
7 Administration Importing an assay 1) Connect the flash drive with the assay files at the Assay connector of the device. 2) Select in the ASSAY MANAGER view. IMPORT Fig. 42 IMPORT ASSAY view The assays located on the flash drive are displayed on the left side of the screen. -
Page 60: Exporting An Assay
7 Administration Exporting an assay 1) Press in the ASSAY MANAGER view. EXPORT Fig. 43 EXPORT ASSAY view The assays located on the device are displayed. 2) Select the assays you want to export or press SELECT ALL 3) Press EXPORT ... - Page 61 7 Administration The assays located on the device are displayed. 2) Select the assays you want to delete or press SELECT ALL 3) Press DELETE 4) Confirm the deleting process with The selected assays are deleted from the device. 5) Press to complete the deleting process.
-
Page 62: Draining Mergite
7 Administration 7.3 Draining MERGITE! Draining the liquid system of the device The liquid system must be drained for transport or storage of the device. For this, the liquid system is rinsed with distilled water first, and then a rinsing process without replenishment of the liquid is performed. -
Page 63: Maintenance
8 Maintenance 8 Maintenance Regular maintenance activities are required to ensure the correct operation of MERGITE!. The maintenance activities indicated below are intended for completion by the user and include cleaning, replacing consumables and checking certain system components as part of the daily, weekly and monthly maintenance. - Page 64 8 Maintenance Maintenance menu: Start > MAINTENANCE Fig. 45 MAINTENANCE menu Function Description RINSE Rinsing the system with wash buffer PURGE Purging wash buffer residues out of the wash basin FULL RINSE Thorough rinsing of the system with wash buffer (duration of approx.
-
Page 65: Maintenance Overview
8 Maintenance 8.1 Maintenance overview 8.1.1 Maintenance at the start of work When switching on the device, the liquid system is automatically rinsed with wash buffer. 8.1.2 Maintenance at the end of work When switching off the device, the liquid system is automatically rinsed and filled with distilled water. -
Page 66: Maintenance Schedule
8 Maintenance 8.2 Maintenance schedule Maintenance step Maintenance Start of work End of work Weekly Monthly Rinsing the liquid system with wash buffer Switching the device on , p. 38 automatic Disinfection of the wash basin Switching the device off, p. 55 Rinsing the liquid system with distilled water Switching the device off, p. -
Page 67: Maintenance And Cleaning Tasks
8 Maintenance 8.3 Maintenance and cleaning tasks The maintenance and cleaning tasks are detailed in the following. Filling the system with distilled water Turn off the device if it is anticipated that the device will not be used for an extended time (e.g. overnight). In this case the liquid system is filled with distilled water in order to prevent salt deposits. - Page 68 8 Maintenance Fig. 46 Connect container with SETUP CLEAN (1:5) 4) Exchange the containers with distilled water (In 1) and wash buffer (In 2) for containers with SETUP CLEAN (1:5). Have a paper towel at the ready on which to place the container cap and to mop up any dripping liquid residues.
- Page 69 8 Maintenance Fig. 48 Connect distilled water (In 1) and wash buffer (In 2) 6) Replace the containers with SETUP CLEAN (1:5) with the containers with distilled water (In 1) and wash buffer (In 2). Have a paper towel at the ready on which to place the container cap and to mop up any dripping liquid residues.
-
Page 70: Cleaning/Disinfection Of The Containers
8 Maintenance Fig. 49 Monthly maintenance completed 8) Press OK The liquid system is cleaned and filled with distilled water. The MAINTENANCE view appears. 8.3.2 Cleaning/disinfection of the containers Regular cleaning and disinfection of the container is necessary to remove dirt particles and biological deposits. -
Page 71: Cleaning The Device And Accessories
8 Maintenance 8) Cleaning and/or disinfection o Weekly disinfection of the container Wet the inner surface of the emptied container with a ® disinfectant (e.g. Schülke Mikrozid ). Let the disinfectant act for the length of time recommended by the manufacturer. o Monthly cleaning and disinfection of the container Fill the container with a suitable cleaning and disinfecting ®... -
Page 72: Cleaning The Device Surfaces
8 Maintenance ATTENTION – DAMAGE TO SURFACES Improper cleaning agents (and in particular acetone) can damage the surfaces. Use suitable acetone-free, ethanol-based cleaners and > ® disinfectants for laboratories and clinics such as Meliseptol New Formula. Cleaning the device surfaces 1) Switch off the device. -
Page 73: Preparing The Container With Setup Clean (1:5)
8 Maintenance Preparing the container with SETUP CLEAN (1:5) WARNING STRONGLY ALKALINE CLEANING SOLUTION EUROIMMUN SETUP CLEAN is corrosive when in contact with skin or eyes. Wear protective gloves, gown and goggles. > Prepare the working solution for the container as follows: 500 ml EUROIMMUN SETUP CLEAN ... -
Page 74: Troubleshooting
9 Troubleshooting 9 Troubleshooting This chapter will present solutions for technical problems in the device. If these do not solve the problem, please contact the EUROIMMUN AG Technical Customer Support. 9.1 Switching on the device Effect Cause and troubleshooting Interrupted power supply Device can’t be switched on. - Page 75 9 Troubleshooting Effect Cause and troubleshooting Valves in the inlet defective, hose/seal in the interior of the device Individual wash columns of the damaged wash basin do not convey liquid Contact Technical Customer Support. or convey an inadequate Chapter 1.10 Customer Support, p. 19 amount of liquid.
-
Page 76: Power Failure
9 Troubleshooting Effect Cause and troubleshooting Slide washed with distilled water Cell resolution, fluorescence patterns are no longer If slides are accidentally washed with distilled water, cell cleavage may occur, detectable. for example. • Check the contents of the wash buffer container. Rinse the liquid system with wash buffer. -
Page 77: Technical Data
10 Technical data 10 Technical data 10.1 Mechanical data Dimensions MERGITE! (width × depth × height) ........approx. 250 × 381 × 207 mm Weight MERGITE! 10 (not including accessories) ........... approx. 6,2 kg MERGITE! 50 (not including accessories) ........... approx. 6,0 kg 10.2 Environmental conditions The system is only suitable for indoor use (laboratory environment) on a fixed place. -
Page 78: Electrical And Operating Data
10 Technical data 10.3 Electrical and operating data External AC adapter (mains adapter) Only use the provided mains adapter and mains cable. AC/DC mains adapter ....autoselection 100-240 V AC / 47 - 63 Hz / DC 24 V, 100 W Device Supply voltage ...................... -
Page 79: Glossary
11 Glossary 11 Glossary Term Meaning Indirect immunofluorescence assay ™ Titerplane technique Process in which all BIOCHIPs of the slide are simultaneously in contact with the liquid and the reactions are started Tab. 18 Glossary Instructions for use • MERGITE! 79/84... - Page 84 YG_0064_A_UK_C04 Version: 01/08/2018 EUROIMMUN Medizinische Labordiagnostika AG • E-Mail euroimmun@euroimmun.de • Internet www.euroimmun.de...
Need help?
Do you have a question about the MERGITE! and is the answer not in the manual?
Questions and answers