Table of Contents
Advertisement
Available languages
Available languages
Quick Links
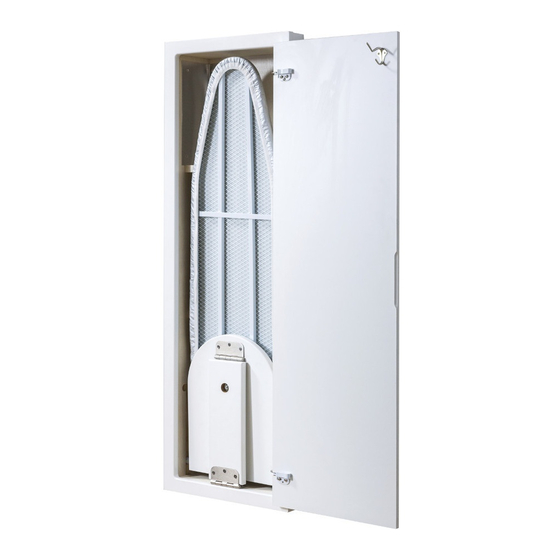
BUILT-IN IRONING CENTER
READ AND SAVE THESE INSTRUCTIONS
WARNING
1. Do not place EXCESSIVE WEIGHT (weight should not exceed 30
pounds) on the ironing board when opened as it is designed to accept
normal ironing use only.
2. Do not use ironing board surface as a shelf or as a child diaper-changing
surface.
3. To avoid getting pinched or otherwise injured, keep fingers/hands clear
of moving parts.
4. Allow iron to cool down before storing in the cabinet.
5. Empty water reservoir and turn off steam action prior to storing iron.
6. Unplug iron cord from outlet when storing, and use care to avoid pinch-
ing the electrical cord.
7. Keep ironing board stored and door closed when not in use.
8. Do not allow children to play with, on, or around the Ironing Center.
TOOLS NEEDED
• Tape measure
• Phillips screwdriver
• Drill with 3/32" dia. bit
• Stud finder
INSTALLATION
1. Determine where to install. (Fig 1)
The NuTone Ironing Centers are designed to fit between standard 16" on-
center wall studs. A 46-1/4 " x 14-1/4 "x 4" deep opening is required. 24"
on-center studs will require framing to proper opening size.
When selecting the exact location for your cabinet, remember to leave room
for your door to open. The door can be mounted on either side of the cabinet.
It is recommended that you allow at least 55 inches wide and 44 inches
deep clearance around the ironing board. The ironing board will swivel to
either side so you will not need to be concerned about blocking a walkway.
However, if rotating the ironing board 90
width clearance of at least 68 inches.
CAUTION: Make sure the location you choose is free of all electrical and
mechanical services. Also make sure that you have an electrical outlet nearby,
or have purchased the Deluxe Accessory (Model No. ICAK) for installation
into the Ironing Center cabinet.
2. Determine distance above floor. (Fig. 2)
The ironing center is designed to be easily installed between two 16"-on-
center wall studs. First determine the desired height of the ironing board
from the floor (Dimension a). Standard countertop height is 36" . Use the
chart below to find and mark the bottom of the wall opening (Dimension
b) - or - use the included template.
Desired Ironing Board Height
(Above Floor)
33 inches
34 inches
35 inches
36 inches
37 inches
38 inches
To register this product,
• Drywall saw or utility knife
• Level
• Pencil
in both directions, allow a total
0
a
Height to Bottom of Opening
(Above Floor)
22-3/4 inches
23-3/4 inches
24-3/4 inches
25-3/4 inches
26-3/4 inches
27-3/4 inches
visit: www.nutone.com
3. Cut the hole in the wall. (Fig. 2)
Locate the wall studs using a stud finder. Cut a 14-1/4"
x 46-1/4" opening in the wall between two studs using a
drywall saw or utility knife.
4. Close hinges. (Fig. 3)
Close the hinges so that they snap shut.
b
MODELS ICUDWH • ICUNUW
55"
Clearance
Wall
34"
16"
14-1/4"
on-center
studs
Wall
46-1/4"
Opening
Floor
Page 1
44"
Clearance
TOP VIEW
Ironing
Board
Center Line
21"
Fig. 1
Top of
ironing
board
a
b
Fig. 2
Fig. 3
Advertisement
Table of Contents

Related Manuals for NuTone ICUDWH

Summary of Contents for NuTone ICUDWH
- Page 1 INSTALLATION 1. Determine where to install. (Fig 1) The NuTone Ironing Centers are designed to fit between standard 16” on- center wall studs. A 46-1/4 ” x 14-1/4 ”x 4” deep opening is required. 24” Wall 46-1/4" on-center studs will require framing to proper opening size.
-
Page 2: Maintenance
Door SERVICE PARTS 2 " 97020252 Hardware Kit - Screws, Hinges, Garment Hook (ICUDWH) 97020253 Hardware Kit - Screws, Hinges, Garment Hook (ICUNUW) Fig. 7 97020742 Model ICAB, Ironing Board Cover 97020743 White, Raised Panel Door (ICUDWH) - Page 3 (16 po) centre à centre 1. Déterminez le lieu d’installation. (Fig. 1) Les centres de repassage NuTone sont conçus pour s’insérer entre des montants standards posés à tous les 40 cm (16 po) centre à centre. Une 117,5 cm Ouverture...
-
Page 4: Entretien
MODÈLES ICUDWH • ICUNUW Page 4 5. Fixez les charnières sur la porte. (Fig. 4) Les charnières permettent de monter la porte sur le côté droit ou gauche de l’armoire. Les charnières se fixent sur la porte de la même manière, quel que Tige soit le côté... -
Page 5: Herramientas Necesarias
1. Determine dónde va a realizar la a centro instalación. (Fig. 1) Los centros de planchado NuTone están diseñados para ajustar entre montantes de pared estándar de 16 pulg. (40 cm) de centro a centro. Se 46-1/4 pulg. requiere una abertura de 46-1/4 x 14-1/4 x 4 pulg. de fondo (117 .5 x 36.2 (117.5 cm) -
Page 6: Mantenimiento
MODELOS ICUDWH • ICUNUW Página 6 5. Fije las bisagras a la puerta. (Fig. 4) Las bisagras se pueden usar para montar la puerta a la derecha o a la izquierda del gabinete. Las bisagras se montan en la puerta de la misma manera, sin Punta importar el lado sobre el que se montaron. - Page 7 Garantía limitada Warranty Period and Exclusions: Broan-NuTone LLC (the “Company”) Période de garantie et exclusions : Broan-NuTone LLC (la « Société ») garantit Periodo y exclusiones de la garantía: Broan-NuTone LLC (la “Compañía”) warrants to the original consumer purchaser of its product (“you”) that the au consommateur acheteur initial («...
- Page 8 MODELS / MODÈLES / MODELOS ICUDWH • ICUNUW Page 8 99045612C...
Need help?
Do you have a question about the ICUDWH and is the answer not in the manual?
Questions and answers