Advertisement
Quick Links
Accu Cutter Company
160 Stover Drive, P O Box 1170, Carlisle, Pennsylvania 17013
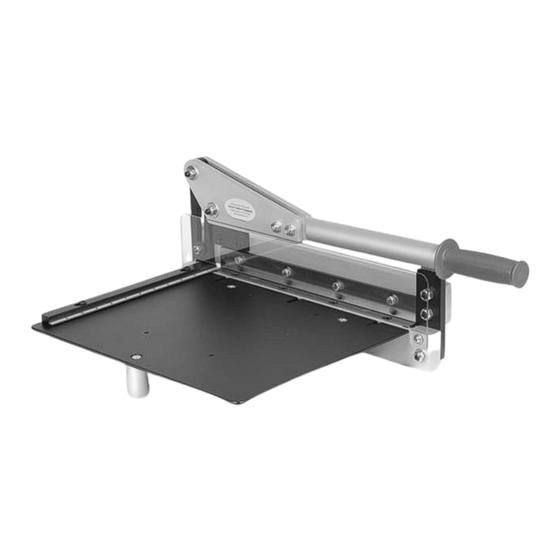
Model 2001EVO 12" Bench Shear
Unpacking the 2001EVO Shear
Care should be exercised unpacking the shear. To facilitate proper packing, the shear was
partially disassembled. In order to reassemble the shear for safe operation, it is essential that you
locate all of the parts for the shear before any packing materials are discarded. The following is a list
of the parts or assemblies included with your shear:
If any parts are missing, please call Accu Cutter before attempting to reassemble the shear.
Work Surface
Make sure the work surface is clean and free from debris. The shear should sit flat and level.
There should be sufficient room on all sides of the shear so nothing will interfere with its safe opera-
tion.
Assembling the 2001EVO Shear
1. Install the Handle. If the safety shield has been removed, it is easier to install the handle
before the safety shield is installed. However, the shear should not be used before the safety
shield is installed. To install the handle, locate the two 3/8" x 1 1/2" bolts and lock nuts. Slide the
flat end of the handle between the two aluminum triangles, line up the holes, and insert the bolts.
(No. 6, Figure 3, Page 4) A large Phillips screwdriver and 9/16" wrench are required.
"We've stayed in business by cutting corners!"
Operator's Manual
(November 2008)
Main body of Shear.
1.
Shear handle with foam grip.
2.
Left safety shield.
3.
Drop-off Gauge and rod.
4.
Two bolts and lock nuts for Shear handle.
5.
Ball hex wrench (5/32").
6.
Standard ball hex wrenches, 5/32" & 3/16"
7.
* * * * *
* * * * *
800-345-0062 (Fax) 717-241-2350
1
Advertisement

Summary of Contents for Accu Cutter 2001EVO
- Page 1 Two bolts and lock nuts for Shear handle. Ball hex wrench (5/32”). Standard ball hex wrenches, 5/32” & 3/16” If any parts are missing, please call Accu Cutter before attempting to reassemble the shear. * * * * * Work Surface Make sure the work surface is clean and free from debris.
- Page 2 1. The Blades. The blades should be examined for nicks or other damage that may have oc- curred during shipping. If there is any damage, call Accu Cutter immediately. If the blades appear okay, you should next check the shear action.
- Page 3 After repeated use the marks can interfere with the accurate adjust of the drop off gauge. Accu Cutter’s Drop Off Gauge is secured by pinching the rod. As a re- sult, there are no marks on the rod to interfere with the adjustment of the Drop Off Gauge.
- Page 4 To correctly adjust the shear action, carefully follow all of the steps below. Examine the shear to determine if any parts, including the blades, are damaged, broken, or missing. If any are, call Accu Cutter for assistance. If none are, con- tinue with this section.
- Page 5 Accu Cutter Company 160 Stover Drive, P O Box 1170, Carlisle, Pennsylvania 17013 800-345-0062 (Fax) 717-241-2350 Carefully loosen bolt Number 3 in Figure 3 above. You should now be able to move the handle up and down without the top and bottom blades touching each other.
- Page 6 Accu Cutter Company 160 Stover Drive, P O Box 1170, Carlisle, Pennsylvania 17013 800-345-0062 (Fax) 717-241-2350 Remove the safety shield. Using the ball hex provided with the shear, loosen the setscrews so they are no longer touching the bottom blade.
- Page 7 Accu Cutter Company 160 Stover Drive, P O Box 1170, Carlisle, Pennsylvania 17013 800-345-0062 (Fax) 717-241-2350 Adjusting the Blades The following instructions are for adjusting the blades of the shear to a “zero” gap or clear- ance. This is the preferred setting for lighter materials like .020” brass, .025” aluminum, and .060”...
- Page 8 The original Power Blade (Figure 1.) was developed by Accu Cutter to reduce the amount of effort needed to cut material. Adding steps to the blade accomplished this. Now, replacing the steps with a graceful curve has further refined the Power Blade.
-
Page 9: Shear Specifications
Maintenance Maintaining The Shear The Model 2001EVO 12” Bench Shear will operate effectively and efficiently for a long time if it is properly maintained. It is important to inspect the shear periodically and to be aware of the normal operation of the shear so that any change in the operation of the shear can be detected im- mediately. -
Page 10: Safety Instructions
Accu Cutter Company 160 Stover Drive, P O Box 1170, Carlisle, Pennsylvania 17013 800-345-0062 (Fax) 717-241-2350 Safety Instructions 1. Do all installation and setup operations prior to operating the shear. 2. Do check all bolts, nuts, screws, fittings, shields, etc. for proper tightening.
Need help?
Do you have a question about the 2001EVO and is the answer not in the manual?
Questions and answers