Table of Contents
Advertisement
Available languages
Available languages
Quick Links
Advertisement
Table of Contents

Subscribe to Our Youtube Channel
Related Manuals for auna 10029926


Summary of Contents for auna 10029926
- Page 1 V-20 DAB Micro-Anlage DAB 10029926 10031466 10031467 www.auna-multimedia.com...
- Page 2 Sehr geehrter Kunde, zunächst möchten wir Ihnen zum Erwerb Ihres Gerätes gratulieren. Bitte lesen Sie die folgenden Anschluss- und Anwendungshinweise sorgfältig durch und befolgen Sie diese um möglichen technischen Schäden vorzubeugen. Warnung • Diese Bedienungsanleitung dient dazu, Sie mit der Funktionsweise dieses Produktes vertraut zu ma- chen.
-
Page 3: Technische Daten
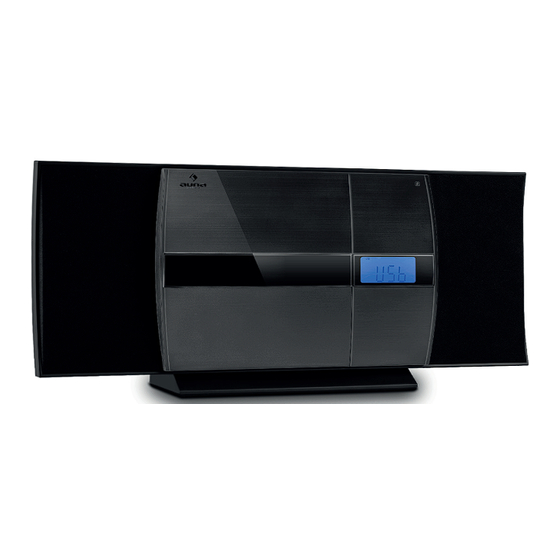
Technische Daten Artikelnr. 10029926, 10031466, 10031467 Stromversorgung AC 230 V ~ 50 Hz, Stromverbrauch 27 W max. Lautsprecher 2 x 3“, 10 W @ 4 Ω (THD bei 1 kHz: max. 10% ) Band FM: 87 MHz - 108 MHz / DAB: 174 - 240 MHz Kompatibel mit USB 1.1 und USB 2.0... - Page 4 Standby/Source Drücken zum Einschalten; Gedrückt halten zum Ausschalten; VOL- Im eingeschalteten Zustand mehrfach drü- cken für Quellenwahl (FM/DAB/AUX) Menu/Info VOL+ Open Play/Pause CD-Fach öffnen Lautsprecher Stop USB Port Für USB-Speichermedien CD-Fach (nicht zum PC-Anschluss geeignet) Standfuß (abnehmbar) Voriger Track Display Nächster Track Rückseite: Ösen für Wandmontage...
- Page 5 Fernbedienung:...
- Page 6 Standfuß: Um den Standfuß abzunehmen, drehen Sie die Anlage um und schieben Sie den Standfuß in Pfeilrichtung zur Rückseite (Fig 1). Heben Sie ihn dann nach oben ab. (Fig 2) Verfahren Sie genau andersherum, um den Standfuß wieder anzusetzen. Inbetriebnahme •...
- Page 7 Bedienungshinweise Globale Funktionen • MODE: Schalten Sie das Gerät mit STANDBY/SOURCE ein. Drücken Sie diesen Taster dann mehrfach, um den Input-Modus zu wählen: CD - DAB - FM - AUX - USB - BT. • VOL+/-: Stellen Sie mit VOL+/- die Lautstärke ein. •...
- Page 8 Radio: FM/DAB • Schalten Sie das Gerät mit STANDBY ein und wählen Sie mit STANDBY/SOURCE den DAB- oder FM- Modus. DAB-Funktionen • Beim ersten Aktivieren des DAB-Modus wird automatisch ein vollständiger Sendersuchlauf durchge- führt. Die Sender werden in alphanumerischer Reihenfolge gespeichert. Die in der Liste erstgenannte Station wird nach dem Suchlauf automatisch gespielt.
- Page 9 DAB: DLS (Informationen vom Sender) - Signal strength (Signalstärke) - Program Type (Genre) - En- semble/Multiplex (Gruppenname der Sendefrequenz) - Channel (aktuelle Sendefrequenz) - Mode (aktueller Modus) - Time&Date (Anzeige von Uhrzeit und Datum) Dieses Gerät unterstützt BT 2.1 + EDR mit dem A2 DP-Profil. Die BT-Funktion kann zum Streamen von Musik von Ihrem Smartphone / Tablet genutzt werden, ermöglicht aber nicht den Einsatz als Freisprecheinrichtung.
-
Page 10: Hinweise Zur Entsorgung
Einstellungen Die System-Einstellungen (Uhrzeit und Datum sowie Anzeigeformat, Auto-Update und den Factory Reset) finden Sie unter MENU. Drücken Sie MENU (bzw. halten Sie MENU auf der Fernbedienung gedrückt) und blättern Sie dann mit den Pfeiltasten. Drücken Sie jeweils ENTER, um ein Untermenü zu öffnen und um einen geänderten Wert zu bestätigen. -
Page 11: Important Safety Advice
Dear Customer, Congratulations on purchasing this product. Please read and follow these instructions, in order to avoid damaging the item. We do not cover any damages that may arise from improper use of the item or the disregard of the safety instructions. Important Safety Advice •... -
Page 12: Technical Data
Technical Data Item #. 10029926, 10031466, 10031467 Power supply AC 230 V ~ 50 Hz, power consumption max. 27 W Speaker 2 x 3“, 10 W @ 4 Ω (THD @ 1 kHz: max. 10% ) Radio Band FM: 87 MHz - 108 MHz / DAB: 174 - 240 MHz Compatible w/ USB 1.1 &... - Page 13 Standby/Source Press to switch on VOL- Press&hold to switch to standby Repeatedly press for source selection Menu/Info VOL+ Open Play/Pause Open cd tray Speakers Stop USB Port Connect USB drive here CD tray (not suitable for PC connection) Stand (detachable) Previous (track/station/preset) Display Next (track/station/preset)
- Page 14 AUDIO IN: Press to enable the Standby: Standby mode ON/ OFF audio in mode button FM/DAB: Press to switch between OPEN/CLOSE: Press to eject or FM & DAB radio close the disc compartment BLUETOOTH: Press to enable USB: Press to enable USB mode Bluetooth mode CD: Press to enable CD mode SCAN: Press to perform a station...
-
Page 15: Initial Use
Stand: To detach the stand, carefully turn the unit upside down and push the stand towards the rear (see fig 1). Then lift it up (see fig 2). Do the opposite to re-attach the stand again. Initial Use • Connect the mains plug to a houshold mains socket (230 V ~50 Hz). •... -
Page 16: Operation
Operation Global Functions • MODE: Switch the unit on with STANDBY/SOURCE, then press repeatedly to select CD - DAB - FM - AUX - USB - BT. • VOL+/-: Press VOL+/- to adjust the output volume. • MUTE: Press MUTE to toggle mute on/off. •... - Page 17 saved station, then press ENTER to tune in the currently highlighted station. • For a new scan, press and hold MENU/INFO for 3 seconds. Confirm with ENTER. • Prune: Press the MENU button on the remote or press and hold the MENU/INFO button on the micro system.
-
Page 18: System Settings
• Type in "0000", if prompted to enter a password. • NFC: When enabled on the transmitting audio device; all that is required is for you to touch the NFC logo on the front of the micro system with the NFC hotspot on your compatible audio device. Enable NFC on your audio device (such as a mobile phone). -
Page 19: Environmental Concerns
Environmental Concerns According to the European waste regulation 2012/19/EU this symbol on the product or on its packaging indicates that this product may not be treated as household waste. In- stead it should be taken to the appropriate collection point for the recycling of electrical and electronic equipment. -
Page 20: Consignes De Sécurité
Chère cliente, cher client, Toutes nos félicitations pour l’acquisition de ce nouvel appareil. Veuillez lire attentivement et respecter les consignes suivantes de branchements et d’utilisation pour éviter d’éventuels dommages techniques. Consignes de sécurité • Ce mode d’emploi sert à vous familiariser aux fonctions de ce produit. Conservez-le bien afin de pouvoir vous y référer à... -
Page 21: Fiche Technique
Fiche technique Numéro d’article 10029926, 10031466, 10031467 Alimentation électrique AC 230 V ~ 50 Hz, consommation énergétique 27 W max Enceintes 2x 3˝, 5 W @ 4Ω (THD à 1kHz : max. 10 %) Bande FM 87 MHz – 108 MHz / DAB: 174 - 240 MHz Compatible avec USB 1.1 et USB 2.0... - Page 22 Veille/source. Appuyer pour allumer ; Rester appuyer pour éteindre ; VOL- Appuyer plusieurs fois en mode allumé pour sélectionner la source (FM/DAB/AUX) Menu/Info VOL+ Ouvrir Lecture/pause Ouvir le compartiment à CD Enceintes Stop Port USB Pour les supports de stockage USB Compartiment à...
- Page 23 Télécommande :...
-
Page 24: Mise En Marche
Pied de support :: Pour détacher le socle, retourner l’appareil et faire glisser le pied dans le sens de la flèche à l’arrière (Fig. 1). Puis soulever le pied vers le haut. (Fig. 2) Procéder en sens inverse pour réinstaller le socle. Mise en marche •... -
Page 25: Consignes D'utilisation
Consignes d’utilisation Fonctions globales • MODE : allumer l’appareil en appuyant sur STANDBY/SOURCE. Puis appuyer plusieurs fois sur cette touche pour sélectionner le mode source : CD – DAB – FM – AUX – USB – BT. • VOL +/- : régler le volume avec VOL +/-. •... - Page 26 Radio : FM/DAB • Allumer l’appareil avec STANDBY et sélectionner le mode DAB ou FM avec la touche STANDBY/SOUR- Fonctions DAB Lors de la première activation du mode DAB, une recherche automatique complète est effectuée. Les sta- tions seront mémorisées dans un ordre alphanumérique. La première station nommée dans la liste sera diffusée automatiquement après la recherche.
- Page 27 DAB : DLS (informations de la station) – Signal Strength (force du signal) – Program Type (type d’émission) – Ensemble/Multiplex (nom de groupe de la fréquence d’émission) – Channel (fréquence d’émission actu- elle) – Mode (mode actuel) – Time&Date (affichage de l’heure et de la date). Cet appareil est compatible avec BT 2.1 + EDR avec profil A2DP.
-
Page 28: Information Sur Le Recyclage
Paramètres Les paramètres du système (heure et date de même que format d’affichage, mise à jour automatique et réinitialisation) sont trouvables dans MENU. Appuyer sur MENU (rester appuyer sur la touche MENU de la télécommande) puis faire défiler avec les touches fléchées. - Page 29 EU-Konformitatserklarung Wir, die CHAL-TEC GmbH Wallstrar.ie 16 10179 Berlin erklaren hiermit, dass die nachfolgend bezeichneten Funkanlagentyp: Stereoanlage Artikelnr. 10029926, 10031466, 10031467 allen folgenden einschlagigen Bestimmungen entspricht: RED-Richtlinie 2014/53/EU LVD-Richtlinie 2014/35/EU RoHS-Richtlinie 2011/65/EU. Angewandte harmonisierte Normen: EN 301489-1V2.1.1 :2017 EN 301489-17V3.1.1:2017 EN 300328V2.1.1 :2016...
Need help?
Do you have a question about the 10029926 and is the answer not in the manual?
Questions and answers