Table of Contents
Advertisement
Advertisement
Table of Contents

Summary of Contents for RephiLe Genie PURIST RG0S00000
- Page 1 Genie PURIST Water System USER MANUAL RephiLe Bioscience, Ltd.
- Page 2 This Manual Is Applicable to the Following Genie PURIST Models RG0S00000 Genie PURIST Ultrapure water system RG0S000T0 Genie PURIST Ultrapure water system with TOC...
-
Page 3: Table Of Contents
Table of Contents 1 INTRODUCTION ......................4 1.1 System Exterior ....................... 5 1.2 Product Features ....................... 7 1.3 Main Applications ...................... 7 1.4 Specifications ......................8 1.5 Operation Principles ....................9 1.6 Technical Specifications .................... 9 2 INSTALLATION ......................10 2.1 Installation Site Requirements ..................10 2.2 Feed Water Requirements ..................10 2.3 Feed Water Quality Measurements ................10 2.4 Installation ........................ -
Page 4: Introduction
2) Disconnect the unit from the power supply prior to perform service work. 3) Refer service to qualified personnel. Contact Information: RephiLe Bioscience, Ltd. Tel: +1-855-RephiLe (+1-855-737-4453) E-mail: support@rephile.com Website: www.rephile.com... -
Page 5: System Exterior
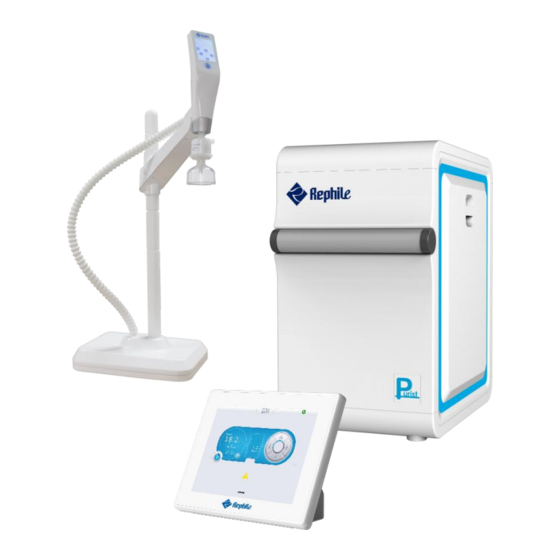
System Exterior Main System Dispenser Control Console Cross bar and dispenser rest Side panel handle on with optional accessories Side panel Electrical connections Water outlets Wall mount ports Touchscreen Final filter Crossbar Crossbar release button Center post Dispenser base Finger rest hook Corrugated tubing Outlets for CAN cable or power Cable and water outlets... - Page 6 Description of the system The Genie PURIST manages the production and distribution of ultrapure water from purified water. It consists of three main units: Main System: manages the production of ultrapure water. Dispenser: integrates the touchscreen and manages the dispensing. ...
-
Page 7: Product Features
dispenser with wet latex gloves on. Signature verification is required for maintenance and service. RephiLe provides full documents support to meet user’s GMP, GSP, GAP, GCP, GLP requirements. 1.3 Main Applications Ultrapure water can be used in many areas. Here are some typical applications. -
Page 8: Specifications
1.4 Specifications Ultrapure Water (Type I) Dispensing Rate Variable speed dispensing up to 2 L/min Resistivity 18.2 MΩ.cm (at 25 ℃) < 5 ppb Particles (>0.2 μm) <1 /mL (with a 0.2 μm final filter) < 0.01 cfu/mL (with a 0.2 μm final filter or RephiBio Microorganism filter) <... -
Page 9: Operation Principles
1.5 Operation Principles Genie PURIST ultrapure water system produces ultrapure water from purified water. Pure water flows through H Pack for further deionization, through a UV lamp chamber with a dual wavelength UV lamp to destroy trace organic pollutants in water, then through a polishing cartridge to remove the last trace of ions, then a 0.2 μm final filter to the outlet. -
Page 10: Installation
2 INSTALLATION 2.1 Installation Site Requirements Item Requirements ≥ 50 cm×50 cm total Installation space Feed water Purified water: EDI, RO, DI or distilled water 5 – 45 Working Temperature 100 – 240 VAC ± 10%, 1 KW (5 A) Power 20 –... -
Page 11: Installation
2.4 Installation 2.4.1 Preparation for Installation 2.4.1.1 Power Supply Power supply must be properly grounded 2.4.1.2 Feed Water Twenty liters of purified water 2.4.2 Items Included Package Name Quantity Note Genie PURIST Main System Including a cable connected to Control Console main system Including 8 mm PE tubing (8 meter), one roll of Teflon tape,... - Page 12 Illustration of water inlets and outlets Label Description Tubing Diameter Connect to HP Dispenser A Spare 8 mm Not used HP Dispenser B Spare 8 mm Not used EDI Drain Spare 8 mm Not used Pure Water In Pure water inlet 8 mm Pure water tank Product To Tank...
- Page 13 2.4.3.2 Genie PURIST External Connection Diagram Power UP dispenser Pure water in Red Line: Electrical loop Blue Line: Water loop Page 13 / 51...
- Page 14 2.4.4 Installing the Dispenser C D E Description Connect to 8 mm tubing port Main system 8 mm tubing port Main system Data cable port Main system or power Data cable port Main system or power Foot switch port Foot switch (Optional) 2.4.4.1 Items included Package Name...
- Page 15 b) Install the dispenser center post to the base, then insert the crossbar on the center post, place the dispenser handle on the magnetic base of the dispenser arm. Take the tubing bundle out from the package, including two pieces of tubing and a cable. Install the tubing and cable as shown in the pictures below.
- Page 16 2.4.4.3 Installing the Wireless Dispenser Upgrade Kit a) For dispenser connected using wireless, need to use the upgrade kit (RG0P0U012) to install the dispenser. The kit comes with a 10 meter link bundle and a power adapter b) Assemble the dispenser as that described above. a) Connect the tubing and power adapter as shown in the pictures below.
- Page 17 2.4.4.4 Installing the Dispenser Kit (RG0P0U001) and the Wireless Dispenser Upgrade Kit a) For one dispenser connected via wire and another one dispenser connected using wireless, need to use the upgrade kit (RG0P0U012) to install the dispenser. The kit comes with a 10 meter link bundle and a power adapter b) Assemble the dispenser as that described above.
- Page 18 2.4.5 Installing the Water Tubing Pure water in 2.4.5.1 Connecting the Inlet Feed Tubing a) Remove the stopper on the pure water inlet on the system. Take the 8 mm PE tubing from the accessories bag and cut a piece of the tubing at proper length for feed. b) Insert one end of the 8 mm PE tubing into the water inlet on the system (Mark as Pure Water In).
-
Page 19: System Startup And Operation
3 SYSTEM STARTUP AND OPERATION 3.1 Check List Prior to System Startup Prior to system startup, use the table below to make sure all parts have been installed and connected, and quality of pure water meets minimal requirements. Check List Feed water quality Pure water: Conductivity <... -
Page 20: System Initial Startup
3.2 System Initial Startup Connect the power adapter to the system to power on the system, set-up menus will show up in order at the initial power-up in a few seconds. 3.2.1 Language Setup The language setup menu will show up in the first page. - Page 21 Choose the actual capacity of pure water tank if a tank is installed. Tap Next to enter Connectivity set-up menu. If the tank is not RephiLe, choose UDF. Setup the height and volume of the feed water tank. 3.2.4 Configuration Make sure there is “√”...
- Page 22 3.2.6 Dispenser Setup Select connection mode for the dispenser from the pull-down menu at the left corner: Select Wireless for wireless connection. Select CAN for the wired connection. Tap Query, the system will automatically search for the dispensers that have been installed. Note: The dispensers may have prior registered to other systems, causing problems in installation...
- Page 23 System will enter the home screen automatically. Page 23 / 51...
-
Page 24: Installing System Consumables
3.3 Installing System Consumables System administrator can set Permission for cartridge replacement in Service Menu. System default is OFF. If the Permission is On, User need to enter a name to verify the installation. Only authorized Users registered in the system are allowed to install or replace consumable. Genie PURIST system has two packs, 1 H Pack and 1 U Pack. - Page 25 b) Take out the cartridges from their packaging, respectively. Remove caps on the cartridge’s inlet and outlet on the system. Follow the instruction below to install cartridges to their corresponding positions. Lock lever Unlocked position Locked position d) Wet the O-rings on the H Pack cartridge with pure water. Page 25 / 51...
- Page 26 Cartridge lock lever e) Turn the lever on the cartridge adapter to the right side at the unlock position as shown in the photo Align the cartridge label facing out. Insert the up end first into the opening on the cartridge adapter, then turn the lever handle to the left to lock the cartridge.
- Page 27 System Setup Swipe a finger down the top section of the home screen to see the drop-down bar. Make sure the system is in Ready mode. If not, toggle between Standby and Ready modes using the drop-down bar to switch the system from Standby to Ready. Drop -down bar Note! Alarms...
- Page 28 3.4.3 Register other Consumables The following consumables need to be registered to the system on the RFID tag reader at installation. At Standby mode, remove the left side panel and find the RFID reader position ( ). Scan the RFID tags for the 185 nm UV lamp and final filter in their corresponding box to register the consumables.
-
Page 29: Information Menu
3.5 Information Menu Control Console Main Page Section 1: Drop-down menu, including the located time and system operating status. Standby Ready Section 2: UP water quality, TOC, temperature, operation mode and UP water recirculation icon. Section 3: Feed water resistivity. Section 4: UP water dispensing set up Volumetric dispensing button, decrease the volume, down to 0.1 L. - Page 30 Section 6: Indicates multiple screens. Swipe left & right anywhere in blank area on screen to switch pages Dispenser Section 1: System operating status (including Standby, Pressure Relief, Recirculation and Product) and tank level. Section 2: Water quality parameters: water resistivity, TOC and temperature. Section 3: Dispensing set up Recirculation button Volumetric dispensing button, decrease the volume, down to 0.1 L.
- Page 31 Control Console - More Pages Information Menu Swipe the screen to page 2 in Standby mode. Page 2 is Information Menu which contains information about system status and history. Water Quality displays measured values about water. UP, TOC and Temp.: UP resistivity, TOC and ...
- Page 32 Alarms & Alerts: Alarms sign appears when there is a technical issue. Some red alarms stop the system from operating to protect the system. Alerts appear when a consumable needs to be replaced or a non-critical event occurs. Information Information about the system: catalog number, serial number, production date, installation date and software version.
-
Page 33: Maintenance Menu
3.6 Maintenance Menu Notes: Maintenance menu is password protected for system administrators. To obtain a password, send request with system’s serial number to cs@rephile.com, support@rephile.com or your local distributor. Maintenance Menu Swipe left on the Screen to page 3 in Standby mode. Page 3 is Maintenance Menu which contains parameter setup, RO cleaning, etc. - Page 34 Audio Three functions have audio options. Alarm and Alert sounds can be selected independently. You can also decide to activate touch clicks Units Change unit of display, including water quality, temperature, pressure, tank level and dispense rate. Change screen brightness and choose energy-saving if needed.
- Page 35 User Config. Manager can add new account to operate the system. Tap Add, then enter a new username and password under Name and Password to add a new account. Select the user level under Permission. 1 (User) means a user can’t add new account.
-
Page 36: Dispensing Water
4 DISPENSING WATER Water can be dispensed from the dispenser handle either by pressing the dispense button on the handle or from the main control console. 4.1 Dispensing Water Tap recirculation icon on the main console or the dispenser to start recirculation. When the resistivity reaches 18.2 MΩ.cm, press the dispense icon on the monitor or on the dispenser... -
Page 37: Maintenance
5 MAINTENANCE 5.1 Basic Alerts Solution Message H-Pack 3000 L Installation Date: XXXX-XX-XX It is XX days overdue. Please replace it in time so Exchange the H Pack and reset. as not to affect the performance of the system. CAT NO: RR700H101 LOT NO: S6PDC0101 U-Pack 3000 L... - Page 38 Page 38 / 51...
-
Page 39: Basic Troubleshooting
Exchange the 185 nm UV lamp or contact a RephiLe professional engineer. · The tank UV lamp may be burnt. · Check Tank UV Exchange the tank UV lamp or contact a RephiLe professional engineer. · Reinstall the H Pack. · H-Pack Error Check the RFID chip. - Page 40 · TOC Sensor Temperature<5℃ Contact a RephiLe professional engineer. · TOC Feed Resistivity<15MΩ.cm Contact a RephiLe professional engineer. · The system detects a leakage. · Shut off power and water supply. · System leakage Remove system side panels, turn on water supply and check leaking points.
-
Page 41: Replacing Consumables
5.3 Replacing Consumables Consumable life, in particular cartridges, is heavily dependent upon feed water quality and amount of water used. Below is a general guideline of frequency to replace consumables. Replacement Consumables Performance Indicator Frequency Dual UV lamp 24 months Increase in TOC 12 months Reduce in flow rate... - Page 42 5.3.1 Replacing the Genie H Pack and Genie U Pack cartridges a) Switch the system to Standby mode, then remove the system right side panel. b) Turn the lever on the cartridge adapter to right to the unlock position, pull the cartridge downwards to disengage the cartridge from its adapter.
- Page 43 d) Tilt the upper end of the UV lamp chamber out. e) Wear gloves included in the new UV lamp package. Avoid direct skin contact with the quartz glass of the UV lamp. Remove the UV lamp cover to expose the UV lamp. Unplug the UV lamp from its power cord, and then carefully remove the old UV lamp from the chamber.
- Page 44 h) Install the UV lamp chamber back to the original position. Turn on the system power. Scan the RFID chip of the UV lamp on the system. Tap Install on the pop-up dialog to reset the corresponding UV lamp. 5.3.3 Replacing the Final Filter a) Remove the final filter b) Install the filter into UP outlet firmly, and make sure no leaking.
-
Page 45: History Inquiry And Export
5.4 History Inquiry and Export Insert a USB stick into the port on the control console as shown. Swipe left on the Screen to Maintenance Menu in Standby mode. Tap History on Maintenance Menu. Tap Start Date and End Date to choose the date that need to check. - Page 46 Read and Print the Exported History Data from a PC Computer: Exported data are encrypted. The files exported can be read as pdf files or printed using RephiLe’s Genie Converter. Genie Conver SW is on the USB that comes with the system.
- Page 47 Tap “File”, choose “Open”. Choose the file folder “GenieData” from the USB stick to open it. Choose the data file you wish to check and then open it. Page 47 / 51...
- Page 48 Tap “Operate”, then choose “Convert”. The data are as shown left. You can Save the data in pdf format or Print it by tapping the icons as shown in the red boxes. Page 48 / 51...
-
Page 49: Parts And Order Information
6 PARTS AND ORDER INFORMATION Genie PURIST Systems Catalog Number Genie PURIST System RG0S00000 Genie PURIST Ultrapure water system RG0S000T0 Genie PURIST Ultrapure water system, with TOC Commonly Used Consumables Catalog No. Product Name Description Unit With a 3 m corrugated pipe, RG0P0U001 Dispenser with support including data cables and... - Page 50 Other Maintenance Spare Parts Please contact RephiLe or your distributor for ordering information. Resistivity Sensor Conductivity Sensor Execution Board Extension Board Electrode Board RFID Reader Flow Meter Pressure Gauge Commonly Used Connector Package Solenoid Valve Check Valve Flow Restrictor Temperature Sensor...
-
Page 51: Warranty Information
RephiLe Bioscience shall under no circumstance be liable for incidental or consequential damages. All rights reserved © 2019 RephiLe Bioscience, Ltd. Reproduction of this manual in any form or any part without written permission from RephiLe is prohibited. REV. 04/19 Trademarks RephiLe, PURIST, LeFil and OrganeFil are registered trademarks of RephiLe Bioscience, Ltd..
Need help?
Do you have a question about the Genie PURIST RG0S00000 and is the answer not in the manual?
Questions and answers