
Related Manuals for Rad Power Bikes Radwagon 2016

Summary of Contents for Rad Power Bikes Radwagon 2016
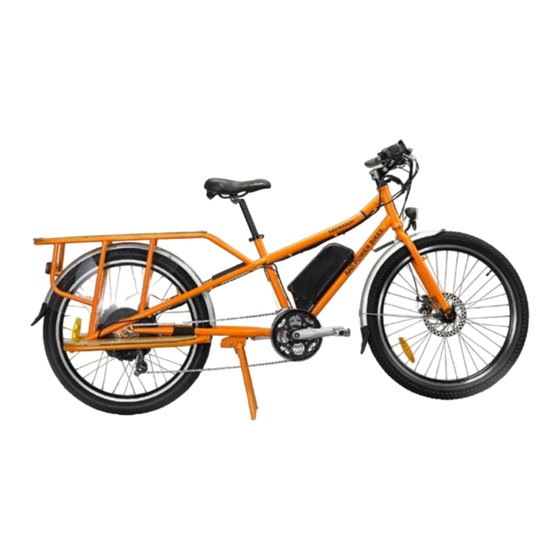
- Page 1 RADWAGON OWNER’S MANUAL 2016 WWW.RADPOWERBIKES.COM We are here to help! Please contact us at INFO@RADPOWERBIKES.COM or 1-800-939-0310 if you have questions. REV010416...
-
Page 2: Welcome
All information in this manual should be carefully reviewed and if you have any questions you should contact Rad Power Bikes immediately. The notes, warnings and cautions contained within the manual and marked by this triangular Caution Symbol should also be given special care. Users should also pay special attention to information marked in this manual beginning with NOTICE. -
Page 3: Table Of Contents
Table of Contents Welcome ......................................2 Using This Manual ..................................... 2 Assembly Instructions ..................................4 Battery Charging ....................................7 Operation ......................................10 Maintenance ....................................18 Troubleshooting ....................................20 Warnings and Safety ..................................22 Link to Assembly Video and Online Resources ..........................27 Limited Warranty .................................... -
Page 4: Assembly Instructions
Remove bike from carton and carefully set out all contents of the box. Remove packaging material protecting the bicycle frame and components. Ensure the following pieces are included in the package. If there are any missing parts please contact Rad Power Bikes for help replacing missing pieces. 1. RadWagon 2. - Page 5 Install front headlight and fender as well as the front fork anti-rotation spring and cover. NOTICE: Ensure all hardware is tightened properly and all safety checks in the following sections are performed before first use. Contact Rad Power Bikes if you have any questions regarding the assembly of your bike.
- Page 6 Recommended Torque Values Hardware Location Torque Required (Nm) Handlebar 18-20 Stem 18-20 Saddle 18-20 Seat 18-20 Rear Wheel 30-35 Bottom Bracket Parts 35-55 Pedals Disk mounting Bolts Disk Caliber Mount Crank Bolts Rear Derailleur Cable Pinch Front Derailleur Clamp Seat Post Clamp Adjusting Seat Height Use the quick release lever to free the seat post and pull upwards or push downwards to reach desired height.
-
Page 7: Battery Charging
should not allow leg strain from over extension, and the hips should not rock from side to side when pedaling. While sitting on the bicycle with one pedal at its lowest point, place the ball of your foot on that pedal. The correct saddle height will allow the knee to be slightly bent in this position. - Page 8 Always charge your battery in temperatures between 50 and 80 degree Fahrenheit and ensure the battery and charger are not damaged before initiating charge. If you notice anything unusual while charging please discontinue charging and use of the bike and contact Rad Power Bikes for help. When the Battery Is Removed o Do not touch the “+”...
- Page 9 Do not charge the battery with any other chargers then what was originally supplied with your Rad Power Bike or a charger purchased directly from Rad Power Bikes for use with your specific bike serial number, as approved by Rad Power Bikes.
-
Page 10: Operation
o Avoid charger contact with liquids, dirt/debris or metal objects. o Store the charger in a location where it cannot suffer damage from falls/impact. o The charger should only be used indoors in a dry ventilated space. o If you notice a strange smell or the charger or battery are overheating, please stop charging and contact Rad Power Bikes. - Page 11 Not taking care to familiarize yourself and practice the operation of the power system on your Rad Power Bikes can lead to death or serious injury, please head this warning.
- Page 12 We suggest that you ride conservatively when you first get your Rad Power Bike to get to know your bike and travel routes. Once you become familiar with the range requirements of your travel routes, and the capabilities of your Rad Power Bikes you can then adjust you riding characteristics if you so desire.
- Page 13 Light Pedaling 30 miles Flat Terrain Normal Payload Not Windy Medium Speeds Light Pedaling 40 miles Flat Terrain Normal Payload Not Windy Low Pedal Assist Level Moderate to Heavy Pedaling Battery Capacity Display The LCD readout on the handlebar of your Rad Power Bike features a battery capacity guage (much like the fuel guage on an automobile).
- Page 14 Do not park, store, or transport your Rad Power Bike on a rack that is not designed for the size and weight of the bike. o Wide tires, as used on Rad Power Bikes, cannot fit into all bike racks, please select an appropriate rack for the width of tires used on your bike.
- Page 15 o When storing your bike or carrying your bike on a rack for transport, you can remove the battery pack to reduce the weight of the bike and make lifting and loading easier. Regenerative Braking Regenerative braking is active on the RadWagon whenever the front and/or rear brake lever is applied. There is an electronic switch in the brake lever and when it is applied, the electric hub motor will turn into a brake.
- Page 16 The use of certified and approved child seating and equipment are required whenever carrying children. Rear wheel guards must be in place whenever carrying passengers to ensure feet and hands do not contact moving wheels. Ensure hands and feet are kept away from wheels at all times the bike is in motion.
- Page 17 Never leave the bike unattended with children on the bicycle. Ensure children are removed from the bike before you look away or walk away from the bike, otherwise the bike could tip over and cause serious injury to your most precious cargo. Do not remove the clear rear wheel side covers from your RadWagon.
-
Page 18: Maintenance
Do not use the front brake by itself, always apply the rear brake first followed by the front brake and be sure to use both brakes for all braking operations. Front fork failure or loss of control are plausible when the front brake is operated independently for slowing at high speed with cargo loads. - Page 19 o If the hub and bottom bracket bearings have been submerged in water they should be taken out and re-greased. This will prevent accelerated bearing deterioration. o If the paint has become scratched or chipped in the metal, use touch up paint to prevent rust. Clear nail polish can also be used as a preventative measure.
-
Page 20: Troubleshooting
Check headset, wheel bearings, pedal bearings and bottom bracket bearings. Ensure pedals are securely tightened to the cranks. 6. Cranks and Pedals Ensure the cranks are securely tightened and are not bent. 7. Derailleurs Check that the derailleur(s) are adjusted and functioning properly. Ensure shift and brake levers are attached to the handlebar securely. - Page 21 The following error codes are the most common and can aid in troubleshooting. If your bike has an error code displayed at any time it is recommended that you cease operation and contact Rad Power Bikes immediately. Error Code...
-
Page 22: Warnings And Safety
Wiring Diagram The basic wiring diagram of the complete electronic system (left) and display (right) are meant for use in basic diagnostics or troubleshooting with the help of a Rad Power Bike technical support agent. Warnings and Safety General Warnings Like any sport bicycling involves risk of injury and damage. - Page 23 Riders must have the physical condition, reaction time and metal capability to ride and manage traffic, road conditions, and sudden situations and also respect the laws governing electric bicycle use where they ride, regardless of age. If you have an impairment or disability such as a visual impairment, hearing impairment, physical impairment, cognitive/language impairment, or a seizure disorder, consult your physician before riding any bicycle.
- Page 24 o Do not lock up the brakes. When braking, apply the rear brake first, then the front brake. The front brake is more powerful and if it is not correctly applied, you may lose control and fall. o Maintain a comfortable stopping distance from all other objects, riders, and vehicles. Safe braking distances are based on forces such as weather and light conditions among other variables.
- Page 25 Ensure handle bar grips are not damaged and properly installed. Loose or damaged grips can cause you to lose control and fall. Do not use this product with standard bicycle trailers, stands or bicycle racks. Contact Rad Power Bikes to check if your equipment will work with the bicycle.
- Page 26 Always use the lowest assist level until you are comfortable with the bike and feel confident in controlling the power. Any aftermarket changes to your Rad Power Bike not expressly approved by Rad Power Bikes could void the warranty and create an unsafe riding experience.
-
Page 27: Link To Assembly Video And Online Resources
Have your dealer replace damaged reflectors and straighten or tighten any that are bent or loose. Link to Assembly Video and Online Resources Assembly Video Please visit the Rad Power Bikes YouTube Channel to view the official RadWagon Assembly Video here: https://www.youtube.com/watch?v=QXyspHygRVI Online Resources Please visit the Rad Power Bikes website at http://www.radpowerbikes.com/pages/radwagon-support-and-best-practices... - Page 28 TERMS OF WARRANTY This warranty only applies to the original owner of a Rad Power Bikes bicycle. This warranty does not apply to rental or commercial use bicycles. This warranty is expressly limited to the replacement of defective parts at the sole discretion of Rad Power Bikes.
Need help?
Do you have a question about the Radwagon 2016 and is the answer not in the manual?
Questions and answers