
Summary of Contents for Pittasoft BlackVue Power Magic Ultra Battery B-124X
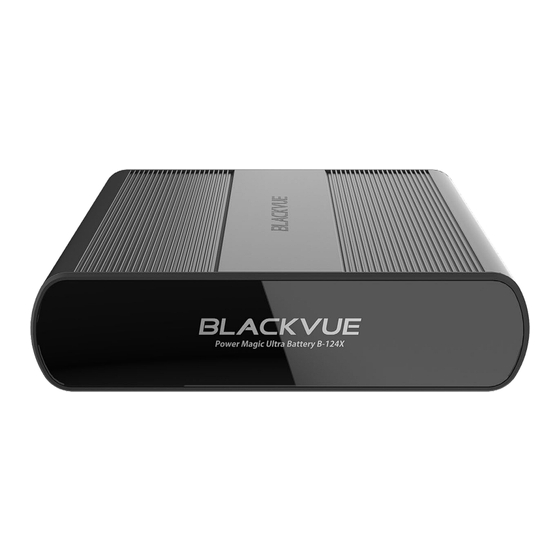
- Page 1 Power Magic Ultra Battery B-124X User Manual ENGLISH / 한국어 / 中文 / ESPAÑOL / 日本語 / FRANÇAIS www.blackvue.com...
- Page 2 BLACKVUE POWER MAGIC ULTRA BATTERY B-124X For the latest version of the manual and customer support go to www.blackvue.com 최신 사용자 설명서나 문의사항은 BLACKVUE 홈페이지에서 확인 하실 수 있습니다 . www.blackvue.co.kr 如需最新版本的用户手册和客户支持,请访问网址 www.blackvue.com Para consultar la última versión del manual y obtener soporte al cliente, vaya a www.blackvue.com 取扱説明書の最新版やカスタマーサポートについては...
- Page 3 FCC Compliance Information FCC Part 15.19 Statements This device complies with Part 15 of the FCC Rules. Operation is subject to the following two conditions: (1) This device may not cause harmful interference, and (2) this device must accept any interference received, including interference that may cause undesired operation. FCC Part 15.105 Statement (Class B) This equipment has been tested and found to comply with the limits for a Class B digital device, pursuant to part 15 of the FCC Rules.
-
Page 4: Safety Instructions
BlackVue Power Magic Ultra Battery B-124X The Power Magic Ultra Battery is designed to power your BlackVue dashcam in Parking Mode for extended periods of time without using your vehicle’s battery. Hardwiring power cable Cigarette lighter plug power cable Safety instructions Incorrect use of the Power Magic Ultra Battery can lead to poor performance and may cause overheating, ignition, explosion, etc. - Page 5 Do not allow metal objects to contact the terminals of the power and output cables. Ensure the battery does not come into contact with water or other liquids. Pittasoft Co., Ltd. is not liable for damage resulting from disassembling, opening or modifying the product. Disposal of your battery pack All electrical and electronic products should be disposed of separately from the municipal waste stream via designated collection facilities appointed by the government or the local authorities.
- Page 6 At a glance LEDs Dashcam (Output : Charging battery to cigarette lighter : Fully-charged battery socket for dashcam) : Bluetooth on USB output Port for Expansion DC in (power cable Battery (sold separately) connection) Power switch y Cigarette: Select this when the Ultra Battery is powered from a cigarette lighter socket using a cigarette lighter plug power cable (standard 5 A charging) y Hardwire: Select this when the Ultra Battery is hardwired to the vehicle’s...
-
Page 7: Product Features
LED indicators and beeps LEDs Beep* Powered on All 3 LEDs turn on together and then Beeps four times turn off one by one. Started charging Red LED blinks for 5 seconds Beeps once Charging Red LED is on Fully charged Green LED is on Bluetooth connected Blue LED is on... - Page 8 Installation guide Set the power switch to the OFF position. Expansion Dashcam DC in Cigarette Hardwire For DIY installation using a cigarette lighter plug power cable: a. Plug the cigarette lighter plug power cable into the Ultra Battery’s DC in port. Plug the other end of the power cable into the vehicle’s cigarette lighter socket.
- Page 9 For a hardwired installation using a hardwiring power cable: a. Plug the hardwiring power cable into the Ultra Battery’s DC in port. Hardwiring power cable b. Referring to your vehicle Owner’s Manual, identify a Switched (accessory power) fuse of 10A or less in your interior fuse panel.
- Page 10 e. Insert the fuse you removed from the fuse panel into the slot closest to the blades on the fuse tap. Note If the original fuse is a low-profile mini type, use the new 10A mini type fuse instead (included). Insert a new 20A fuse into the slot furthest away from the fuse tap blades.
- Page 11 Plug the ‘Output cable’ into the port labeled Dashcam on the Ultra Battery. Plug your dashcam’s power plug into the cigarette lighter socket on the Ultra Battery’s ‘Output cable’ . Note To ensure good electrical contact you can use electrical tape to tape the plug and socket together. Use a pry tool to lift the edges of the windshield trim/molding and tuck in the power cord.
- Page 12 BlackVue Battery Manager App Download the BlackVue Battery manager app from the Google Play Store (Android) or the Apple App Store (iOS) to manage power and settings. Connecting to the Ultra Battery via Bluetooth Turn on the Ultra Battery. ū If you are using the cigarette lighter plug power cable set the power switch to the Cigarette position. ū...
- Page 13 Battery information screen Settings Battery’s Bluetooth ID Model Current battery status Current charge state Device plugged into Battery temperature USB port* Real-time input voltage and current Real-time output voltage and current Total battery capacity available for use (set by user) Estimated time to full charge (hours: mins) at the present power input level Estimated usage time (hours: mins) at...
- Page 14 Battery capacity No. of battery packs Recommended battery capacity setting 1 (Ultra) 6,000 mAh 1 (Ultra) + 1 (Expansion) 12,600 mAh 1 (Ultra) + 2 (Expansion) 19,200 mAh 1 (Ultra) + 3 (Expansion) 25,800 mAh 1 (Ultra) + 4 (Expansion) 32,400 mAh 1 (Ultra) + 5 (Expansion) 39,000 mAh...
-
Page 15: Product Specifications
USB port: 4.75 V–5.25 V / 2 A (max) Customer Support For customer support, manual and any updates please visit www.blackvue.com. You can also email a Customer Support expert at cs@pittasoft.com. Limited Warranty The warranty period of this product is 1 year from the purchase data. - Page 16 BlackVue Power Magic Ultra Battery B-124X 차량의 배터리를 보호하면서 블랙박스의 주차모드를 장 시간 사용 할 수 있습니다. 또는 전원 케이블 (퓨즈박스 배선 연결 케이블) 전원 케이블 (시가잭 케이블) 안전 설명 Power Magic Ultra Battery을 올바르게 사용하지 않으면 성능이 저하되고 과열, 화재, 폭발의 위험이 있습니다. 다음의 설명에 따라 제...
- Page 17 아이들 또는 애완동물이 제품을 만지지 못하도록 하십시오. 배터리 충전케이블의 연결단자에 금속 등 도체성 물체가 닿지 않도록 주의하십시오. 배터리를 물 또는 기타 액체 등에 젖지 않도록 주의 하십시오. (주)피타소프트는 제품 분해, 개조로 인해 발생하는 피해에 대해 그 어떤 책임도 지지 않습니다. 배터리...
- Page 18 Power Magic Ultra Battery B-124X 살펴보기 LEDs : 배터리 충전 중 Dashcam : 배터리 완충 (블랙박스와 연결) : 블루투스 동작 중 USB 출력단자 확장형 배터리 연 DC in 결 단자 (별매품) (차량 전원에 연결 ) 차량 전원 공급 옵션 y Cigarette (5 A): 시가잭 충전 케이블을 이용한 배터 리...
- Page 19 LED 동작사양 LEDs Beep* 3개의 LED가 동시에 켜진 후에 빨간 경고음 4번 전원이 켜질 때 색, 초록색, 파란색 순서로 꺼짐 충전이 시작될 때 빨간색LED가5초간 점멸 경고음 1번 충전 중 빨간색LED가 점등 충전이 완료 초록색LED가 점등 되었을 때 블루투스가 파란색LED가 점등 연결되었을...
- Page 20 USB 소켓(5 V) 1개를 통해 휴대용 장치(스마트폰, 휴대용 Wi-Fi 핫스팟등)를 충전하면서 동시에 블랙박스에 전원을 공급할 수 있 습니다. 제품설치방법 전원 입력 스위치를 O 로 설정합니다. Expansion Dashcam DC in Cigarette Hardwire 시가잭 충전 케이블을 이용한 설치방법 a. 시가잭 충전 케이블을 배터리팩의 “DC in”포트에 연결하십시오. 전원케이블의 다른 쪽 끝 (시가잭 케이블)을 차량 시가 소켓에...
- Page 21 퓨즈박스 전원 케이블을 이용한 설치방법: a. 퓨즈박스용 전원 케이블을 배터리팩의 “DC in”포트에 연결 하십시오. 전원 케이블 (퓨즈박스 배선 연결 케이블) b. 차량 매뉴얼을 참고하여 퓨즈박스용 전원 케이블을 연결할 수 있는 10A이하의 ACC 단자를 확인 하십시오. ACC단자는 시가 라이터 및 카 오디오등 입니다. 주의...
- Page 22 e. 퓨즈박스에서 분리한 퓨즈를 퓨즈젠더 핀과 가까운 슬롯에 삽입하십시오. 참고 차량에서 분리한 퓨즈가 퓨즈젠더에 맞지 않는 경우, 동봉된 10A퓨즈를 사용하세요. 구성품에 포함되어 있는 별도의 20A 퓨즈를 비어있는 슬롯에 삽입하십시오. 제공된 퓨즈 액세서리 입력전원 출력전원 g. 제거한 ACC 단자의 퓨즈자리에 퓨즈젠더를 삽입하십시오. 주의...
- Page 23 블랙박스 연결 케이블을 배터리팩의 “Dashcam”포트에 연결 하십시오. 블랙박스의 전원 플러그를 블랙박스 연결 케이블의 시가소켓에 연결합니다. 참고 시가소켓케이블과 블랙박스의 전원 플러그를 연결 한 후 제품 분리를 방지하기 위해 절연 테이프를 이용해서 고정하시기 바랍니다. 배선정리 도구를 이용해 앞유리 트림/몰딩의 가장자리를 들어 올리고 전원케이블을 정리하시기 바랍니다. 제공된 벨크로 테이 프를...
- Page 24 BlackVue Battery 어플리케이션 Blackvue Battery어플리케이션을 구글스토어 또는 애플 앱스토어에서 다운로드 받습니다. 블루투스를 통한 배터리팩 연결방법 배터리팩의 전원을 켜십시오. 괊 시가잭 케이블를 사용해서 전원을 공급받는 경우 Cigarette 위치로 설정. 괊 퓨즈박스 연결 케이블을 사용해서 전원을 공급받는 경우 Hardwire 위치로 설정 스마트폰 설정으로 이동하여 블루투스를 켜십시오. Blackvue Battery 앱을...
- Page 25 배터리 정보 화면 설정 배터리 블루투스 정보 모델명 현재 배터리 상태표시 배터리 충전량 USB 사용정보 배터리 내부온도 표시* 충전 전압 및 전류 출력 전압 및 전류 배터리 용량 충전 예상시간 배터리 사용 가능 시간 * 일부 USB cable의 경우 사용정보를 확인 할 수 없 습니다.
- Page 26 배터리 용량 배터리 수량 권장 배터리 용량 설정 1 (Ultra) 6,000 mAh 1 (Ultra) + 1 (Expansion) 12,600 mAh 1 (Ultra) + 2 (Expansion) 19,200 mAh 1 (Ultra) + 3 (Expansion) 25,800 mAh 1 (Ultra) + 4 (Expansion) 32,400 mAh 1 (Ultra) + 5 (Expansion) 39,000 mAh 확장...
- Page 27 USB 소켓 : 4.75 V–5.25 V / 2 A (max) 고객지원 고객지원, 설명서, 업데이트에 관한 자세한 사항은 www.blackvue.co.kr을 방문하여 확 인하십시오. 추가 문의사항은 고객만족센터 as@pittasoft.com으로 연락 주시기 바랍니다. 품질보증 본 제품의 품질보증 기간은 구매일로부터 1년입니다. 품질보증 기간 이내에 정상적으로 올바르게 사용했음에도 불구하고 제품이 고장 나는 경우에는 당사 서비스 센터에서 무상으...
- Page 28 BlackVue Power Magic Ultra Battery B-124X Power Magic Ultra Battery 用于在停车模式下更长时间地为 BlackVue 行车记录仪供电,无需使用汽车蓄电池。 或者 硬接线 电源线 点烟器插头电源线 安全说明 Power Magic Ultra Battery 使用不当会造成性能不佳,并可能导致过热、着火、爆炸。为正确使用产品,请遵守以下说明: 使用产品之前熟悉用户手册内容。 只能使用制造商提供的 BlackVue 原厂线缆。如需更换,请联系客户支持或附近经销商。 产品仅可用于为行车记录仪供电。 请勿使产品受到阳光直射和/或加热。 请勿接触高温。 请勿使用点烟器多插座分离器(适配器)连接产品。 请勿将产品放在微波炉或高压环境中。 请勿自行维修或改装产品。 请勿投掷或使电池受到任何物理冲击。 请勿拆开,压缩或穿刺产品。 请勿在静电环境中使用产品,因为静电环境会影响电池保护电路的运行。 如果产品在使用过程中发出异常气味,应立即拔掉电源,并联系客户支持或最近的经销商。 如果电池膨胀,应立即停止使用。并联系客户支持或最近的经销商。 使产品远离儿童和/或宠物。 BLACKVUE...
- Page 29 请勿让金属物体接触电源端子和输出线缆。 避免电池接触水或其他液体。 Pittasoft Co., Ltd.对于因拆卸、打开或改装产品而导致的损坏概不负责。 电池组的处理 所有电气和电子产品都应与城市垃圾分开废弃,通过政府或当地部门指定的回收机构来处理。请联系当地部门了解 您所在区域的废弃和回收方式。 请勿焚烧或暴露于火焰。过热可能导致起火或爆炸。 部件 安装 Power Magic Ultra Battery B-124X 之前,请检查包装箱内以下物品是否齐全。 Power Magic 用户手册 Ultra Battery B-124X 行车记录仪输出线缆 点烟器插头电源线 (点烟器插口) 保险丝抽头套装 硬接线电源线 (3种类型) 魔术贴 (2 EA) 注意 Power Magic Expansion Battery B-124E 配有连接器线缆,用以代替以上的线缆/保险丝抽头套装。 Power Magic Ultra Battery B-124X...
- Page 30 产品简介 Dashcam :电池正在充电 (输出到行车记录仪 :电池完全充满 的点烟器插口) :蓝牙开启 USB 输出 Expansion Battery DC in(电源线连接) (单独销售)端口 电源开关 y Cigarette:当 Ultra Battery 通过点烟器插头电源线从点烟器插口供电时 (5 A标准充电)选择此档位 y Hardwire:当 Ultra Battery 通过硬接线电源线连接汽车保险丝面板时 (9 A快速充电)选择此档位 y OFF:关闭 Ultra Battery BLACKVUE...
- Page 31 LED指示灯和蜂鸣 蜂鸣* 3 个 LED 同时点亮,然后接连熄灭。 接通电源 蜂鸣四次 红色 LED 闪烁 5 秒钟 开始充电 蜂鸣一次 红色 LED 点亮 充电 绿色 LED 点亮 已充满 蓝色 LED 点亮 蓝牙已连接 红色和绿色 LED 一起闪烁 低输入电压警告/ 高输入电压警告 红色 LED 和绿色 LED 接连闪烁 过热警告 每秒钟蜂鸣一次 * 通过蓝牙利用 BlackVue Battery manager 应用可禁止蜂鸣。 产品特性...
- Page 32 安装指南 将电源开关拨到 OFF 位置。 Expansion Dashcam DC in Cigarette Hardwire 对于DIY安装,应使用点烟器插头电源线: a. 将点烟器插头电源线 插入 Ultra Battery 的 DC in 端口。将电源线另一端插入汽车的点烟器插座。 点烟器插头电源线 b. 将电源开关拨到 Cigarette 位置。继续执行步骤 3。 Expansion Dashcam DC in Cigarette Hardwire 警示 当使用点烟器插头电源线时,务必将开关拨到 Cigarette 位置。使用点烟器插头电源线时如果将开关拨到 Hardwire 位置,可能导致 产品故障、过热、着火等状况。 BLACKVUE...
- Page 33 或者 对于硬接线安装,应使用硬接线电源线: a. 将硬接线电源线 插入 Ultra Battery 的 DC in 端口。 硬接线电源线 b. 查阅车主说明书,在内饰保险丝面板中找到 10A 或 10A 以下的开关(附件电源)保险丝此类开关保险丝包括点 烟器和汽车音响保险丝插槽。 警示 如果将 Ultra Battery 连接到恒定功率 (BATT) 保险丝,可能会损耗汽车蓄电池。 c. 取下找到的开关保险丝,并与 3 个保险丝抽头中的一个进行类型匹配。 d. 将 ACC 电线插入保险丝抽头的连接器端。使用压线钳或钳子将连接器压接到电线上。 地线(环) 到 Ultra Battery Power Magic Ultra Battery B-124X...
- Page 34 e. 将从保险丝面板上取下的保险丝插入距离保险丝抽头插片最近的插槽。 注意 如果原装保险丝为薄款小型保险丝,需改用新型 10A 小型保险丝(包含)。 将 20A 新保险丝插入距离保险丝抽头插片最远的插槽。 输出至B-124X 功率输入 输出至工厂附件 g. 将保险丝插片插入保险丝面板上的开关保险丝空插槽。 警示 请参阅图示,按正确方向插入保险丝抽头。在正确方向上,新保险丝 (f.) 直接从保险丝插槽获取供电,不会给原 装保险丝 (e.) 带来附加负荷。如果以相反方向插入保险丝抽头,则原装保险丝可能因附加负荷而熔断。 h. 将地线(环)连到接地点,例如直接接触汽车框架裸露金属部分的 螺栓。将地线紧固在裸露金属车架上(比如将其紧固在螺栓下)。 将电源开关拨到 Hardwire 位置。 Expansion Dashcam Cigarette Hardwire BLACKVUE...
- Page 35 将“输出线缆”插入 Ultra Battery 上贴有 Dashcam 标签的端口。 将行车记录仪的电源插头插入 Ultra Battery 的“输出线缆”上的点烟器插口。 注意 为确保电接触良好,您可以使用电工胶带将插头和插口绑在一起。 使用撬具撬起挡风玻璃密封条/模塑的边缘,并塞入电源线。使用配套提供的魔术贴固定 Ultra Battery。 警示 请勿使产品受到阳光直射和/或加热。 Power Magic Ultra Battery B-124X...
- Page 36 BlackVue Battery Manager 应用 从 Google Play Store (Android) 或 Apple App Store (iOS) 下载 BlackVue Battery manager 应用,以管理电源和设置。 通过蓝牙连接 Ultra Battery 开启 Ultra Battery。 ū 如果使用点烟器插头电源线,应将电源开关拨到 Cigarette 位置。 ū 如果使用硬接线电源线,应将电源开关拨到 Hardwire 位置。 打开智能手机的设置页,开启蓝牙。 打开 BlackVue Battery manager 应用。从列表中选择您的 Ultra Battery。如果您的 Ultra Battery 未显示,点击扫描刷新 列表。...
- Page 37 电池信息屏幕 设置 电池的蓝牙 ID 型号 当前电池状态 当前充电状态 插入 USB 端口的 电池温度 设备* 实时输入电压和电流 实时输出电压和电流 可使用的总电池容量(用户设定) 当前功率输入等级下估计还需多长时间充满(小时:分钟) 当前功率输出等级下的估计使用时间(小时:分钟) * 有些 USB 电缆可能未被检测到 电池设置屏幕 返回/取消 该设置只适用于新款豪华汽车(特 别是针对韩国制造的宝马车),这 打开或关闭蜂鸣提示 类车型配备可限制停车模式时间的 设置总的可用电池容量。 内置行车记录仪。 查看下表了解推荐设置。 如果您使用自购买的行车记录仪, 例如 BlackVue 行车记录仪,可关闭 该设置。 保存更改 恢复到默认出厂设置 Power Magic Ultra Battery B-124X...
- Page 38 电池容量 电池组数量 推荐的电池容量设置 1 (Ultra) 6,000 mAh 1 (Ultra) + 1(扩展) 12,600 mAh 1 (Ultra) + 2(扩展) 19,200 mAh 1 (Ultra) + 3(扩展) 25,800 mAh 1 (Ultra) + 4(扩展) 32,400 mAh 1 (Ultra) + 5(扩展) 39,000 mAh 对于附加的扩展电池,我们推荐每块以 6,600 mAh 递增。 Power Magic Expansion Battery B-124E(单独销售)...
- Page 39 大约 80°C (176°F) 高温切断 12.8 V / 6,000 mAh / 76.8 Wh 容量 行车记录仪端口:11V−14.2V / 2A(最大) 输出电压/电流 USB 端口:4.75V−5.25V / 2A(最大) 客户支持 如需客户支持、用户手册以及内容更新,请访问网址 www.blackvue.com 。 您还可以给客户支持专家发送电子邮件,邮件地址:cs@pittasoft.com 。 有限质量保证 产品质保期为 1 年,从购买日开始。 如果质保期内产品在正常和正确使用下出现故障,我们的服务中心将免费维修产品。 对产品进行拆解、改装和改造将使质保无效。 对于质保期内因不正确使用导致的故障或问题,相应维修成本由客户承担。 对于不正确使用产品所导致的任何损失或损坏,制造商概不负责。 Power Magic Ultra Battery B-124X...
-
Page 40: Instrucciones De Seguridad
BlackVue Power Magic Ultra Battery B-124X La Power Magic Ultra Battery está diseñada para dar alimentación a su cámara para salpicadero BlackVue en el modo de estacionamiento durante largos periodos de tiempo sin alimentación de la batería del vehículo. Conexión del cable de alimentación... - Page 41 No permita que objetos metálicos entren en contacto con los terminales de la batería ni con los cables de salida. Asegúrese de que la batería no entre en contacto con el agua ni con otros líquidos. Pittasoft Co., Ltd. no será responsable de los daños causados al desmontar, abrir o modificar el producto. Eliminación de su batería recargable Todos los aparatos eléctricos y electrónicos deben llevarse a los puntos de recogida de residuos municipales para su...
- Page 42 De un vistazo Cámara para salpicadero LEDs (salida para la toma : Batería en carga del encendedor para : Batería totalmente cargada la cámara) : Bluetooth activado Salida USB Puerto para Expansion Entrada de Battery (a la venta por alimentación CC separado) (conexión del cable de alimentación)
-
Page 43: Características Del Producto
Indicadores LED y avisos sonoros LEDs Bip* Encendido Los 3 LED se iluminan a la vez y se Emite cuatro bips apagan uno a uno. Se inició la carga El LED rojo parpadea durante 5 s Emite un bip Cargando LED rojo permanece encendido Cargada LED verde permanece encendido... -
Page 44: Guía De Instalación
Guía de instalación Coloque el interruptor de encendido en la posición de apagado (OFF). Expansion Dashcam DC in Cigarette Hardwire Para la instalación sencilla usando un cable con conector para la toma de alimentación del encendedor : a. Conecte el cable de alimentación con conector para la toma del encendedor al puerto de entrada de alimentación DC in de la Ultra Battery. - Page 45 Para la instalación de cableado usando una cable de alimentación fijo: a. Conecte el cable de alimentación fijo al puerto de entrada de alimentación DC in de la Ultra Battery. Conexión del cable de alimentación b. Consulte el manual de propietario de su vehículo, identifique un fusible conectado (de alimentación de algún accesorio) de 10 A o menos, en el interior del panel de fusibles.
- Page 46 e. Inserte el fusible que sacó del panel de fusibles en el terminal portafusibles en la ranura más próxima a la patillas metálicas. Nota Si el fusible original es un minifusible de perfil bajo, use en su lugar el nuevo minifusible de 10 A (incluido). Inserte un fusible nuevo de 20 A en la ranura más alejada de las patillas metálicas del terminal portafusibles.
- Page 47 Conecte el ‘Cable de salida’ en el puerto etiquetado como Dashcam en la Ultra Battery. Conecte el enchufe de alimentación de su cámara para salpicadero en la toma de alimentación para encendedor en el cable de salida de la Ultra Battery. Nota Para garantizar un buen contacto eléctrico, puede usar cinta aislante para sujetar el enchufe y la toma.
- Page 48 Aplicación de gestión BlackVue Battery Descargue la aplicación de gestión BlackVue Battery desde Google Play Store (Android) o Apple App Store (iOS) para gestionar la alimentación y ajustes. Conectar la Ultra Battery por Bluetooth Encienda la Ultra Battery. ū Si está usando el cable de alimentación con conector para la toma del encendedor coloque el interruptor de encendido en la posición Cigarette.
- Page 49 Pantalla de información de la batería Ajustes ID del Bluetooth de la batería Modelo Estado actual de la batería Estado actual de carga Dispositivo conectado Temperatura de batería al puerto USB* Tensión e intensidad de corriente de entrada en tiempo real Tensión e intensidad de corriente de salida en tiempo real Capacidad total de la batería disponible para usar (establecida por el usuario)
- Page 50 Capacidad de batería Núm. de baterías recargables Ajuste recomendado de capacidad de la batería 1 (Ultra) 6.000 mAh 1 (Ultra) + 1 (Expansion) 12.600 mAh 1 (Ultra) + 2 (Expansion) 19.200 mAh 1 (Ultra) + 3 (Expansion) 25.800 mAh 1 (Ultra) + 4 (Expansion) 32.400 mAh 1 (Ultra) + 5 (Expansion) 39.000 mAh...
-
Page 51: Especificaciones Del Producto
Soporte al cliente Para obtener soporte al cliente, manuales y actualizaciones de firmware, visite www.blackvue.com. También puede enviar un correo electrónico a un experto de Soporte al cliente en cs@pittasoft.com. Garantía limitada El periodo de garantía de este producto es de 1 año a partir de la fecha de compra. - Page 52 BlackVue Power Magic Ultra Battery B-124X Power Magic Ultra Battery は、車両バッテリーを消費せずに、駐車モードの BlackVue 車載カメラに電源を長時間供給す る目的で使用されます。 または ハードワイ ヤー電源ケ ーブル シガレットライタープラグ電源ケーブル 安全上のご注意 Power Magic Ultra Battery の使用方法を間違えると性能が劣化するだけでなく、過熱、発火、爆発などの原因となること があります。本製品を適切に使用するため、以下の指示に従ってください。 本製品を使用する前に取扱説明書の内容を熟知してください。 メーカーより提供された純正 BlackVue ケーブルのみをお使いください。交換が必要な場合はカスタマーサポート かお近くの販売店にご連絡ください。 本製品は車載カメラの電源供給にのみ使用してください。 本製品を直射日光や熱源にさらさないでください。 本製品を高温にさらさないでください。 本製品を、シガレットライターマルチソケットスプリッター (アダプター) と併用しないでください。 本製品を電子レンジに入れたり高圧環境下に置かないでください。 ご自分で本製品を修理または改造しないでください。 本バッテリーを落下させたり、物理的な衝撃を与えないでください。...
- Page 53 使用中に本製品から異臭が出たら、直ちに電源プラグを抜き、カスタマーサポートかお近くの販売店にご連絡く ださい。 本製品が膨張したら、直ちに使用を中止してください。カスタマーサポートかお近くの販売店にご連絡ください。 本製品をお子様やペットの手に届かない場所に保管してください。 電源ケーブルや出力ケーブルの端子に、金属性の物体を接触させないでください。 バッテリーを水などの液体に接触させないでください。 Pittasoft Co., Ltd. では、本製品の分解や開封や改造が原因で発生した損害に対して、一切責任を負いません。 バッテリーパックの廃棄 電気製品や電子製品は、燃えるごみと区別して、国または地方自治体が指定した専門の回収業者によって回収さ れることになっています。お住まいの地域の廃棄・リサイクルの詳細については、お近くの地方自治体にお問合 せください。 焼却したり火炎にさらさないでください。火災や爆発の危険があるので、高熱にさらさないでください。 部品 Power Magic Ultra Battery B-124X を取り付ける前に、以下の品目が同梱されているかご確認ください。 Power Magic Ultra 取扱説明書 Battery B-124X 車載カメラの出力ケー シガレットライター ブル (シガレットライター プラグ電源ケーブル ソケット) ハードワイヤー ヒューズタップキット 電源ケーブル (3種類) マジックテープ (2本) 注...
- Page 54 概要 :バッテリーの充電中 Dashcam (車載カメラ 用シガレットライタ :満充電バッテリー ーソケットへの出力) :ブルートゥースオン USB出力 Expansion Battery DC in (電源ケー (別売) 用ポート ブルの接続) 電源スイッチ y Cigarette:シガレットライタープラグ電源ケーブルを使用してシガレ ットライターソケットソケットから Ultra Battery に電源が供給される 場合に、これを選択します (標準5A充電) y Hardwire:ハードワイヤー電源ケーブルを使用して車両のヒューズパ ネルから Ultra Battery にハードワイヤー接続する場合に、これを選択 します (急速9A充電) y OFF:Ultra Battery の電源を切ります BLACKVUE...
- Page 55 LEDインジケーターとビープ音 ビープ音* 電源オン 3個の LED がすべて同時に点灯して 4 回ビープ音が鳴る から、順次消灯します。 充電開始 赤 LED が5秒間点滅する 1 回ビープ音が鳴る 充電中 赤 LED が点灯する 満充電 緑 LED が点灯する ブルートゥース接続 青 LED が点灯する 低入力電圧警告/ 赤と緑の LED が同時に点滅する 高入力電圧警告 過熱警告 赤と緑の LED が交互に点滅する 1 秒おきにビープ音が鳴る * BlackVue Battery manager アプリを使用すると、ブルートゥースを介してビープ音を無効にすることができます。 製品の特徴...
- Page 56 取付ガイ ド 電源スイッチを「OFF」の位置にします。 Expansion Dashcam DC in Cigarette Hardwire シガレットライタープラグを使用した DIY 取り付け: a. Ultra Battery の DC in ポートにシガレットライタープラグ電源ケーブルを差し込みます。電源ケーブルの 他端を車両のシガレットライターソケットに差し込みます。 シガレットライタープラグ 電源ケーブル b. 電源スイッチを「Cigarette」の位置にします。ステップ 3 に進みます。 Expansion Dashcam DC in Cigarette Hardwire 注意 シガレットライタープラグ電源ケーブルを使用する場合は、スイッチを「Cigarette」に設定する必要があります。シガレットラ イタープラグ電源ケーブルを使用する場合にスイッチを「Hardwire」位置に設定すると、本製品が故障・過熱・点火する恐れが あります。 または BLACKVUE...
- Page 57 ハードワイヤー電源ケーブルを使用したハードワイヤー取り付け: a. Ultra Battery の DC in ポートにハードワイヤー電源ケーブルを差し込みます。 ハードワイヤー 電源ケーブル b. 愛車の取扱説明書をご覧になり、車内ヒューズパネルで 10A 以下のスイッチ経由 (アクセサリ電源) ヒューズを 見つけてください。そのヒューズの例として、シガレットライターやカーステレオのヒューズスロットが挙げ られます。 注意 Ultra Battery を常時通電 (BATT) ヒューズに接続すると、車両のバッテリーが上がってしまう恐れが あります。 c. 見つけたスイッチ経由ヒューズを取り外し、3 個のヒューズタップのいずれかのヒューズと一致するか確認し ます。 d. ヒューズタップのコネクター端に ACC ワイヤーを挿入します。圧着ツールかペンチを使用して、ワイヤーに コネクターを圧着します。 アースワイ ヤー (リング) Ultra Battery へ Power Magic Ultra Battery B-124X...
- Page 58 e. ヒューズパネルから取り外したヒューズを、ヒューズタップのブレードに一番近いスロットに挿入します。 注 低プロフィールのミニタイプヒューズが使用されている場合、代わりに、付属の新品の 10A ミニタイプヒュ ーズを使用してください。 ヒューズタップのブレードから一番遠いスロットに、新しい 20A ヒューズを挿入します。 B-124X への出力 電源入力 工場設置アクセ サリへの出力 g. ヒューズパネルの空のスイッチ経由ヒューズスロットに、ヒューズタップを挿入します。 注意 図を参照して、正しい方向にヒューズタップを挿入してください。正しい方向に挿入すると、元のヒューズ (e.) の負荷が増加せず、新しいヒューズ (f.) に、ヒューズスロットから直接電源が供給されます。ヒューズタ ップを逆に挿入した場合、元のヒューズの負荷が増加するので、ヒューズが切れることがあります。 h. アースワイヤー (リング) を、車体の露出した金属フレームに直接ね じ込まれているボルトなどのアースポイントに接続します。露出し た金属フレームに、アースワイヤーを固定します (例:ボルトの下に Expansion Dashcam 固定する)。 Cigarette Hardwire 電源スイッチを「Hardwire」の位置にします。 BLACKVUE...
- Page 59 「出力ケーブル」を、Ultra Battery の Dashcam ポートに差し込みます。 車載カメラの電源プラグを、Ultra Battery の「出力ケーブル」のシガレットライターソケットに差し込みます。 注 電気的な接続を確実にするため、電気工事用テープを巻きつけてプラグとソケットを束ねます。 プライツールを使ってフロントガラストリム/モールドの端を持ち上げ、その中に電源コードを入れ込みます。 付属のマジックテープで Ultra Battery を適切な位置に固定します。 注意 本製品を直射日光や熱源にさらさないでください。 Power Magic Ultra Battery B-124X...
- Page 60 BlackVue Battery Manager アプリ Google Play Store (Android) または Apple App Store (iOS) から BlackVue Battery manager アプリをダウンロードして電源 や設定の管理を行います。 ブルートゥース経由での Ultra Battery の接続 Ultra Battery の電源を入れます。 ū シガレットライタープラグ電源ケーブルを使用する場合は、電源スイッチを Cigarette の位置に設定します。 ū ハードワイヤー電源ケーブルを使用する場合は、電源スイッチを Hardwire 位置に設定します。 スマートフォンの設定に進み、ブルートゥースをオンにします。 BlackVue Battery manager アプリを開きます。リストから Ultra Battery を選択します。Ultra Battery が表示されない 場合、スキャンをタップしてリストを更新してください。...
- Page 61 バッテリー情報画面 設定 バッテリーのブルートゥースID 型式 バッテリーの現在の状態 現在の充電状態 USB ポートに差し バッテリー温度 込んだデバイス* リアルタイムの入力電圧と電流 リアルタイムの出力電圧と電流 使用可能なバッテリー総容量 (ユーザーが設定) 現在の電力入力レベルにおける満充電まで の予想時間 (時間:分) 現在の電力消費レベルにおける予想 使用可能時間 (時間:分) * USB ケーブルによっては検知されないものがあります バッテリー設定画面 戻る/キャンセル この設定は、駐車モードの時間を ビープ音による警告の 制限する車載カメラが内蔵された オンオフ 新型高級車 (特に韓国市場向けの 使用可能なバッテリー総容 BMW など) にのみ適用されます。 量を設定します。推奨され BlackVue 車載カメラなど、後付車 る設定については下表をご 載カメラを使用する場合は、この 覧ください。...
- Page 62 バッテリーの容量 バッテリーパックの個数 推奨バッテリー容量設定 1 個 (Ultra) 6,000 mAh 1 個 (Ultra) + 1 個 (Expansion) 12,600 mAh 1 個 (Ultra) + 2 個 (Expansion) 19,200 mAh 1 個 (Ultra) + 3 個 (Expansion) 25,800 mAh 1 個 (Ultra) + 4 個 (Expansion) 32,400 mAh 1 個...
- Page 63 12.8 V / 6,000 mAh / 76.8 Wh 車載カメラポート:11 V〜14.2 V / 2 A (最大) 出力電圧 / 電流 USB ポート:4.75 V〜5.25 V / 2 A (最大) カスタマーサポー ト カスタマーサポートや取扱説明書やアップデートなどについては、www.blackvue.com をご覧ください。 あるいは、カスタマーサポートのエキスパート (cs@pittasoft.com) までご連絡ください 限定保証 本製品の保証期間は購入日より 1 か年です。 適切な使用状態で保証期間内に製品が故障した場合には、弊社サービスセンターにて無償で製品を修理致します。 本製品を分解・変更・改造すると保証が無効になります。 保証期間内であっても、不適切な使用によって生じた不具合や問題の修復や修理の費用は、お客様に負担してい...
-
Page 64: Instructions Relatives À La Sécurité
BlackVue Power Magic Ultra Battery B-124X La batterie Power Magic Ultra Battery est conçue pour alimenter votre dashcam BlackVue en mode parking pour une période prolongée sans utiliser la batterie de votre véhicule. Câble d’alimentation permanent Câble d’alimentation à fiche allume-cigare Instructions relatives à... - Page 65 Faites attention à ce qu’aucun objet métallique n’entre en contact avec les bornes des câbles d’alimentation et de sortie. Assurez-vous que la batterie n’entre pas en contact avec de l’eau ou d’autres liquides. Pittasoft Co., Ltd. ne peut être tenue responsable des dommages causés par le démontage, l’ouverture ou la modification du produit.
- Page 66 En bref Voyant Dashcam (sortie vers : Batterie en cours de chargement prise allume-cigare : Batterie complètement chargée pour dashcam) : Bluetooth activé Sortie USB Port pour batterie Entrée DC d’extension (vendue (connexion du câble séparément) d’alimentation) Interrupteur d’alimentation y Cigarette : Choisissez ce mode lorsque la batterie Ultra Battery est alimentée par une prise allume-cigare à...
-
Page 67: Caractéristiques Du Produit
Voyants et signaux sonores Voyant Signal sonore* Allumée Les 3 voyants s’allument simultanément, puis Quatre bips s’éteignent un par un. Commence à charger Le voyant rouge clignote pendant 5 secondes Un bip Chargement Le voyant rouge est allumé Pleinement chargée Le voyant vert est allumé Bluetooth connecté... -
Page 68: Guide D'installation
Guide d’installation Réglez l’interrupteur d’alimentation sur la position OFF. Expansion Dashcam DC in Cigarette Hardwire Pour les installations temporaires utilisant un câble d’alimentation à fiche allume-cigare : a. Branchez le câble d’alimentation à fiche allume-cigare dans le port DC in de la batterie Ultra Battery. Branchez l’autre extrémité... - Page 69 Pour une installation câblée utilisant un câble d’alimentation permanent : a. Branchez le câble d’alimentation permanent dans le port DC in de la batterie Ultra Battery. Câble d’alimentation permanent b. En vous reportant au manuel du propriétaire de votre véhicule, identifiez un fusible Conencteur (alimentation accessoire) de 10 A dans votre boîte à...
- Page 70 e. Insérez le fusible que vous avez retiré de la boîte à fusibles dans l’emplacement le plus proche des lames sur le raccord à fusible. Remarque Si le fusible d'origine est de type mini à profil surbaissé, utiliser le nouveau fusible de type mini de 10 A à la place (fourni). Insérez le nouveau fusible de 20 A dans l'emplacement le plus éloigné...
- Page 71 Branchez le « câble de sortie » dans le port indiqué Dashcam sur la batterie Ultra Battery. Branchez la fiche d’alimentation de votre dashcam dans la prise allume-cigare sur le « câble de sortie » de la batterie Ultra Battery. Remarque Pour assurer un bon contact électrique, vous pouvez utiliser du ruban isolant pour scotcher ensemble la fiche et la prise. Servez-vous de l’outil de levier pour soulever la garniture du pare-brise et insérez-y le cordon d’alimentation.
- Page 72 Application de gestion BlackVue Battery Téléchargez l’application de gestion BlackVue Battery depuis le Google Play Store (Android) ou l’App Store d’Apple (iOS) afin de gérer l’alimentation et les réglages. Connexion à la batterie Ultra Battery via Bluetooth Allumez la batterie Ultra Battery. ū...
- Page 73 Écran d’information de la batterie Réglages Identifiant Bluetooth de la batterie Modèle État actuel de la batterie État de chargement actuel Appareil branché Température de la batterie sur le port USB* Tension et courant d’entrée en temps réel Tension et courant de sortie en temps réel Capacité...
- Page 74 Capacité de la batterie Nombre de blocs-batteries Réglage de capacité de batterie recommandé 1 (Ultra) 6 000 mAh 1 (Ultra) + 1 (extension) 12 600 mAh 1 (Ultra) + 2 (extension) 19 200 mAh 1 (Ultra) + 3 (extension) 25 800 mAh 1 (Ultra) + 4 (extension) 32 400 mAh 1 (Ultra) + 5 (extension) 39 000 mAh Pour chaque batterie d’extension supplémentaire, nous conseillons d’augmenter de 6 600 mAh.
-
Page 75: Service Client
Service client Pour contacter le service client et obtenir les manuels et les mises à jour, rendez-vous sur www.blackvue.com. Vous pouvez également envoyer un e-mail à un expert du service client à l’adresse cs@pittasoft.com Garantie limitée La période de garantie de ce produit est d’un an à compter de la date d’achat. - Page 76 Notes...
- Page 77 Notes...
-
Page 78: Product Warranty
Q The term of this product warranty is 1 year from the purchase date. We, PittaSoft Co., Ltd., provide the product warranty according to the Consumer Dispute Settlement Regulations (drawn up by the Fair Trade Commission). PittaSoft or designated partners will provide the warranty service upon request. Warranty... - Page 79 제품보증서 본Q제품의Q보증기간은Q구입일로부터Q1년입니다.Q 저희Q피타소프트에서는Q소비자Q분쟁해결Q기준(공정거래위원회Q고시)에Q따라Q아래와Q같이Q제품에Q대한Q보증을Q실시합니다.Q서비스Q 요청시Q피타소프트Q또는Q지정된Q협력사에서Q서비스를Q합니다. 보증내용 소비자Q피해Q유형 보증기간이내 보증기간이후 제품교환/ 구입 후 10일 이내에 중요한 수리를 요하는 경우 구입가환급 구입 후 1개월 이내에 중요한 부품에 수리를 요하는 경우 제품교환 해당 없음 제품교환/ 교환된 제품이 1개월 이내에 중요한 수리를 요하는 경우 구입가환급 교환...
- Page 80 I 7F, BYC HIGHCITY Building A 131, Gasan Digital 1-ro, Geumcheon-gu, Seoul, Republic of Korea, 08506 Customer Support I cs@pittasoft.com Product Warranty I One-Year Limited Warranty Designed by Pittasoft Co., Ltd. Manufactured by EGEN Inc. facebook.com/BlackVueOfficial www.blackvue.com Made in Korea COPYRIGHT 2019 Pittasoft Co., Ltd. All rights reserved. ©...
Need help?
Do you have a question about the BlackVue Power Magic Ultra Battery B-124X and is the answer not in the manual?
Questions and answers