Table of Contents
Advertisement
Advertisement
Table of Contents

Subscribe to Our Youtube Channel
Summary of Contents for ConMed PRO2038
- Page 1 Power The Hall Attachment ® ® Instruction Manual...
- Page 2 Proprietary Information This manual contains information deemed proprietary to Linvatec Corporation. The information contained herein, including all of the designs and related materials, is the sole property of Linvatec and/or its licensors. Linvatec and/or its licensors reserve all patent, copyright and other proprietary rights to this document, including all design, manufacturing methodology and reproduction.
-
Page 3: Table Of Contents
2.1.2.2 AO Drill (PRO2070) ........5 2.1.2.3 AO Attachment - Small (PRO2038) ......5 2.1.2.4 Trinkle /AO Attachment (PRO2029) . - Page 4 Table of Contents Page PowerPro ATTACHMENT OPERATION (Continued) 2.1.5 Wire and Pin Driving Attachments ....... . 10 2.1.5.1 Wire Driver (PRO5028) for Battery Handpieces .
-
Page 5: Introduction
INTRODUCTION General Warnings t is recommended that personnel study this 1. This equipment is designed for use by med- manual before attempting to operate, clean ical professionals completely familiar with ® ® the required techniques and instructions for or sterilize Hall PowerPro attachments. -
Page 6: Symbol Definitions
8. Continually check all attachments for over- Symbol Definitions heating. If overheating is noticed, discon- tinue use and return equipment for service. Attention, consult accom- 9. Do not attach, insert or remove accessories panying documents. or attachments while the handpiece is oper- ating. -
Page 7: Powerpro Attachment Operation
1/4” Jacobs Chuck (PRO2041) • 1/4” High Torque Jacobs Chuck (PRO2042) • Trinkle/AO (PRO2029) • AO Attachment - Small (PRO2038) To disconnect an attachment twist the • Radiolucent Drive Adapter Attachment attachment collet-lock in the direction of (PRO2514) the arrow. Remove the attachment. -
Page 8: Reaming Attachments
2.1.1 Reaming Attachments 2.1.1.2 Aesculap Reamer (PRO2060) All reaming attachments are geared down to provide higher torque levels for acetabulum and femoral reaming, hip screws, or any procedure where high torque is necessary. All PowerPro reaming attachments are easily recognized by the red-colored proximal ring. -
Page 9: Drilling Attachments
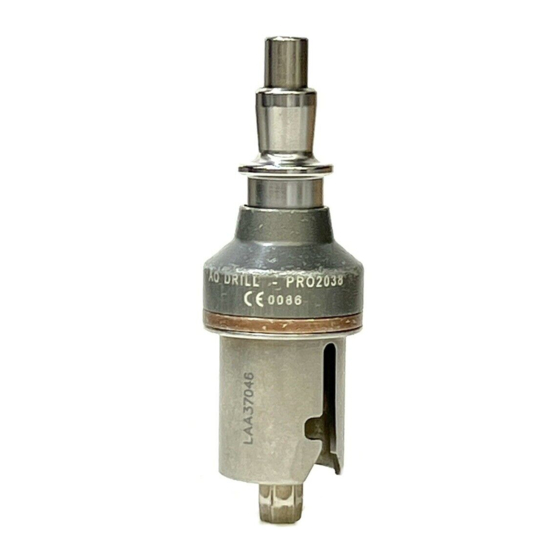
1. To attach accessories to Drill and AO attachments: (a) Place the handpiece in the safe posi- tion. 2.1.2.3 AO Attachment - Small (b) Pull the collet sleeve back and insert (PRO2038) the accessory shank into the collet. Release the collet sleeve. 2.1.2.1 Zimmer/Hudson Drill (PRO2046) Specifications:... -
Page 10: Trinkle /Ao Attachment (Pro2029)
Trinkle Shank Accessories for the Trinkle/AO 2.1.2.4 Trinkle /AO Attachment Attachment (PRO2029) To attach accessories to the Trinkle/AO attachment: (a) Place the handpiece in the safe posi- tion. (b) Pull the collet sleeve back. Specifications: Collet: Accepts Trinkle and ASIF/AO accessories Cannulation: 3.4 mm Color Ring: Purple... -
Page 11: Jacobs Chucks
AO/ASIF Drill Bits for the Trinkle/AO 2.1.3 Jacobs Chucks Attachment 1. To attach accessories to the Jacobs Chuck 1. Align the flat portion of the drill bit shank attachments: with the black arrow on the outer collet sleeve. (a) Place the handpiece in the safe posi- tion. -
Page 12: 1/4" Jacobs Chuck (Pro2041)
2.1.3.2 1/4” Jacobs Chuck (PRO2041) 2.1.4 Keyless Chucks To attach accessories to Keyless Chuck attachments: (a) Place the handpiece in the safe posi- tion. (b) Insert accessory shank into chuck. Specifications: (c) While holding the knurled ring below the chuck, turn the knurled portion of Collet: 1/4”... -
Page 13: 1/4" Keyless Chuck (Pro2250)
2.1.4.2 1/4” Keyless Chuck (PRO2250) 2.1.4.4 Radiolucent Drive Adaptor (PRO2514) Specifications: 1. To attach a radiolucent drive attachment: Collet: 1/4” Keyless Chuck (a) Place the handpiece in the safe posi- Cannulation: 4.1 mm tion. Color Ring: Copper (b) Slide the radiolucent drive attachment onto the adaptor until it is completely seated against the collar of the adaptor. -
Page 14: Wire And Pin Driving Attachments
Advancement Advancement Lever Lever Wire Driver (PRO5028) Pin Driver (PRO5032) for Battery Handpieces for Battery Handpieces 2.1.5 Wire and Pin Driving 2.1.5.1 Wire Driver (PRO5028) for Attachments Battery Handpieces Specifications: NOTES: Collet: Wire Driver 1. See the appropriate PowerPro handpiece Cannulation: Accepts wires from 0.028 in. -
Page 15: Sawing Attachments
2.1.6 Sawing Attachments 2.1.6.2 Reciprocating Saw Attachment (PRO2045) NOTES: See the appropriate PowerPro handpiece instruction manual for information to insert and drive wires and pins. Do not operate any saw attachment (Reciprocating Saw - PRO2045, Sagittal Saw - PRO2043) in the oscillate mode. They are only to be operated in the drill Specifications: mode. -
Page 16: Maintenance
MAINTENANCE Cleaning and Sterilizing Regular and proper maintenance of your Power- Pro attachments are the best way to protect your 3.1.1 Cleaning Precautions investment. It is essential that you have your powered surgical instruments serviced as sched- Follow universal precautions for protective uled so as to retain their optimum performance apparel when handling and cleaning con- and reliability, which will reward you with safer,... -
Page 17: Attachment Cleaning Instructions
3.1.2 Attachment Cleaning Instructions Clean attachments as soon as possible after use. 1. Remove the attachment from the handpiece prior to cleaning. 2. Thoroughly scrub attachments with a clean, soft brush dampened with a mild, pH-balanced detergent. Remove all traces of blood, debris and stains. -
Page 18: Sterilization Information
NOTES: 3.1.3 Sterilization Information The following guidelines do not guarantee that the device is sterile after team sterilization is safe and effective and the procedure. Your institution is still has no contraindications for its use in ster- responsible for the normal sterility ilizing attachments. - Page 19 Minimum recommended sterilization exposure times are as follows: Table 1: Sterilization Parameters Minimum Sterilization Type Temperature Exposure Dry Cycle Time Sterilization Guidelines for Sterilizing PowerPro Attachments Individually or in the PowerPro PRO5090 System Sterilization Case Steam Pre-vacuum 270 - 272°F (132 - 133°C) 4 minutes 8 minutes minimum * Steam Gravity...
-
Page 20: Customer Service, Repairs And Warranty
CUSTOMER SERVICE, REPAIRS and WARRANTY Customer Service f you need technical assistance regarding the use or application of this product, or you encounter a problem that requires servicing or repair, contact Linvatec Customer Service at 800-925-4255 or your Hall Surgical Representative. Outside the U.S. contact your local Linvatec Hall Repre- sentative. - Page 21 Minimum repair charge - There is a minimum repair charge (except for products covered under warranty). This charge also applies to products returned for repair in which a problem cannot be veri- fied. Whenever it is required to return your product for repairs, be sure to package it in a protective carton. We recommend that you save the original shipping container for this purpose.
-
Page 22: Handpieces, Attachments And Accessories
PowerPro Battery Two-Trigger Handpiece (International) PRO5300 PowerPro Battery Oscillator Handpiece PowerPro Handpiece Attachments PRO2029 Trinkle/AO Attachment PRO2030 5/32” Jacobs Chuck Attachment w/key PRO2038 AO Small Attachment PRO2040 AO Reamer Attachment PRO2041 1/4” Jacobs Chuck Attachment PRO2042 1/4” High Torque Jacobs Chuck Attachment... -
Page 23: Linvatec And Hall Surgical Instrument Warranty
13. APEX Autoclavable Camera Heads - 500 Linvatec and Hall ® Surgical use service program (prorated credit after Instrument Warranty 250 uses) 14. Envision 1/4” Autoclavable Camera Heads - invatec Corporation, (“the Company”), 500 uses or Twelve (12) months, whichever warrants to the first purchaser or lessee comes first (“Customer”) that the Linvatec and Hall... - Page 24 Within a reasonable time after receipt of the The foregoing limited warranties are in lieu Instrument, the Company will investigate and of all other warranties, express or implied, shall correct any defect covered by warranty by including, but not limited to, the implied war- providing, at its option, one of the following: ranties of merchantability and fitness for a service or repair of the Instrument, a replace-...
- Page 28 11311 Concept Boulevard Largo, Florida 33773-4908 Phone: (727) 392-6464 Customer Service: (800) 925-4255 USA Fax: (727) 399-5256 International Fax: (727) 397-4540 www.linvatec.com © 2002 Linvatec Corporation, a subsidiary of ConMed Corporation 0123 All rights reserved. Printed in USA W41-065-004 Rev. C 02/2002...
Need help?
Do you have a question about the PRO2038 and is the answer not in the manual?
Questions and answers