
Subscribe to Our Youtube Channel
Summary of Contents for Slamtec RPLIDAR S1
-
Page 1: Contents
RPLIDAR Low Cost 360 Degree Laser Range Scanner Development Kit User Manual Model:S1 Shanghai Slamtec.Co.,Ltd... -
Page 2: Table Of Contents
Contents CONTENTS ..............................1 OVERVIEW ..............................3 TEMS IN THE EVELOPMENT ........................3 RPLIDAR S1 ........................错误!未定义书签。 USB A DAPTER ..............................4 CONNECTION AND USAGE ........................6 ONNECTION ..............................6 USB A NSTALL RIVER FOR THE DAPTER ......................6 PPLICATION .......................... -
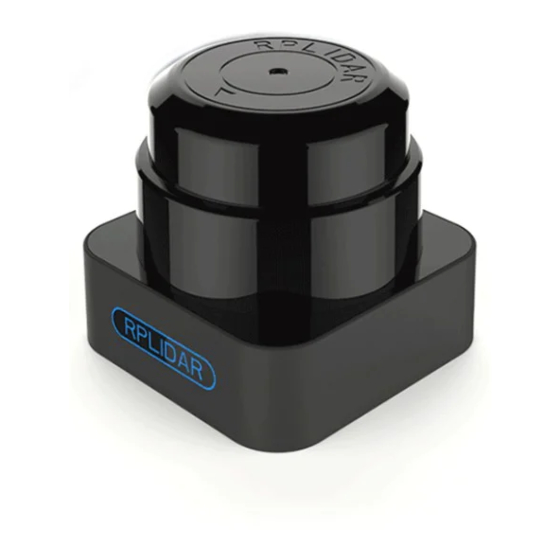
Page 3: Overview
Overview RPLIDAR S1 development kit includes the matched tools used for evaluating RPLIDAR’s performance and initial development. After connecting the RPLIDAR S1 with PC via USB cable and connecting the power adapter to the USB cable, users can observe the cloud map of the environment scanning point collected by the RPLIDAR in RoboStudio and start development based on the SDK. -
Page 4: Rplidar S1
The USB adapter comes with a dial switch. It can be used to switch the Baud rate from 115200 to 256000 or vice versa, which is compatible with RPLIDAR S1 and former RPLIDAR series. Please note that the Baud rate should be set as 256000 if the USB adapter is connected with RPLIDAR S1.. - Page 5 Figure 1-3 RPLIDAR Adapter 5 / 18 Copyright (c) 2009-2017 RoboPeak Team Copyright (c) 2013-2017 Shanghai Slamtec Co., Ltd.
-
Page 6: Connection And Usage
Connection and Usage Connection RPLIDAR S1 can be easily connected to PC according to the following steps. 1) Connect RPLIDAR S1 with the USB adapter. Figure 2-1 Connect RPLIDAR S1 and USB Adapter 2) Connect the USB adapter to your PC via the Micro-USB cable. If the PC is... - Page 7 [Control Panel] -> [Device and Printers]. Please refer to the below figure. Figure 2-5 Recognized Serial Port Name Matched with the USB Adapter 7 / 18 Copyright (c) 2009-2017 RoboPeak Team Copyright (c) 2013-2017 Shanghai Slamtec Co., Ltd.
-
Page 8: Run Demo Application
PC; 3. Click the RPLIDAR S1 icon to extend the tool buttons below the icon: the left one is to adjust the motor speed while the right one is to open the tool bar in the major work area as shown in Figure 2-7. - Page 9 Figure 2-7 The Lidar Plugin in RoboStudio The serial number, version and model of the RPLIDAR S1 will show next with its icon in the lidar control panel. The supported commands of RPLIDAR are showed in the tool bar. The descriptions are listed in the bellow table.
-
Page 10: Troubleshooting
The current actual rotating speed will show in the upper left corner of the major work area. For instance, the actual rotating speed in the following screenshot is 12.88Hz. 10 / 18 Copyright (c) 2009-2017 RoboPeak Team Copyright (c) 2013-2017 Shanghai Slamtec Co., Ltd. - Page 11 Figure 2-10 The Motor Speed Adjustment Dialogue of RPLIDAR in RoboStudio 11 / 18 Copyright (c) 2009-2017 RoboPeak Team Copyright (c) 2013-2017 Shanghai Slamtec Co., Ltd.
-
Page 12: Sdk Introduction And Usage
SDK Introduction and Usage RPLIDAR S1 Interface Definition and Specification The standard RPLIDAR S1 uses SH1.0-6P female receptacle and interface lead as communication interface. Detailed interface definition is shown in the following figure: Figure 3-1 RPLIDAR S1 Interface Signal Color... -
Page 13: Pin Definition For The Usb Adapter
RPLIDAR S1 uses the one 5V DC power supply for powering the scan motor and the scan core at the same time. No extra power is required. With build-in and speed-adjustable motor driver, RPLIDAR S1 can control the start, the stop and the rotating speed of the motor via the MOTOCTL signal. - Page 14 2s when the input is 240Vac and at maximum load. Holdup time At least 30ms when shut the input is between 240Vac/50Hz and at maximum load. Rise time 14 / 18 Copyright (c) 2009-2017 RoboPeak Team Copyright (c) 2013-2017 Shanghai Slamtec Co., Ltd.
-
Page 15: Configure Rplidar S1 Scan Frequency
Configure RPLIDAR S1 Scan Frequency The RPLIDAR S1’s scan frequency can be modified by invoking the related functions in the SDK to configure the motor speed. Please refer to the RPLIDAR protocol and application note for more information and the SDK for the sample code on RPLIDAR scan frequency. -
Page 16: Operation Recommendation
Improper use may even damage the sensor. Please avoid using RPLIDAR in extreme high temperature (>40 degree) and too low temperature (<-10 degree). Ambient Light Compared with RPLIDAR A series, RPLIDAR S1 performs better to resist ambient light interference, which supports it to work properly in outdoor environment. 16 / 18 Copyright (c) 2009-2017 RoboPeak Team Copyright (c) 2013-2017 Shanghai Slamtec Co., Ltd. -
Page 17: Revision History
Revision History Description Date Version 2019-03-28 RPLIDAR S1 initial version 17 / 18 Copyright (c) 2009-2017 RoboPeak Team Copyright (c) 2013-2017 Shanghai Slamtec Co., Ltd. -
Page 18: Appendix
OWER DAPTER NPUT PECIFICATION ..................14 3-5 RPLIDAR P IGURE OWER DAPTER UTPUT PECIFICATION ................. 14 3-6 RPLIDAR P IGURE OWER DAPTER EGULATION ................14 18 / 18 Copyright (c) 2009-2017 RoboPeak Team Copyright (c) 2013-2017 Shanghai Slamtec Co., Ltd.
Need help?
Do you have a question about the RPLIDAR S1 and is the answer not in the manual?
Questions and answers