Advertisement
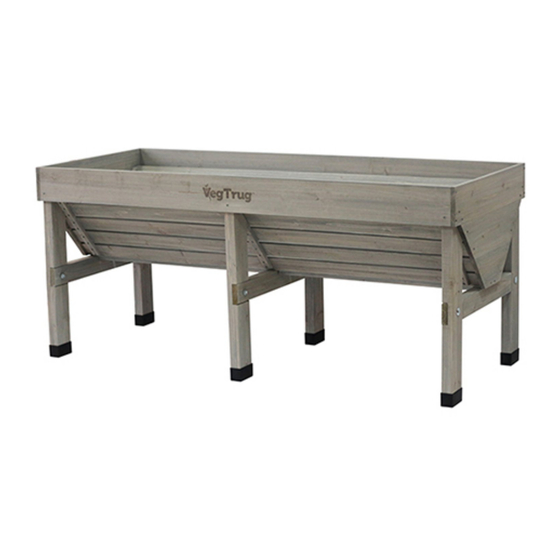
Building The VegTrug
Congratulations on your purchase of the VegTrug. Please go to
on what you can grow and how to get the best use from your VegTrug. You can also see a video of the
VegTrug build on the website or on the VegTrug iPhone App.
1. The VegTrug is very simple to assemble. Start by creating the H of the legs by using the bolts, washers
and nuts, placing them through the pre-drilled holes as shown in the picture. Gently tap the head of the
bolt into the hole so that it fits snugly into the leg. At this stage, do not tighten up the bolts completely, but
leave them loose so that there is some lateral movement in the vertical leg posts.
2. Stand the legs in a line on the ground and then place the ʻspineʼ of the VegTrug through the centre of the
H securing with the screws as indicated.
3. Next place the pre-formed side boards on the VegTrug as shown in the picture. You can ensure that they
are the right way up because the the pre-drilled holes are at the top of the posts. Line up the top edge of
the side boards with the top of the VegTrug leg posts. This will ensure that there is a gap at the bottom
between the boards and the spine. Secure the boards in place with the screws provided using the pre-
drilled holes making sure that the VegTrug is standing square.
4. Offer up the V shaped end boards to the VegTrug. They should fit snugly and correctly lining up with the
ends of the sideboards. At this stage, secure them with one screw in either side to hold them in place.
5. Offer up the top side boards of the VegTrug and ensure that they meet the V shaped end boards correctly
showing a level, even finish to the top of the VegTrug all round. If the boards do not connect properly,
stand at the end of the VegTrug with your feet inside the legs and move the H in or out so that all the
boards meet and all the screw holes line up correctly.
6. Once it is all in place, secure all the boards using the screws provided as shown in the picture.
7. Remember to tighten up the leg bolts at the end of the process. There is no need to over-tighten them -
just enough so that there is resistance and they will not come undone by hand.
Using The VegTrug
After you have put the VegTrug together, simply place the pre-formed liner into the VegTrug so that the top
edge overlaps. Fold the liner back over the top edge of the VegTrug and then pull the draw string tight to
tighten the liner and hold it in place whilst you fill the VegTrug with a suitable potting mix. Fill to within 2-4 cm
of the top edge. Once the potting mix is in place, you can release the draw string and tuck the liner down to
be level with the potting mix. It is a good idea to put the VegTrug in place before you fill it with potting mix!
Your VegTrug is now ready for planting. Go to
see what you can grow!
The Large (2m) VegTrug will take around 420 Litres of potting mix and the Small (1m) VegTrug will take 210
Litres of potting mix and the Mini (75cm) will take around 160 Litres of potting mix.
Maintaining The VegTrug
The VegTrug is pre-treated with a water based vegetable safe preservative. The VegTrug will fade in colour
when placed in direct sun-light and should be treated on an annual basis as a minimum. Ensure that you use
a vegetable safe product on the VegTrug.
As a raw material, wood will naturally contract and expand due to the humidity, heat and seasons. Hairline
cracks may appear to open or close accordingly. This movement in the material will be reduced and
controlled with regular re-treatment of the product.
Replacement liners and VegTrug greenhouse frames and covers can be purchased from your local stockist.
www.VegTrug.Com
www.VegTrug.Com
or download the VegTrug iPhone App to
for instructions and tips
Advertisement
Table of Contents

Summary of Contents for VegTrug VegTrug
- Page 1 finish to the top of the VegTrug all round. If the boards do not connect properly, stand at the end of the VegTrug with your feet inside the legs and move the H in or out so that all the boards meet and all the screw holes line up correctly.
Need help?
Do you have a question about the VegTrug and is the answer not in the manual?
Questions and answers