Advertisement
Quick Links
Advertisement

Subscribe to Our Youtube Channel
Summary of Contents for Nabtesco CONPAL
- Page 1 ROLLATOR BRAKE SYSTEM USER MANUAL SpeedControl SpeedControl 9009330B...
- Page 3 81-SS30048a Unit (Speed Control Unit) User’s Manual [For Users] 1 Precautions 1-1 Prior to Use —————————————————————————————————————————————————————————— 2 1-2 During Use ——————————————————————————————————————————————————————————— 3 1-3 During Repair and Inspection —————————————————————————————————— 3 1-4 During Storage ————————————————————————————————————————————————————— 3 2 Device Features and Component Names 2-1 Device Features ————————————————————————————————————————————————————...
- Page 4 Rollator itself. Please prepare a separate user's manual for the Rollator main body to which the CONPAL unit is to be installed for when the product is to be delivered to the user.
- Page 5 81-SS30048a 1-2 During Use WARNING ・ Walk with the Rollator while taking care that the wheels do not become inserted in a groove, such as a groove of a railway crossing, escalator, or elevator. A wheel in a groove may lead to falling. ・...
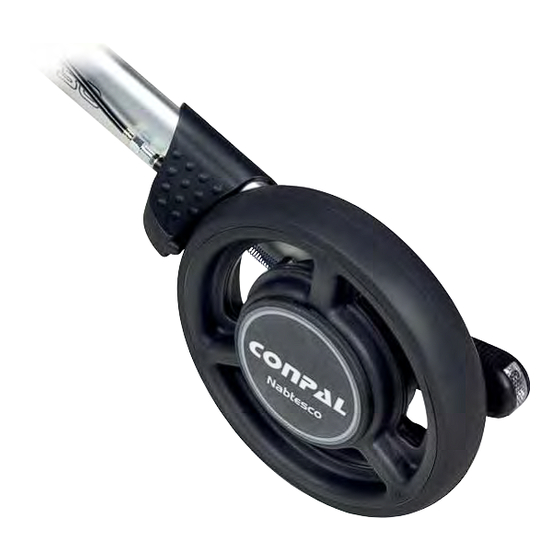
- Page 6 Device Features and Component Names 2-1 Device Features When installed to a Rollator, the CONPAL unit (Speed Control unit), automatically activates the brake at the time of sudden acceleration, preventing falling during Rollator use. Unlike a conventional resistance brake system, the CONPAL unit activates the brake only at times of sudden acceleration, making it possible for the user to walk smoothly without the brake applied during normal walking.
- Page 7 81-SS30048a 2-2 Component Names Outer View Inner View Name Remarks Center cap Tire Wheel (outer) Wheel (inner) Wheel installation bolt 3 used (M8×25) Adapter Sleeve Main body installation nut (Cap nut, M6) - 5 -...
- Page 8 81-SS30048a 3. Replacing the Tire 3-1 Checking if the Tire Needs to Be Replaced ・ There are grooves on the outer periphery of the tire. Check if the grooves exist. (Figure 1 and Figure 2) ・ If the grooves have worn away on either the left or right tire, the tire needs to be replaced. Be sure to contact the distributor.
- Page 9 ・ Does the brake ever not work well or not work at all? ・ During use, does not the CONPAL unit produce an abnormal noise? ・ During use, do not the wheels shake significantly? ・ Are any wheel installation nuts or main body installation bolts loose? ・...
- Page 10 81-SS30048a 4-2 Care CAUTION ・ When taking care of the product, do not pour water on the product. Wipe down the product using a cloth that was soaked in water and then squeezed tight. ・ If water enters the product, apply the brake five or six times prior to use to verify that the brake works. If the brake does not work, apply the brake several times, verify brake force recovery, and then use the product.
-
Page 11: If You Think Something Is Wrong
81-SS30048a 5 If You Think Something Is Wrong 5-1 If You Think Something Is Wrong During Use WARNING ・ If an abnormality exists, do not use the product. ・ If you sense that something is abnormal during use, stop use immediately and promptly contact the distributor. - Page 12 In a case where the product has been dropped, operates abnormally, or produces an abnormal noise, do not use the product. If repair is required, be sure to contact the distributor. ・ Do not remove and install the CONPAL unit to another Rollator or device. Doing so may lead to an unanticipated accident. CAUTION ・...
- Page 13 (1) Insert the sleeve from the Rollator inside. (Figure 4) (2) Insert the CONPAL wheel from the Rollator outside into the installed sleeve, in alignment with the left-right installation direction, and securely insert the adapter, aligning it to the indented sections of the main body.
- Page 14 Set the same adjustment levels on the left and right. Left and right brake force mismatch may lead to unanticipated falling. (1) Remove the center cap with the CONPAL unit still installed on the Rollator. (Figure 7) (2) Rotate the tire and align the wheel (outer) adjustment window and adjuster position. (Figure 8) (3) Insert the provided hexagonal wrench into the hexagonal hole of the adjuster.
- Page 15 81-SS30048a Figure 9 Figure 10 Brake force Brake force High High Brake Force: Low Brake Force: Medium Figure 11 Brake force High Brake Force: High - 13 -...
- Page 16 Securely tighten the main body installation bolts. Inadequate tightening results in the risk of installation area play and tire disengagement. (1) With the CONPAL unit mounted to the Rollator, loosen the three main body installation bolts and remove the wheel (outer) and tire. (Figure 12) (2) Install the new tire, aligning the tire to the angularities of the wheel.
- Page 17 81-SS30048a Figure 13 7-4-2 Replacing the Tire (Method B) WARNING ・ This procedure shall be done in the condition that the rear wheel attaches on the frame of the rollator. Working with detaching the wheel from the rollator would cause to failures of the product. CAUTION ・...
- Page 18 81-SS30048a Figure 14 The rubber tire has three (3) juts inner side to be fit to the wheel body. Figure 15 Push like flipping the tire from the wheel. Figure 16 Figure 17 CAUTION Put three juts on the tire to inset ditches on the wheel body.
- Page 19 81-SS30048a ・Side view Figure 18 Figure 19 OK OK OK OK NG NG NG NG Gap between tire and wheel. ・Top view Figure 20 Figure 21 OK OK OK OK NG NG NG NG The lateral surfaces are not on the same level.
- Page 20 81-SS30048a Manufactured by: Assistive Products Department Accessibility Innovations Company Service Center 35 Uozakihamamachi, Higashinada-ku, Kobe-shi, Hyogo 658-0024 TEL: +81-078-413-2724, FAX: +81-078-413-2725 URL: http://welfare.nabtesco.com *For improvement purposes, the information, specifications, etc., described in this manual are subject to change without notice.
Need help?
Do you have a question about the CONPAL and is the answer not in the manual?
Questions and answers