Table of Contents
Advertisement
DANGER
If you smell gas:
1.Shut off gas to the appliance.
2.Extinguish any open flame.
3.If odor continues, keep away from the appliance and
immediately call your gas supplier or fire department.
WARNING
Do not store or use gasoline or other flammable vapors
and liquids in the vicinity of this or any other appliance.
An LP‐cylinder not connected for use shall not be
stored in the vicinity of this or any other appliance.
WARNING
Improper installation, adjustment, alteration, service
or maintenance can cause property damage, injury or
death.
Read and follow all the warnings, installation,
operating and maintenance instructions thoroughly
before assembling and using this equipment.
Failure to follow these instructions could result in fire
or explosion, which could cause property damage,
personal injury or death.
WARNING
For outdoor use ONLY!
CARBON MONOXIDE HAZARD
This appliance can produce
DANGER
carbon monoxide which has no
odor.
Using it in an enclosed space can
kill you.
Never use this appliance in an
enclosed space such as a
camper, tent, car or home.
Call Customer Service Hotline
1‐855‐242‐6887
DO NOT RETURN TO THE STORE
Question, Problems, Missing parts?
Before running to your retailer, call our customer
service department at 1‐855‐CHANT‐US
(1‐855‐242‐6887) from 8:00am to 5:00pm Eastern
time, Monday through Friday.
GAS FIRE TABLE
MODEL NO.: PG196T
Advertisement
Table of Contents

Related Manuals for Member's Mark PG196T


Summary of Contents for Member's Mark PG196T
- Page 1 GAS FIRE TABLE DANGER MODEL NO.: PG196T If you smell gas: 1.Shut off gas to the appliance. 2.Extinguish any open flame. 3.If odor continues, keep away from the appliance and immediately call your gas supplier or fire department. WARNING Do not store or use gasoline or other flammable vapors and liquids in the vicinity of this or any other appliance. An LP‐cylinder not connected for use shall not be stored in the vicinity of this or any other appliance. WARNING Improper installation, adjustment, alteration, service or maintenance can cause property damage, injury or death. Read and follow all the warnings, installation, operating and maintenance instructions thoroughly before assembling and using this equipment. Failure to follow these instructions could result in fire or explosion, which could cause property damage, Call Customer Service Hotline personal injury or death. 1‐855‐242‐6887 WARNING For outdoor use ONLY! CARBON MONOXIDE HAZARD This appliance can produce DANGER carbon monoxide which has no DO NOT RETURN TO THE STORE odor. Question, Problems, Missing parts? ...
-
Page 2: Table Of Contents
TABLE OF CONTENTS Product Specifications........................2 ... -
Page 3: Safety Information
SAFETY INFORMATION Please read and understand this entire manual before attempting to assemble, operate or install ... - Page 4 SAFETY INFORMATION Keep ...
- Page 5 SAFETY INFORMATION ...
-
Page 6: Package Contents
PACKAGE CONTENTS A ... -
Page 7: Hardware Contents
HARDWARE CONTENTS ... - Page 8 ASSEMBLY INSTRUCTIONS Install the Tank Holder (G) to the Base (H) using 4pcs BB. M5 X 8 Bolt M5X10 Bolt G H Lay down the Rear Panel (D), and then attach the Base assembly using 2pcs AA. M6X16 Bolt M6X16 Bolt D ...
- Page 9 ASSEMBLY INSTRUCTIONS Install the Front Panel (E) to the Base using 2pcs AA. M6 X 16 Bolt M6X16 Bolt X 2 E 4. Install the Beam (C) using 2pcs BB. Tips: The end with small mental piece must be installed downwards. M5X10 Bolt M5 X 8 Bolt X 2 C C ...
- Page 10 ASSEMBLY INSTRUCTIONS 5. Install the Door Handles (CC) to two doors by using 2 pcs EE. Door Handle X 2 X 2 M4 X 8 Bolt 6. Position the Doors (B) to the door posts of front & rear panel as shown. Then fasten 2 AA from top. Repeat the same procedure for another door as well. M6 X 16 Bolt M6X16 Bolt X 2 B ...
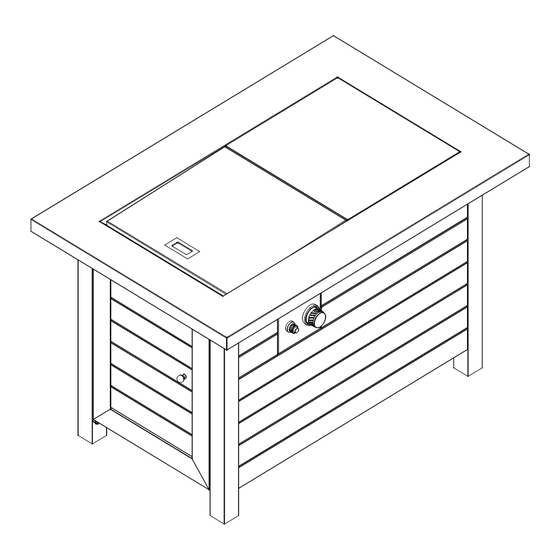
- Page 11 ASSEMBLY INSTRUCTIONS 10 Install the Cylinder Baffle (F) using 2pcs EE. M4 X 8 Bolt X 2 F 11. Place the Table (A) onto the base and fasten 4pcs AA. Tips: The Firebowl should be siting at the same side with the control panel. M6 X 16 Bolt M6X16 Bolt X 4 Firebowl ...
- Page 12 ASSEMBLY INSTRUCTIONS 13. Tips: (Use two people to) Lift carefully and keep the unit to the upright position onto the floor, that will help you to proceed this step much easiler. Before doing this, hold the burner lid in place to avoid droping. Step 1 . Install the Ignition & Thermocouple Pin Bracket to Pilot Box using 1pc EE. Step 2. Insert corrugated pipe to burner tube comepletely to the end and fasten 1pc EE. M4X8 Bolt M4 X 8 Bolt X 2 Burner tube Pilot box Before After Corrugated pipe...
- Page 13 ASSEMBLY INSTRUCTIONS Install the tank ...
- Page 14 ASSEMBLY INSTRUCTIONS Tighten ...
-
Page 15: Safety Check
ASSEMBLY INSTRUCTIONS 17. -
Page 16: Lighting Instructions
LIGHTING INSTRUCTIONS 1. -
Page 17: Care And Maintenance
CARE AND MAINTENANCE Cleaning ... - Page 18 CARE AND MAINTENANCE Inspecting ...
-
Page 19: Troubleshooting
TROUBLESHOOTING Problem ... -
Page 20: Warranty
WARRANTY PROOF OF PURCHASE is required to access this warranty program, which is in effect from the date ... -
Page 21: Replacement Parts List
REPLACEMENT PARTS LIST For replacement parts, call our customer service department at 1‐855‐CHANT‐US (1‐855‐242‐6887), 8 ... - Page 22 REPLACEMENT PARTS LIST PART ...
Need help?
Do you have a question about the PG196T and is the answer not in the manual?
Questions and answers