Table of Contents
Advertisement
Quick Links
EST 9600
TABLE OF CONTENTS
SECTION 1 - OVERVIEW ............................................................................ 2
SECTION 2 - SPECIFICATIONS ................................................................. 5
SECTION 3 - CONTROLS AND INDICATORS........................................... 6
SECTION 4 - INSTALLATION..................................................................... 7
SECTION 5 - QUICK SETUP GUIDE ......................................................... 8
SECTION 6 - SETUP.................................................................................. 11
SECTION 7 - INTERFACE SIGNALS AND CABLING.............................. 22
SECTION 8 - TROUBLESHOOTING ........................................................ 26
SECTION 9 - WARRANTY......................................................................... 27
Data Comm for Business, Inc.
PO Box 6329
Champaign, IL 61826-6329
December 1, 2006
(217) 897-6600
Firmware Version: 1.03
www.dcbnet.com
8500117
Advertisement
Table of Contents

Related Manuals for DCB EST-9600


Summary of Contents for DCB EST-9600
-
Page 1: Table Of Contents
EST 9600 TABLE OF CONTENTS SECTION 1 - OVERVIEW ................2 SECTION 2 - SPECIFICATIONS ..............5 SECTION 3 - CONTROLS AND INDICATORS........... 6 SECTION 4 - INSTALLATION..............7 SECTION 5 – QUICK SETUP GUIDE ............8 SECTION 6 - SETUP.................. 11 SECTION 7 - INTERFACE SIGNALS AND CABLING...... -
Page 2: Section 1 - Overview
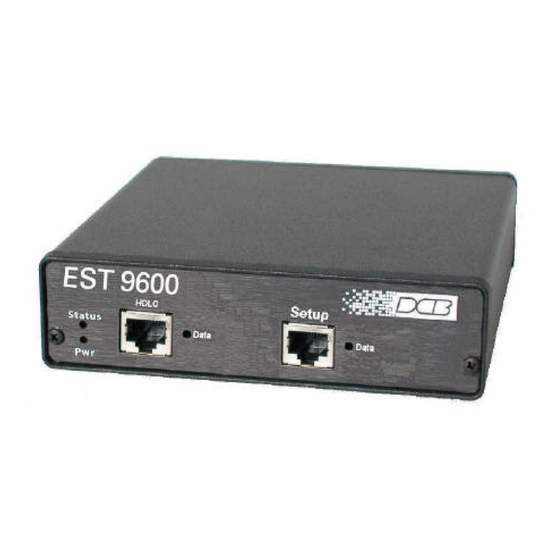
The EST-9600 supports RS-232 serial interface speeds up to 230 Kbps, RS-530 speeds up to 2048 Kbps. To deliver HDLC traffic via Ethernet in as close to the nature of HDLC as possible, the EST-9600 uses TCP/UDP “best-effort”, speedy delivery, rather than the delay and extra overhead that TCP/IP error-correction and flow control could cause. - Page 3 • Easy to setup and maintain • Web browser, telnet or serial port configuration • Statistics, logging and diagnostic tools • Can authenticate with RADIUS server • Stand-alone or Rack Mounting • 120, 220 VAC, 12, 24, 48 and 125 VDC options EST 9600 Front View EST 9600 Rear View (48 VDC Version)
- Page 4 APPLICATION...
-
Page 5: Section 2 - Specifications
SPECIFICATIONS PORTS One synchronous serial port: RS-232 (per EIA/TIA 561 RJ 45 connector) Speeds to 230 Kbps RS-530 or V.35 balanced interface option Speeds to 2.048 Mbps One 10/100BaseT Ethernet port One asynchronous 9600 baud RS-232 port for setup HDLC COMPATIBILITY Accepts/Sends any HDLC frame up to 1500 bytes long Data Encoded via NRZ or NRZI Standard CRC-CCITT as used in HDLC or Sync PPP... -
Page 6: Section 3 - Controls And Indicators
CONTROLS AND INDICATORS CONTROLS DIP Switches Switch Down Normal Reset Setup Port Inactive Setup Port Active Must be Down Must be Down INDICATORS Front Indicator Condition Meaning Power Power to unit Status Set for Internal Clock Set for External Clock Sync Flashing Sync Port Data Activity... -
Page 7: Section 4 - Installation
Management Security The EST-9600 can be managed via the Serial Setup port, via Telnet, or via a Web Browser. The serial port can be enabled or disabled using switch 2 on the rear of the unit. Switch 2 must be up for the serial management port to be active. -
Page 8: Section 5 - Quick Setup Guide
4 Set HDLC Port Values 8 Save and Activate The EST-9600 can tunnel in encrypted mode or with no encryption. Menu selection 2 is used if you wish to change from the default of Encryption ON to NONE. For Tunnel Mode, menu selection 3, set the Tunnel Mode to either Host or Drop. - Page 9 In the “HDLC Port Values” menu, enter the clock choice for the drops and the host. The default is Internal Clock. There are jumpers inside the EST-9600 that must be set to match the software setting. See the photos below for details on changing the clock source jumpers.
- Page 10 After making all the necessary changes, select item 8 from the main menu, “ Save and Activate”. Remember that after changing the IP address, if the EST-9600 is again accessed for setup via telnet or a web browser, it is necessary to change the address of the PC to match the IP subnet of the EST-...
-
Page 11: Section 6 - Setup
At the Enter password: prompt, press <Enter>. The following menu should appear. Enter name: admin Enter password: ---- Welcome to the EST-9600 version v1_00 Setup Program ---- 1 Set Administration Values 2 Set HDLC Tunnel Values 3 Set Ethernet LAN Values... - Page 12 MENUS The following menus are available from the SETUP port or via Telnet. To change a setting, type the <item #> <space> <new data> and press <Enter>. Set Administration Values Username: admin Password: Respond to Ping: enable Telnet Setup Enable: enable Telnet Setup Port: 8000 Web Browser Setup Enable: enable Web Server Port: 80...
- Page 13 Set HDLC Port Values Sync Mode Clock Source: internal Internal Clock Rate (bps): 56000 Encoding: nrz Max Transmit Unit (bytes): 1500 ---HDLC Values ------------------------------------- 1 Sync Mode Clock Source [0=external, 1=internal] 2 Internal Clock Rate (bps) [0=1200, 1=2400, 2=4800, 3=9600, 4=19200, 5=38400, 6=56000, 7=64000, 8=128000, 9=192000, 10=256000, 11=512000, 12=768000, 13=1536000, 14=2048000] 3 Encoding...
- Page 14 ----------------------------------------------- Host Authorized Names and Passphrases - == Drop 16: Passphrase 16: Drop 17: Passphrase 17: Drop 18: Passphrase 18: Drop 19: Passphrase 19: Drop 20: Passphrase 20: ----------------------------------------------- Advanced Tunnel Values Host Authentication Mode: user-list Idle Disconnect Time (seconds): 120 Send Keep-Alives Time (seconds): 40 press return for more, ESC to quit: -----------------------------------------------...
- Page 15 On the URL bar of the browser, enter the IP address of the EST-9600. If you have changed the default web browser port from 80, enter the new port number with the IP address, i.e. “192.168.0.96:7999”...
- Page 16 ADMINISTRATION Admin Password. Access to the EST-9600 is controlled with the Administration functions. Under Administration the user name and password are set. Admin Access Control. Ping can be enabled or disabled. Telnet access can be enabled or disabled. The Telnet setup port can be changed from the default 8000 to any other port. Web browser access can be enabled or disabled.
- Page 17 Set Clock sets a relative clock, relative to the power-on time of the EST-9600. The clock is reset when the EST-9600 is rebooted. Set All Defaults puts all the settings back to the factory default state. Config File is a way to save the configuration file to a PC or to load a working configuration file from a PC into the EST-9600.
- Page 18 HDLC TUNNEL HDLC Tunnel is a top level menu with sub menus for setting the HDLC tunnel attributes. The Tunnel Configuration sub menu is used to set the Common Passphrase. Advanced Tunnel Configuration sets the idle disconnect value and the keep-alive value. Authorized Drop Names &...
- Page 19 RADIUS Servers provides a way to move the authentication from the Host EST-9600 to a Radius server. This is useful when a radius server is used as a centralized authorization device. In installations with many EST-9600 units, a radius server approach makes it easier to change EST- 9600 host devices in the event of a hardware failure.
- Page 20 HDLC Port Values set the clock source to external or internal, the speed, and the Maximum Transmit Unit (MTU). The EST-9600 defaults to internal sync mode clock source. There are 15 clock speed choices, ranging from 1200 bps to 2048000 bps.
- Page 21 The Tunnel Logfile shows the status of the connections to the remote drop or host. Note that the keys are changed every 24 hours. Tunnel Node status shows the traffic count for HDLC and ethernet traffic. The HDCL Logfile shows HDLC traffic. The DHCP Client Log shows DHCP activity.
-
Page 22: Section 7 - Interface Signals And Cabling
INTERFACE SIGNALS AND CABLING CONNECTOR AND PIN REFERENCE 1 2 3 4 5 6 7 8 RJ-45 Plug and Jack PORT INTERFACE Synchronous Port The Synchronous port can be either RS-232 or RS-530 depending on the position of a jumper inside the unit. - Page 23 Ethernet Port Signal In/Out Transmit Transmit Receive Receive Setup Port RS-232 (RJ-45) Signal In/Out Data Set Ready Data Carrier Detect Busy Signal Ground ----- Receive Data Transmit Data Clear to Send Request to Send...
- Page 24 CABLES Synchronous Port RS-232 RJ-45 DB-25 DB-25 RS-530 RS-530 RJ-45 DB-25...
- Page 25 Setup Port To a TERMINAL Terminal RJ-45 DB-25P To a PC using terminal emulation Computer RJ-45 DE-9S DB-25S...
-
Page 26: Section 8 - Troubleshooting
TROUBLESHOOTING When troubleshooting problems, a rational plan can save you many hours of frustration. The following is a brief outline of standard troubleshooting procedures. 1. Gather the facts to determine the exact nature of the problem. 2. Draw a picture of the system showing the equipment at both the host and remote ends and the phone lines or in-house wiring. -
Page 27: Section 9 - Warranty
WARRANTY This DCB product is warranted to be free of defects in materials and workmanship for two years. Data Comm for Business, Inc. will repair or replace any equipment proven to be defective within the warranty period. All warranty work is F.O.B. Champaign, IL. This warranty is exclusive of abuse, misuse, accidental damage, acts of God or consequential damages, etc.
Need help?
Do you have a question about the EST-9600 and is the answer not in the manual?
Questions and answers