
Related Manuals for Igo ERÖ


Summary of Contents for Igo ERÖ
- Page 1 ERÖ USER MANUAL PLEASE READ THIS MANUAL BEFORE OPERATING AND WATCH THE FULL ASSEMBLY INSTRUCTIONAL VIDEO AT: w w w . i G O e l e c t r i c . c o m / b u i l d m y e r o...
- Page 2 Electric reserves the right to make changes without notice to design(s) and / prices listed in this manual. This manual has be compiled with great care. iGO can not be held responsible for any inaccuracies whatsoever. w w w . i G O e l e c t r i c . c o m...
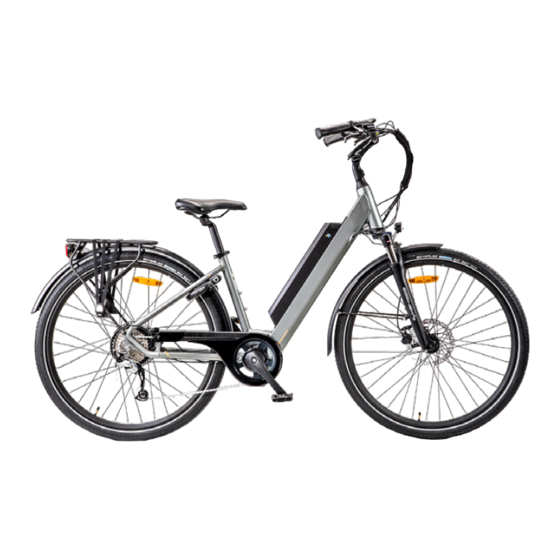
- Page 3 Completely new way of cycling. Whether you use the ebike for commuting, shopping or just a leisurely ride, you will do so comfortably and confidently on your new iGO. Chances are that you have not previously owned an electric bike with pedal assistance.
-
Page 4: Table Of Contents
TABLE OF CONTENTS DISPLAY & FUNCTIONS BUTTONS INFORMATION ON THE SCREEN CONTROLS SETTINGS MENU ERROR CODES PEDAL ASSISTANCE WHAT IS PEDAL ASSISTANCE? TURNING PEDAL ASSISTANCE ON/OFF DERAILLEUR FUNCTIONS MORE INFORMATION ON PEDAL ASSISTANCE BATTERY & CHARGING BATTERY RANGE DISCONNECTING AND REMOVING THE BATTERY CHARGING THE BATTERY USING THE BATTERY AS A POWER SOURCE WHAT YOU SHOULD KNOW ABOUT YOUR BATTERY... - Page 5 BRAKE MAINTENANCE FOR TEKTRO AURIGA HYDRAULIC DISC BRAKE ALIGNMENT OF THE CALIPER CHANGING BRAKE PADS TEKTRO PART # E10.11 MAINTENANCE SERVICING GENERAL MAINTENANCE CLEANING PARTS PARTS LIST WARRANTY INFORMATION WARRANTY WARRANTY LIMITATIONS WARRANTY TERMS WARRANTY CARD PLEASE READ IMPORTANT BATTERY STORAGE INFORMATION ON PAGE 19 IMPROPER STORAGE OF YOUR BATTERY COULD RESULT IN TOTAL BATTERY FAILURE...
-
Page 6: Display & Functions
DISPLAY & FUNCTIONS The battery must be in the ebike for the display to function. Make sure that the battery is locked into the battery rack. It is not necessary to keep the key in the lock while riding Turn the power on by pressing the ‘ON/OFF’ Button for 2 seconds. BUTTONS ‘ON/OFF’... -
Page 7: Information On The Screen
DISPLAY & FUNCTIONS INFORMATION ON THE SCREEN SPEED (km/h or mph) ASSISTANCE LEVEL (0 - 8) Mode 0 = No assistance BATTERY INDICATOR 5 Bars = Full Battery ENERGY CONSUMPTION INDICATOR Full bars = High battery consumption = Less range ODOMETER Total distance traveled TRIP ODOMETER... -
Page 8: Controls
DISPLAY & FUNCTIONS CONTROLS Turning the ebike ON/OFF Press and hold the 'ON/OFF' Button for 2 seconds to turn the electric system on or off. The control panel can only be used when the battery is connected to the ebike and key switched to the 'on' position. If the system is not used for a duration of 5 minutes, it will shut itself off to conserve battery. - Page 9 DISPLAY & FUNCTIONS CONTROLS (Cont’d) Lighting With the ebike’s power on , tap the ‘ON/OFF’ button once to turn on the lighting system. This will turn on the backlight for the display, as well as the front and rear lights. Tapping the power button once again will turn the lighting system off.
-
Page 10: Settings Menu
DISPLAY & FUNCTIONS SETTINGS MENU By holding the ‘SET’ button for 3 seconds you will enter the Settings Menu. The Settings Menu will allow you to change certain features of your ebike. Once in the Settings menu the word ‘SET’ will begin to flash, pressing the ‘SET’ button will allow you to switch between the different settings. -
Page 11: Error Codes
Error 8: Malfunction in the electronic controller (signal) Error 9: Malfunction in the display (signal) If error persists contact iGO Technical Support iGO TECHNICAL SUPPORT (phone lines open Mon-Fri 9:00 am - 5:00 pm EST) tel:1 866 996 6686 email: support@iGOelectric.com... -
Page 12: Pedal Assistance
PEDAL ASSISTANCE WHAT IS PEDAL ASSISTANCE? The bike is equipped with 8 levels of electronic pedal assistance. As you pedal, the motor will assist you and enhance your pedaling effort. This will allow you to pedal much further and faster but use much less energy and effort. It is also a great feature when climbing a hill, as the motor will help to make any climb easy. -
Page 13: More Information On Pedal Assistance
PEDAL ASSISTANCE SAFETY PRECAUTIONS WHILE USING THE PEDAL ASSIST & ON DEMAND THROTTLE • Since the motor is assisting you, you will easily reach higher speeds than you might be used to. We recommend that you ride the bike in a minimal traffic area at first to become more comfortable with it. -
Page 14: Battery & Charging
BATTERY & CHARGING BATTERY RANGE How far can I travel on my electric bike? The total distance you can travel on your electric bike is not an easy amount to specify. The range depends on many different factors including, but not limited to: •... -
Page 15: Disconnecting And Removing The Battery
BATTERY & CHARGING DISCONNECTING & REMOVING THE BATTERY On the top-left side of your battery is the battery lock. This lets you lock/unlock the battery pack of the bike. To Lock: Insert the bottom of the battery into its receptacle on an angle as shown while pushing the top of the battery into the lock. -
Page 16: Charging The Battery
BATTERY & CHARGING CHARGING THE BATTERY The battery can be charged both on and off of the bike. Please identify your charging port (figure 16.1). First plug the chargers male plug into the battery, then plug the chargers 110 volt plug into your wall outlet. - Page 17 BATTERY & CHARGING ATTENTION! Make sure to only charge the battery in a dry, well ventilated area. ATTENTION! Unplug the charger when the battery is fully charged, or when charger is not in use. ATTENTION! The battery will sustain permanent damage if not used for a long period of time (ex: Winter storage).
-
Page 18: What You Should Know About Your Battery
BATTERY & CHARGING WHAT YOU SHOULD KNOW ABOUT YOUR BATTERY • DO NOT connect the positive terminal of the battery to the negative terminal. • The battery is sealed and therefore is rain resistant, however, DO NOT expose your battery to water. •... -
Page 19: How To Store Your Battery During Non Use
BATTERY & CHARGING IMPORTANT BATTERY STORAGE INFORMATION When not using your bike for periods exceeding one month please charge as follows: 1. Before storage make sure that the battery is not charged more than 50% so that it will except a periodic charge. (You cannot periodically charge a fully charged battery) 2. -
Page 20: Adjusting Your Ebike
ADJUSTING YOUR ERGOFIT EBIKE FRONT LED LIGHT INSTALLATION Identify the light bracket mounting bolt and nut. Assemble as seen in figure 20.1 using a 4mm allen key. Make sure that the light bracket is in same position before attaching to light. Fig. -
Page 21: Adjusting Stem Angle & Handlebar Position
ADJUSTING YOUR ERGOFIT EBIKE ADJUSTING STEM ANGLE & HANDLEBAR POSITION Once installed the stem on you ERÖ requires no tools to adjust creating an extremely comfortable and ergonomic riding position. To adjust the stem slide the lock button on the left side of the stem down as shown in figure 21.4. -
Page 22: Adjusting Your Seat Height
ADJUSTING YOUR ERGOFIT EBIKE ADJUSTING YOUR SEAT HEIGHT Your seat height should be adjusted properly to ensure you get the most comfortable ride possible. The seat height is properly adjusted when your knee has a slight bend when sitting on the saddle with your foot on the pedal at its lowest position (figure 22.1). -
Page 23: Gears
TIRE PRESSURE The tire pressure will affect the range and comfort of your bike. iGO recommends that you always keep your tires at the designated pressure to ensure the best ride. The recommended tire pressure is listed on the sidewall of the tire. The tire pressure is measure in P.S.I. (Pounds / Square Inch). -
Page 24: Brake Maintenance For Tektro Auriga Hydraulic Disc Brake
BRAKE MAINTENANCE FOR TEKTRO AURIGA HYDRAULIC DISC BRAKE A video tips can be seen at: https://youtu.be/z2Uqi80Y67Y If you pull the brake lever and the pads don’t stop your bike, you probably have air in your brake line. Unless you have bled brakes before we strongly suggest this be done by a professional bike mechanic. -
Page 25: Changing Brake Pads Tektro Part # E10.11
BRAKE MAINTENANCE FOR TEKTRO AURIGA HYDRAULIC DISC BRAKE CHANGING BRAKE PADS TEKTRO PART # E10.11 • Using a 5mm allen key remove caliper mounting bolts & remove caliper (figure 25.1). • Choose a mid-size flat head screw driver and wipe blade with rubbing alcohol. •... -
Page 26: Maintenance
MAINTENANCE SERVICING Servicing your bike is very important. You can avoid unnecessary damage by servicing your bike regularly. In the paragraphs to follow, there are some simple tips you can follow at home to keep the bike running at top performance. GENERAL MAINTENANCE •... -
Page 27: Cleaning
MAINTENANCE CLEANING Regular cleaning of your ebike will prolong its life and reduce the appearance of rust and corrosion build up. REMOVE THE BATTERY BEFORE CLEANING and use brushes and wet sponges to remove dirt. Finish by drying with paper cloths / towel. (Use of a mild soap solution, degreaser, chain lube and a chain cleaning device are recommended for a thorough cleaning.) When cleaning the ebike do not submerge parts or let water accumulate by the... -
Page 28: Parts
PARTS PARTS LIST PART NO. PART DESCRI PTIO N P RICE - $(CA D) P222 SADDLE BLACK 29.95 P095 SEAT POST BLACK 24.95 P096 SEAT POST CLAMP BLACK 10.95 P223 SUNTOUR SUSPENSION FORK BLACK 129.95 P224 REAR CARGO RACK 89.95 P225 REAR CARGO RACK BOLT 1.95... - Page 29 PARTS PART NO. PART DESCRI PTIO N P RICE - $(CA D) P124 FRONT RIM 700C BLACK 49.95 P125 FRONT RIM QUICK SQUEWER BLACK 12.95 P126 REAR RIM 700C BLACK 49.95 P065 REAR WHEEL CAP NUT 4.95 P066 REAR WHEEL FLAT WASHER 1.95 P067 REAR WHEEL SPECIAL WASHER...
-
Page 30: Warranty Information
In no event shall iGO be liable for any loss, inconvenience or damage, whether direct, incidental, consequential or otherwise,... -
Page 31: Warranty Terms
3.2 iGO Electric is free of any liabilities in regards to (parts of) the bike being damaged as a result of: a. Improper adjustment of the handlebar, stem, saddle, seatpost, gears, brakes, quick release axles of the wheels, and spoke tension. - Page 32 Article 5: Transport of Warranty Products. 5.1 If it is determined by iGO that a bike/part is to be returned to iGO, it must be done in it’s original packaging. If the original packaging is not available, an equivalent package must be used to ensure the product is well protected from any damages it may incur during transport.
-
Page 33: Warranty Card
WARRANTY INFORMATION WARRANTY CARD Please fill out this form and mail it to iGO so that we can register your serial number in our system. Also, retain your receipt as proof of purchase. iGO Electric Attn: Warranty Card 1340, 55th Ave. - Page 34 w w w . i G O e l e c t r i c . c o m...
- Page 35 NOTES w w w . i G O e l e c t r i c . c o m...
- Page 36 1340, 55 su ppo r t @iGO e le ct r ic.co m LACHINE, QC, H8T 3J8 w ww.i GOe l ectr i c. com CANADA IG OEROMA1 80505E N...
Need help?
Do you have a question about the ERÖ and is the answer not in the manual?
Questions and answers