
Summary of Contents for Extrema Machinery XS-1A25
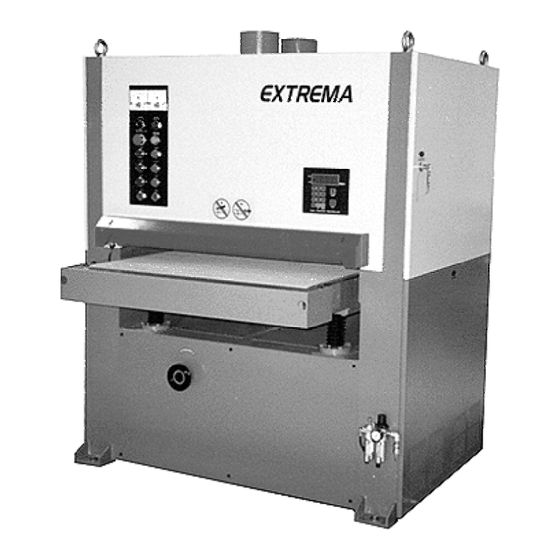
- Page 1 XS-1A25 EXTREMA MACHINERY COMPANY, INC. PO BOX 1450, ALBANY, LOUISIANA 70711 (877) 398-7362 FAX (225) 567-2966...
-
Page 2: Table Of Contents
TABLE OF CONTENTS General Safety Rules Shipping & Receiving Instructions Unpacking & Checking Contents Cleaning the Machine Lifting the Machine Installation Instructions Connection to Air Supply Line Electrical Safety Rules Electrical Connection Starting & Stopping the Machine Abrasive Belt Oscillation & Tracking Safety Tracking Adjustment Abrasive Belt Tracking Device Illustration Air Diagram... -
Page 3: General Safety Rules
GENERAL SAFETY RULES There is a certain amount of hazard involved with the use of woodworking machinery. Using the machine with the respect and caution demanded as far as safety precautions are concerned will considerably lessen the possibility of personal injury. However, if normal safety precautions are overlooked or ignored, severe personal injury to the operator can occur. -
Page 4: Shipping & Receiving Instructions
27. Protective guards and shields must be in place at all times unless they must be removed for specific service or maintenance. They should be immediately replaced when service or maintenance is completed. 28. Make sure that operator clearly knows how to stop the machine before starting work. 29. -
Page 5: Unpacking & Checking Contents
UNPACKING & CHECKING CONTENTS The machine has been well packed at the manufacturer’s factory and shipped in good condition. The machine is shipped in one wooden pallet. Upon receiving the machine, carefully unpack it and check all items as according to the packing list. -
Page 6: Installation Instructions
INSTALLATION INSTRUCTIONS 1. Upon arrival, the machine is to be checked as to damage that may have occurred during transport. In case of damage, the shipping company is to be informed as soon as possible and a corresponding complaint is to be made. 2. -
Page 7: Electrical Safety Rules
ELECTRICAL SAFETY RULES 1. Do not alter or bypass any protective interlock. 2. Before starting the machine, read and observe all warning labels and markings such as nameplates and identification plates. 3. Only personnel who are properly trained and have adequate knowledge and skill should undertake all electrical/electronic troubleshooting and repair. -
Page 8: Electrical Connection
ELECTRICAL CONNECTION An authorized electrician should do the electrical connection. 1. Check whether the main voltage is in accordance with the connecting voltage mentioned on the switch panel or wiring diagram. • The main cable should be screwed to the machine. The cable should be securely fastened to the wall and connected with a main switch. -
Page 9: Starting & Stopping The Machine
STARTING & STOPPING THE MACHINE Before starting the machine all weekly or daily greasing points must be done. A. Starting the Machine: 1. Open the aircock. Make sure the air pressure is at 90PSI. NOTE: The machine cannot be started if the aircock is closed. 2. -
Page 10: Tracking Adjustment
TRACKING ADJUSTMENT Check tracking by moving a piece of paper in and out of the electric eye. At this time, the tension roller should move from side to side. If the tension roller does not move, the electric eye and solenoid valve must be checked. If belt runs to one side and the tracking cylinder is extended out full travel, loosen jam nut on cylinder and move the cylinder push cap out, or move the spring tension in. -
Page 11: Air Diagram
AIR DIAGRAM 1. Air Supply Valve 2. Turning Switch (for abrasive belt tensioning) 3. Tension Cylinder 4. T-way 5. Solenoid Valve (for brake oscillation) 6. Brake Cylinder 7. Solenoid Valve (for abrasive belt oscillation) 8. Speed Control Valve 9. Tracking Cylinder 10. - Page 12 ADJUSTING THE PLATEN The combination head sander contains a flat platen behind the contact drum. The combination head sander can be operated in 3 modes: 1. Platen up (Fig. 1): The sander functions as a drum only machine. 2. Platen in level position with the contact drum (Fig. 2): Contact drum and platen are both working.
-
Page 13: Changing Of An Abrasive Belt
CHANGING ABRASIVE BELT 1. Open the main aircock. 2. Move turning switch downward, by which the tension roller is lowered. 3. The quick release handle is to be turned to the front and pull it upwards. Now supporting lock is to be removed. 4. -
Page 14: General Maintenance Of The Conveyor Belt
GENERAL MAINTENANCE OF THE CONVEYOR BELT 1. Tension of the Conveyor Belt: A. The feeding conveyor has auto tracking by limit switch and air cylinder. B. The conveyor belt can be adjusted, if it is too loose, with the socket wrench provided. -
Page 15: Greasing & Lubrication
GREASING & LUBRICATION 1. Check all oil and grease nipples weekly. 2. Check oil tank level monthly. 3. Check the gearbox yearly. 4. Lubricate the shaft and the bushing of the tension unit regularly. 5. First month only: • Drain out oil and change with new oil after the first month of operation. In running period, change oil at 2500 hours or 6-month intervals, whichever comes first. -
Page 16: Deficiencies During The Sanding Operation
DEFICIENCIES DURING THE SANDING OPERATION 1. The stock to be sanded is thinner at the beginning. CAUSE: • The rear pressure bar is too low in relation to the contact roller. 2. The stock to be sanded is thinner at the end. CAUSE: •... -
Page 17: Deficiencies In The Sanding Pattern
DEFICIENCIES IN THE SANDING PATTERN 1. Notches or grooves in the work piece straight strip CAUSE: • Dirty pressure bar 2. Snake marks on a part of the work piece CAUSE: • Local damage of the sanding belt 3. Straight parallel running stripes over the entire width of the work piece CAUSE: •... - Page 20 MAIN FRAME GROUP...
- Page 21 Main Frame Group Part Name Part No Main Frame 1S241236 Upper Door (Front) 4S241238 Upper Door (Rear) 4S241239 Lower Door (Front) 4S241240 Upper Door (Left) 4S241241 Upper Door (Right) 4S241241-1 Lower Door (Left) 4S241242 Lower Door (Right) 4S241243 Hand Wheel Diameter 200mm Interlock Safety Cutoff D4DS-15FS...
- Page 22 WORKING TABLE & CONVEYOR GROUP...
- Page 23 Working Table & Conveyor Group Part Name Part No Table 4S241235 Front Feed Roller Tube 4S241027 Rear Feed Roller 4S241024 Front Feed Roller Shaft 4S241028 Front Feed Roller Cover 4S241249 Conveyor Belt W610mmXL2140mm Slider B 4S241021 Slider B 4S241021 Front Conveyor Roller Support/L 3S241030 Front Conveyor Roller Support/R 3S241031...
- Page 24 P HEAD GROUP...
- Page 25 P Head Group Part Name Part No Cantilever 3S242050 Tracking Roller Support 4S242015 Idle Steel roller 4S242016 Rubber Roller Left Support 3S242002 Rubber Roller Right Support 3S242003 Contact Roller 4S242007 Top Slider (Platen Assembly) 4S242021 Bottom Slider (Platen Assembly) 4S242022 Pad (Woolen) W2”XL660mm Idle Steel Roller...
- Page 26 PRESSURE ROLLER GROUP...
- Page 27 Pressure Roller Group Part Name Part No Dust Collector 3S242053 Dust Collector Fixed Plate 4S242056 Pressure Roller 4S244004 Bearing Housing 4S244001 Spring 4S244005 Bearing #6002-LLU Pressure Roller Support 4S244044 Adjusting Nut W3/8” Washer W3/8” Washer Hex. Socket Cap Bolt M8X1.25X16L Spring Washer Hex.
Need help?
Do you have a question about the XS-1A25 and is the answer not in the manual?
Questions and answers