
Related Manuals for Protec PLM-8000


Summary of Contents for Protec PLM-8000
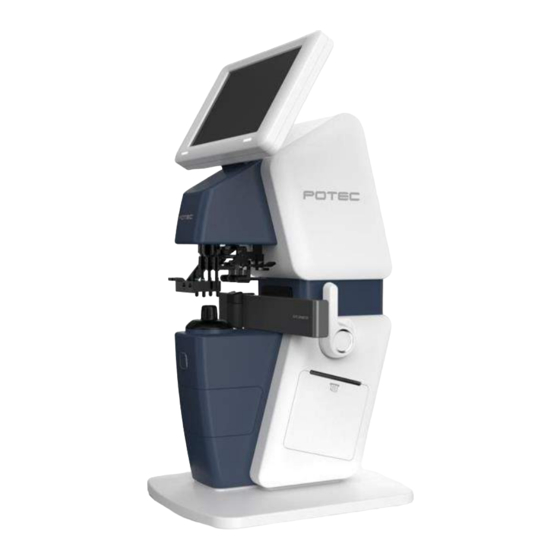
- Page 1 OPERATION MANUAL AUTO LENSMETER PLM-8000 Revision 1.0 (2017.11) www.potec.biz Before use, read this manual carefully.
-
Page 2: Important Notice
PLM-8000 Operation Manual IMPORTANT NOTICE This product may malfunction due to electromagnetic waves caused by portable personal telephones, transceivers, radio-controlled toys, etc. Be sure to avoid having objects such as, which affect this product, brought near the product. The information in this publication has been carefully checked and is believed to be entirely accurate at the time of publication. -
Page 3: Safety Information
PLM-8000 Operation Manual SAFETY INFORMATION If you see any warnings or cautions printed on the warning labels, follow the safety instructions in this manual. Ignoring such cautions or warnings while handling the product may result in injury or accident. Be sure to read and fully understand the manual before using this product. -
Page 4: General Safety Information
PLM-8000 Operation Manual Handle with care Fragile Do not build up more than 4 boxes Do not use hand-hooks Refer to instruction manual This indicates hazardous situations which may result in crush your hand Disposal of your old appliance When this crossed-out wheeled bin symbol is attached to a product it means the product is covered by the European Directive 2012/19/EU (effective since 14.02.2014). - Page 5 During Blue transmittance measurement, blue rays are emitted from CAUTION the LED source. Do not place the multiple socket-outlet for PLM-8000 system on the CAUTION floor in order to prevent liquid penetration and damage to the product. PLM-8000 system shall not be connected with additional multiple...
- Page 6 8000 system, shall not be less than 100VA. If non-medical electrical equipment (e.g. Video monitor, IT equipment, etc.) that may be connected with PLM-8000 are, directly connected to CAUTION the wall socket-outlets, high touch current may flow since the earth continuity is not ensured.
- Page 7 PLM-8000 Operation Manual Do not expose the device to sunlight or bright light from lighting equipments. NOTE...
-
Page 8: Label
PLM-8000 Operation Manual Label T3.15AH 250V RS232C... -
Page 9: Table Of Contents
PLM-8000 Operation Manual CONTENTS I M P O RTA N T N O T I C E ..............................I S A F E T Y I N F O R M AT I O N ............................II For EU Countries ................................II Symbols marked on the Instrument.......................... - Page 10 PLM-8000 Operation Manual 5 . 9 C o n n e c t i o n w i t h e x t e r n a l o p t o m e t r y e q u i p m e n t ..............24 S e l f - d i a g n o s i s a n d M a i n t e n a n c e ........................
-
Page 11: Introduction
This device aims to take the measurements of vertex powers, cylinder axis, prismatic power and prism base setting within a restricted area of unprocessed lens, processed framed lens and contact lens, Auto Lensmeter PLM-8000 also has functions to measure UV/BLUE transmission. -
Page 12: Features
PRK-Series, PDR-8000). (5) Built-in the printer The PLM-8000 has built-in printer so it is possible to print the measurement data easily. (6) User is able to measure the height of the optical center with glasses PD and frame... -
Page 13: Notes For Using The Instrument
OFF. Then, move the instrument while holding the lower part of the main body with both hands. (8) When the PLM-8000 is not used at the long time, please turn off the power and put the dust cover. (9) Environment conditions. -
Page 14: Description
PLM-8000 Operation Manual 4. Description 4.1 Configuration Na me Fu nc ti on 1. LCD Display 7.0 inch TFT Color LCD Monitor, Touch 2. Lens retainer To fix the lens 3. Lens holder Measure the lens when the lens is fixed on the lens holder. This... -
Page 15: Accessories
PLM-8000 Operation Manual Na me Fu nc ti on To connect communication with other equipment(PC, PRK-Series, 11. RS232C connector PDR-7000) 12. LAN cable port To upgrade S/W, Not for everyday use 13. USB connector Turn on or off power the device 14. -
Page 16: Installation And Preparation
PLM-8000 Operation Manual 4.3 Installation and Preparation 4.3.1 Preparation before use (1) Open the box. (2) Make sure all articles are there (printing paper, dust cover, Operator’s Manual etc.). (3) Set the device on the table. Don’t install the machine under bright light or avoid surrounding bright NOTE light and direct sun light for better result. -
Page 17: Storage After Use
PLM-8000 Operation Manual 4.3.3 Storage after use (1) When the PLM-8000 is not used for a long time, please turn off the power and disconnect the power cord from the power outlet. (2) Clean with soft cloth. (3) Clean the cover glass’s dusts by wind blower and soft cloth. -
Page 18: Operating Panel
PLM-8000 Operation Manual 4.4 Operating panel 4.4.1 Basic operation Basic operation of the PLM-8000 is performed on the touch panel. 4.4.2 Measurement display Cylinder Auto Measurement unit Measurement Lens Type Patient ID Measured lens Measured lens Measured data PD/OH Mode... - Page 19 PLM-8000 Operation Manual (7) Lens Type Indicates the type of the lens which is presently being measured. (8) Progressive guide line It indicates the location to find near & distance power. ☞ Progressive guide line is displayed only when progressive lenses are measured.
-
Page 20: Uv/Blue Display
PLM-8000 Operation Manual Press this button in order to change CYL (+) from. Button for clearing the value of the measured data to ‘0’ Button for print out the measured value To enter the UV or Blue measurement icon screen... -
Page 21: Pd Display
PLM-8000 Operation Manual (1) Measured data Indicates the following data: UV : UV transmission value. BLUE : BLUE transmission value. Protect UV : UV protect value. Protect BLUE : BLUE protect value. (2) Current Transmission Ratio Display the transmission ratio in a bar graph form. -
Page 22: User Setup Display
PLM-8000 Operation Manual 4.4.5 User Setup display User mode is provided as Touch Screen for users to set-up directly. (1) STEP ① 0.25 : Display step, 0.25 step ② 0.125 : Display step, 0.125 step ③ 0.06 : Display step, 0.06 step ④... - Page 23 PLM-8000 Operation Manual (6) Init Screen ① Auto When the lens on the lens holder is detected as a progressive addition lens, the normal measurement screen changes to the PAL measurement screen automatically. When the distance portion of a PAL is placed on the lens holder, it is not detected as a PAL ...
- Page 24 PLM-8000 Operation Manual ② ON S/R/L : Enable automatic transfer function in case left/right lens measurement. Initial screen stands by for single lens measurement. ③ OFF R/L : Disable automatic transfer function in case of left/right lens measurement. Initial screen stands by for right lens measurement.
- Page 25 PLM-8000 Operation Manual (14) BPS Select the speed of the external communication ① 2400 : communication speed by 2400. ② 4800 : communication speed by 4800. ③ 9600 : communication speed by 9600. ④ 19200 : communication speed by 19200.
- Page 26 PLM-8000 Operation Manual (19) TIME Pressing ‘-’ or ‘+’ button renders the related item to be decreased or increased by “1”. 00 ~ 23 : Hour 00 ~ 59 : Minute 00 ~ 59 : Second (20) Date Option Order of displaying the date...
-
Page 27: Measurement
PLM-8000 Operation Manual 5. Measurement 5.1 Preparation (1) Connect the power cable. (2) Turn ON the power. ☞ Do not turn on the power as the lens is on the lens table or else it is possible to occur errors as measuring or starting. If ‘Error-Initial Error!!!’ or ‘Setup Data Error’, ‘UV Init Error’, ‘BLUE Init Error’... -
Page 28: Measuring Multi-Focal Lenses
PLM-8000 Operation Manual (5) Adjust the focus. (6) Press the read button to store the measured value. (7) Raise the lens retainer, and place the other lens on the nosepiece. (8) Adjust the focus. (9) Press the read button to store the measured value. Press the Print button( to print out the measured value. -
Page 29: Measuring Bifocal / Trifocal Lenses
PLM-8000 Operation Manual (6) If the far distance portion is discovered, indication of lens cursor will show to find the location of near portion and ADD value is presented on screen. (7) Save measured value by pressing read button. If exterior printer is supported. -
Page 30: Measuring Contact Lenses
PLM-8000 Operation Manual (5) Find the Far distance portion of the lens as shown in the following figure. Mostly the optical center of lenses is the Far distance portion of the lenses. (Bifocal Lens: Distance portion Near portion) (Trifocal Lens: Distance portion Intermediate portion Near portion) -
Page 31: Measuring Uv / Blue
PLM-8000 Operation Manual 5.5 Measuring UV / BLUE (1) Connect the power cable. (2) Turn ON the power. (3) Take out UV, BLUE cover and put in the lens of glasses like the below picture (4) Press the read button to store the measure value. -
Page 32: Power-Saving Mode
PLM-8000 Operation Manual (7) Align the horizontal and vertical bar with the both sides abstract point by using the direction indicator button (8) Press the read button to store the measure value. (9) Press the EXIT button (10) Press the Print button to print out the measured value 5.8 Power-saving mode... -
Page 33: Self-Diagnosis And Maintenance
PLM-8000 Operation Manual 6. Self-diagnosis and Maintenance 6.1 Before contacting the service personnel When the instrument operates abnormally or malfunctions, a warning message will appear on the display. In this case, take the following measures. When the instrument does not work properly even after the following measures are taken, turn OFF the instrument, and contact an authorized supplier. -
Page 34: Replacing Print Paper
PLM-8000 Operation Manual 6.2 Replacing Print paper When a red line appears on the side of the printer paper, it means that the paper is running short. In such a case, stop using the printer and replace the roll with a new one. -
Page 35: Replacing Ink Cartridge
PLM-8000 Operation Manual (4) Press the right and left sides of the printer cover to close the printer. CAUTION Be careful not to touch the printer head inside the device. 6.3 Replacing Ink cartridge (1) Remove the c-ring with tweezers. -
Page 36: Cleaning The Cover Glass
PLM-8000 Operation Manual 6.5 Cleaning the cover glass (1) Remove the lens holder Lens holder (2) Clean the cover glass. Cover glass Clean the cover glass under the lens holder with the Hand Air Blower. The dust on the cover glass may be sharp particles. If you wipe without CAUTION an air blower, the coating on the cover glass may scratch. -
Page 37: Service Information
POTEC representative or distributor for repair. Inform them of the following information, which is indicated on the nameplate of the instrument. Product Name : PLM-8000 Serial Number : Seven characters indicated on the nameplate Problems : Detailed description is appreciated. -
Page 38: Specification
PLM-8000 Operation Manual 7. Specification 7.1 Specifications Measurement Sphere power(SPH) -25D ~ +25 D (0.01 / 0.06 / 0.12 / 0.25 D steps) Cylinder power(CYL) 0D ~ ±10 D (0.01 / 0.06 / 0.12 / 0.25 D steps) 0˚ ~ 180˚ (1˚ step) -
Page 39: Components
PLM-8000 Operation Manual Pressure : 80 ~ 106 kPa Temperature : -10℃ ~ +55℃ In storage (non packaging) Humidity : 10% ~ 95% RH Pressure : 70 ~ 106 kPa Temperature : -40℃ ~ +70℃ In transport & storage (packing)
Need help?
Do you have a question about the PLM-8000 and is the answer not in the manual?
Questions and answers