
Summary of Contents for Labwit ZWY-111B
- Page 1 User’s Manual Economic Horizontal Shaking Incubator This Manual applies to: Modes: ZWY-111B , ZWY-211B ,ZWY-111G , ZWY-211G , ZWY-111C , ZWY-211C , ZWY-111D , ZWY-211D , ZWF-111 and ZWF-211...
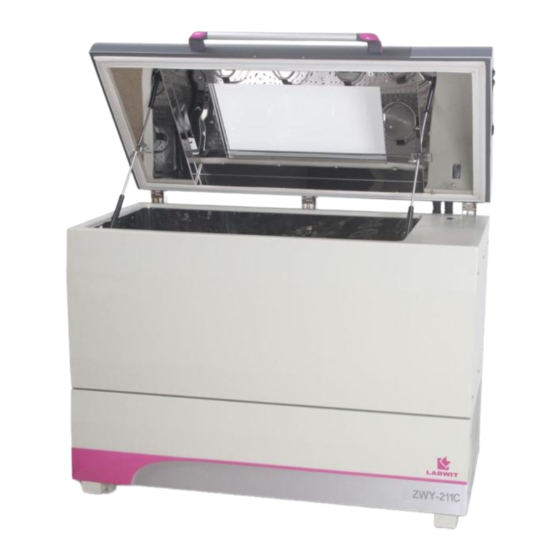
- Page 2 Your choice indicates that you have very high requirements on style and performance of this type of incubators. LABWIT shaking incubators have achieved a good reputation and trust among various clients for its advanced temperature controlling technology, sound framework design, excellent molded exterior and outstanding professional workmanship.
- Page 3 Safety instruction! Please be sure to follow the instructions, which are important to your safety. Danger! Warnings against injury and damage. 1. The electrical supply circuit to the incubator must confirm to all national and local electric codes. Check the serial-data plate for voltage, cycle, phase and amperage requirements before you connect the unit.
- Page 4 Attention! Instructions for optimal performance Before starting your equipment, the unit must be placed horizontally on a solid, flat floor, and elevated and leveled with four foot blocks. The incubator needs even heat lost on all surfaces in order to maintain small internal temperature variations .As a result, a minimum of 20 cm must be allowed between the rear and sides of the incubator to any obstructions.
-
Page 5: Table Of Contents
Table of contents 1. Performance Parameters _________________________________________ 3 2. Technical Specifications _________________________________________ 4 3. Control Panel __________________________________________________ 5 4. Preparation and Start-up _________________________________________ 7 5. Control Mode & Clock Checking ___________________________________ 8 6. Temperature Retaining Switch Setting ______________________________ 8 7. Temperature, Speed, Timer Settings _______________________________ 9 8. -
Page 6: Performance Parameters
“Long-Life” brushless AC motor creates a smooth, quiet and uniformed shaking motion High capacity for up to 5L flasks (except ZWY-111B/211B, ZWF-111/211) Option: unit equipped with RS-485 interface communication can be connected to local network so that remote data logging and control can be achieved via laptop/ PCs. -
Page 7: Technical Specifications
Technical Specifications ZWY- ZWY- ZWY- ZWY- ZWY- ZWY- ZWF- ZWF- Model 111B 211B 111C 211C 111D 211D Volume (L) Mode Orbital Orbital Orbital Reciprocal A+5 to Temperature (° C) 4 to 60 4 to 60 4 to 60 4 to 60 to 60 to 60 to 60... -
Page 8: Control Panel
Control Panel Cooling Model Heating Only Models Time button: Button to display the preset time and the status of the power-off recovery function. Press again to display the remaining time (if Timer is set). Press it to stop the acoustic alarm when needed Refrigeration status button (Refrigerated unit only) Button to display the current refrigerating parameter, defrost timer and the defrost period in turns. - Page 9 Set/Confirm button: Press this button to enter the menu of setting, press it at the end of the setting to save and exit. Temperature alarm indicator: When the temperature inside the chamber is deviated over the preset alarm limit , the ALARM indicator flashes and the alarm beeps Heating indicator:...
-
Page 10: Preparation And Start-Up
Preparation and Start-up 4.1 Before starting your equipment, the unit must be placed horizontally on a solid, flat floor, and elevated and leveled with four foot blocks. The foot blocks are provided to level as well as “fix” the unit firmly on the floor. To allocate the blocks in position, please do strictly follow the procedures: Safety instruction! Please be sure to follow the instructions, which are really important for your safety. -
Page 11: Control Mode & Clock Checking
Control Mode & Clock Checking 5.1. Press "Set/confirm", press the "Increase" button to "1", then press the "Set/confirm" again. The screen shows the current control mode and current date & time. 5.2. Press "Set/confirm" to exit to the home page Display current control Exit mode and time... -
Page 12: Temperature, Speed, Timer Settings
Temperature, Speed, Timer Settings 7.1. Press "Set/confirm", press the "Increase" button to "3", then press the "Set/confirm" again. The screen shows the current temperature preset value, press "Increase" or "Decrease" to change the value; press "Set/confirm" to save and switch to speed page, press "Increase" or "Decrease" to change the value, and press "Set/confirm"... -
Page 13: Date & Time Settings
Date & Time Settings 8.1. Press "Set/confirm", press the "Increase" button to "4", then press the "Set/confirm" again. The screen shows the current time clock, press "Increase" or "Decrease" to change the time; press "Set/confirm" to save and switch to "year" setting page, press "Increase" or "Decrease" to set the year, and press "Set/confirm"... -
Page 14: Temperature & Speed Alarm Settings
Temperature & Speed Alarm Settings 9.1. Temperature and speed alarm is activated when temperature or speed is deviated over limit. The deviation alarm limit can be preset as below, 9.2. Press "Set/confirm", press the "Increase" button to "5", then press the "Set/confirm" again. The screen shows the current "temperature deviation"... -
Page 15: Refrigeration & Defrost Settings
Refrigeration & Defrost Settings (Only for refrigerated models) This unit is equipped with automatic and manual defrosting functions. With proper settings of refrigeration function and auto-defrosting cycle, this unit can be used for continuous operation at low temperature settings. Please note defrosting function will only be activated when actual temperature at 10℃... - Page 16 Alternatively, if the set temperature is not so low as critical, in most cases, manual defrosting will be adequate. c) The proper of defrosting cycle can vary upon actual environmental conditions, preset temperature value and running time. We recommend defrost at least 1-2 times per day, with 3-5 minutes for each cycle.
-
Page 17: Temperature Calibration
Temperature Calibration Special Attention! Temperature of each unit has been carefully calibrated in factory before dispatch. No further calibration is needed. But if it does, do follow the calibration process strictly or consult your supplier, as wrong operation can interfere the temperature accuracy significantly. To calibrate the temperature, take a certified calibrated thermometer in a small bottle with glycerin and place that in the geometrical center of the incubator. -
Page 18: Non-Volatile Memory Function Setting
Non-Volatile Memory Setting If the non-volatile memory function is active (ON), the unit will run to the originally temperature, speed and time program when the external power is recovered after a power failure. 12.1 To set the non-volatile memory function, first press the, then press the Increase button to “8”, next press the "Set/Confirm"... -
Page 19: Sum Run Time Checking
Sum Run Time Checking The total run time of current operation can be checked via following steps. Run time starts counting once "Start/Stop" button is pressed, and stops when pressed again. 14.1 Press "Set/Confirm" button and press the "Increase" button to "10", then press "Set/Confirm" button again to see "Sum Run Time". -
Page 20: Shaking Diameter Adjustment
Shaking Diameter Adjustment (only for ZWF-111/211) These models have an adjustable shaking stroke of Ø0-50mm. To adjust it, please follow the instructions below, Special Attention! Power supply must be disconnected before performing the following operations! 16.1 Cut off the main power, remove the shaking tray. Manually turn the shaking mechanism until the position like the picture above. -
Page 21: Trouble Shootings
Trouble Shootings Error Indicator Possible cause Corrections Power supply is not Check the power supply system to see if there is connected voltage on the line Power on , Plug has no access to Plug in firmly No display socket The power switch has not Turn on the power switch on the right been turned on. - Page 22 platform is out of control circuit control The platform keeps The door switch has short Use a blower drier to dry the chamber shaking after the circuit ,could be caused by Press the Start/Stop button before opening the door door is opened humidity As the door is Improper operating method...
-
Page 23: Electronic Control System
Electronic Control System... -
Page 24: After-Sale Service
-life time services. Please fully fill in the Return Card and send it back to the service department of LABWIT. In this way we can keep you updated about technical improvements that might benefit the future performance of your equipment.
Need help?
Do you have a question about the ZWY-111B and is the answer not in the manual?
Questions and answers