Table of Contents
Advertisement
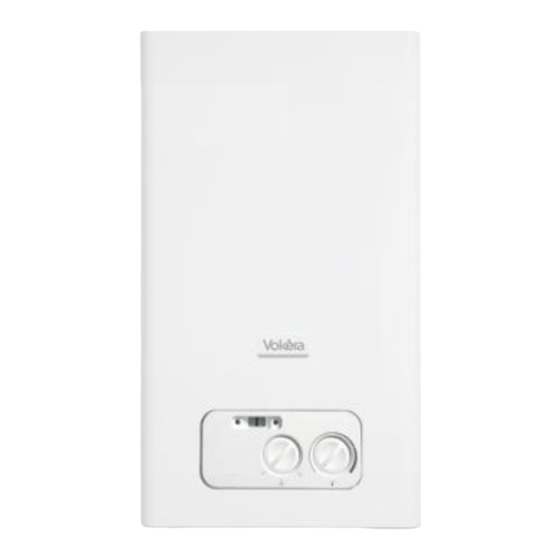
Mynute VHE
High effi ciency open vent boiler
Installation
& Servicing
Instructions
Mynute 15VHE G.C. N° 41 094 68
THESE INSTRUCTIONS
TO BE RETAINED
BY USER
Vokèra is a licensed member of the Benchmark scheme
which aims to improve the standards of installation and
commissioning of domestic hot water systems in the UK.
1
Advertisement
Table of Contents

Related Manuals for VOKERA Mynute VHE Series


Summary of Contents for VOKERA Mynute VHE Series
- Page 1 Mynute VHE High effi ciency open vent boiler Installation & Servicing Instructions Mynute 15VHE G.C. N° 41 094 68 THESE INSTRUCTIONS TO BE RETAINED BY USER Vokèra is a licensed member of the Benchmark scheme which aims to improve the standards of installation and commissioning of domestic hot water systems in the UK.
-
Page 2: Table Of Contents
Contents Design principles & operating sequence Page Gas valve 6.10 Injectors Principle components 6.11 Electrodes and condense sensor Mode of operation (at rest) 6.12 Flue fan & burner assembly Mode of operation 6.13 Main heat exchanger Safety devices 6.14 Condense trap removal 6.15 Flue collector removal Technical data Page... - Page 3 fl ue outlet from a top outlet to rear outlet. to the person responsible for the property in which the The Mynute VHE can also be used with the Vokera twin appliance is located/installed. A replacement copy can fl...
-
Page 4: Checking The Co 2 & Adjusting The Valve
2-digit LED TEMPERATURE SELECTOR GREEN LED RED LED display MODE SELECTOR SWITCH Fig. Boiler at reset/standby Select this position if/when the boiler requires to be reset Boiler switched OFF Select this position if you want the boiler to remain OFF (this will over-ride any heating/hot water request from the time-clock/programmer) Boiler switched ON Select this position when you want the boiler to respond to a heating/hot water... -
Page 5: Principle Components
SECTION 1 DESIGN PRINCIPLES AND OPERATING SEQUENCE main heat water/air 1.1 PRINCIPLE COMPONENTS fl ow tempera- exchanger separator ture sensor A fully integrated electronic control board featuring ● electronic temperature control, anti-cycle control, pump over-run, self-diagnostic fault indicator, full air/ gas modulation. -
Page 6: Technical Data
SECTION 2 TECHNICAL DATA 2.1 Central Heating MYNUTE 15 VHE Heat input (kW) 15.00 Maximum heat output (kW) 60/80°C 14.60 Minimum heat output (kW) 60/80°C 3.44 Maximum heat output (kW) 30/50°C 15.74 Minimum heat output (kW) 30/50°C 3.82 Minimum static head 1 metre Maximum static head 30 metres... - Page 7 Water heating energy efficiency Seasonal space heating energy efficiency class class Parameter Symbol Value Unit Parameter Symbol Value Unit Seasonal space heating energy Rated heat output Prated ηs efficiency For boiler space heaters and boiler combination heaters: useful For boiler space heaters and boiler combination heaters: heat output useful efficiency At rated heat output and high-...
-
Page 8: General Requirements (Uk)
SECTION 3 GENERAL REQUIREMENTS (UK) This appliance must be installed by a competent person with BS 6891. in accordance with the Gas Safety (Installation & Use) Pipe work from the meter to the appliance must be of Regulations. adequate size. Pipes of a smaller size than the appliance gas inlet connection must not be used. -
Page 9: Electrical Supply
Engineers publication (IGE/UP/7) ‘Guide for Gas Instal- lations in Timber Frame Buildings’. 3.10 INHIBITORS Vokera recommend that an inhibitor - suitable for use with aluminium heat exchangers - is used to protect the boiler and system from the effects of corrosion and/or electrolytic action. - Page 10 3.11.2 ALTERNATIVE CLOSE-COUPLED AR- RANGEMENT If necessary or if preferred, a close-coupled arrange- ment for the feed and expansion pipe work can be used as an alternative to a combined feed and vent pipe. The confi guration of the close-coupled pipe work shall be as shown in fi...
-
Page 11: General Requirements (Eire)
3A.6.2 AUTOMATIC BY-PASS installation of the appliance will be in an unusual location Vokera recommend that an automatic bypass is installed special procedures may be necessary, refer to I.S. 813 to ensure the required minimum fl ow-rate is achieved at for detailed guidance on this aspect. -
Page 12: 10 Inhibitors
3A.10 INHIBITORS ● The cold feed pipe must be 15mm diameter Vokera recommend that an inhibitor - suitable for use ● The cold feed pipe and safety vent pipe must both rise with aluminium heat exchangers - is used to protect the ●... -
Page 13: Delivery
4.5.1 CONCENTRIC HORIZONTAL FLUE (For concentric vertical fl ue, see 4.5.2). (For twin fl ue applications, see 4.5.3). The appliance can be used with either the Vokera con- densing 60/100mm concentric fl ue system or the optional Fig. 7 80/125mm concentric fl ue system. - Page 14 4.5.1.1 EXTENDING THE FLUE FITTING THE HORIZONTAL FLUE KIT Connect the bend – supplied with the terminal kit – to Carefully measure the distance from the centre of the the top of the boiler using clamp (supplied) see fi g. 7. appliance fl...
- Page 15 4.5.2 CONCENTRIC VERTICAL FLUE The vertical fl ue terminal is 1.0 metre in length and can- The appliance can be used with either the Vokera con- not be cut; therefore it may be necessary to adjust the densing 60/100mm concentric fl ue system or the optional height of the appliance to suit or use a suitable extension.
- Page 16 4.5.3 TWIN FLUE SYSTEM and secure the exhaust manifold connection to the fl ue The Vokera twin fl ue system enables greater fl ue distances spigot using the screw provided (C). to be achieved (see 4.4.2) than that of a concentric fl ue ...
-
Page 17: Connecting The Gas & Water
NOTE Seal the fl ue terminal assembly to the wall using cement or a suitable alternative that will provide satisfactory weatherproofi ng. The interior and exterior trim can now be fi tted. 4.5.3.3 VERTICAL TERMINATION (fi g. 16) The twin fl ue system must be converted to the dedicated concentric fl... -
Page 18: Electrical Connections
top connections capped off, however these can be re- moved to allow pipe work confi gurations as detailed in 3.11. Depending on system requirements, it may necessary to increase the size of the fl ow & return pipe work after the service connections. - Page 19 4.7.3 CONNECTING THE MAINS (230V) INPUT (see fi g. 21) Locate and remove the terminal block cover (230V) pressing clip (A). Pass the supply cable fi rst through the cable anchorage point and then through cable glands. Connect the supply cable wires (LIVE, NEUTRAL, & EARTH) to their corresponding terminals (L, N, &...
-
Page 20: Commissioning
SECTION 5 COMMISSIONING 5.1 GAS SUPPLY INSTALLATION 5.5 PRE-OPERATION CHECKS Before attempting the initial lighting of the appliance, the Inspect the entire installation including the gas meter, following checks must be carried out: test for tightness and purge. Refer to BS 6891 (I.S. 813 ... -
Page 21: Final Fl Ushing Of The Heating System
Online at: vokera.co.uk NOTE Chemicals used to cleanse the system and/or inhibit cor- For UK residents by calling: 0870 607 0281 ... -
Page 22: General
It is the law that any servicing work is carried out by competent person such as a Vokera engineer, an approved service agent, British Gas, CORGI registered personnel or other suitably qualifi ed personnel. -
Page 23: Printed Circuit Board
6.8 PRINTED CIRCUIT BOARD (fi g. 25) Replace in the reverse order. Check and adjust burner Carry out component removal procedure as described in pressure settings. 6.4. Pull the control fascia forward and lower it. Locate WARNING, A GAS TIGHTNESS CHECK MUST BE and remove the screws which secure the control panel CARRIED OUT. -
Page 24: Flue Fan & Burner Assembly
6.12 FLUE FAN & BURNER ASSEMBLY Step 1 Carry out component removal procedure as described in 6.4. Step 2 Slacken the gas pipe (A) at the outlet connection and swing/rotate away from the fan assembly. Disconnect the electrical plugs from the fan. If only the fan/fan mixer is to be removed, proceed to step 6. -
Page 25: Main Heat Exchanger
6.14 CONDENSE TRAP REMOVAL (fi g. 32) 6.13 MAIN HEAT EXCHANGER (fi g.31) Carry out component removal procedure as described The heat exchanger is a non-serviceable item and should only be removed if it’s necessary to replace it. The heat in 6.4. -
Page 26: Checks, Adjustments And Fault Fi Nding
AUTOSTOP: Further information on the AUTOSTOP ured at the primary thermistor, the appliance will begin function, can be obtained from your local Vokera Sales the modulation phase whereby the fan and gas valve will Representative. - Page 27 WITH THE AID OF A PROPERLY CALIBRATED FLUE Gas type and appliance fan speed (output) must be set GAS ANALYSER. according to the specifi c appliance specifi cation. Vokera accepts no responsibility if the gas type and/or fan speed NOTE is not correctly adjusted according to the respective ap- To adjust the gas valve you must fi...
-
Page 28: Combustion Analysis Test
pressure must be adjusted as follows: 7.7 ELECTRICAL CHECKS Using a 2,5mm Allen key, very slowly turn the minimum Any electrical checks must be carried out by a suitably adjustment screw (see fi g. 36) – clockwise to increase, qualifi... -
Page 29: Component Values & Characteristics
NOTE Restore the electrical supply to the boiler and turn the selector switch to the on position. The boiler should now function as described in section 7.2. Should the boiler fail to respond, the internal fuses and connectors should be checked to ensure integrity and continuity. -
Page 30: Wiring Diagrams
If external controls are to be added to the system, they must be connected to the appliance as shown in the following diagrams. For advice on controls that are not featured in this book, please contact Vokera technical 0844 391 0999 NOTE THE LINK WIRE MUST BE REMOVED IF ADDI- ●... - Page 31 FUNCTIONAL DIAGRAM NOTE. L-N-E CONNECTION MUST NOT BE INTERCHANGED CONTROL SWITCHING OF TIME CLOCK AND ROOM THERMOSTAT RATED IS 230 V.a.c. Fig. 39 F Hv Fan power supply 230 V X4÷X9 Connection to PCB low voltage F Lv Fan signal control F.O.H.T Flow over heat thermostat E.P.
- Page 32 FUNCTIONAL DIAGRAM Fig. 40 8.4.1. “S” - Plan with Vokera 2-channel programmer 8.4.2. “Y” - Plan with Vokera 2-channel programmer Fig. 41...
-
Page 33: Related Documents
SECTION 10 LPG INSTRUCTIONS 10.1 RELATED DOCUMENTS BS 6798 INSTALLATION OF BOILERS OF RATED INPUT NOT EXCEEDING 60 kW BS 5449 PART 1 FORCED CIRCULATION HOT WATER SYSTEMS BS 5446 INSTALLATION OF GAS HOT WATER SUPPLIES FOR DOMESTIC PURPOSES BS 5440 PART 1 FLUES BS 5482... -
Page 34: Combustion Analysis Test
ATTENTION Gas type and appliance fan speed (output) must be set Fig. 45 according to the specifi c appliance specifi cation. Vokera accepts no responsibility if the gas type and/or fan speed 10.8.5 FAN SPEED TABLE is not correctly adjusted according to the respective ap- Use the following table to set the corresponding fan speeds that are relative to the appliance you are working on. - Page 35 As part of the installa on process, ESPECIALLY WHERE A FLUE unless this ac on is recommended, following HAS BEEN FITTED BY PERSONS OTHER THAN THE BOILER contact with Vokera technical. If any such INSTALLER, visually check the integrity of the whole flue adjustment is recommended and further system to confirm that all components are correctly...
- Page 36 Benchmark Commissioning and Servicing Section It is a requirement that the boiler is installed and commissioned to the completed in full. www.centralheating.co.uk © Heating and Hotwater Industry Council (HHIC)
-
Page 37: Commissioning Checklist
GAS BOILER SYSTEM COMMISSIONING CHECKLIST This Commissioning Checklist is to be completed in full by the competent person who commissioned the boiler as a means of demonstrating compliance with the appropriate Building Regulations and then handed to the customer to keep for future reference. CONTROLS Optimum start control Fitted... - Page 38 SERVICE RECORD It is recommended that your heating system is serviced regularly and that the appropriate Service Interval Record is completed. Service Provider SERVICE 01 SERVICE 02 ² % ² % ² % ² % SERVICE 03 SERVICE 04 ² % ²...
-
Page 42: Benchmark
Registered address: Vokèra Ltd Borderlake House Unit 7 Riverside Industrial Estate London Colney Herts AL2 1HG enquiries@vokera.co.uk www.vokera.co.uk www.vokera.ie Sales, General Enquires T 0844 391 0999 F 0844 391 0998 Vokèra Ireland West Court, Callan Co Kilkenny T 056 7755057 F 056 7755060 Vokèra Limited reserve the right to change...
Need help?
Do you have a question about the Mynute VHE Series and is the answer not in the manual?
Questions and answers