
Related Manuals for Ositech Communications Titan III

Summary of Contents for Ositech Communications Titan III
- Page 1 Ositech Titan III Gateway - Technical Reference Guide Document Status: Released Title: Ositech Titan III Gateway – Technical Reference Guide Revision: F Document # : 290303-001-NA Page 1 of 115...
- Page 2 Physio-Control, Inc. Microsoft and Windows registered trademarks of the Microsoft Corporation. All other names herein are trademarks or registered trademarks of their respective owners. Title: Ositech Titan III Gateway – Technical Reference Guide Revision: F Document # : 290303-001-NA Page...
-
Page 3: Table Of Contents
Table of Contents 1 INTRODUCTION ......................... 5 1.1 PURPOSE ............................ 5 1.2 BEFORE YOU BEGIN ......................6 1.3 STEPS MAKING TITAN III GATEWAY READY FOR USE........... 6 2 DEFINITIONS ........................7 3 INSTALLATION FOR WINDOWS ................... 8 3.1 WINDOWS CONFIGURATION SOFTWARE INSTALLATION ........8 3.2 TITAN III DEVICE DRIVER INSTALLATION .............. - Page 4 ..........102 APPENDIX I: STATUS PAGE .................... 103 APPENDIX J: UNDERSTANDING TRANSMISSION CONNECTIONS ....106 APPENDIX K: REGULATORY COMPLIANCE INFORMATION ......109 Title: Ositech Titan III Gateway – Technical Reference Guide Revision: F Document # : 290303-001-NA Page 4 of 115...
-
Page 5: Introduction
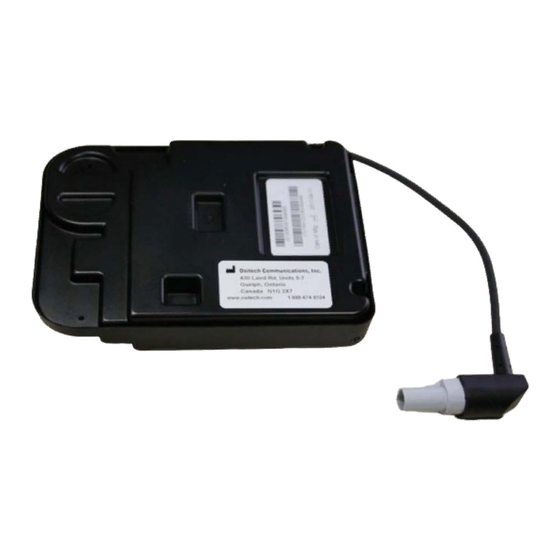
Fast Audio operations, or a combination, as well as the International version. Below, is a picture of an Ositech Titan III Gateway (with Fast Audio support) including its respective protective enclosure. This manual will detail how to install and ®... -
Page 6: Before You Begin
1. Insert CD and install Configuration Utility, Drivers and Technical Reference Guide on the PC. 2. Connect the Titan III Gateway to the PC powered by the LIFEPAK device and configure for use. 3. Run sample tests on the LIFEPAK device to verify connectivity and sample transmission operations using the included Wireless Radios. -
Page 7: Definitions
802.11 Wifi Protected Access – Pre Shared Key WPA2-ENT – 802.11 Wifi Protected Access 2 – Enterprise WPA2-PSK – 802.11 Wifi Protected Access 2 – Pre Shared Key Title: Ositech Titan III Gateway – Technical Reference Guide Revision: F Document # : 290303-001-NA Page 7 of 115... -
Page 8: Installation For Windows
Start Menu. You must review the Technical Reference Guide prior to configuring your Ositech Titan III Gateway, to familiarize yourself with its operations. Do not connect your Ositech Titan III Gateway until you have run the Windows installation to the PC via USB. - Page 9 During this time, be patient while the Ositech Titan III Gateway Configuration Utility Setup Wizard launches, it may take a few moments. Once the Ositech Titan III Gateway Configuration Utility Setup Wizard loads, click the Next button to continue. At this point, you need to examine the software license agreement that is displayed. You must accept the software license agreement in order to continue.
- Page 10 The setup wizard will now advise you that the Ositech Titan III Gateway Configuration Utility has been installed on your computer. Click the Finish button to exit the Ositech Titan III Gateway Configuration Utility Setup Wizard. The software for Ositech Titan III Gateway is now fully installed and accessible via your Start button.
-
Page 11: Titan Iii Device Driver Installation
Connect the Ositech Titan III Gateway to your LIFEPAK device and then power on the LIFEPAK device. Start your computer system, and then connect the USB Cable to the Ositech Titan III Gateway and then insert the other end of the USB cable into any free USB port on your computer system. - Page 12 Ensure that “Install the software automatically [Recommended]” is selected, and then click Next to continue with the USB installation. You will now be advised that the Ositech Titan III Gateway device has not passed Windows Logo testing. You must click “Continue Anyway” to continue with the installation at this point.
- Page 13 The Found New Hardware Wizard should now advise you that it has completed installing your Ositech Titan III Gateway device. Click Finish to close the wizard. Title: Ositech Titan III Gateway – Technical Reference Guide Revision: F Document # : 290303-001-NA...
-
Page 14: Windows Vista Usb Device Driver Installation
Connect the Ositech Titan III Gateway to your LIFEPAK device and then power on the LIFEPAK device. Start your computer system, and then connect the USB Cable to the Ositech Titan III Gateway and then insert the other end of the USB cable into any free USB port on your computer system. - Page 15 The Found New Hardware Wizard should now advise you (via your system tray) that it has successfully completed installing your Ositech Titan III Gateway. Title: Ositech Titan III Gateway – Technical Reference Guide Revision: F Document # : 290303-001-NA Page...
-
Page 16: Windows 7 Usb Device Driver Installation
Connect the Ositech Titan III Gateway to your LIFEPAK device and then power on the LIFEPAK device. Start your computer system, and then connect the USB Cable to the Ositech Titan III Gateway and then insert the other end of the USB cable into any free USB port on your computer system. -
Page 17: Windows 8/8.1 Usb Device Driver Installation
Connect the Ositech Titan III Gateway to your LIFEPAK device and then power on the LIFEPAK device. Start your computer system, and then connect the USB Cable to the Ositech Titan III Gateway and then insert the other end of the USB cable into any free USB port on your computer system. - Page 18 Browse to your CDROM drive. Please note, the drive letter associated with your specific CDROM drive may be different from that illustrated below. Title: Ositech Titan III Gateway – Technical Reference Guide Revision: F Document # : 290303-001-NA...
- Page 19 Titan III Gateway, with no further action required. The Update Drive Software wizard should now advise you that it has successfully completed installing your Ositech Titan III Gateway. Title: Ositech Titan III Gateway – Technical Reference Guide Revision: F Document # : 290303-001-NA...
-
Page 20: Windows 10 Usb Device Driver Installation
Connect the Ositech Titan III Gateway to your LIFEPAK device and then power on the LIFEPAK device. Start your computer system, and then connect the USB Cable to the Ositech Titan III Gateway and then insert the other end of the USB cable into any free USB port on your computer system. - Page 21 Driver Software”. Ensure you have the Ositech installation CDROM inserted into your CDROM drive at this time. The Update Driver Software wizard will now greet you. Click “Browse my computer for driver software” to proceed. Title: Ositech Titan III Gateway – Technical Reference Guide Revision: F Document # : 290303-001-NA Page...
- Page 22 Click the Next button, and at this point, Windows 10 will proceed to install the Ositech Titan III Gateway, with no further action required. The Update Drive Software wizard should now advise you that it has successfully completed installing your Ositech Titan III Gateway.
- Page 23 At this time, the Windows Device Manager will now indicate the Ositech Titan III Gateway as a Network Adapter. The Ositech Titan III Gateway is properly installed when the Device Manager indicates it as a Network Adapter accordingly. Title: Ositech Titan III Gateway – Technical Reference Guide...
-
Page 24: Lifepak ® Device Operations
LIFEPAK DEVICE OPERATIONS This section will illustrate how to use the Ositech Titan III Gateway device in a real world scenario, in conjunction with a LIFEPAK device. In order to begin, you need to ensure you have the proper credentials to access the wireless network(s) that you intend to join, and as well, you will need your access credentials (Username, Password, and URL) for ®... - Page 25 If you are having difficulty accessing the Ositech Titan III Wireless Configuration Utility, please contact Physio-Control, now part of Stryker, Technical Support, or your local LIFENET System team. Note: To access the Ositech Titan III Gateway Configuration Utility, your system must have Windows Internet Explorer version 7 or higher installed.
- Page 26 The configuration utility will now appear and the Welcome page will greet you. On the left side of the configuration utility, click Basic, to access the Basic Settings page. Title: Ositech Titan III Gateway – Technical Reference Guide Revision: F...
- Page 27 Here, you will enter a Description as a user-friendly name for the Ositech Titan III Gateway, keeping in mind that this field populates the associated column on the LIFENET System. As your Description, make this name unique to identify the location.
- Page 28 Network, you may click “View Available Wireless Networks”. This feature will present you a list of Wireless Networks that has been detected within your range. As well, please Title: Ositech Titan III Gateway – Technical Reference Guide Revision: F Document # : 290303-001-NA...
- Page 29 Once you have selected the appropriate cellular provider, click the Save button to proceed. Title: Ositech Titan III Gateway – Technical Reference Guide Revision: F Document # : 290303-001-NA...
- Page 30 To proceed with the connection test, click the “Perform a Connection Test” button. Your Ositech Titan III Gateway will now perform a test with the connection(s) you have just created. Please be patient during the actual test, as this may take a few moments.
- Page 31 Basic button. On the Basic page, populate the settings as required for your account on the LIFENET System accordingly. When you have completed entering your specific settings, click the Save button. Title: Ositech Titan III Gateway – Technical Reference Guide Revision: F Document # : 290303-001-NA...
- Page 32 Upon successful registration, you will receive confirmation informing you that the registration was successful. Your Ositech Titan III Gateway is now ready for use. You should now logout of the Configurator and close the browser window and unplug the device. Please refer to the Placement Guide for more details about proper gateway storage.
- Page 33 When the overall transmission is complete, the LIFEPAK device will indicate Transmission Completed, and the Ositech Titan III Gateway will provide its audible successful transmission tones. Title: Ositech Titan III Gateway – Technical Reference Guide...
-
Page 34: Titan Iii Gateway Configuration Utility
This section describes the Ositech Titan III Gateway Configuration Utility in greater detail. In order to have your Ositech Titan III Gateway functional for operations with your LIFEPAK device, it needs to be configured for your specific connection prior to use. This is accomplished using the Ositech Titan III Gateway Configuration Utility. - Page 35 Country in which the Gateway will be operated from. Once you have the selected the Country of operation, click the Save button. Title: Ositech Titan III Gateway – Technical Reference Guide Revision: F Document # : 290303-001-NA...
- Page 36 You will observe the notice “The Gateway has not been setup for initial use, factory default settings have been loaded. Please proceed to configure your Ositech Titan III Gateway for your specific operation environment, and then click “Apply Changes” to save your settings.
- Page 37 The main Ositech Titan III Gateway Configuration Utility has seven sub areas on the left that are selectable; Welcome, Basic, Wireless, Audio (if audio equipped), Register Gateway, Advanced Settings, and Logout. Whenever you have finished your session with the Configurator, always click to Logout before disconnecting power to your Gateway.
-
Page 38: Welcome
5.1 WELCOME Whenever you launch the Ositech Titan III Gateway Configuration Utility, it will open to the Welcome screen. The Welcome screen provides an easy avenue to determine version histories. Here you can view the electronic Serial Number as well as the firmware version of the Ositech Titan III Gateway. -
Page 39: Basic Settings
Telephone number fields show up under similarly named columns on the LIFENET System. These fields will allow you to uniquely identify your Ositech Titan III Gateway on the LIFENET System. If you have made any changes here, remember to click the Save button, then Apply Changes. -
Page 40: Gateway Identification
Serial No. The Serial No. option. This field contains the unique bar-coded serial number of your Ositech Titan III Gateway. This area is for your reference, and is not user adjustable and as a result, grayed out. Title: Ositech Titan III Gateway – Technical Reference Guide... -
Page 41: Telephone Number
However, if you are instructed to enter a specific URL, please select Other from the pull down choices, and then you will be able to enter your specific URL in the box below. Title: Ositech Titan III Gateway – Technical Reference Guide Revision: F... -
Page 42: Username
The Username option. This parameter is a user name associated with an account in which the Ositech Titan III Gateway device is to be registered. This is a valid user name used to log into an account on the LIFENET System. This field is limited to 91 characters in length. -
Page 43: Enable Audible Feedback
5.2.8 Enable Audible Feedback The Enable Audible Feedback option. This option will either enable or disable audible feedback from your Ositech Titan III Gateway. By default, this option is checked to Enable Audible Feedback, however if you wish to disable audible feedback, please uncheck this option. -
Page 44: Wireless Settings
Wireless Settings. You will now observe the Connection options that comprise the Wireless Settings. The Wireless Settings are a local function on the Ositech Titan III Gateway. These settings will determine how the Ositech Titan III Gateway will connect to the Internet to allow communications with the LIFENET System. 5.3.1 CONNECTIONS 5.3.1.1... -
Page 45: Connection Name
Access Points that are hard wired and stable and meet the minimum communication requirements as outlined in the Communication Requirements for Audio Operation Appendix. Title: Ositech Titan III Gateway – Technical Reference Guide Revision: F Document # : 290303-001-NA... -
Page 46: Backhaul
Unchecking this option, if there are many Wireless Networks that are not visible, can slow down how fast the Gateway can establish a connection. Title: Ositech Titan III Gateway – Technical Reference Guide Revision: F Document # : 290303-001-NA... -
Page 47: Authentication Type
If the Authentication Type is set to WEP, WPA-PSK or WPA2-PSK, the Key field will also be required. The Ositech Titan III Gateway automatically handles key values; just enter the key as required by the associated Wireless Network. Note, any spaces at the end of key are ignored;... -
Page 48: Password
Ositech Titan III Gateway to be configured to use. This feature has been added to allow the user to display what wireless networks are visible to the Ositech Titan III Gateway for debugging purposes or in cases where the Ositech Titan III Gateway is in the vicinity of the wireless network to be configured. -
Page 49: New Cellular Connection
Login Password, and the Authorization (for VPN connections only), and an area to Select Cellular Provider. When creating a new cellular connection, always choose a Cellular Provider first, and then the fields can be customized, if required. Title: Ositech Titan III Gateway – Technical Reference Guide Revision: F Document # : 290303-001-NA... -
Page 50: Connection Name
APN String in your SIM Card. Not all SIM Cards support this feature, please check with your cellular service provider if wish to enable this feature. Title: Ositech Titan III Gateway – Technical Reference Guide Revision: F Document # : 290303-001-NA... -
Page 51: Login Username
Remember, after you have completed configuring your new cellular connection, click the Save button, and then Apply Changes. Title: Ositech Titan III Gateway – Technical Reference Guide Revision: F Document # : 290303-001-NA Page... -
Page 52: Connection Test
DO NOT USE YOUR BROWSER’S BACK BUTTON TO RETURN. Instead, please use the “Click here to navigate back”. See Appendix E for more complete details regarding a failed test. Title: Ositech Titan III Gateway – Technical Reference Guide Revision: F Document # : 290303-001-NA... -
Page 53: Connection Management
Prioritizing your connections will permit you to customize the order in which you connect to wireless networks. Title: Ositech Titan III Gateway – Technical Reference Guide Revision: F Document # : 290303-001-NA... -
Page 54: Connection Manipulation
Apply Changes (from left side options) to apply these to your Ositech Titan III Gateway. If you do make changes to any of your connections, it is advised that you test each to ensure they are fully functional. -
Page 55: Register Device
5.4 REGISTER DEVICE The Ositech Titan III Gateway must be registered with the LIFENET System in order to proceed with any real world transmissions. On the left side of the configuration utility, select Register Device to continue. Once registration has completed successfully, this option changes to Unregister Device. - Page 56 You will be advised that your registration attempt has been successful. As a result, your Gateway is now fully ready for operations with your LIFEPAK device for transmissions to the LIFENET System. Title: Ositech Titan III Gateway – Technical Reference Guide Revision: F Document # : 290303-001-NA...
-
Page 57: Unregister Device
At this point, you are now prompted to confirm you wish to Unregister the Gateway. Click OK to Unregister your Ositech Titan III Gateway. In order to proceed, you must have a valid connection to the LIFENET System. Title: Ositech Titan III Gateway – Technical Reference Guide... - Page 58 You will now be advised that your Ositech Titan III Gateway device has been successfully unregistered from the LIFENET System. Please be advised, that your Gateway device will NOT re-register itself the next time it is used to attempt to send a transmission to the LIFENET System, or perform a connection test.
-
Page 59: Audio
5.6.1 ADVANCED To access Advanced, under Advanced Settings, select Advanced. DO NOT ALTER any of these settings without the advice of your local LIFENET System team. Title: Ositech Titan III Gateway – Technical Reference Guide Revision: F Document # : 290303-001-NA... -
Page 60: Import/Export Settings
Ositech Titan III Gateways, and also to restore your saved configurations back to your Ositech Titan III Gateway. This is very important if performing a firmware update, as your existing configuration can be exported prior to the firmware upgrade, then imported back once the firmware upgrade has completed. -
Page 61: Import Configuration
5.6.2.1 IMPORT CONFIGURATION If you wish to import an external, previously saved, Ositech Titan III Gateway configuration file, click the Browse button to begin. Note, you cannot import a configuration, if the Gateway is currently registered. At this point, you must now select the external configuration file to import. Locate the external configuration file on your computer system, and then click the Open button. - Page 62 Your selected configuration has now been successfully imported. However, remember that these changes have not yet been applied, so ensure you click Apply Changes from the left side of the configuration utility. Title: Ositech Titan III Gateway – Technical Reference Guide Revision: F Document # : 290303-001-NA...
-
Page 63: Export Configuration
5.6.2.2 EXPORT CONFIGURATION If you wish to export an Ositech Titan III Gateway configuration to an external file, click the Export button to begin. Windows will now prompt you to save the configuration file. Click the Save button to continue. - Page 64 Select the location of your choice, and when ready, click the Save button to save the file. You can create a number of export files, each one being uniquely named to identify its contents. Title: Ositech Titan III Gateway – Technical Reference Guide Revision: F Document # : 290303-001-NA...
-
Page 65: Wifi Supported Countries
Here you may select any International country outside of the USA or Canada. Pull down the Country selector, and choose the country from which the Gateway will operate. Title: Ositech Titan III Gateway – Technical Reference Guide Revision: F Document # : 290303-001-NA... - Page 66 Due to regulatory domain compliance, at this time, a special password is required to finalize the country selection process. Please contact Physio-Control, now part of Stryker, Technical Support, or your local LIFENET team to proceed. Title: Ositech Titan III Gateway – Technical Reference Guide Revision: F Document # : 290303-001-NA...
-
Page 67: Restore Factory Settings
This will also result in the gateway registration being reset locally; however the Gateway is not unregistered from the LIFENET System. Click OK to proceed. Title: Ositech Titan III Gateway – Technical Reference Guide Revision: F Document # : 290303-001-NA... - Page 68 The default settings are now loaded and applied. Title: Ositech Titan III Gateway – Technical Reference Guide Revision: F Document # : 290303-001-NA Page 8 of 115...
-
Page 69: Debug Log
Debug Log. This area also allows you to select the Debug Log options including the ability to Delete Log, Export Log, and a convenient Back button to return to the previous menu. Title: Ositech Titan III Gateway – Technical Reference Guide Revision: F Document # : 290303-001-NA... -
Page 70: Delete Debug Log
You will now be prompted to actually save the file. Should you wish to alter the file name and/or path, please do so now, then click Save to store the file accordingly. Title: Ositech Titan III Gateway – Technical Reference Guide Revision: F... -
Page 71: Back
5.6.5.3 Back Click the Back button to return to the previous menu. Title: Ositech Titan III Gateway – Technical Reference Guide Revision: F Document # : 290303-001-NA Page 1 of 115... -
Page 72: Other
Advanced Settings, click Other. The Other functions available include the options to perform a firmware upgrade on the Ositech Titan III Gateway, and the ability to change your login credentials. Title: Ositech Titan III Gateway – Technical Reference Guide Revision: F... -
Page 73: Perform Firmware Upgrade
Once you have clicked to perform a firmware upgrade, the configuration utility will launch the Titan III Software Update feature. To begin the software update process, click the Browse button to continue. - Page 74 While the update is in progress, you will observe its progress, and then when the software has been uploaded to the Ositech Titan III Gateway, click the OK button to continue. Title: Ositech Titan III Gateway – Technical Reference Guide...
- Page 75 Once you click OK, the Titan III Software Update page will display its status. Please be patient during this time, as this process can take approximately 2.5 minutes to complete. Once the update has completed, you will then be advised of the current software version that you have just upgraded to.
-
Page 76: Change Login Credentials
Please enter the new Username and Password of your choice. Finally, Re-enter your password as a security check. Then, click Update to apply your new Username and Password. Title: Ositech Titan III Gateway – Technical Reference Guide Revision: F Document # : 290303-001-NA... - Page 77 Ositech Titan III Gateway is restarted. Please disconnect power from the Ositech Titan III Gateway, and then reapply power. The next time you login to the Ositech Titan III Gateway, you will now use your newly assigned username and password.
-
Page 78: Technical Support
TECHNICAL SUPPORT Should you require any technical assistance with your Ositech Titan III Gateway, or if you have any questions or concerns, contact Physio-Control, now part of Stryker, Technical Support. The hours for live technical support are from 6am to 4pm Pacific Time, Monday through Friday. -
Page 79: Appendix A: Cellular Pre-Authorization
MEID of the cellular radio. This is located on the white sticker which is attached to the Ositech Titan III Gateway itself. Once you have retrieved the MEID of the cellular radio, you may now contact your CDMA provider and pre-authorize your cellular radio for use. -
Page 80: Appendix B: Verizon (Cdma) Activation / Reactivation
If the activation process is successful, you will be returned to the Wireless Settings page without further notice regarding activation. Please remember to Apply Changes when complete. Title: Ositech Titan III Gateway – Technical Reference Guide Revision: F Document # : 290303-001-NA... - Page 81 Reactivate button present at this time. Click the Reactivate button to proceed, however ensure you are situated on the local Verizon network, and that you have sufficient signal strength. Title: Ositech Titan III Gateway – Technical Reference Guide Revision: F Document # : 290303-001-NA...
- Page 82 At this time, please contact Technical Support for further instructions, with regards to your failed reactivation. Title: Ositech Titan III Gateway – Technical Reference Guide Revision: F Document # : 290303-001-NA Page...
-
Page 83: Appendix C: Sim Card Removal / Insertion
APPENDIX C: SIM CARD REMOVAL / INSERTION If your Ositech Titan III Gateway has support for Cellular operations, you may have the need to either insert or remove an existing SIM Card. This section will illustrate the removal and/or insertion of a SIM Card into your Cellular capable Gateway. Please be aware, removal and/or insertion of a SIM Card requires the Gateway protective clam shell to be opened to access the SIM Card slot, and then closed afterwards before use. - Page 84 7. Once all four rivets have been unlocked, invert the clam shell case such that the rivets may be grasped for removal using the tweezers. Title: Ositech Titan III Gateway – Technical Reference Guide Revision: F Document # : 290303-001-NA...
- Page 85 9. Now that all four rivets have been removed, grasp the clam shell case, and invert the case. The bottom case of the clam shell will now be facing up. Title: Ositech Titan III Gateway – Technical Reference Guide Revision: F...
- Page 86 10. Using one hand, gently separate the clam shell by lifting the bottom side of the clam shell upwards. 11. You should now observe the internal components of the Gateway. Title: Ositech Titan III Gateway – Technical Reference Guide Revision: F Document # : 290303-001-NA...
- Page 87 12. This step can be omitted, if your Ositech Titan III Gateway does not have the Audio feature. Observe the aluminum foil tape. Gently lift the aluminum foil tape to expose the microphone cord below. After you have lifted the aluminum foil tape, unplug the microphone cord from the microphone jack.
- Page 88 15. Insert the SIM Card at this point, press and feel for it to click and lock in place. A properly inserted SIM Card will be flush with the face plate and will not stick out. Title: Ositech Titan III Gateway – Technical Reference Guide Revision: F...
- Page 89 16. Replace the SIM Card slot cover accordingly. 17. Reconnect the microphone cord into the microphone jack. (For Gateways with Audio feature only) Title: Ositech Titan III Gateway – Technical Reference Guide Revision: F Document # : 290303-001-NA Page 9 of 115...
- Page 90 19. Next, ensure all cables, connectors and antennae are fully seated and secured to the Gateway. Once you have verified all cabling, etc, you will need to route the Hypertronic cable properly. See illustration below. Title: Ositech Titan III Gateway – Technical Reference Guide Revision: F Document # : 290303-001-NA...
- Page 91 20. Prepare to close the clam shell case. 21. Close the clam shell case. Ensure the Hypertronic cable exiting the Gateway is not being pinched at this time. Title: Ositech Titan III Gateway – Technical Reference Guide Revision: F Document # : 290303-001-NA...
- Page 92 23. Grasp the Gateway, and examine the plexiglass window. Ensure the SIM Card slot cover is in place, and that the clam shell case is locked and secure. Title: Ositech Titan III Gateway – Technical Reference Guide Revision: F Document # : 290303-001-NA...
- Page 93 Section 5 regarding configuration. Once you have configured your Gateway, you may then refer to the Gateway Placement Guide, and replace the Gateway in the side pouch of your LIFEPAK device. Title: Ositech Titan III Gateway – Technical Reference Guide Revision: F Document # : 290303-001-NA...
-
Page 94: Appendix D: How To Reset Username And Password
If you wish to proceed, click OK. At this point, you must login to the Ositech Titan III Gateway; however, since you have requested to reset the username and password, you need to enter “reset” as both the username and password in order to continue with the reset process. - Page 95 Once you have logged in using the reset credentials, the Gateway will then perform the reset. At this point, you will need to re-configure your Ositech Titan III Gateway for further use. It is advisable that you import your previously saved configuration, for more ease of use.
-
Page 96: Appendix E: Troubleshooting Failed Connections
The connection test duplicates how the Ositech Titan III Gateway will attempt to make a connection to the Internet. It will start with the highest priority connection and work its way down to the lowest priority connection, unless a specific connection has been selected for individual testing. - Page 97 Stage 4. This stage of testing verifies that you can successfully access the Internet through your wireless access point. A failure at this stage indicates the Ositech Titan III Gateway is able to connect to your wireless Access Point; however it cannot access the Internet. Possible causes include the settings of your wireless Access Point itself, the backhaul connection to the Access Point (i.e.
- Page 98 Compatible Extensions) options enabled, this may cause unreliable operations with Titan III Wireless Gateways. Should the CCX option be enabled, the Titan III Wireless Gateways may fail authentication with the CISCO Access Point(s). In order to alleviate this condition, it is recommended to disable this feature on the CISCO WLC Access Point(s).
-
Page 99: Appendix F: Communication Requirements For Audio Operation
• Both Wifi and Cell connections can possibly support audio transmissions. To help with the first factor above the Ositech Titan III Wireless Fast Audio Gateway provides a programmable option to determine which communication connections should be used for audio uploads. Those that do not allow audio... - Page 100 Ositech recommends a minimum upload speed of 2.0Mbps for a lightly loaded internet connection. Title: Ositech Titan III Gateway – Technical Reference Guide Revision: F Document # : 290303-001-NA...
-
Page 101: Appendix G: Front Panel Led's
APPENDIX G: FRONT PANEL LED’S The Ositech Titan III Gateway front panel, shown below, has a number of LED’s to help assist in determining the state of the unit. Not all the LED’s are used for the Ositech Titan III Gateway functionality, those that are used are described below. -
Page 102: Appendix H: Expected Audible Responses
Scenario 4: Your Ositech Titan III Gateway is Unregistered. In this scenario, if your Ositech Titan III Gateway has not been registered, and the Gateway is powered on, you will hear a series of ten fast monotone beeps. This situation will occur if you power on the Gateway without it being registered on the LIFENET System. -
Page 103: Appendix I: Status Page
APPENDIX I: STATUS PAGE The Status Page provides extensive diagnostic and statistical data regarding the current operations of the Ositech Titan III Gateway. Access to the Gateway Status Page is made conveniently through Internet Explorer. Once you launch Internet Explorer, you may access the status page directly with the following URL;... - Page 104 Wifi statistics accordingly. You will also observe that the Cellular statistics are not listed, since a cellular connection is not active at this time. Title: Ositech Titan III Gateway – Technical Reference Guide Revision: F Document # : 290303-001-NA...
- Page 105 ** Please note, RSSI Cellular Signal Strength, as indicated above, is stated as a numeric dBm value. In the example above, the RSSI Cellular Signal Strength is -81 dBm. Title: Ositech Titan III Gateway – Technical Reference Guide Revision: F...
-
Page 106: Appendix J: Understanding Transmission Connections
APPENDIX J: UNDERSTANDING TRANSMISSION CONNECTIONS The Ositech Titan III Gateway has been designed to allow the user to define the optimum connectivity path to the LIFENET System via the Internet connection it maintains. The connection list contains all the possible connections, Wifi and/or Cellular, that can be attempted. - Page 107 Based on the table above, the programming of the connection list is critical to having the Ositech Titan III Gateway connect for optimum operation. Here are some key points to keep in mind while creating the connection list.
- Page 108 Wifi if in range and finally over cellular if possible. Audio data can be uploaded when connected to the Station or Hospital Wifi; otherwise ECG data will only be uploaded. Title: Ositech Titan III Gateway – Technical Reference Guide Revision: F Document # : 290303-001-NA...
-
Page 109: Appendix K: Regulatory Compliance Information
This device complies with IC RSS-102 radiation exposure limits set forth for an uncontrolled environment. This device should be installed and operated with minimum distance of 20 centimeters or 7.87 inches from all persons. Title: Ositech Titan III Gateway – Technical Reference Guide Revision: F Document # : 290303-001-NA... - Page 110 This Class B digital apparatus complies with Canadian ICES-003. EU DECLARATION OF CONFORMITY: Hereby, Ositech Communications Inc. declares that the Titan III Gateway is in compliance with Directive 2014/53/EU. The full text of the EU declaration of conformity is available at the following internet address: https://www.ositech.com/regulatory-titan-iii-gateway-eu-declaration-of-conformity/...
- Page 111 6.5V to 13.2V Current Draw - Simultaneous Cellular (GPRS 2UP+2DN) and WiFi Peak Instantaneous Current: 1.3A max @ 6.5V Average Current: 0.74A @6.5V Title: Ositech Titan III Gateway – Technical Reference Guide Revision: F Document # : 290303-001-NA Page 1 of 115...
- Page 112 10 ± 2 (HT 40, MCS7 802.11n WLAN Antenna: Type: Monopole Impedance: 50Ω Radiation: Omni-directional Polarization: Linear Gain: <3 dbi VSWR: <2.0 Title: Ositech Titan III Gateway – Technical Reference Guide Revision: F Document # : 290303-001-NA Page 2 of 115...
- Page 113 1850.2 – 1909.8 1930.2 – 1989.8 Cellular Antenna: Type: Monopole Impedance: 50Ω Radiation: Omni directional Polarization: Linear Gain: <3 dBi VSWR: <2.5 Title: Ositech Titan III Gateway – Technical Reference Guide Revision: F Document # : 290303-001-NA Page 3 of 115...
- Page 114 This warranty is in lieu of all other warranties, expressed or implied and no representative or person is authorized to assume for OSITECH any other liability in connection with the sale of equipment. Title: Ositech Titan III Gateway – Technical Reference Guide Revision: F Document # : 290303-001-NA...
- Page 115 Should you have any questions concerning this Agreement, or if you desire to contact OSITECH for any reason, please visit our website at www.ositech.com or write to: OSITECH Communications, Inc. 430 Laird Rd., Units 5-7 Guelph, Ontario, Canada N1G 3X7.
Need help?
Do you have a question about the Titan III and is the answer not in the manual?
Questions and answers