Sign In
Upload
Download
Table of Contents
Contents
Add to my manuals
Delete from my manuals
Share
URL of this page:
HTML Link:
Bookmark this page
Add
Manual will be automatically added to "My Manuals"
Print this page
×
Bookmark added
×
Added to my manuals
Manuals
Brands
Nordson EFD Manuals
Laboratory Equipment
E2V
Operating manual
Nordson EFD E2V Operating Manual
Automated dispensing systems
Hide thumbs
1
2
Table Of Contents
3
4
5
6
7
8
9
10
11
12
13
14
15
16
17
18
19
20
21
22
23
24
25
26
27
28
29
30
31
32
33
34
35
36
37
38
39
40
41
42
43
44
45
46
47
48
49
50
51
52
53
54
55
56
57
58
59
60
61
62
63
64
65
66
67
68
69
70
71
72
73
74
75
76
77
78
79
80
81
82
83
84
85
86
87
88
89
90
91
92
93
94
95
96
97
98
99
100
101
102
103
page
of
103
Go
/
103
Contents
Table of Contents
Bookmarks
Table of Contents
Contents
Table of Contents
Introduction
Nordson EFD Product Safety Statement
Halogenated Hydrocarbon Solvent Hazards
High Pressure Fluids
Qualified Personnel
Intended Use
Regulations and Approvals
Personal Safety
Fire Safety
Preventive Maintenance
Important Disposable Component Safety Information
Action in the Event of a Malfunction
Disposal
Equipment-Specific Safety Information
Specifications
Operating Features
EV Series System Component Identification
EV Front Panel
EV Back Panel
Camera
Joystick
Installation
Unpack the System Components
Position the Robot and Install and Connect Components
Check the Camera and Dispenser Installation
Prepare the Work Surface or Fixture Plate
Connect Inputs / Outputs (Optional)
Power on the System
Concepts
About Programs and Commands
About Offsets
About Marks
Overview of the Dispensemotion Software
Primary View Screen and Tab Bar
Secondary View Screen
Horizontal and Vertical Toolbar Icons
Setup and Dispense Command Icons
Navigation and Jogging Window
System Setup Screen
Camera Screen, Tab Bar, and Icons
Camera Setup Screen
Keypad
Continued on Next Page
Setup
Setting System Parameters
Restoring the System to the Factory Default Settings
Setting Password Protection
Setting up and Calibrating the System (Required)
Verifying the Robot Model and Tip Detector Selection
(Only EV Systems with a Tip Detector) Setting up the Tip Detector
Focusing and Calibrating the Camera
Setting the Camera-To-Tip Offset
Setting the Tip-To-Workpiece Offset (Z Clearance) Using the Camera Focus
Testing the System Setup and Calibration
How the System Responds to Needle Z Detect or Needle XY Adjust
Setting up Inputs / Outputs
Configuring Input / Outputs for a Special Purpose
Setting How the System Responds When a Mark Is Absent (Optional)
Setting How the System Finds Marks (Optional)
Setting How the System Captures Z Height Values (Optional)
Programming
How to Automatically Update Offsets
How to Create and Run a Program
How to Lock or Unlock a Program
How to Measure a Path or Circle on a Workpiece
How to Create Patterns
Dispense Dot Sample Program
Lines and Arcs Sample Program
Circle Sample Program
How to Use the Example Icon
How to Create a Mark
How to Use Marks or Fiducial Marks in a Program
How to Dispense on Multiple Workpieces in an Array
How to Disable Dispensing for Specific Workpieces in an Array
How to Set up Auto Purge, Program Cycle Limits, or Fluid Working Life Limits
How to Use Point Offset to Adjust All Points in a Program
Operation
Starting the System and Running a Program
Running a Program by Scanning a QR Code
Pausing During a Dispense Cycle
Purging the System
Shutting down the System
Accessories
Pre-Configured Output Cables
Fixture Plates
Start / Stop Box
Tip Detector
Height Sensor
Mounting Brackets
Technical Data
Dimensions
Mounting Hole Template
Wiring Diagrams
Dispenser Port
Ext. Control Port
I/O Port
Example Input / Output Connections
Appendix A, Command Function Reference
Appendix B, DXF File Import
Overview of the DXF Screen
Setting DXF Import Preferences
Importing a DXF File
Appendix C, QR Code Scanning Setup
Appendix D, Multi-Needle Setup and Use
Appendix E, Height Sensor Setup and Use
Appendix F, I/O Pin Function Setup
Advertisement
Quick Links
Download this manual
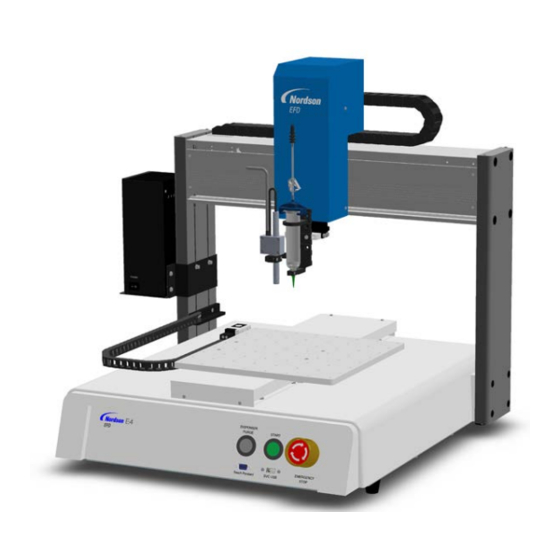
EV Series Automated Dispensing Systems
Operating Manual
™
Electronic pdf files of Nordson EFD
manuals are also available at
www.nordsonefd.com
Table of
Contents
Previous
Page
Next
Page
1
2
3
4
5
Advertisement
Table of Contents
Need help?
Do you have a question about the E2V and is the answer not in the manual?
Ask a question
Questions and answers
Related Manuals for Nordson EFD E2V
Laboratory Equipment Nordson EFD E4V Operating Manual
Automated dispensing systems (103 pages)
Laboratory Equipment Nordson EFD E3V Operating Manual
Automated dispensing systems (103 pages)
This manual is also suitable for:
Ev series
E5v
E4v
E3v
E6v
Table of Contents
Save PDF
Print
Rename the bookmark
Delete bookmark?
Delete from my manuals?
Login
Sign In
OR
Sign in with Facebook
Sign in with Google
Upload manual
Upload from disk
Upload from URL


Need help?
Do you have a question about the E2V and is the answer not in the manual?
Questions and answers