Table of Contents
Advertisement
Bullet R1 Operation Manual
WARNING: NEVER LEAVE THE ROASTER UNATTENDED DURING ROASTING!
ALWAYS UNPLUG THE ROASTER AFTER IT HAS COOLED DOWN!
ALWAYS DRINK FRESH COFFEE!
Please read and follow the instructions below. If uncertain about any instructions,
please contact a certified Aillio representative by phone (+886) 2 2508 0602 or email:
support@aillio.com
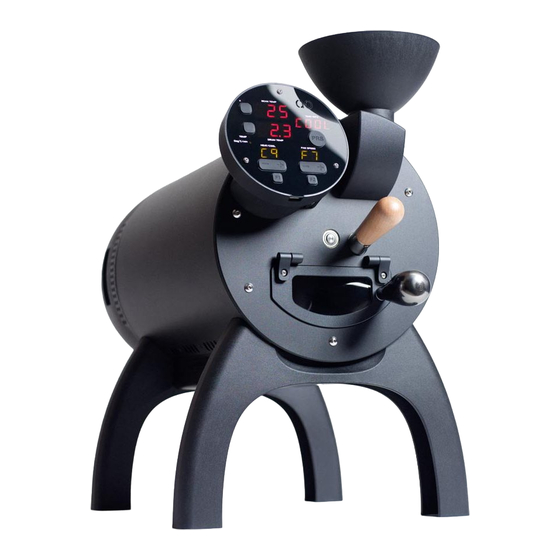
The Bullet R1 is a high performance electric coffee roaster with a maximum capacity of
1kg. The Aillio Bullet R1 will be referred to as "R1".
Click here for this manual in other
languages
www.aillio.com
Advertisement
Table of Contents

Related Manuals for Aillio Bullet R1


Summary of Contents for Aillio Bullet R1
- Page 1 Aillio representative by phone (+886) 2 2508 0602 or email: support@aillio.com The Bullet R1 is a high performance electric coffee roaster with a maximum capacity of 1kg. The Aillio Bullet R1 will be referred to as “R1”. ...
-
Page 2: Important Safeguards
17. Allow 10cm (4 inches) of space around the sides and front of the roaster. 18. Never use the R1 from within a cabinet. 19. Never leave the Bullet R1 unattended during preheating and roasting. Also, do not leave the roaster unattended until 2 minutes after the cooling process has ... - Page 3 26. The Bullet R1 is not intended to be operated by means of an external timer or separate remote-control system. 27. This appliance is intended to be used in household and similar applications such as: staff kitchen areas in shops, offices and other working environments; farm ...
- Page 4 Most sections updated. Added information about the Infrared bean temperature sensor (IBT sensor) 2.8 Updated mechanical check 2.9 Added Only Service Authorized personnel are allowed to repair R1 (M.) 2.10 Removed chapter related to optional software data logging program (M.) www.aillio.com 3 ...
- Page 5 www.aillio.com 4 ...
- Page 6 ● Unless recommended by Aillio, accessories must not change the operation of the coffee roaster or interfere with normal operation. ● Do not operate the Bullet R1 if not fully assembled. This includes connecting the chaff collector. ● Do not operate the coffee roaster if it is damaged or you suspect a malfunction. ...
- Page 7 / hose to ensure adequate airflow. The suction fan can affect the performance of the R1 by increasing the airflow, thus potentially removing too much heat. www.aillio.com 6 ...
- Page 8 Table of Contents Bullet R1 Operation Manual IMPORTANT SAFEGUARDS Revisions Alterations Service & Accessories Electrical Mechanical Roasting Venting Table of Contents Getting started Roaster overview Control panel overview Unpacking and preparing the R1 Mechanical Check Seasoning the Drum IMPORTANT NOTICE ...
- Page 9 (If you have never roasted coffee, then this is the guide for you) The Basics of coffee roasting Recommended preheating temperatures Button function in each mode Error messages Critical Errors Warnings Specifications This manual in other languages Thai user manual www.aillio.com 8 ...
-
Page 10: Getting Started
Getting started Roaster overview www.aillio.com 9 ... - Page 11 Control panel overview www.aillio.com 10 ...
- Page 12 Heating to P0. Listen for any obvious metal against metal scraping sounds. ● If you see rust on the drum, do not be alarmed. It is normal for an unseasoned drum to oxidize and this will disappear during seasoning. www.aillio.com 11 ...
- Page 13 ● Drum speed should be set to D9 for the first 10 roasts. This is to prevent beans getting stuck and potentially pushing the door open. After about 10 roasts, the surface should have less friction and the drum speed can be lowered. www.aillio.com 12 ...
- Page 14 www.aillio.com 13 ...
-
Page 15: Operating Modes
Operating the Bullet R1 Operating modes The PRS button controls the different cycles of the roasting process. Pressing this button will cycle through each roasting step. Off Mode The roaster is ready to preheat. The power up and down buttons will select your preheating ... - Page 16 4. Pro - press the HC buttons up/down to select the default power when the roast starts, see fig. 14 5. PH - press the HC buttons up/down to select the default preheat temperature when the R1 starts up, see fig. 15 www.aillio.com 15 ...
- Page 17 www.aillio.com 16 ...
- Page 18 You can manually press the PRS to enter Charge mode in these cases. If the R1 has not entered Charge Mode after a period of 35 minutes, it is necessary to manually press the PRS button to enter the Charge mode. www.aillio.com 17 ...
- Page 19 (ROR) (Fig. 7). 3. The FAN button controls both exhaust fan and drum RPM. To change between the two, use the F2 button. Drum RPM is marked with a “d”, and fan speed with “F” (Fig. 8). www.aillio.com 18 ...
- Page 20 To do this, press the F1 button while in Cooling mode. This will take you back to the off mode, but with the cooling tray still running (the clock display will show bAC. After setting the preheat temperature, press PRS to begin another preheat and roast. www.aillio.com 19 ...
- Page 21 It is imperative to keep the R1 connected to the mains power while it cools down. This will keep the cooling fans running to cool both some sensitive mechanical parts as well as the electronics and the IBT sensor. Unplugging the R1 before it has completely cooled will damage it. www.aillio.com 20 ...
- Page 22 t h e r e i s a h i g h r i s k o f d a m a g i n g t h e g l a s s . (It's very costly to replace). SAFETY NOTICE If the IR window is dirty, the drum temperature will not be measured correctly. This can lead to the R1 overheating, potentially damaging it. One indication of a dirty IR window www.aillio.com 21 ...
- Page 23 DO NOT use a compressed airgun directly into the front of the roaster as you will damage the insulation tube. You can use compressed air on the back of the roaster, and it can also be applied in the air intake, next to the drum pulley. www.aillio.com 22 ...
-
Page 24: Problem Solving
If a noise is still heard, remove the front by unscrewing the 6 hex screw on the front. Add a larger shim to allow more clearance between the drum and the front plate. You can combine shims if needed www.aillio.com 23 ... - Page 25 When you feel the two screws cannot be tightened further, stop. Reattach the cover by using a hex screwdriver with a straight head. Round headed drivers are very hard to use. www.aillio.com 24 ...
- Page 26 Tighten and reassemble making sure to tighten the belt when mounting the motor bracket www.aillio.com 25 ...
- Page 27 On the small PCB connected to the drum motor, there is a fuse. Inspect it and if blown, replace with a 1.5A 20mm fuse. www.aillio.com 26 ...
- Page 28 See table below. Tools Needed: Hex Key 2&2,5mm Symptom: Cause: Solution: Drum does not heat Power is set to P0 Set Power to P1-P9 up Power PCB Faulty Contact us www.aillio.com 27 ...
- Page 29 There is no real ‘sweet spot’ for the Bullet R1, but a 1kg charge of some beans may take longer to get to first or second crack than you would like, or you may have more ...
- Page 30 *** A Note About Bean Temperature Readings on the Bullet R1*** The original Bullet R1 (serial numbers below 1425) shipped with an infrared sensor for measuring drum temperatures during preheat, and also with a traditional bean temperature probe. These Bullets lack the IBTS and will only give one bean temperature ...
- Page 31 You can now toggle between the two readings on your Bullet R1 by pushing the (A) button on the control panel. When the (x) light is on, it displays the temperature reading from the IBTS, which gives a more accurate reading ...
- Page 32 Change drum speed speed Go to Cool Drum Change Change Cool Mode cooling box exhaust fan Beans Fan speed speed Go to Off Mode Shut down www.aillio.com 31 ...
- Page 33 Fan speed speed/ drum /drum speed / Cool speed / cooling tray Beans cooling tray fan speed speed (during back to back roasting) Shut Go to Off Mode down www.aillio.com 32 ...
-
Page 34: Error Messages
First make sure you have the 512 latest firmware. Check if the drum can spin freely. This error can also occur if the bearing is not seated correctly in the front place, making the drum difficult to spin. If error persists then www.aillio.com 33 ... - Page 35 IBTS, then if the micro fan does not sure the small fan is spinning. start up, the firmware will revert back to the old type Drum Temp sensor with a lower temperature limit. www.aillio.com 34 ...
- Page 36 Another way for the RPM to be too high is if an external fan is directly connected to the R1, and it is causing too high an airflow. www.aillio.com 35 ...
-
Page 37: Specifications
Tray: Detachable. Fan Cooling. Connected to underside of roaster ● Chaff Collector: Detachable. Empty every 2-3kg of roasting ● Bullet R1 - Input Voltage: 2 00V-240V. 50Hz-60Hz ● ● Bullet R1/120V - Input Voltage: 1 00V-127V. 50Hz-60Hz ... - Page 38 This manual in other languages Thai user manual www.aillio.com 37 ...
Need help?
Do you have a question about the Bullet R1 and is the answer not in the manual?
Questions and answers