Table of Contents
Advertisement
Quick Links
What's inside the box?
•
C2200 chassis
•
Console cables and related
hardware, SFPs, CD-ROM
Installation references
•
C2200 CMTS Hardware
Installation Guide
•
Casa Systems -- CMTS
Release Notes
Observe all electrical warnings and
precautions during installation.
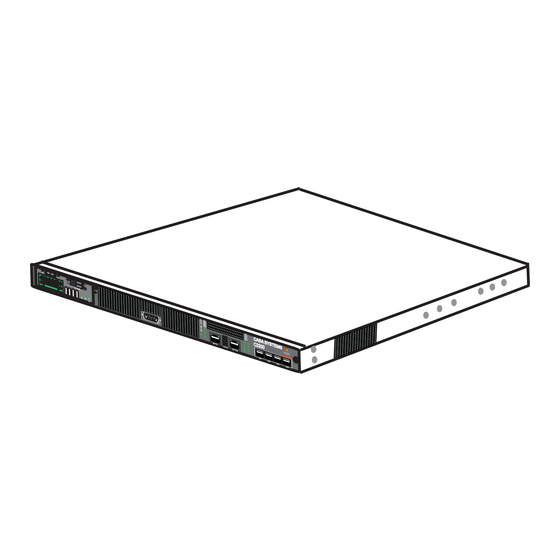
To populate rack, start from the first available postion from
4
the bottom of the rack.
Install four screws (two per mounting ear) and turn clockwise
to tighten.
S
M1
A
Y
M2
S
0
l
M3
B
S
M4
FUSE
T
A
T
A
A B
L
M
BITS
RED
10/100
S
M1
A
Y
M2
0
S
M3
l
B
S
M4
T
FUSE
A
T
A
A B
L
M
BITS
RED
10/100
S
M1
A
Y
M2
0
S
M3
l
B
S
M4
T
FUSE
A
T
A
A B
L
M
BITS
RED
10/100
S
M1
A
Y
M2
0
l
S
M3
M4
B
S
FUSE
T
A
T
A B
A
L
M
RED
10/100
BITS
S
M1
Y
M2
A
S
0
l
M3
B
M4
S
FUSE
T
A
T
A
A B
L
M
BITS
RED
10/100
Open the shipping container.
1
Remove the system and the box containing
the system accessories.
0
l
B
A
FU SE
A
B
A
C A S
T E M
S Y S
Connect chassis to ground.
5
Place star washer over threaded post, then
position #6 ring terminal over stud.
Place split washer over stud.
ESD strap
Secure with nut and turn nutdriver
clockwise to tighten.
G1
G2
CASA SYSTEMS
CASA SYSTEMS
G3
G4
C2200
C2200
C C A S A
CASA
A S A
0
G1
G2
G3
G4
G1
CASA SYSTEMS
CASA SYSTEMS
G2
G3
G4
C2200
C2200
C A S A
A S A
CASA
G1
G2
G3
G4
G1
CASA SYSTEMS
CASA SYSTEMS
G2
G3
G4
C2200
C2200
C A S A
CASA
A S A
G1
G2
G3
G4
G1
CASA SYSTEMS
CASA SYSTEMS
G2
G3
G4
C2200
C2200
C A S A
CASA
A S A
G1
G2
G3
G4
G1
CASA SYSTEMS
CASA SYSTEMS
G2
G3
G4
C2200
C2200
C A S A
A S A
CASA
G1
G2
G3
G4
Split washer
Star washer
C2200 CMTS Quick Installation
Install rack mounting hardware comprising
2
mounting ears, screws, and spacers.
A
L
M
S
Y
M1
S
M2
M3
S
M4
T
A
T
G1
G2
G3
C A S
C A S
G4
A S Y
A S Y
BI TS
C 2 2
C 2 2
S T E
S T E
RE D
0 0
0 0
M S
M S
10 /10
0
CA SA
C C A
A S
S A
A
G1
G2
G3
G4
S
A
l
B
FUSE
A
A B
L
M
GND wire and
Stud
loop connector
Nut
View from top
3
Spacer and screw
to form guideposts
Screws
6
Install SFPs and connect Ethernet RJ-45
(copper) or LC (fiber optic) connectors into SFPs.
S
M1
G1
Y
M2
G2
S
M3
G3
M4
G4
S
T
A
T
RED
10/100
BITS
GigE interfaces to routers, switches, and servers (DHCP,
TFTP, ToD).
For remote management over Telnet/SSH, insert Ethernet
RJ-45 connector into 10/100 Ethernet port. Default IP address
is 192.168.2.100; subnet mask is 255.255.255.0.
Locate and install the rack mounting
brackets.
Position each bracket inside rack.
Turn clockwise to tighten screws.
Corresponding
bracket at
level position
CASA SYSTEMS
CASA SYSTEMS
C2200
C2200
CASA
C C A S A
A S A
G1
G2
G3
G4
Advertisement
Table of Contents

Summary of Contents for Casa C2200 CMTS
- Page 1 C2200 CMTS Quick Installation Open the shipping container. Locate and install the rack mounting Install rack mounting hardware comprising mounting ears, screws, and spacers. brackets. What’s inside the box? Remove the system and the box containing Position each bracket inside rack.
- Page 2 Configure the CMTS software, interfaces, routing protocols, BPI, 1. Login to the CLI using the root login and the casa password. load balancing, spectrum management, modulation profiles, etc. 2. Enable the CMTS privileged mode to configure the CMTS.
Need help?
Do you have a question about the C2200 CMTS and is the answer not in the manual?
Questions and answers