Table of Contents
Advertisement
Available languages
Available languages
LED-DECKENLEUCHTE MIT BLUETOOTH-LAUTSPRECHER /
LED CEILING LIGHT WITH BLUETOOTH SPEAKER /
PLAFONNIER À LED AVEC HAUT-PARLEUR BLUETOOTH
LED-DECKENLEUCHTE MIT
BLUETOOTH-LAUTSPRECHER
Montage-, Bedienungs- und Sicherheitshinweise
PLAFONNIER À LED AVEC
HAUT-PARLEUR BLUETOOTH
Instructions de montage, d'utilisation et
consignes de sécurité
LED STROPNÍ SVÍTIDLO S
BLUETOOTH REPRODUKTOREM
Pokyny k montáži, obsluze a bezpečnostní pokyny
LÂMPADA LED PARA TETO
COM BLUETOOTH
Indicações de montagem, utilização e segurança
IAN 288149
LED CEILING LIGHT WITH
BLUETOOTH SPEAKER
Assembly, operating and safety instructions
LED-PLAFONDLAMP MET
BLUETOOTH-LUIDSPREKER
Montage-, bedienings- en veiligheidsinstructies
LÁMPARA LED DE TECHO CON
ALTAVOZ BLUETOOTH
Instrucciones de montaje, de uso y de seguridad
Advertisement
Chapters
Table of Contents

Subscribe to Our Youtube Channel
Related Manuals for LIVARNO LUX 288149

Summary of Contents for LIVARNO LUX 288149
- Page 1 LED STROPNÍ SVÍTIDLO S LÁMPARA LED DE TECHO CON BLUETOOTH REPRODUKTOREM ALTAVOZ BLUETOOTH Pokyny k montáži, obsluze a bezpečnostní pokyny Instrucciones de montaje, de uso y de seguridad LÂMPADA LED PARA TETO COM BLUETOOTH Indicações de montagem, utilização e segurança IAN 288149...
- Page 2 Klappen Sie vor dem Lesen die beiden Seiten mit den Abbildungen aus und machen Sie sich anschließend mit allen Funktionen des Gerätes vertraut. Before reading, unfold the page containing the illustrations and familiarise yourself with all functions of the device. Avant de lire le mode d‘emploi, ouvrez la page contenant les illustrations et familiarisez-vous ensuite avec toutes les fonctions de l‘appareil.
- Page 4 10 9...
-
Page 5: Table Of Contents
Inhaltsverzeichnis Legende der verwendeten Piktogramme ............Seite Einleitung ............................Seite Bestimmungsgemäße Verwendung ....................Seite Lieferumfang ............................Seite Teilbeschreibung ..........................Seite Technische Daten ..........................Seite Sicherheit ............................Seite Sicherheitshinweise ..........................Seite Sicherheitshinweise zu Batterien ......................Seite Vorbereitung ..........................Seite Benötigtes Werkzeug und Material ....................Seite Vor der Installation .........................Seite Inbetriebnahme .........................Seite Leuchte montieren / installieren ......................Seite Wandhalterung montieren .........................Seite Batterien einlegen / wechseln ......................Seite Leuchte über den Lichtschalter bedienen ...................Seite 10... -
Page 6: Legende Der Verwendeten Piktogramme
Einleitung Legende der verwendeten Piktogramme Warn- und Sicherheitshinweise Bedienungsanleitung lesen! beachten! Volt (Wechselspannung) Vorsicht! Stromschlaggefahr! Hertz (Frequenz) So verhalten Sie sich richtig Entsorgen Sie Verpackung Watt (Wirkleistung) und Gerät umweltgerecht! Entsorgen Sie Batterien Schutzklasse I umweltgerecht! LED-Deckenleuchte mit Räumen geeignet. Die Leuchte kann auf allen nor- Bluetooth-Lautsprecher mal entflammbaren Oberflächen befestigt werden. -
Page 7: Teilbeschreibung
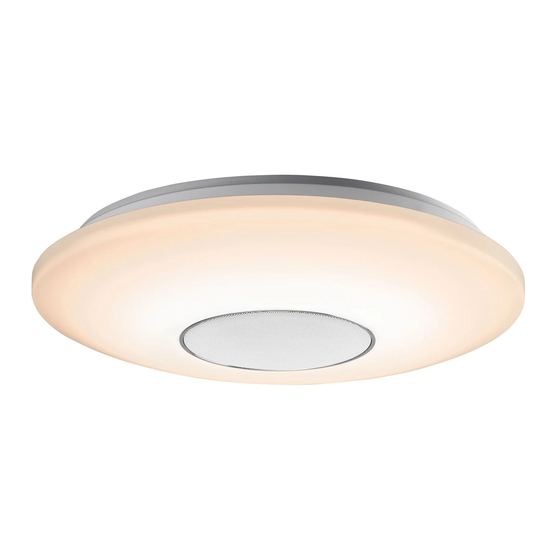
Einleitung / Sicherheit Teilbeschreibung Frequenzbereich Lautsprecher: 120–20.000 Hz Leuchte: Bluetooth-Version: Leuchten-Basis Bluetooth-Reichweite: ca. 9 m Kunststoffabdeckung Steuerungsverfahren Lautsprecherabdeckung Fernbedienung: Infrarot (in Kunststoffabdeckung integriert) Reichweite Fernbedienung: 5–6 m Schrauben Dübel Sicherheit Markierung Bohrlöcher (1, 2, 3) Netzanschlusskabel (extern) Lüsterklemme Sicherheitshinweise Schraubenaufnahmelöcher Haltebolzen Aufkleber Bei Schäden, die durch Nichtbeachtung dieser Be-... -
Page 8: Sicherheitshinweise Zu Batterien
Sicherheit / Vorbereitung / Vor der Installation Vermeiden Sie unbedingt die Berührung der Batterien von Kindern fernhalten, nicht kurz- Leuchte mit Wasser oder anderen Flüssigkeiten. schließen oder auseinandernehmen. Öffnen Sie niemals das Gehäuse der Leuchte Alle Batterien eines Satzes gleichzeitig aus- oder stecken irgendwelche Gegenstände in wechseln. -
Page 9: Inbetriebnahme
Vor der Installation / Inbetriebnahme Machen Sie sich vor der Installation mit allen Führen Sie das Netzanschlusskabel durch die Anweisungen und Abbildungen in dieser Anlei- dafür vorgesehene Bohrung in der Leuchten- tung sowie mit der Leuchte selbst vertraut. Basis und befestigen Sie die Leuchte an der Stellen Sie vor der Installation sicher, dass an Decke (siehe Abb. -
Page 10: Leuchte Über Den Lichtschalter Bedienen
Inbetriebnahme Abdeckung aufsetzen und zurückschieben, um stufenweise je Druckvorgang. Wird die „ “ das Batteriefach zu schließen. Taste Dimmer + lange gedrückt, erhöht sich die Beleuchtungsstärke automatisch bis zur ma- Ihre Fernbedienung ist betriebsbereit. ximalen Helligkeit. 2. Beleuchtungsstärke verringern Leuchte über den Drücken Sie die „... -
Page 11: Musiklautstärke Regeln
Inbetriebnahme / Wartung und Reinigung / Entsorgung 3. Pause Ist die Verbindung hergestellt, ertönt eine kurze Melodie. Drücken Sie die „ “ Taste Pause / Bluetooth-Ver- Bei einer ersten Verbindung mit Ihrem Handy, bindung Standby kurz, um die Pausefunktion zu Tablet etc. -
Page 12: Garantie Und Service
Sammelstellen in Ihrer Gemeinde oder wenden Sie sich an den Händler, bei dem das Produkt gekauft wurde. Bitte halten Sie für alle Anfragen den Kassenbon und die Artikelnummer (IAN 288149) als Nachweis für den Kauf bereit. Garantie und Service Garantieerklärung Konformitätserklärung... - Page 13 Table of contents List of pictograms used ......................Page 14 Introduction ...........................Page 14 Intended use ............................Page 14 Scope of delivery ..........................Page 14 Parts Description ..........................Page 14 Technical Data ............................Page 15 Safety ..............................Page 15 Safety instructions ..........................Page 15 Safety Instructions for batteries ......................Page 16 Preparation ...........................Page 16 Required tools and material .......................Page 16...
-
Page 14: List Of Pictograms Used
Introduction List of pictograms used Observe the warning and safety Please read the operating instructions! instructions! Volt (AC) Caution! Risk of electric shock! Hertz (mains frequency) For your safety Dispose of packaging and device in Watt (effective power) an environmentally-friendly manner! Please dispose of the batteries in an Safety class I environmentally-friendly manner! -
Page 15: Technical Data
Introduction / Safety Safety Wall plug Drill hole markers (1, 2, 3) Mains connection cable (external) Safety instructions Terminal block Screw holes Retaining bolts Damage due to failure to comply with these instruc- Adhesive labels tions for use will void the warranty! We assume no LED Ceiling lights liability for consequential damages! We assume no liability for property damage or personal injury due... -
Page 16: Safety Instructions For Batteries
Safety / Preparation / Prior to installation Preparation Prevent fire and risks of injury Required tools and material Do not leave the light or packaging lie about carelessly. Plastic film or bags, plastic parts, The tools and materials specified are not included. etc. -
Page 17: Initial Use
Initial use Initial use Installing the wall bracket Mounting / installation of the Install the wall bracket for the remote control light (see Fig. A–I) using the screws or adhesive pads shown in Figure I. Before installation ensure that the circuit, to which the light will be connected, is not ener- Inserting / replacing batteries gised. -
Page 18: Dimming The Light
Initial use Dimming the light A brief melody will sound once connected. When connecting with your mobile, tablet, etc. 1. Increasing brightness for the first time, select Bluetooth connection Press the “ “ button Dimmer + , to increase “LBT00738“. the brightness. -
Page 19: Maintenance And Cleaning
Initial use / Maintenance and Cleaning / Disposal / Warranty and Service 3. Pause Contact your local refuse disposal Press the “ ” button Pause / Bluetooth Con- authority for more details of how to nection Standby briefly to pause. Holding dispose of your worn-out product. -
Page 20: Declaration Of Conformity
E-Mail: leuchtenservice@action-leuchten.de www.action-leuchten.de IAN 288149 Please have your receipt and the item number (IAN 288149) ready as your proof of purchase when enquiring about your product. Declaration of conformity This product meets the requirements of applicable European and national regulations (RED directive 2014/53/EU, Ecodesign directive 2009/125/EC, RoHS directive 2011 / 65 / EU). - Page 21 Table des matières Légende des pictogrammes utilisés ................Page 22 Introduction ...........................Page 22 Utilisation conforme ..........................Page 22 Contenu de la livraison ........................Page 22 Description des éléments ........................Page 23 Caractéristiques techniques ........................Page 23 Sécurité .............................Page 23 Indications de sécurité ........................Page 23 Consignes de sécurité relatives aux piles ..................Page 24 Préparation ...........................Page 24 Outils et matériel nécessaires ......................Page 24...
-
Page 22: Légende Des Pictogrammes Utilisés
Introduction Légende des pictogrammes utilisés Respectez les avertissements et les Lire le mode d'emploi ! consignes de sécurité ! Volt (tension alternative) Attention ! Risque d'électrocution ! Hertz (fréquence) Conduite à tenir Mettez l’emballage et l’appareil au Watt (puissance active) rebut dans le respect de l'environne- ment ! Mettez les piles au rebut dans le Classe de protection I... -
Page 23: Description Des Éléments
Introduction / Sécurité Description des éléments Plage de fréquence Enceinte : 120–20.000 Hz Lampe : Version Bluetooth : Base de la lampe Portée Bluetooth : env. 9 m Cache en plastique Procédé de commande Grille de haut-parleur de la télécommande : infrarouge (intégré... -
Page 24: Consignes De Sécurité Relatives Aux Piles
Sécurité / Préparation / Avant l‘installation Évitez impérativement tout contact de la lampe Conserver les piles hors de portée des enfants, avec de l‘eau ou d‘autres liquides. ne pas les jeter au feu, ne pas les court-circuiter Ne jamais ouvrir le boîtier de la lampe ou y coin- et ne pas les désassembler. -
Page 25: Mise En Service
Avant l‘installation / Mise en service électrique. Celle-ci doit connaître les caractéristiques Passez le câble d‘alimentation dans le trou de la lampe et ses conditions de raccordement. prévu à cet effet dans la base de la lampe et fixez la lampe au plafond (voir ill. F–G). Avant l‘installation, familiarisez-vous avec l‘en- Brancher les trois fils de l‘installation intérieure semble des instructions et des illustrations du pré-... -
Page 26: Commander La Lampe Via L'interrupteur
Mise en service Remettre le couvercle, afin de refermer le progressivement, selon le nombre de pression compartiment à piles. effectuées. Si la touche de variation + « » est pressée plus longtemps, le niveau d‘in- Votre télécommande est prête à l‘emploi. tensité... -
Page 27: Régler Le Volume De La Musique
Mise en service / Entretien et nettoyage / Mise au rebut 2. Titre suivant Si la connexion est établie, une brève mélodie retentit. Appuyez sur la touche de sélection du titre Lors d‘une première connexion avec votre (suivant) « » , afin de jouer le titre suivant. -
Page 28: Garantie Et Service Après-Vente
Pour toute demande, veuillez tenir à disposition le ticket de caisse et le numéro d‘article (IAN 288149) Garantie et service après-vente comme preuve d‘achat. Déclaration de garantie Déclaration de conformité... - Page 29 Inhoudsopgave Legenda van de gebruikte pictogrammen ............. Pagina 30 Inleiding ............................Pagina 30 Correct gebruik ..........................Pagina 30 Omvang van de levering ........................ Pagina 30 Beschrijving van de onderdelen ..................... Pagina 30 Technische gegevens ........................Pagina 31 Veiligheid ............................ Pagina 31 Veiligheidsinstructies ........................
-
Page 30: Legenda Van De Gebruikte Pictogrammen
Inleiding Legenda van de gebruikte pictogrammen Waarschuwings- en Lees de gebruiksaanwijzing! veiligheidsinstructies in acht nemen! Voorzichtig! Kans op een elektrische Volt (wisselspanning) schok! Hertz (frequentie) Zo handelt u correct Verwijder e verpakking en het appa- Watt (nuttig vermogen) raat op een milieuvriendelijke manier! Verwijder de batterijen op een Beschermingsklasse I milieuvriendelijke manier! -
Page 31: Technische Gegevens
Inleiding / Veiligheid Veiligheid Schroeven Plug Markering boorgaten (1, 2, 3) Veiligheidsinstructies Stroomkabel (extern) Kroonsteentje Opnamegaten voor de schroeven Bij beschadigingen die worden veroorzaakt door Bevestigingsbouten het niet in acht nemen van deze gebruiksaanwijzing Sticker vervalt de garantie! Wij zijn niet aansprakelijk voor LED-plafondlamp gevolgschade! Bij materiële schade of persoonlijk letsel die worden veroorzaakt door onjuist gebruik... -
Page 32: Veiligheidsinstructies Voor Het Gebruik Van Batterijen
Veiligheid / Voorbereiding / Voor de installati levensduur uitvallen, moet de complete lamp Zorg ervoor, dat de batterijen correct worden worden vervangen. geplaatst, d.w.z. dat u rekening moet houden De lamp niet op vochtige op geleidende on- met de polariteit (+ en –). dergrond installeren! Verwijder lege batterijen direct. -
Page 33: Ingebruikname
Voor de installatie / Ingebruikname zekering of schakel het betreffende stroomcir- Monteer de kunststof afdekking van de cuit in de groepenkast uit (0-stand). lamp. Plaats hiervoor de afdekking met de drie Controleer hiervoor de spanningsvrijheid met inkepingen aan de desbetreffende bevesti- een spanningzoeker. -
Page 34: Afstandsbediening Gebruiken
Ingebruikname worden uitsluitend via de afstandsbediening verlichtingssterkte automatisch verminderd tot bestuurd. de minimale helderheid. Afstandsbediening gebruiken 30 minuten-timer OPGELET! Alle functies van de afstandsbediening 1. Timer inschakelen staan ter beschikking, als de LED-plafondlamp Druk op de „ “ knop , om de LED-plafond- wordt ingeschakeld met de wandschakelaar. -
Page 35: Muziekvolume Regelen
Ingebruikname / Onderhoud en reiniging / Afvoer Na succesvolle verbinding staan u de vol- Daarna wordt de Bluetooth-verbinding uitge- gende audiobedieningen ter beschikking: schakeld. Muziekvolume regelen Onderhoud en reiniging 1. Muziekvolume verminderen VOORZICHTIG! GEVAAR VOOR ELEK- Druk op de „ “... -
Page 36: Garantie En Service
IAN 288149 Garantie en service Houd bij alle vragen alstublieft de kassabon en het artikelnummer (IAN 288149) als bewijs van aan- Garantieverklaring koop bij de hand. 3 Jaar garantie vanaf aankoopdatum op dit appa-... - Page 37 Seznam obsahu Vysvětlení použitých piktogramů ................Strana 38 Úvod ..............................Strana 38 Používání v souladu s určením ......................Strana 38 Obsah dodávky ..........................Strana 38 Popis dílů ............................Strana 38 Technická data ..........................Strana 39 Bezpečnost ..........................Strana 39 Bezpečnostní pokyny ........................Strana 39 Bezpečnostní...
-
Page 38: Vysvětlení Použitých Piktogramů
Úvod Vysvětlení použitých piktogramů Dbejte na výstrahy a řiďte se Přečtěte si návod k obsluze! bezpečnostními pokyny! Pozor! Nebezpečí zásahu elektrickým Volt (střídavé napětí) proudem! Hertz (kmitočet) Tak postupujete správně Obal i výrobek odstraňujte do Watt (činný výkon) odpadu ekologicky! Odstraňujte baterie do odpadu Ochranná... -
Page 39: Technická Data
Úvod / Bezpečnost Bezpečnost Hmoždinka Značení otvorů (1, 2, 3) Síťový připojovací kabel (externí) Bezpečnostní pokyny Svorkovnice Otvory pro šrouby Čep Při škodách způsobených nedodržením tohoto ná- Nálepka vodu k obsluze zaniká záruka! Za následné škody Stropní LED svítidlo se neručí! Za věcné nebo osobní škody, způsobené neodborným zacházením nebo nerespektováním Dálkové... -
Page 40: Bezpečnostní Pokyny K Bateriím
Bezpečnost / Příprava / Před instalací Příprava Vyvarujte se nebezpečí požáru a poranění Potřebné nářadí a materiál Nenechávejte ležet svítidlo nebo obalový materiál bez dohledu. Plastové fólie / pytlíky, Uvedené nářadí a materiály nejsou součástí do- umělohmotné díly atd., by mohly být pro děti dávky. -
Page 41: Uvedení Do Provozu
Uvedení do provozu Uvedení do provozu Montáž nástěnného držáku Montáž a instalace svítidla Namontujte držák pro dálkové ovládání na (viz obr. A–I) stěnu pomocí šroubů nebo lepících pol- štářků jak je znázorněno na obrázku I. Před instalací zajistěte, aby byl přívod elektric- kého proudu ke svítidlu bez napětí. -
Page 42: Tlumení Světla
Uvedení do provozu Bluetooth spojení 2. Vypnutí světla Stiskněte tlačítko„ “ (osvětlení) , abyste 1. Bluetooth spojení LED stropní svítidlo vypnuli. Příjem povelu se potvrdí signálem. Stiskněte tlačítko audio „ “ (Audio) . Příjem povelu se potvrdí signálem. Cca za 1 až 2 vteřiny dojde k automatickému Tlumení... -
Page 43: Údržba A Čištění
Uvedení do ... / Údržba a čištění / Zlikvidování / Záruka a servis hudebního titulu nebo pro přehrání písničky Při třídění odpadu se řiďte podle ozna- znovu od začátku. čení obalových materiálů zkratkami (a) a čísly (b), s následujícím významem: 2. -
Page 44: Adresa Servisu
+49 (0) 2903 / 449 48410 E-mail: leuchtenservice@action-leuchten.de www.action-leuchten.de IAN 288149 Pro všechny požadavky si připravte pokladní blok a číslo výrobku (IAN 288149) jako doklad o nákupu. Prohlášení o shodě Tento výrobek splňuje požadavky platných evropských a národních směrnic (RED-směrnice 2014/53/EU, ekologický design směrnice 2009/125/EG, RoHS-směrnice 2011/65/EU). - Page 45 Índice Leyenda de pictogramas utilizados ..............Página 46 Introducción ..........................Página 46 Uso adecuado ..........................Página 46 Volumen de suministro ........................Página 46 Descripción de las piezas ......................Página 47 Datos técnicos ..........................Página 47 Seguridad ........................... Página 47 Indicaciones de seguridad ......................Página 47 Indicaciones de seguridad respecto a las pilas ................
-
Page 46: Leyenda De Pictogramas Utilizados
Introducción Leyenda de pictogramas utilizados ¡Tenga en cuenta las advertencias e ¡Leer las instrucciones de uso! indicaciones de seguridad! ¡Precaución! ¡Peligro de descarga Voltio (corriente alterna) eléctrica! Hercio (frecuencia) Cómo proceder de forma segura ¡Deseche el embalaje y el aparato de Vatio (potencia efectiva) forma respetuosa con el medio ambiente! -
Page 47: Descripción De Las Piezas
Introducción / Seguridad Descripción de las piezas Radioespectro del altavoz: 120–20.000 Hz Lámpara: Versión Bluetooth: Base de la lámpara Alcance del Bluetooth: aprox. 9 m Cubierta de plástico Procedimiento de control Cubierta del altavoz del mando a distancia: infrarrojo (integrada en la cubierta de plástico Alcance del mando a Tornillos distancia:... -
Page 48: Indicaciones De Seguridad Respecto A Las Pilas
Seguridad / Preparativos / Antes de la instalación funcionamiento necesaria para la lámpara Nunca recargue pilas no recargables. ¡Peligro (220–240 V∼, 50 / 60 Hz). de explosión! Evite que la lámpara entre en contacto con agua Mantenga las pilas fuera del alcance de los ni- u otros líquidos. -
Page 49: Puesta En Funcionamiento
Antes de la instalación / Puesta en funcionamiento instruida en instalaciones eléctricas. Este debe co- Pase el cable de conexión por el orificio pro- nocer las características de la lámpara y de la visto para ello en la base de la lámpara disposición eléctrica. -
Page 50: Manejar La Lámpara A Través Del Interruptor De La Luz
Puesta en funcionamiento Vuelva a empujar la tapa hacia arriba para + „ “ durante un tiempo, la intensidad de cerrar el compartimento. la luz se ajustará al máximo automáticamente. 2. Reducir la intensidad de la luz Su mando a distancia está listo para funcionar. Pulse el botón regulador –... -
Page 51: Ajustar Volumen
Puesta en funcionamiento / Mantenimiento y limpieza / Eliminación 2. Finalizar la conexión Bluetooth función de pausa. Si pulsa el botón pause / co- Pulse el botón de audio „ “ (Audio) . La nexión Bluetooth Standby „ “ durante mu- señal recibida será... -
Page 52: Garantía Y Servicio Técnico
IAN 288149 Garantía y servicio técnico Para realizar cualquier consulta, tenga a mano el recibo y el número de artículo (IAN 288149) como Declaración de garantía justificante de compra. El aparato incluye una garantía de 3 años a partir Declaración de conformidad... - Page 53 Índice Legenda dos pictogramas utilizados ..............Página 54 Introdução ..........................Página 54 Utilização adequada ........................Página 54 Volume de fornecimento ......................... Página 54 Descrição das peças ........................Página 54 Dados técnicos ..........................Página 55 Segurança ........................... Página 55 Indicações de segurança ....................... Página 55 Indicações de segurança relativas às pilhas ................
-
Page 54: Legenda Dos Pictogramas Utilizados
Introdução Legenda dos pictogramas utilizados Considerar as indicações de aviso e Ler o manual de instruções! de segurança! Volt (tensão alternada) Cuidado! Perigo de choque elétrico! Hertz (frequência) Procedimento correto Elimine a embalagem e o aparelho Watt (Potência efetiva) de forma ecológica! Elimine as pilhas usadas de forma Classe de protecção I ecológica. -
Page 55: Dados Técnicos
Introdução / Segurança Segurança Cobertura do alti-falante (integrado na cobertura de plástico Parafusos Indicações de segurança Bucha Marcação dos orifícios de perfuração (1, 2, 3) Cabo de conexão à rede (externo) Em caso de danos causados pela inobservância Bloco de terminais deste manual de instruções, perde-se o direito à... -
Page 56: Indicações De Segurança Relativas Às Pilhas
Segurança / Preparação / Antes da instalação Não instale o dispositivo de iluminação numa Limpe os contactos das pilhas e o aparelho base húmida ou condutora de electricidade! antes de inserir as pilhas. Certifique-se de que as baterias foram inseridas Evite perigos de queimadura correctamente, isto significa, esteja atento à... -
Page 57: Colocação Em Funcionamento
Antes da instalação / Colocação em funcionamento Nota: Certifique-se de que os condutores indi- Antes da instalação, certifique-se de que no cabo a que será ligado o candeeiro não haja viduais do cabo de alimentação (corrente) tensão. Para isso, retire o fusível ou desligue estão ligados correctamente: condutor de cor- o interruptor automático na caixa de fusíveis rente, preto ou castanho = símbolo L, condutor... -
Page 58: Operar O Candeeiro Através Do Interruptor De Luz
Colocação em funcionamento Operar o candeeiro através 2. Diminuir a intensidade de iluminação do interruptor de luz Prima o botão „ “ Dimmer para diminuir a intensidade de iluminação. Quando a inten- O candeeiro de teto LED pode ser ligado e sidade de iluminação mínima for alcançada, um desligado através do interruptor de luz na pa- ruído de piep irá... -
Page 59: Regular Volume Da Música
Colocação em funcionamento / Manutenção e limpeza / Eliminação 2. Encerrar conexão Bluetooth Pausa / Conexão Bluetooth Standby seja Prima o botão áudio „ “ (Áudio) . O sinal pressionado longamente, a conexão Bluetooth de recepção é confirmado com um ruído de Piep. será... -
Page 60: Garantia E Assistência
Garantia Para qualquer questão, guarde o talão de compra Este aparelho possui 3 anos de garantia a partir da e o número de artigo (IAN 288149) como com- data de compra, válida apenas para o primeiro provativo da mesma. comprador e não transmissível. Guarde o talão de compra como comprovativo. - Page 61 DE-59872 Meschede DEUTSCHLAND Stand der Informationen · Last Information Update · Version des informations · Stand van de informatie · Stav informací · Estado de las informaciones · Estado das informações: 07 / 2017 · Ident.-No.: 9000.034.080 072017-8 IAN 288149...
Need help?
Do you have a question about the 288149 and is the answer not in the manual?
Questions and answers