
Subscribe to Our Youtube Channel
Related Manuals for steel GENESI Series

Summary of Contents for steel GENESI Series
- Page 1 MANUALE D’USO Forni da incasso INSTRUCTION MANUAL Built-in ovens GEBRAUCHSANWEISUNG Einbauöfen MANUEL D'UTILISATION Fours à encastrer GEBRUIKSAANWIJZING Inbouwovens BRUGERVEJLEDNING Indbygningsovne...
-
Page 2: Table Of Contents
Suggestions for using the oven correctly ______________________________________ 65 Examples of cooking ______________________________________________________ 66 7. Cleaning and maintenance ________________________________ 70 Cleaning the stainless steel surfaces _________________________________________ 70 Cleaning the enamelled surfaces ____________________________________________ 70 Cleaning the polished surfaces ______________________________________________ 70 Cleaning the knobs and the control panel ______________________________________ 70 Cleaning the oven ________________________________________________________ 71 8. -
Page 3: General Information
Warnings This user’s manual is an integral part of the product purchased. The user must conserve the manual correctly so that it is always available for consultation during the use and maintenance of the product. Keep this user’s manual for future reference. If the product is resold, the manual must be transferred to any subsequent owner or user of the product. -
Page 4: Warnings For Safety And Use
Warnings 2. Warnings for safety and use THIS MANUAL IS AN INTEGRAL PART OF THE APPLIANCE. IT MUST BE KEPT IN ITS ENTIRETY AND IN AN ACCESSIBLE PLACE FOR THE ENTIRE WORKING LIFE OF THE OVEN. WE URGE YOU TO READ THIS MANUAL AND ALL THE INFORMATION IT CONTAINS CAREFULLY BEFORE USING THE OVEN. - Page 5 Warnings THE IDENTIFICATION PLATE WITH THE TECHNICAL DATA, SERIAL NUMBER AND THE MARK IS CLEARLY VISIBLE ON THE BACK OF THE APPLIANCE. A SECOND PLATE, INCLUDING DETAILED INFORMATION ABOUT THE MODEL AND SERIAL NUMBER, IS PLACED INSIDE THE EQUIPMENT ON THE LEFT SIDE AND IS VISIBLE ON OPENING THE OVEN DOOR. THESE PLATES MUST NEVER BE REMOVED.
-
Page 6: Installation
Before using the appliance, remove the protective plastic on the control panel, stainless steel parts, etc... The manufacturer declines any responsibility for damage incurred by persons, animals or objects that is caused by not following the above guidelines (cfr. -
Page 7: Fastening The Oven To The Unit
Instructions for the installer Fastening the oven to the unit Do not use the oven door handle for lifting or handling, including while unpacking the oven. The oven must be positioned by two people. The unit must be coated with heat-resistant material (minimum 90° C). Leave the minimum clearances suggested in the following diagrams. - Page 8 Instructions for the installer 60x90 OVEN 90x60 OVEN...
-
Page 9: Fitting The Telescopic Guides (Optional)
Instructions for the installer Fitting the telescopic guides (optional) Proceed as follows to install: remove the telescopic guides A from the packing and remove all protective film; • remove all the accessories that are inside the oven; • position the telescopic guide to the required height by coupling the upper side to the frame •... -
Page 10: Electric Connection
Instructions for the installer Electric connection Make sure that the voltage and the size of the mains corresponds to the specifications shown on the plate located on the back of the appliance. A second plate, including detailed information about the model and serial number, is placed inside the equipment on the left side and is visible on opening the oven door. -
Page 11: Electric Power Table
Instructions for the installer 3.5.2 Type of power supply It is possible to obtain different connections according to the voltage, simply by moving the unconnected cable ends on the terminal board as shown in the following diagrams. 60x60 / 60x90 / 90x60 OVEN 60x90 OVEN ORIGINAL CONNECTION OT APPLICABLE FOR... -
Page 12: Description Of Controls
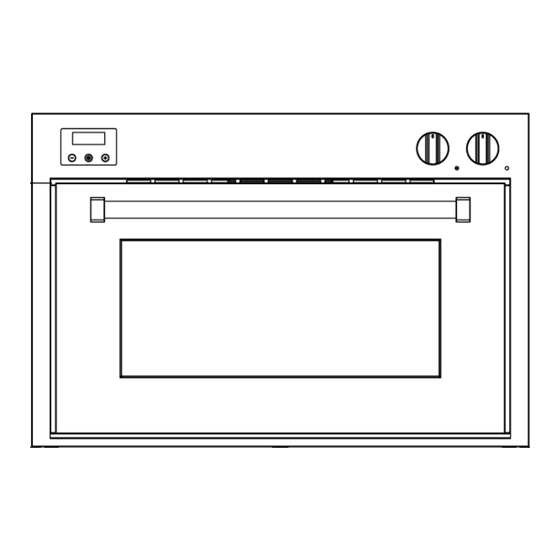
Instructions for the user 4. Description of controls Front panel All the oven controls are grouped together on the front panel. SINGLE OVEN (MULTIFUNCTION OVEN) DOUBLE OVEN (MULTIFUNCTION OVEN + TOP OVEN) SINGLE OVEN (MULTIFUNCTION OVEN) DOUBLE OVEN (MULTIFUNCTION OVEN + TOP OVEN) PROGRAMMABLE TIMER MULTIFUNCTION OVEN TEMPERATURE SELECTOR MULTIFUNCTION OVEN COOKING FUNCTIONS SELECTOR... - Page 13 Instructions for the user MULTIFUNCTION OVEN COMBINATION STEAM MULTIFUNCTION OVEN DESCRIPTION OF KNOBS ON MULTIFUNCTION AND COMBINATION STEAM OVEN The electric oven is controlled by two knobs: function selection knob and temperature selection knob. They allow you to choose the most suitable type of heating for different cooking requirements, by switching on the heating elements appropriately and setting the required temperature (from 50°...
- Page 14 Instructions for the user TOP OVEN GENESI ASCOT ENAMELLED OVEN STAINLESS OVEN ENAMELLED OVEN STAINLESS OVEN DESCRIPTION OF TEMPERATURE AND COOKING FUNCTION SELECTION KNOB The top oven is controlled by a single knob. By positioning the knob appropriately and by setting the required temperature, both upper and lower heating elements will switch on.
- Page 15 Instructions for the user USING AND PROGRAMMING THE DIGITAL CLOCK ON GENESI OVENS The digital clock enables the oven to be set to automatically switch on and off. DECREASE KEY MODE KEY INCREASE KEY This programmer works like a touch screen; rest the tip of the finger on the key for a few seconds to activate it.
- Page 16 Instructions for the user PROGRAMMING THE COOKING DURATION This function is for programming the cooking duration after which the oven switches off automatically. Set the required cooking function and temperature using the control knobs; • touch the “Mode” key to enter the programming menu, touch again and the word “Dur” •...
- Page 17 Instructions for the user COOKING WITH CORE PROBE (COMBINATION STEAM OVEN ONLY) Only use the temperature probe recommended for this oven. This function is for automatically controlling oven operation by setting the cooking level at the core of the food. Using the core probe disables all duration, cooking end or timer settings.
- Page 18 Instructions for the user USING AND PROGRAMMING THE DIGITAL ANALOGUE CLOCK ON ASCOT OVENS The digital clock enables the oven to be set to automatically switch on and off. TIMER KEY COOKING END KEY TIME SETTING AND RESET KEY DECREASE KEY INCREASE KEY INITIAL POWER-ON AND SETTING THE TIME When first powering on the appliance or following a power failure the display flashes.
- Page 19 Instructions for the user PROGRAMMING THE COOKING DURATION This function is for programming the cooking duration after which the oven switches off automatically. Set the required cooking function and temperature using the control • knobs; press the key to enter the programming menu; the display will light up •...
- Page 20 Instructions for the user BEEPER At the end of each preset function, an audible alarm sounds which turns off automatically after 7 minutes; press the key to turn the beeper off immediately. Seven different types of audible alarm are available on the appliance; to choose between them press key for at least 7 seconds;...
-
Page 21: Using The Oven
Instructions for the user 5. Using the oven General warnings When the oven or grill is operating, the outer walls and oven door can become very hot. Keep children away from the appliance. Do not allow children to sit on the oven door or play with it. Do not use the door as a stool. -
Page 22: Using The Multifunction And Combination Steam Oven
Instructions for the user Using the multifunction and combination steam oven 5.3.1 Risk of condensation Some cooking with high water content combined with the use • of certain functions can cause the formation of condensation on the door's inner glass. To prevent this occurring, open the oven door for a few seconds once or twice while cooking. - Page 23 Instructions for the user 5.3.5 Convection cooking Turn the function switch knob to position ; turn the thermostat knob in correspondence with the required temperature value. 5.3.6 Steam cooking The steam generator becomes very hot: pour mineral or decalcified water only into the tank; never use substances containing alcohol or detergents.
- Page 24 Instructions for the user 5.3.9 Cooking with the roasting spit Proceed as follows: Slide the meat to be cooked on the spit rod A and secure it with the adjustable forks. • Hang the hook B at the top of the oven as shown in the figure. •...
-
Page 25: Using The Top Oven
Instructions for the user Using the top oven The oven features: one heating element beneath the base of the oven; • one heating element on the roof of the oven; • refractory stone (on the bottom) for cooking pizza and bread. •... -
Page 26: Cooking Suggestions
Instructions for the user 6. Cooking suggestions Suggestions for using the oven correctly 6.1.1 Traditional cooking With this type of cooking, the heat comes from the top and the bottom. It is therefore preferable to use the central guides. If the cooking requires a hotter temperature from the bottom or from the top, use the lower or upper guides. -
Page 27: Examples Of Cooking
Instructions for the user Examples of cooking Quantity of water (litre) (**) Level (*) Temperature Cooking duration (minutes) GRILLING TYPES OF FOOD MEDIUM ROAST BEEF (1.5 kg) 220 - 240 40 - 50 BONED LEG OF LAMB, MEDIUM-RARE 170 - 190 120 - 150 PORK PORK ROAST WITH RIND... - Page 28 Instructions for the user ROASTING HOT AIR UPPER/LOWER HEATING TYPES OF FOOD MEATLOAF 500 g 170 - 180 60 - 70 200 - 210 PORK ENTRECOTE 160 - 170 70 - 80 190 - 210 MEDIUM STEAK (400 g) 170 - 180 30 - 45 200 - 230 FATTY ROAST (1.5 kg)
- Page 29 Instructions for the user STATIC STEAM COOKING TYPES OF FOOD STAGE ADJUSTING THE GRILL (**) DESSERTS POUND CAKE (6 EGGS) 150 - 160 30 - 40 0.3 L POUND CAKE (3 EGGS) 150 - 160 25 - 35 0.3 L FRUIT CAKE WITH SPONGE-CAKE MIXTURE 150 - 160 20 - 30...
- Page 30 Instructions for the user FAN ASSISTED STEAM COOKING TYPES OF FOOD STAGE ADJUSTING THE GRILL (**) PORK SAVOURY TART (1.5 kg) 25 - 25 0.4 L 60 - 75 PORK SHOULDER CASSEROLE (1.5 kg) 100 - 120 0.5 L PORK SHOULDER CASSEROLE (2.5 kg) 130 - 150 0.5 L SHIN OF PORK...
-
Page 31: Cleaning And Maintenance
To clean and preserve the stainless steel surfaces, use a solution of warm water and vinegar or neutral soap. Pour the solution onto a damp cloth and wipe the steel surface, in the direction of the satin finish, rinse thoroughly and dry with a soft cloth or chamois leather. -
Page 32: Cleaning The Oven
Clean the stainless steel parts and enamelled parts as described in the corresponding sections “7.1 Cleaning the stainless steel surfaces” and “7.2 Cleaning the enamelled surfaces”. -
Page 33: Special Maintenance
Instructions for the user 8. Special maintenance Periodically, it is necessary to maintain or replace some parts that are subject to wear and tear. Specific instructions are given below for each type of maintenance. Before performing any operations, switch off the power supply to the appliance. Removing the oven door The oven door can be completely removed to enable more thorough cleaning. -
Page 34: Removing The Side Rack-Holder Frames
Instructions for the user To clean the area between the outer glass and the intermediate glass, use a soft brush in the space between the glass panels, as shown on p. 72. To refit the door, follow the instructions on p. 72 in reverse order. When the hinges B are back in their seats, open the door all the way and re-fit the safety catches of the hinges, lowering the respective pins A (one for each hinge). -
Page 35: Removing And Cleaning The Inside Oven Fan
Instructions for the user Removing and cleaning the inside oven fan The inside fan of the ventilated oven may require periodic cleaning. To disassemble the fan proceed as follows: Make sure that the power supply to the appliance is switched off. •... -
Page 36: Cleaning The Water Tank
C from the front guide D (detail 3). Clean the cover and the water tank following the instructions given in section “7.1 Cleaning the stainless steel surfaces”. To reposition and secure the cover, follow the above instructions in reverse order. - Page 37 B00090 ZS7814 03/15...
Need help?
Do you have a question about the GENESI Series and is the answer not in the manual?
Questions and answers