Table of Contents
Advertisement
Quick Links
Advertisement
Table of Contents

Related Manuals for LEMFO H2


Summary of Contents for LEMFO H2
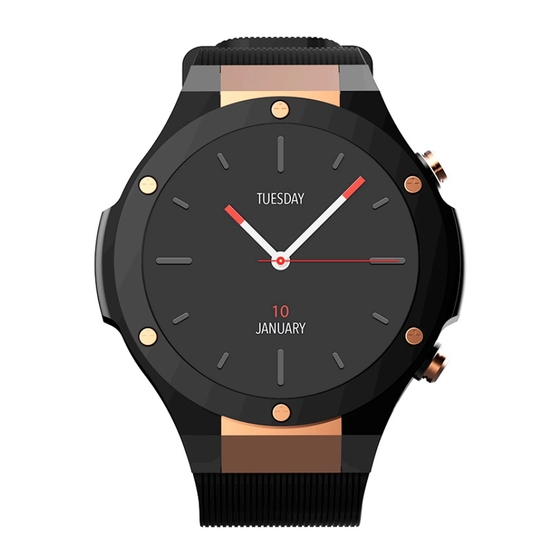
- Page 1 H2 Smart Watch User Manual...
- Page 2 Thank you for choosing our company smart watches. You can read this manual to have a comprehensive understanding of the using of device, and operate it simply. The company reserves the right to amend the contents of this manual without prior notice. Package: one gift box, one user manual, one smart watch, and one charging cable. ● How to charge: Magnetic charging cable. As shown in the following picture, please point the charging cable to the charging contact on the back of the smart watch. Then it starts to charge. It takes about 120minutes for charging. ● How to use insert sim card: This smart watch supports GSM 2G call function and support WCDMA 3G Internet doesn’t support CDMA and CDMA 2000. Support NANO card. In the off state, as shown in the following picture, there is a SIM card cover in the back of the smart watch. Gently open the cover, you can see a SIM card slot. Please install the SIM card according to the above direction, then close the cover before you turn on the device. Please note that the two contacts of the charging cable cannot touch the conductive object at the same time, otherwise it will cause short circuit combustion.
- Page 3 ●How to use it: The right bottom key is power key: long press power for power on/off, short press for back the home screen. And the screen is on or off accordingly if short press again. The right top key is back key: short press for back to the previous menu. When the screen is off, short press for bright screen. TP gesture operation: Enter each function, slide from left to right for back to the previous menu. Time interface : long press the middle of the time interface, slide left/right for change different time interface, click to choose the one you want. Time interface download: long press the middle of the time interface, then slide left, there is a plus...
- Page 4 mark in the end, click the mark on online state, then you can choose new time interface what you like. The third part APP interface enlarge / reduce in size: No matter in any interface, long press power key, enter an interface. There is a size enlarge /reduce key at the top of interface. It can enlarge and reduce a interface. After you make a chose, click Cancel to return. Recent task: The system will be slower if open too many applications. You can view the recently opened applications, also can choose to close some applications. ● Status Bar: pull-down from the standby state screen. There are 3 pages. Middle page: Notification mode selection on the first line on this page. The second line: Wrist bright screen / fight Mode/ data connection / GPS The third line: brightness option/ Bluetooth / Wi-Fi Left page: There are date, time, week, SIM signal, Bluetooth connection status, power percent information on this page.
- Page 5 at 12p.m every day and returned to 0. ● Switch platform: select the phone you want to connect to, select Android or iOS system. ● Notification: At standby interface, slide to the right for the notification message. Choose one to click, it will be full screen to display the message content. ● Weather: At standby interface, slide up for the weather interface. In the online status, the device will update the local weather conditions. ● Main menu: At standby interface, slide left for the main menu interface. ● Music play: At standby interface, slide left for the main menu interface, slide left again for music play interface. ● Heart rate measurement: enter main menu - health - heart rate: it is dynamic heart rate measurement. Slide right for back out. Click history record, it can save the last 20 records, showing the average/maximum/minimum data of each measurement. ● Pedometer: There are steps and distance date on it. The data will be saved at 12p.m every day and returned to 0. ● Dialing: supports GSM 2G call function.
- Page 6 ● Call Log: At dial interface, slide left to access the record interface. ● Contacts: can save local contacts. At Bluetooth contraction status, can synchronize all the contacts data from the phone contacts. ● Bluetooth: Main menu - setting - connection - Bluetooth, turn on the Bluetooth, click search Bluetooth device, select the name of the Bluetooth device name, click connection. If you want other devices to search for the watch, please select the machine can be searched. ● Wi-Fi: Main menu -- setting -- connection -- WLAN, select the name of Wi-Fi network to connect it and enter the password.
- Page 7 the browser on smart watch. ● Wireless upgrade: Main menu - setting - about watch - wireless upgrade - click test version. Please make sure that your phone has more than 80% power for upgrade version, so you can enjoy the last software at any time. As the Bluetooth protocol is different between all the mobile phone brands. Sometimes the Bluetooth connection will be instability between mobile phone and smart watch. Please turn off the Bluetooth, then reconnect. If the smart watch stops working, please press the power key for 10 seconds to restart the smart watch. Watch connect Cellphone : Firstly download App“WiiWatch”in the cellphone. ●Android phone, enter watch main menu-connect phone-find the QR code- use cell phone scan the QR code to download the App, or scan below QR code.
- Page 8 Turn on Bluetooth in cellphone and connect “WiiWatch”, enter Setting at right corner – Device management –auto start searching – when it display searched device H2, tap H2,connected successfully, the Bluetooth icon shows connected sign.
- Page 9 If need disconnect Bluetooth, tap connected device will disconnect automatically. If you want find smart watch, click search find my phone, the cellphone will beep to remind. ●iPhone search “WiiWatch” in Appstore to download and install. 1 Open“WiiWatch”and turn on Bluetooth in iPhone; 2 Watch into main menu –choose Switch platform and choose iOS-and click next, device will reboot.
- Page 10 3 Watch back to main menu – connect cellphone – 3 interfaces totally, enter the 3 one –turn on search -1 second later will display WiiWatch as following image, click it, remind connecting, then it will be done shortly. Warranty 1. If it appears quality problems caused by manufacturing, materials, design within one year(since the day of purchase), battery and cable within 6 months. we will offer free warranty. Premise is using normally and correctly. 2. About the fault caused by the user’s personal reasons, we don't offer free warranty, as follows: 1). Disassemble or refit the product. 2). Caused by immodesty drop 3). All artificial damage or misuse (such as: make water into the host, the external force shatter, scratch damage of peripheral components, etc.), all these are beyond the scope of the warranty. 3. When ask for free warranty, you must provide a warranty card with the seal of purchase place and purchase date. 4. If you met problems during use, please contact the shop customer service which you bought from. 5. Please make the final products as the standard. Date of purchase: IMEI code: Buy store:...
Need help?
Do you have a question about the H2 and is the answer not in the manual?
Questions and answers