Table of Contents
Advertisement
Quick Links
Advertisement
Table of Contents

Related Manuals for Somnus DM18 APAP

Summary of Contents for Somnus DM18 APAP
- Page 1 ® Somnus DM18 APAP CPAP Ventilator User Manual...
- Page 2 Read and understand the entire user manual before operating this device. Store this user manual properly for future reference. Product name: CPAP Ventilator Model: DM18 APAP Safety classification: class II, type BF protection against electric shock Contact Info for After-Sales Services Manufacturer: Shenzhen Dymind Biotechnology Co., Ltd.
- Page 3 Declaration This user manual may be modified without notice. Dymind Biotech reserves the right of final interpretation of this user manual. The pictures in this user manual are indicative only. If there is inconsistency between the pictures and the actual product, the actual product shall govern. Do not use the pictures for other than intended use.
-
Page 4: Table Of Contents
Content Content 1 Overview ..............................1 1.1 Intended Use............................. 1 1.2 Operation Theory ..........................1 1.3 Warnings, Cautions and Contraindications..................2 1.3.1 Warnings ............................ 2 1.3.2 Cautions ............................. 3 1.3.3 Contraindications ........................3 1.4 Symbols ............................3 1.5 Quality Guarantee ..........................4 1.6 Disposal ............................ - Page 5 Content 5.2.4 Cleaning the Headbands......................22 5.3 Disinfection ............................. 22 5.4 Transfer the Device ......................... 22 6 Service and Repair ..........................23 7 Troubleshooting ..........................24 Appendix A Specifications ........................26 A.1 Basic Specification ......................... 26 A.2 Technical Specification ........................27 Appendix B Terms ..........................
-
Page 6: Overview
1 Overview Overview 1.1 Intended Use The CPAP Ventilator is intended for the treatment of Obstructive Sleep Apnea (OSA) in patients weighing over 30kg (66 lbs). It may be used in the home or hospital. The CPAP Ventilator has two treatment modes: CPAP and APAP. ... -
Page 7: Warnings, Cautions And Contraindications
1 Overview Therefore, the patient must undergo pressure titration in hospital before using the CPAP Ventilator. A licensed physician will present a report on usage pressure and perform pressure titration for the patient. The CPAP Ventilator is operated by using the display screen and control buttons on top of the ventilator. -
Page 8: Cautions
1 Overview 1.3.2 Cautions Before turning on the device, make sure the power supply is steady and meets the requirements. The use of communications equipment, electromechanical equipment, or MRI equipment near this device may cause interference to this device and should be kept at a distance. ... -
Page 9: Quality Guarantee
1 Overview Symbol Description Alerts you to injury if not operating based on the description under this symbol. Serial Number of the product Date of manufacture Manufacturer Ingress protection IP21 Type BF applied part Refer to instruction manual European CE declaration of conformity Authorized Representative in the European Community 1.5 Quality Guarantee For failures caused by material and manufacturing, Dymind Biotech offers a 2-year warranty on the... -
Page 10: Installation And Configuration
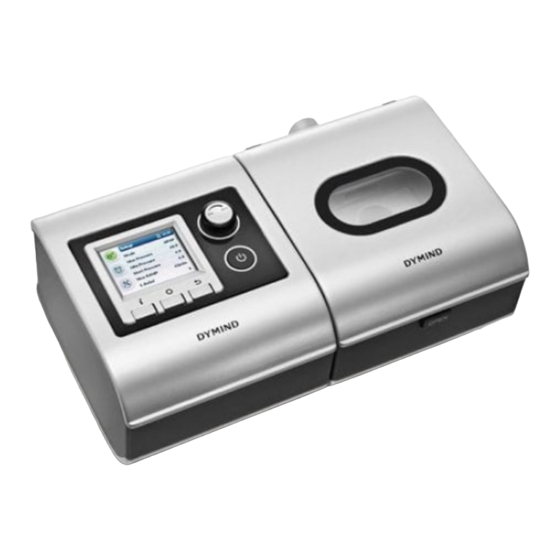
2 Installation and Configuration Installation and Configuration 2.1 Device Composition The CPAP Ventilator consists of a host, humidifier, air tubing, mask, and power adapter (100–240 V AC, 50/60 Hz, 24 V DC). 2.2 Interfaces 1 - Host 2 - Humidifier 3 - SD card: storing treatment data for up to a year 4 –... - Page 11 2 Installation and Configuration In alignment with the air channel and electrical connection of the humidifier, gently push the host so that the connecting clip of the host and that of the humidifier are locked to each other. Inject water into the water tub. a.
-
Page 12: Operation Panel
2 Installation and Configuration 2.4 Operation Panel 1 - Control Wheel/Push Button: Use this button to select a menu option and confirm the selection. The control wheel button supports three operations: pressing (for confirming the selection), rotating clockwise, and rotating counterclockwise. ... -
Page 13: Batch Parameter Settings
2 Installation and Configuration 2.5 Batch Parameter Settings The user can set the treatment parameters quickly though Micro SD. (Note: Users can set all parameters of device , for details, see 3 Parameter Settings.) The procedure is as below : Abtain the configuration file from your local agent. -
Page 14: Parameter Settings
3 Parameter Settings Parameter Settings The parameters on the user setup screen (press the button to enter the screen) can be set by the patient. Other parameters must be set by a licensed physician or under the instruction of a licensed physician. - Page 15 3 Parameter Settings Level screen. Setting the humidity level Rotate the control wheel to select a humidity level for the humidifier and press the button to confirm the selection (see Figure 3-2). Figure 3-2 Setting the humidity level The level of humidity can be set before or after cure. The value of Humidity Level ranges from 1 to 6, or it can be set to Off.
-
Page 16: User Setup ( Button)
3 Parameter Settings Figure 3-5 Stop warming or cooling Humidity Level is set to a proper value if small drops of condensed water exist inside the groove of the tubing in the next morning. Humidity Level is set to an excessively large value if many water droplets exist inside the tubing and mask;... - Page 17 3 Parameter Settings Parameter Setting Description Mask This parameter specifies the mask type. Values: Nasal, Full Face Xlief The ventilator automatically detects respiratory rhythm when it is operating and reduces the pressure inside the mask during exhalation to increase the patient comfort level.
-
Page 18: Detailed Setup ( Button + Shuttle Button)
3 Parameter Settings 3.4 Detailed Setup ( Button + Shuttle Button) The parameters on the detailed setup screen must be set by a licensed physician or under the instruction of a licensed physician. Press and held the button and control wheel at the same time for 3s to enter the detailed setup screen (see Figure 3-7). - Page 19 3 Parameter Settings Parameter Setting Description Max RAMP This parameter specifies the maximum ramp time. Values: Off: to disable the ramp feature. 5 minutes/10 minutes/…/55 minutes/60 minutes: user-defined maximum ramp time. If Max RAMP is set to 10 minutes, Ramp Time on the Home screen can be set to OFF, 5 minutes, or 10 minutes.
-
Page 20: Reminder Configuration
3 Parameter Settings 3.4.2 Reminder Configuration Rotate the control wheel to the Reminder menu on the Setup screen and press the button to enter the Reminder screen (see Figure 3-8). On the Reminder screen, the operator can set the time for notifying the patient of replacing components or the time for device maintenance. -
Page 21: System Configuration
3 Parameter Settings 3.4.3 System Configuration Rotate the control wheel to the Configuration menu on the Setup screen and press the control wheel to enter the Configuration screen (see Figure 3-9). On the Configuration screen, the operator can set such parameters as Language, Set Time, and LCD Light. Figure 3-9 Configuration screen Parameter Setting Description... -
Page 22: Routine Use
4 Routine Use Routine Use WARNING Do not perform repair or maintenance when the device is operating. The patient can undergo treatment by using the methods described in this chapter, or view the sleep quality and sleep report the previous day. 4.1 Treatment Steps ... -
Page 23: Sleep Report
4 Routine Use After using the ventilator, press to stop therapy. Put off the mask and headbands and unplug the power cord to shut down the ventilator. In the case of power failure or in the unlikely event of fault conditions, take off the mask to avoid inhaling the air you have exhaled previously. -
Page 24: Sleep Report
4 Routine Use 4.2.2 Sleep Report Parameter Description Period This parameter specifies the period of a sleep report, which may be one day, one week, one month, three months, six months, or one year. Days>4hrs This parameter records the number of days when the ventilator is used for more than 4 hours. -
Page 25: Cleaning And Maintenance
5 Cleaning and Maintenance Cleaning and Maintenance WARNING Unplug the CPAP Ventilator before cleaning. Clean the mask and air tubing based on the instruction of the manufacturer and determine the cleaning period. Do not perform repair or maintenance when the device is operating. ... -
Page 26: Cleaning The Water Tub Of The Humidifier
5 Cleaning and Maintenance 5.1.2 Cleaning the Water Tub of the Humidifier It is recommended that water in the water tub be changed and the water tub be washed every day based on the following steps: Switch off the ventilator and keep it off for 15 minutes for cooling down. Open the cap of the humidifier by pressing the [OPEN] button. -
Page 27: Cleaning The Headbands
5 Cleaning and Maintenance Air dry the tube in a shady and cool place until the tube is thoroughly dry. The shelf life of air tubing is 3 years. It is suggested to change the air tubing after every one year use. 5.2.4 Cleaning the Headbands Remove the headbands from the mask. -
Page 28: Service And Repair
6 Service and Repair Service and Repair The CPAP Ventilator should be maintained by the user. Check the following items before using the ventilator: Check whether the air tubing and mask are sealed Check whether the treatment pressure is generated and appears on the display screen ... -
Page 29: Troubleshooting
7 Troubleshooting Troubleshooting The table below lists common problems you may have with the CPAP Ventilator and possible solutions to those problems. If none of the corrective actions solve the problem, contact your physician or device supplier. Problem Possible Cause Solution ... - Page 30 7 Troubleshooting Problem Possible Cause Solution condensation. Always keep the air outlet of the humidifier lower than the tube and mask to prevent ingress of water inside the tube. You feel pain in the Nasosinusitis or otitis media Contact your physician immediately. nose, paranasal sinuses, or eyes.
-
Page 31: Appendix A Specifications
7 Troubleshooting Appendix A Specifications A.1 Basic Specification Dimensions 270 mm × 162 mm × 106 mm Weight 1.6 kg Power supply 100–240 V AC, 50/60 Hz; 24 V DC Air outlet 22 mm conical air outlet Data storage microSD card, data management software Degree of protection against Class II, type BF Applied Part, the mask is applied part... -
Page 32: Technical Specification
Appendix A Specifications A.2 Technical Specification Pressure and Flow Rate Pressure Range 4~20hPa (display resolution 0.1hPa, interval 0.2 hPa) Pressure Measurement Tolerance ±0.5hPa or ± 4% of measured value Flow Measurement Tolerance ±5 L/min or 10% of measured value, whichever is greater Ramp Time 0~60min, ±10% Maximum Single Fault Steady Pressure... - Page 33 7 Troubleshooting...
-
Page 34: Appendix B Terms
Appendix B Terms Appendix B Terms Apnea Hypoventilation Index APAP Automatic Continuous Positive Airway Pressure Chronic Obstructive Pulmonary Disease COPD CPAP Continuous Positive Airway Pressure ETS/E-sensitivity Expiratory Trigger Sensitivity IFR/ I-rate Inspiratory Flow Rate ITS/I-sensitivity Inspiratory Trigger Sensitivity Obstructive Sleep Apnea OSAS Obstructive Sleep Apnea Syndrome... -
Page 35: Appendix C Emc Requirements
7 Troubleshooting Appendix C EMC Requirements This product needs special precautions regarding EMC and needs to be installed and put into service according to the EMC information provided, and this unit can be affected by portable and mobile RF communications equipment. Do not use a mobile phone or other devices that emit electromagnetic fields, near the unit. - Page 36 Appendix C EMC Requirements Guidance and manufacture’s declaration – electromagnetic immunity The CPAP Ventilator is intended for use in the electromagnetic environment specified below. The customer or the user of CPAP Ventilator should assure that it is used in such an environment. Immunity Electromagnetic environment - IEC 60601 test level...
- Page 37 Appendix C EMC Requirements Guidance and manufacture’s declaration – electromagnetic immunity The CPAP Ventilator is intended for use in the electromagnetic environment specified below. The customer or the user of CPAP Ventilator should assure that it is used in such an environment. IEC 60601 test Compliance Immunity test...
- Page 38 Appendix C EMC Requirements Recommended separation distances between portable and mobile RF communications equipment and the Ventilator . The CPAP Ventilator is intended for use in an electromagnetic environment in which radiated RF disturbances are controlled. The customer or the user of the CPAP Ventilator can help prevent electromagnetic interference by maintaining a minimum distance between portable and mobile RF communications equipment (transmitters) and the CPAP Ventilator as recommended below, according to the maximum output power of the communications equipment.
-
Page 39: Appendix D Packing List
Appendix D Packing List Appendix D Packing List Name Quantity Host Humidifier Air tubing Nasal mask Air Filter Power adapter MicroSD card Ventilator User Manual Carrying case Power cable Ventilator Quick Start Guide Ventilator Packing List... - Page 40 P/N: 65020001AY (1.0)
Need help?
Do you have a question about the DM18 APAP and is the answer not in the manual?
Questions and answers