Advertisement
Table of Contents
Advertisement
Table of Contents

Summary of Contents for marposs Nemo
- Page 1 Quick Starting Guide...
- Page 2 1 GETTING STARTED..............2 SETTINGS..................3 PROGRAMMING................4 MEASURE..................This is Nemo Quick Starting Guide, for any other detailed information it is necessary to refer to the Software Manual officialy released and available also on the Marposs website. - 2 -...
- Page 3 GETTING STARTED There are three Nemo versions with a different rear panel; one of them, with DigiCrown box connectors, it is designed for digital probe devices and Marposs DigiNet products (see F 1). The second one is designed for IGURE input devices using USB connections and Marposs EasyBox products (see 2).
- Page 4 This chapter describes the operations sequence to connect all devices. EasyBox using the USB port (see F IGURE IGURE Bluetooth® dongle wireless Marposs wave devices using the USB port (see F IGURE IGURE DigiCrown box making sure the box is locked in position by pushing the tab down...
- Page 5 Insert the power cable into the connector and screw finger tight to secure (see F IGURE IGURE Turn on the NEMO (see F IGURE IGURE - 5 -...
- Page 6 SETTINGS This chapter describes the operations sequence to identify the input devices and to see which transducers are connected to Nemo. From the Home page, tap on “S ” button (see ETTINGS IGURE IGURE Tap on “H ” button (see F...
- Page 7 Tap on “M ” button (see F EASURE EVICES IGURE IGURE Tap on “U ” button (see F PDATE IGURE IGURE - 7 -...
- Page 8 ” in the following window (see F IGURE IGURE If a Bluetooth® key dongle is not connected to the Nemo, go to the step 6. Otherwise keep on as follows: Tap on “Y ” if you like to add a wireless Marposs wave device (see F 5a).
- Page 9 After Nemo has automatically recognized the devices connected, it may be necessary to enable and connect the highlighted/selected transducer/ sensor to device. Double tap on the red field or tap on the “E ” button (see F IGURE IGURE Select the transducer from the dropdown list and tap on “O...
- Page 10 Tap on “T .” button to see the selected RANSD transducer’s current reading or sensor’s value (see IGURE IGURE IGURE Tap on “H ” button to return to the Home page. - 10 -...
- Page 11 PROGRAMMING This chapter describes the operations sequence to program a measuring cycle. From the Home page, tap on “P ” button ROGRAMMING (see F IGURE IGURE Tap on “P ” button (see F ROGRAMS IGURE Note: If you like to define a Master Set before a Part Program consult the Software Manual.
- Page 12 Tap on “N ” button (see F IGURE IGURE Tap on “O ” button (see F IGURE IGURE - 12 -...
- Page 13 Tap on “O ” button (see F IGURE IGURE Double tap on the Formula field and write using the virtual keyboard the formula of the characteristic. Then tap on “Ok” button (see F IGURE IGURE - 13 -...
- Page 14 You can now associate more than one characteristic to the part program, by tapping on “N ” and repeating the entry shown in F 6 with a new IGURE characteristic. At the end of that operation tap on “O ” (see F IGURE IGURE The new part is created (see F...
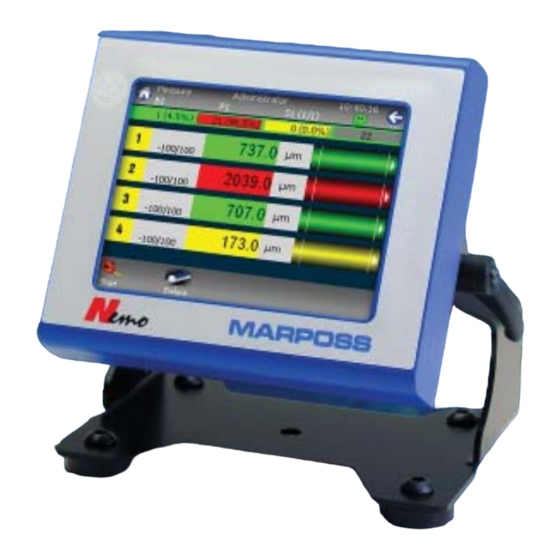
- Page 15 MEASURE This chapter describes the operations sequence to execute and display the measurements. From the home page, tap on “M ” button (see EASURE IGURE IGURE Tap on “B ” button (see F ATCHES IGURE IGURE - 15 -...
- Page 16 Tap on “A ” button (see F IGURE IGURE Tap on “N ” button (see F IGURE IGURE - 16 -...
- Page 17 Select a part program and tap on “O ” button (see IGURE IGURE Enter the name of the batch and Tap on “O ” button (see F IGURE IGURE - 17 -...
- Page 18 Tap on “M ” button (see F EASURE IGURE IGURE Tap on “S ” button to begin the measure cycle TART (see F IGURE Note: If you like to perform a Zeroing before start measure consult the Software Manual. IGURE - 18 -...
- Page 19 Tap on “S ” button at the end of the measure cycle (see F IGURE IGURE Tap on “H ” button to return to the home page. - 19 -...
- Page 20 MARPOSS, and other names/signs relative to Marposs products, referred to or shown in this document are registered trade marks or trade marks of Marposs in the United States and in other countries. Any third party rights relating to trade marks or registered trade marks referred to in this document are recognised for the respective holders.
Need help?
Do you have a question about the Nemo and is the answer not in the manual?
Questions and answers