
Summary of Contents for Carp Madness XXL 2020
- Page 1 Instructions Attention: On Youtube or www.Carp-Madness.de are detailed video instructions. Carp Madness XXL Baitboat 2020 1 1 1...
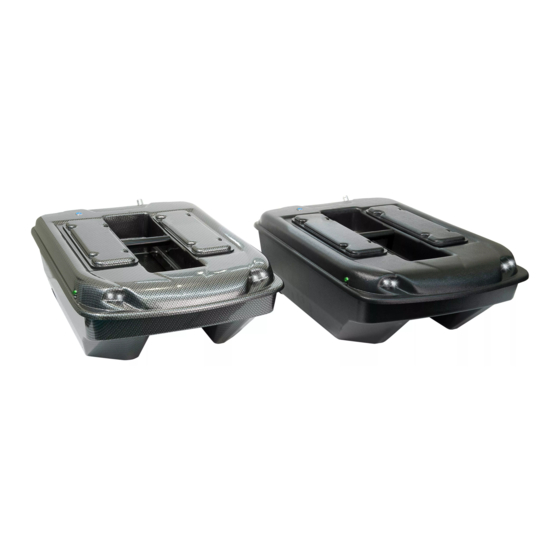
- Page 2 We are glad that you have chosen a kit of the CM bait boat. These are selected high-quality components, of which some are specially made for this boat. The hull is made of ABS, is therefore very light and dimensionally stable and can be easily glued or repaired.
- Page 3 Assembly of the fuselage: 1. Installation of the shafts and the motor Put the lower part of the fuselage upside down on the table. In the two rear openings should later sit the screws. The later hole has to be measured, cantered from left and right and so high, that the screw is as far down as possible but not too deep, so that the screws don´t touch the table (later the floor).
- Page 4 The stern tube is sealed from the outside with the green rubber seal. Remove the last rear ball bearing by inserting the green shaft seal and then insert the shaft and connect to the motor. This should be done before installing the drive unit in the boat. Only the propeller is screwed in the assembled state.
- Page 5 Attention: The shaft should be well lubricated before the insertion and the assembly. This serves on the one hand for lubrication but also to achieve a good tightness of the shaft position. This step is one of the most important, it requires the utmost care. That step determines the later quiet and smooth running.
- Page 6 Screws / rivets feed flap battery wave bore wave bore 6 6 6...
- Page 7 2. Fitting the feed flap It is possible to equip the boat with one or two feeder flaps. That depends on your field of application; of course, with 2 flaps the volume of the feed shafts is halved. With one flap, even larger buoys or baitfish can be transported.
- Page 8 Triggering a 1 or 2-piece flap: The inner part of the Bowden cable must perform the support function under the flap. Drill the hull diagonally at the correct height, then drill the plastic part at an appropriate angle. Insert the Bowden cable into the KS part, seal it with adhesive silicone first and then coat the whole side with adhesive and then glue it onto the hull.
- Page 9 Assembly division shaft: 9 9 9...
- Page 10 Mounting the hinges with 1 or 2 flaps: 10 10 10...
- Page 11 Illustration: Servo operation of 2 feeder flaps incl. Bowden cable and battery holder 11 11 11...
- Page 12 Illustration: Servo operation of 1 feed flap with Bowden cable 12 12 12...
- Page 13 3. Attaching and connecting the electronics The electronics must be inserted and connected in accordance to the photos and instructions of the individual components. The attachment is a double-sided adhesive tape. The cables must of course be laid clean after a successful test. Make sure that the components are still accessible after the hull and lid have been glued together.
- Page 14 4. Adjust the controls The controllers are fully automatic and do not need to be taught. We recommend to solder the cables firmly to the motors after a successful adjustment. The screws supplied by us have a left and a right direction. This is important to allow the best possible directional stability.The direction of the screws should be installed towards the outside of the boat Congratulations, now the hull is ready !!!!!!!!!!I<...
- Page 15 Example: Mounted lower shell X-Jet 15 15 15...
- Page 16 Mounting the lid: The diodes supplied by us are pre-assembled and ready. These diodes only need to be screwed into the fuselage. After assembly, these should still be sealed. Be sure to secure the screwing of the sockets as this area of the boat will be difficult to reach after gluing. We recommend to connect the diodes parallel, because then the other diodes will still work, if one fails.
- Page 17 Mounting the main switch: We recommend our illuminated switch, which replaces the small switch on the controller after gluing the fuselage. This small switch on the controller should be cut off and replaced by the main switch as follows: 17 17 17...
- Page 18 18 18 18...
- Page 19 bonding After everything works perfectly, the two parts can be glued. Please note that the two parts can not be separated anymore. It is important to pay attention to clean and grease-free adhesive surfaces. For safety's sake, clean the surfaces outside and inside the shaft with a little solvent. The appropriate adhesive (we recommend a special adhesive silicone, adhesive silicone is better, since the residues can be easily removed later) at least 3-5 mm evenly thick apply.
- Page 20 The black handle must be drilled on both sides to 10 mm and can then be mounted at the center of gravity final. Now make the electrical connections between the upper and lower shell and finally glue the magnets to the cover holder. 20 20 20...
- Page 21 CONGRATULATIONS, now everything is ready. 21 21 21...
- Page 22 We are happy about all pictures of finished CM bite boats. The boats can also be colored. A lot of fun and Tight Lines Wishes MK Handels GmbH Carp Madness Fishing Tackle www.carp.madness.de Inh.: Dipl. Ing. Markus Käsbeck Miesing 21 84494 Niederbergkirchen email: info@carp-madness.de...
- Page 23 : MK Handels GmbH , Carp Madness, Miesing 21, 84494 Niederbergkirchen 2. Meaning of the battery symbols Batteries are marked with the symbol of a crossed-out rubbish bin (see below). This Symbol indicates that batteries should not be disposed of with the household waste.
Need help?
Do you have a question about the XXL 2020 and is the answer not in the manual?
Questions and answers