Table of Contents
Advertisement
Advertisement
Table of Contents

Subscribe to Our Youtube Channel
Related Manuals for National Instruments Ettus E3 Series

Summary of Contents for National Instruments Ettus E3 Series
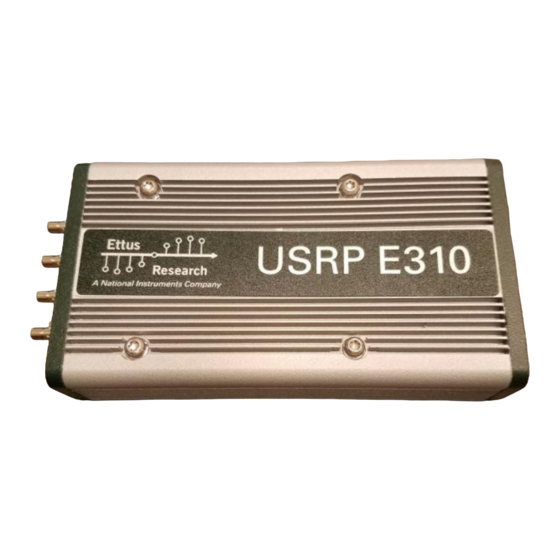
- Page 1 OpenCPI Ettus E3XX Getting Started Guide Version 1.5 Figure 1: Top View (E310)
- Page 2 Ettus E3XX Getting Started Guide ANGRYVIPER Team Revision History Revision Description of Change Date v1.3.1-E3XX Initial Release 3/2018 v1.4 Updated for Release 9/2018 v1.5 Version bump only 4/2019...
-
Page 3: Table Of Contents
Ettus E3XX Getting Started Guide ANGRYVIPER Team Table of Contents 1 References 2 Overview 3 Prerequisites 3.1 Installation of provided projects: core, assets and bsp_e310 ......3.2 Vendor Software Setup . -
Page 4: References
Ettus E3XX Getting Started Guide ANGRYVIPER Team References This document assumes a basic understanding of the Linux command line (or “shell”) environment. The reference(s) in Table 1 can be used as an overview of OpenCPI and may prove useful. Title Published By Link Getting Started... -
Page 5: Overview
Ettus E3XX Getting Started Guide ANGRYVIPER Team Overview This document provides steps for configuring a factory provided Ettus USRP E310 with the OpenCPI runtime environment for executing applications, configuring a development system to build OpenCPI bitstreams targeting the e3xx platform, and examples of executing applications on the OpenCPI configured E310. Prerequisites This guide assumes that, at a minimum, the following RPMs are installed: RPM Name... -
Page 6: Vendor Software Setup
ANGRYVIPER Team Vendor Software Setup The platform that is expected to be used is the Ettus Research/National Instruments Universal Software Radio Peripheral (USRP) E310 (or E3XX) SDR (e.g. e3xx). This OpenCPI-enabled platform provides the capability of deploying hardware and software workers while using Xilinx’s 13.4 distribution of Linux. - Page 7 Ettus E3XX Getting Started Guide ANGRYVIPER Team Figure 2: Back Panel • Ethernet cable: An Ethernet port is available on the E310 (Figure 2) and is required when the Network mode (discussed later) environment is used. The OpenCPI BSP for the E310 is configured for DHCP. Figure 3: Front Panel •...
-
Page 8: Sd Card Setup
Ettus E3XX Getting Started Guide ANGRYVIPER Team split into two individual channels referred to as “Front End A” and “Front End B.” Specific details can be found in the vendor manuals. SD Card Setup Make a backup image of factory SD card (assumes Linux host) This section provides the steps for creating an SD card backup image. -
Page 9: Script Setup
Ettus E3XX Getting Started Guide ANGRYVIPER Team Script Setup There are two type of setups or modes for running applications on any embedded radio: Network and Standalone. In Network mode, a development system hosts the OpenCPI tree as an NFS server to the E310 which is an NFS client. -
Page 10: Setup System Time Reference
Ettus E3XX Getting Started Guide ANGRYVIPER Team Setup system time reference If Linux system time is not required to be accurate, this step may be skipped. For either Network or Standalone mode, the following settings that are passed by mynetsetup.sh/mysetup.sh to the zynq_net_setup.sh/zynq_setup.sh scripts may require modification: •... -
Page 11: Centos 7
Ettus E3XX Getting Started Guide ANGRYVIPER Team 6.1.2 CentOS 7 From the host, install the necessary tools using yum: % sudo yum install nfs-utils From the host, allow NFS past SELinux % sudo setsebool -P nfs_export_all_rw 1 % sudo setsebool -P use_nfs_home_dirs 1 From the host, allow NFS past the firewall: % sudo firewall-cmd --permanent --zone=public --add-service=nfs % sudo firewall-cmd --permanent --zone=public --add-port=2049/udp... -
Page 12: Configuring The Runtime Environment On The Platform
Ettus E3XX Getting Started Guide ANGRYVIPER Team Configuring the runtime environment on the platform Network Mode 1. Plug in an Ethernet cable to a network configured for DHCP 2. Ensure a micro-USB to USB cable is connected between the E310’s serial port and development host 3. -
Page 13: Standalone Mode
Ettus E3XX Getting Started Guide ANGRYVIPER Team Standalone Mode 1. (Not required for OpenCPI in this mode) Plug in an Ethernet cable to a network configured for DHCP 2. Ensure a micro-USB to USB cable is connected between the E310’s serial port and development host 3. -
Page 14: Build An Application
Ettus E3XX Getting Started Guide ANGRYVIPER Team Build an application The setup of the platform can be verified by running an application that uses both RCC and HDL workers. A simple application that requires two RCC and one HDL worker is located in assets/applications/bias.xml, but only the RCC artifacts are provided with the installation of RPMs, and are availble on the SD card (Standard Mode) or mounted CDK directory (Network Mode). - Page 15 Ettus E3XX Getting Started Guide ANGRYVIPER Team Property 18: file_write.bytesWritten = "0" Property 19: file_write.messagesWritten = "0" Property 20: file_write.stopOnEOF = "true" (cached) Property 21: file_write.ocpi_debug = "false" (parameter) Property 22: file_write.ocpi_endian = "little" (parameter) Application started/running Waiting up to 1 seconds for application to finish Application finished Dump of all final property values: Property 3: file_read.messageSize = "16"...
- Page 16 Ettus E3XX Getting Started Guide ANGRYVIPER Team 0000040 0314 0102 0315 0102 0316 0102 0317 0102 0000050 0318 0102 0319 0102 031a 0102 031b 0102 0000060 031c 0102 031d 0102 031e 0102 031f 0102 0000070 0320 0102 0321 0102 0322 0102 0323 0102 0000080 0324 0102 0325 0102 0326 0102 0327 0102 0000090 0328 0102 0329 0102 032a 0102 032b 0102 00000a0 032c 0102 032d 0102 032e 0102 032f 0102...
-
Page 17: Run An Application In Standalone Mode
Ettus E3XX Getting Started Guide ANGRYVIPER Team Run an Application in Standalone Mode The default setup script sets the OCPI_LIBRARY_PATH variable to include the all of the artifacts that are required to execute the application. Specifically, all three of the artifacts that are located on the SD card are mounted at /mnt/card/opencpi/xilinx13_4/artifacts. -
Page 18: Appendices
Ettus E3XX Getting Started Guide ANGRYVIPER Team Appendices Generating Boot Artifacts In normal use cases, the SD card should be createdable and usable via the simple steps in Section 4. This section outlines the steps required to regenerate the artifacts used in previous sections for solely informational purposes and is not expected for users to have to complete these steps. -
Page 19: B Copying Only Required Files To Sd Card
Ettus E3XX Getting Started Guide ANGRYVIPER Team Copying only required files to SD card Copy embedded OS and boot files to SD card Copy the following files/directories onto the SD card: $ cp /opt/opencpi/cdk/e3xx/sdcard-xilinx13_4/boot.bin /run/media/<user>/<partition>/ $ cp /opt/opencpi/cdk/e3xx/sdcard-xilinx13_4/devicetree.dtb /run/media/<user>/<partition>/ $ cp /opt/opencpi/cdk/e3xx/sdcard-xilinx13_4/u-boot.img /run/media/<user>/<partition>/ $ cp /opt/opencpi/cdk/e3xx/sdcard-xilinx13_4/uImage /run/media/<user>/<partition>/ $ cp /opt/opencpi/cdk/e3xx/sdcard-xilinx13_4/uramdisk.image.gz /run/media/<user>/<partition>/ Files needed for Standalone Mode...
Need help?
Do you have a question about the Ettus E3 Series and is the answer not in the manual?
Questions and answers