Advertisement
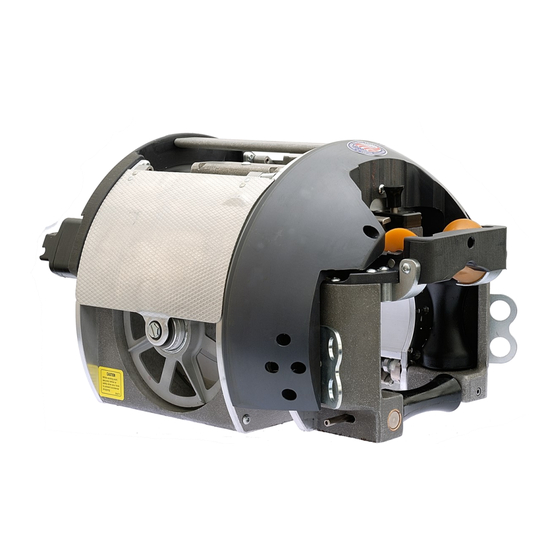
Apollo Cable Lasher
Operation and Maintenance
All rights reserved. No part of this publication may be copied, reproduced or
transmitted in any form whatsoever without the written permission of General
Machine Products Co., Inc.
General Machine Products Co., Inc. • 3111 Old Lincoln Hwy • Trevose, PA 19053 • USA
TEL: +1-215-357-5500 • FAX: +1-215-357-6216 • www.gmptools.com
U.S. Patents: 6,062,542 and 6,389,989
1
General Machine Products Co., Inc.
Manual P/N 30757 ver 3
AK 10-2016
Advertisement

Subscribe to Our Youtube Channel
Summary of Contents for GMP Apollo Lasher
- Page 1 Apollo Cable Lasher Operation and Maintenance All rights reserved. No part of this publication may be copied, reproduced or transmitted in any form whatsoever without the written permission of General Machine Products Co., Inc. General Machine Products Co., Inc. • 3111 Old Lincoln Hwy • Trevose, PA 19053 • USA TEL: +1-215-357-5500 •...
- Page 2 Apollo Lasher REVISION HISTORY: Date Details Author Original issue Adspeak Revised format for clarity 07-2013 A. Konschak Removed repair parts Updated procedure for 10-2016 A. Konschak opening door...
-
Page 3: Table Of Contents
Page 22 1.0 General This manual covers the care, operation and maintenance of your GMP Apollo cable lasher, which you can use to lash cables up to 3.5 in. (89mm) dia. to suspension strand, or smaller cable sizes to an existing lashed cable and strand. -
Page 4: Description
Also, you should always raise and lower the Apollo lasher with a hand- line or a truck lift. Use the bridle assembly at pole transfers! When... - Page 5 6mm through 10mm. 3.3 Lashing wire The Apollo lasher has two magazines for loading lashing wire, each can hold a 5.38 in. (137mm) dia. by 1.81 in. (46mm) high wire coil. You can use either of the standard wire coil sizes in the magazines: 1,200 ft.
- Page 6 3.7 Bridle assembly The Apollo lasher is supplied with a bridle assembly that resists rot. The 5 foot long rope assembly is equipped with a forged snap hook at each end and a floating forged steel ring between the snap hooks for the attachment of a suita- ble towing line.
-
Page 7: Operating Instructions
However, you should find this section of the book helpful in outlining the correct sequence of steps to take in using your Apollo lasher. 4.2 Preparing a lashing wire coil The first step in any lashing operation is to prepare the lashing wire coil. - Page 8 Apollo Lasher 2. Verify that the adjustable tension roller is in the correct position for the type of lashing. The roller should be in the lower-most position for normal lashing wire tension, including lashing broadband coaxial cables. The roller should be in the upper-most position for higher lashing wire tension.
- Page 9 5. Hold on to the looped end of the coil. Cut and remove the remain- ing cable tie and then continue to snug the reel cover against the wire coil ensuring a tight fit. The reel brake can be depressed into cutout on rear flange to hold the reel stationary as you tighten the reel cover.
- Page 10 Apollo Lasher 9. Feed the wire into the drive wheel from the rearward direction so the wire moves around the drive wheel toward the front of the lasher. Figure 13 10. Continue feeding wire until it exits the drive wheel. The...
- Page 11 12. Ensure the wire is captivated be- tween the roller and the housing. 13. If more wire is needed, disengage the drive wheel to pull out more lashing wire. (See Figure 15) Figure 17 14. Close the cover and using a screwdriver, tighten the fastener (clockwise) 1/4 turn until the fastener seats and can’t be tightened further.
- Page 12 14. Now the final steps. Pull up on the handle to de-clutch and disengage the drive wheel to pull some lashing wire from the lasher. Secure the lashing wire to the strand by using a GMP D or E lashing wire clamp. Attach the bridle assembly to the towing eyes on the Apollo lasher and you are ready to lash.
- Page 13 4.5 Over-lashing procedure Here is the proper way to overlash onto existing cable installations using the Apollo lasher: 1. Check the lashing wire coils to ensure there is enough lashing wire for the span. 2. Lower the rear gate to its lowest position by fully depressing the thumb latch and sliding the roller down.
- Page 14 Secure the lashing wire to the strand by using a GMP D or E lashing wire clamp. Attach the bridle assembly to the towing eyes on the Apollo lasher and you are ready to lash.
- Page 15 4.6.2 Lashing wire termination 1. Secure the lashing wire to the strand with a lashing wire grip before cutting or otherwise releasing tension in the lashing wire. The lashing wire grip should be placed far enough from where the supports, spacers and lashing wire clamps are to be installed to avoid having to move the grip.
- Page 16 Remove the D lashing wire grip(s). 4.7 Moving your lasher around a pole When you need to move your Apollo lasher around a pole or other obstruction, follow these steps. Figure 27 Warning: While aloft, ALWAYS wear a safety belt with a safety strap securely attached to help prevent you from falling.
- Page 17 See section 4.6 for more information on terminating lashing wire. Clamp the lashing wire to the strand. To pull a length of lashing wire from the Apollo lasher without rotating the drum, actuate the de-clutch lever and pull out enough lashing wire from your machine so you can terminate it with a clamp or continue lash- ing past the obstruction.
-
Page 18: Troubleshooting
5.0 Troubleshooting 5.1 General Most problems you encounter while operating your Apollo lasher have simple solutions. Read through the section to find your problems, then follow the recommended steps. If you can’t solve the problem, then call the factory. -
Page 19: Maintenance
The towing bracket is designed to be an integral part of the safety of the Apollo lasher when it is being transferred. So, inspect the towing bracket for cracks or other degradation. Check the screws to ensure their tightness. -
Page 20: Options And Other Information
Apollo Lasher 7.0 Options and other miscellaneous information 7.1 General The Apollo lasher has been designed to minimize the snag and catch points and therefore requires no optional halo. 7.2 GMP lashing accessories The following items will help to increase your productivity and bottom line. - Page 21 D Lashing Wire Grip D Lashing Wire Clamp 08605 07886 E Lashing Wire Grip Lashing Wire 81460 Towing Bridle Assy Poly Tow Rope 05817 70190 B Ratchet Wrench 216C Tool 07511 15439...
-
Page 22: Layout
Apollo Lasher LOWER TENSION ROLLER SHAFT REEL COVER Fig. 31, Side View REAR STRAND RELEASE KNOB EXIT ROLLER (LH) EXIT ROLLER (RH) REAR GUIDE ROLLER VERTICAL ROLLER ASSY LOWER SHAFT LOWER REAR SUPPORT ASSY ROLLER ASSY Fig. 32, Rear View... - Page 23 FRONT STRAND RELEASE KNOB TOWING BRACKET LOWER FRONT ROLLER Fig. 33, Front View DOOR ASSY LH TOWING BRACKET FRONT ROLLER W/O CLUTCH REAR ROLLER ASSY TOWING BRACKET DOOR ASSY RH Fig. 34, Top View...
- Page 24 Apollo Lasher General Machine Products Co., Inc. • 3111 Old Lincoln Hwy Trevose, PA 19053 • USA TEL: +1-215-357-5500 • FAX: +1-215-357-6216 • www.gmptools.com...
Need help?
Do you have a question about the Apollo Lasher and is the answer not in the manual?
Questions and answers