
Related Manuals for FläktGroup MINIMASTER RDKS


Summary of Contents for FläktGroup MINIMASTER RDKS
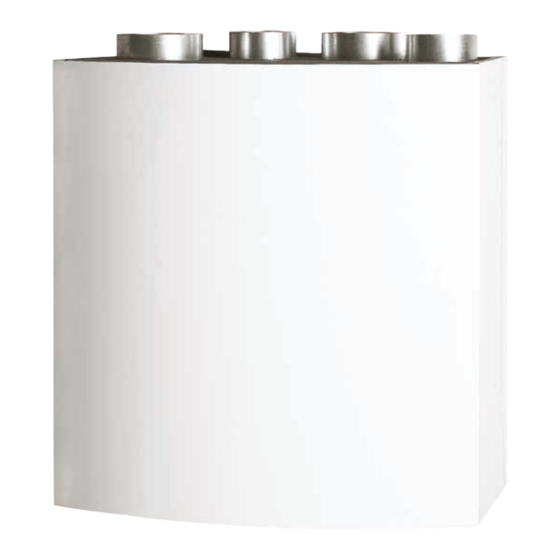
- Page 1 HEAT RECOVERY UNIT MINIMASTER RDKS INSTALLATION, OPERATION, MAINTENANCE AND SPARE PARTS...
-
Page 2: Table Of Contents
Heat recovery unit RDKS - Technical manual CONTENTS OPERATION AND MAINTENANCE (FOR USER) Functions, system design, electrical data, energy class ..........3 ISYteq Basic control panel Operation ............................ 4 Overview of symbols and functions ................5 ISYteq Touch 3.5 control panel ..................... General information ........................6 Cleaning of the display ......................6 General buttons and symbols ....................6... -
Page 3: Functions, System Design, Electrical Data, Energy Class
Heat recovery unit RDKS - Technical manual OPERATION AND MAINTENANCE – FUNCTIONS, SYSTEM DESIGN, ELECTRICAL DATA, ENERGY CLASS FANS ETHERNET CONNECTION (OPTIONAL) The fans are powered by energy-efficient EC motors. They are easy to This function can be used to connect the unit to an existing network. remove for service and maintenance. -
Page 4: Isyteq Basic Control Panel Operation
Heat recovery unit RDKS - Technical manual ISYteq BASIC CONTROL PANEL - OPERATION UNIT WITH COOKER HOOD The unit has a built-in control unit that controls the operation of the fans, the rotary heat exchanger and any electric heaters. When the boost damper in the cooker hood is opened, the fan The unit is controlled via an external ISYteq Basic or ISYteq Touch 3.5 speed increases. -
Page 5: Overview Of Symbols And Functions
Heat recovery unit RDKS - Technical manual ISYteq BASIC CONTROL PANEL - OVERVIEW OF SYMBOLS AND FUNCTIONS SYMBOLS DURING NORMAL OPERATION AWAY HOME FORCED Symbol Description AWAY mode HOME mode FORCED mode for 120 minutes Defrosting mode. The unit resumes normal operation after 15 minutes Switch operating modes between: AWAY, HOME and FORCED. -
Page 6: Isyteq Touch 3.5 Control Panel
Heat recovery unit RDKS - Technical manual ISYteq TOUCH 3.5 CONTROL PANEL GENERAL GENERAL BUTTONS AND SYMBOLS The following buttons and symbols are universal and available on The control panel has a touch screen display. Use your finger or the many menu pages. -
Page 7: Home Screen
Heat recovery unit RDKS - Technical manual ISYteq TOUCH 3.5 CONTROL PANEL - HOME SCREEN STATUS LINE Heat recovery active Postheater active Preheater active Defrosting in progress CLOCK CURRENT SETPOINT, SUPPLY AIR TEMPERATURE OPERATING STATUS ALARMS Manual mode No alarm Heating stove mode Alarm B CO2 control... -
Page 8: Operation
Heat recovery unit RDKS - Technical manual ISYteq TOUCH 3.5 CONTROL PANEL - OPERATION SHORTCUT TO SETTING OF TEMPERATURE SETPOINT SHORTCUT TO SETTING OF DATE AND TIME See page 9 for more information on temperatures. ALARMS SELECT OPERATING STATUS See page 9. See page 9. - Page 9 Heat recovery unit RDKS - Technical manual ISYteq TOUCH CONTROL 3.5 PANEL - OPERATION SELECTING OPERATING STATUS MENU The symbol on the home screen shows the operating status. Press the centre of the fan symbol to change the status. Normal mode (manual) Heating stove mode, makes it easier to light a heating stove or open fireplace.
-
Page 10: Maintenance And Cleaning Of Heat Exchanger And Fans
Heat recovery unit RDKS - Technical manual MAINTENANCE AND CLEANING OF HEAT EXCHANGER AND FANS GENERAL The drive belt and seals may need replacing due to wear and tear. Check them for damage and replace if necessary. For designations, The fans, filters and heat exchanger are very important for the opera- see spare parts list on page 33. -
Page 11: Filter Alarm And Filter Replacement
Heat recovery unit RDKS - Technical manual FILTER ALARM AND FILTER REPLACEMENT TO REPLACE THE FILTER, FOLLOW THE STEPS BELOW. The supply air and exhaust air filters should normally be replaced every six months. In dirty areas, the filters may need to be replaced When replacing dirty filters, use of a face mask is recommended (low- more frequently. - Page 12 Heat recovery unit RDKS - Technical manual OVERHEATING PROTECTION, ROTOR ALARM, TEMPERATURE ALARM, OTHER ALARMS THERMAL OVERLOAD PROTECTION OTHER ALARMS The fan motors are equipped with thermal overload protection devices, The unit has various alarms that are not supported by the simple which are reset manually by briefly disconnecting the power.
-
Page 13: Dimensions, Installation Measurements
Heat recovery unit RDKS - Technical manual INSTALLATION - DIMENSIONS, INSTALLATION MEASUREMENTS RDKS-2 LEFT RDKS-1 RIGHT Outdoor air and supply air to the left. Left-hinged door. Outdoor air and supply air to the right. Right-hinged door. 265 285 Weight: 40 kg Connection (female) Diameter Supply air... -
Page 14: Wiring And Connection Diagram
Heat recovery unit RDKS - Technical manual WIRING AND CONNECTION DIAGRAM WIRING AND CONNECTION DIAGRAM, CONTROL CARD FläktGroup DC_9295GB_20190326_R5 We reserve the right to make changes without prior notice... -
Page 15: Duct Connection, Duct Insulation
Heat recovery unit RDKS - Technical manual DUCT CONNECTION, DUCT INSULATION Note! During installation, the instructions regarding unit installation and duct insulation must be adhered to without deviation. Otherwise, there is a risk of condensation and moisture resulting in major damage. DUCT CONNECTION DUCTS IN WARM SPACES (INDOORS) Exhaust air from the unit may only be connected to a ventilation... -
Page 16: Installation Options And Duct Definitions
Heat recovery unit RDKS - Technical manual INSTALLATION OPTIONS AND DUCT DEFINITIONS INTRODUCTION To prevent accidents and injury: If the unit is not installed immediately after delivery, it should be stored The unit must be connected to ducting and the door well-protected under a roof in its original packaging. -
Page 17: Installation Of Unit With Accessories
Heat recovery unit RDKS - Technical manual INSTALLATION OF UNIT WITH ACCESSORIES If the unit is not installed immediately after delivery, it should be stored while connected to ducts. We recommend that the unit be lifted into well-protected under a roof in its original packaging. The unit is in- place by two people wearing protective gloves. - Page 18 Heat recovery unit RDKS - Technical manual INSTALLATION OF UNIT WITH ACCESSORIES 5 0 0 (If applicable) Ethernet cable NOTE! If an Ethernet cable is used, make sure it is long enough to al- Make sure that the unit don’t fall of by folding out at least two of the locking elements on the mounting plate, as well as securing the low the unit door to be opened without problems.
- Page 19 Heat recovery unit RDKS - Technical manual INSTALLATION OF UNIT WITH ACCESSORIES INSTALLATION OF FRONT COVER RDKZ-15-b-c-ddd-e (ACCESSORY) Ceiling/Wall Side panel Screw Front panel Spacer M a x 5 9 3 Kitchen cabinet RDKZ-15 3 5 0 Overlap ca 10 mm ≈...
- Page 20 Heat recovery unit RDKS - Technical manual INSTALLATION OF UNIT WITH ACCESSORIES INSTALLATION OF MOUNTING KIT FOR KITCHEN CABINET DOOR IN FRONT OF THE UNIT RDKZ-18-1 2. Determine the position of the brackets on the kitchen cabinet door sideways through marking on the bracket, see the picture above. Mounting kit RDKZ-18-1 3.
- Page 21 Heat recovery unit RDKS - Technical manual RDKZ-41-1 CONTROL PANEL ISYteq BASIC - INSTALLATION AND CONNECTION The power supply must be switched off while Make sure that the control cable is correctly con- control panel RDKZ-41-1 is being installed and nected to the control card before switching on the dismantled.
- Page 22 Heat recovery unit RDKS - Technical manual RDKZ-41-3 ISYteq TOUCH 3.5 CONTROL PANEL - INSTALLATION AND CONNECTION 5. Connect the cable to the back of the display as shown above. NOTE! Do not touch the electronics. 1. Open the control panel using a screwdriver. Push the display back into the enclosure.
-
Page 23: Adjustment, Commissioning (For Installer And Service Personnel)
Heat recovery unit RDKS - Technical manual ADJUSTMENT, COMMISSIONING (FOR INSTALLER AND SERVICE PERSONNEL) SETTINGS DATE / TIME To enter the “Settings” menu: 1. Press the gear cog button. 1. Set the date and continue by pressing “Confirm”. 2. Set the time. Press “Confirm”. 2. -
Page 24: Login, Settings
Heat recovery unit RDKS - Technical manual LOGIN, SETTINGS LOGIN Installers and service personnel must log in to access “Settings”. The default (preset) password is 0000. This password can be changed. 1. Enter the correct password. Press “Confirm”. Use, for instance, the back of a pencil for greater precision. -
Page 25: Adjustment
Heat recovery unit RDKS - Technical manual ADJUSTMENT INTRODUCTION AIRFLOW CALCULATION Adjustment of air flow and temperature may only be carried out by an The unit is equipped with four measurement points as per figure 16 installation engineer or service personnel. During adjustment, use the above. -
Page 26: Control Panel Operation, Commissioning
Heat recovery unit RDKS - Technical manual CONTROL PANEL OPERATION, COMMISSIONING ADJUSTMENT There are two ways to enter the adjustment menu. 1. The first is to press the question mark on the start screen. The question mark will not be shown if the menu has been opened pre- viously. - Page 27 Heat recovery unit RDKS - Technical manual CONTROL PANEL OPERATION, COMMISSIONING Option 1 - Use the ± buttons. Configure the settings for the supply air fan in the same way. Here you set the desired supply air temperature (setpoint). Note: Option 2 - Enter the desired value, confirm with .
- Page 28 Heat recovery unit RDKS - Technical manual CONTROL PANEL OPERATION, COMMISSIONING control is only active at normal speed. At low and high speed, set the fan speed in % of max. speed. To complete the adjustment, click the brown check mark. CO2 CONTROL 1.
-
Page 29: Parameter List
Heat recovery unit RDKS - Technical manual PARAMETER LIST Note that incorrect parameter settings can cause moisture problems, operational disruption and other types of malfunction. For this reason, the settings must be configured by suitably qualified professionals. TEMPERATURES Parameter Type of value Range Unit Standard value... - Page 30 Heat recovery unit RDKS - Technical manual PARAMETER LIST SETTINGS Parameter Type of value Range Unit Standard value Comment Date / Time – – – Select language – – Swedish Reset filter alarm – – – For resetting alarm in advance Login 0000-9999 –...
- Page 31 Heat recovery unit RDKS - Technical manual PARAMETER LIST Parameter Type of value Range Unit Standard value Comment 6. Air quality 6.1 CO control Yes / No – Setpoint CO 0-2000 P-band 0-2000 Int action time 0-9999 ppm at 0 V 0-9999 ppm at 10 V 0-9999...
- Page 32 Heat recovery unit RDKS - Technical manual PARAMETER LIST Parameter Type of value Range Unit Standard value Comment 7.4 Contact functions DI1 Timer input 1 NO/NC – DI2 Timer input 2 NO/NC – DI3 Rotation monitor NO/NC – Not applicable to domestic ventilation DI4 Pressure monitor defrosting NO/NC –...
- Page 33 Heat recovery unit RDKS - Technical manual PARAMETER LIST Parameter Type of value Range Unit Standard value Comment 9. Save values Saves adjusted values in control panel, max. 5 values Memory 1 – – – – Memory 2 – – –...
- Page 34 Heat recovery unit RDKS - Technical manual REPLACEMENT PARTS RIGHT VERSION (RDKS-1) LEFT VERSION (RDKS-2) NOT SHOWN. 70 69 68 67 66 65 64 Ethernetkort (tillbehör) 11 N 12 L 1314 15 16 32 33 34 35 36 8 10 - 1 5 R D K Z If the supply cord is damaged, it must be replaced by the manufacturer, an authorised service firm or a similarly qualified professional in order to avoid hazard.
-
Page 35: Ec Declaration Of Conformity
Heat recovery unit RDKS - Technical manual EC DECLARATION OF CONFORMITY ENCLOSURE II A Declaration of Conformity In accordance with: EU Directive for Machinery, 2006/42/EC EU EMC Directive, 2014/30/EU EU Directive for Energy related Products ErP 2009/125/EC EU RoHS Directive, 2011/65/EU Manufacturer FläktGroup Sweden AB Fläktgatan 1... - Page 36 Heat recovery unit RDKS - Technical manual DISPOSAL OF PRODUCTS AND PACKAGING MATERIALS Separate at source according to local regulations. Depending on the product, the following should be removed when disposing of it: - Circuit boards, cables, coils, motors, sensors etc. - Filters other than metal ones (cooker hoods).
- Page 37 MiniMASTER RDKS + ISYteq Basic PRODUCT INFORMATION IN ACCORDANCE WITH COMMISSION REGULATION (EU) NO. 1254/2014 ANNEX IV AS REFERRED TO IN ARTICLE 3(1b) (a) Brand FläktGroup MiniMASTER RDKS (b) Model designation Climate zone Energy class Cold -71.4 (c) Specific energy use (SEC) Average -30.5...
- Page 38 MiniMASTER RDKS + ISYteq Touch 3.5 PRODUCT INFORMATION IN ACCORDANCE WITH COMMISSION REGULATION (EU) NO. 1254/2014 ANNEX IV AS REFERRED TO IN ARTICLE 3(1b) (a) Brand FläktGroup MiniMASTER RDKS (b) Model designation Climate zone Energy class Cold -73.2 (c) Specific energy use (SEC) Average -32.0...
- Page 39 MiniMASTER RDKS + ISYteq Touch 3.5pp + CO PRODUCT INFORMATION IN ACCORDANCE WITH COMMISSION REGULATION (EU) NO. 1254/2014 ANNEX IV AS REFERRED TO IN ARTICLE 3(1b) (a) Brand FläktGroup MiniMASTER RDKS (b) Model designation Climate zone Energy class Cold -76.7...
- Page 40 WWW.FLAKTGROUP.COM MINIMASTER RDKS FläktGroup is the European market leader in smart, energy-efficient ventilation systems for optimal indoor comfort, critical applications and fire safety. Our products and solutions are based on innovative technology, high quality and superior performance, backed by over 100 years of experience in the industry.
Need help?
Do you have a question about the MINIMASTER RDKS and is the answer not in the manual?
Questions and answers