
Summary of Contents for Crestron Electronics, Inc. TSS-7
- Page 1 TSS-7/TSS-10 7 in. and 10.1 in. Room Scheduling Touch Screens Supplemental Guide Crestron Electronics, Inc.
- Page 2 Original Instructions The U.S. English version of this document is the original instructions. All other languages are a translation of the original instructions. Crestron product development software is licensed to Crestron dealers and Crestron Service Providers (CSPs) under a limited non-exclusive, non-transferable Software Development Tools License Agreement. Crestron product operating system software is licensed to Crestron dealers, CSPs, and end-users under a separate End-User License Agreement.
-
Page 3: Table Of Contents
Contents Introduction ........................... 1 Product Features ......................... 2 Access the Setup Screens ......................4 Configure the Device ........................5 Ethernet Setup ............................5 Diagnostics & Advanced ........................... 7 Test Patterns ............................8 Touch Test ............................. 9 LAN Test .............................. 10 About ................................ - Page 4 Scheduling Application Setup ....................39 Crestron Room Scheduling Application....................40 Zoom Rooms ............................. 41 Appspace ..............................46 Teem ................................52 Robin ................................54 EMS Software ............................57 Space Connect ............................59 NFS Rendezvous ............................64 Gingco.net ..............................66 Connect to Crestron XiO Cloud Service ................68 Claim a Single Device ..........................
-
Page 5: Introduction
The Crestron TSS-7 and TSS-10 are functionally similar. For simplicity within this guide, the term “touch screen” is used except where noted. For more information on the TSS-7 and TSS-10, refer to the TSS-7/TSS-10 Quick Start Guide (Doc. 8326) at www.crestron.com/manuals. -
Page 6: Product Features
Space Connect™ room scheduling application NFS™ Rendezvous room scheduling application Gingco.net™ room scheduling application SharingCloud™ room Future Future scheduling application Custom user project (Continued on following page) 2 • TSS-7/TSS-10: Room Scheduling Touch Screens Supplemental Guide – DOC. 8327B... - Page 7 Camera Future Future PinPoint™ beacon (Hardware (Hardware Touch Screen Features ready) ready) USB for accessory integration Ambient light sensor for auto dimming Audio for emergency broadcast Control system interface Supplemental Guide – DOC. 8327B TSS-7/TSS-10: Room Scheduling Touch Screens• 3...
-
Page 8: Access The Setup Screens
) that may be tapped to return to the Setup screen and a Save & Exit button that may be tapped to save all settings, to exit the setup screens, and to return to the selected scheduling application. 4 • TSS-7/TSS-10: Room Scheduling Touch Screens Supplemental Guide – DOC. 8327B... -
Page 9: Configure The Device
Tap APPLY CHANGES to apply any new Ethernet settings to the touch screen • and to stay in setup mode. Tap REBOOT to exit setup mode and reboot the touch screen. • Supplemental Guide – DOC. 8327B TSS-7/TSS-10: Room Scheduling Touch Screens• 5... - Page 10 DNS, or the alternate preferred DNS, tap the text field underneath the setting name. The on-screen numeric keypad opens for the chosen setting. Edit IP Address On-Screen Numeric Keypad 6 • TSS-7/TSS-10: Room Scheduling Touch Screens Supplemental Guide – DOC. 8327B...
-
Page 11: Diagnostics & Advanced
The test screens are explained in the sections that follow. Tap < BACK to return to the Setup screen. Supplemental Guide – DOC. 8327B TSS-7/TSS-10: Room Scheduling Touch Screens• 7... -
Page 12: Test Patterns
Use the Test Pattern Diagnostics screen to display any of the available test patterns. Tap one of the buttons on the screen to display its respective test pattern. Tap < BACK to return to the Diagnostics & Advanced screen. 8 • TSS-7/TSS-10: Room Scheduling Touch Screens Supplemental Guide – DOC. 8327B... -
Page 13: Touch Test
Use the touch test screen to test the touch functionality of the display. When a location button is tapped, its respective indicator lights on the screen. Tap RETURN to return to the Diagnostics & Advanced screen. Supplemental Guide – DOC. 8327B TSS-7/TSS-10: Room Scheduling Touch Screens• 9... -
Page 14: Lan Test
The connection data updates after every successive ping. Tap < BACK to return to the Diagnostics & Advanced screen. 10 • TSS-7/TSS-10: Room Scheduling Touch Screens Supplemental Guide – DOC. 8327B... -
Page 15: About
If application updates are available, the touch screen downloads and installs the updates. The status of the updates is shown on the bottom of the screen. Tap < BACK to return to the Setup screen. Supplemental Guide – DOC. 8327B TSS-7/TSS-10: Room Scheduling Touch Screens• 11... -
Page 16: Configuration Via Web Interface
For more information on configuring the scheduling application, refer to "Configuration via Web Interface" in the Crestron Room Scheduling Panels Operations Guide (Doc. 8205) at www.crestron.com/manuals. 12 • TSS-7/TSS-10: Room Scheduling Touch Screens Supplemental Guide – DOC. 8327B... -
Page 17: Actions Menu
After Restore is selected a dialog box is displayed asking whether the device settings should be restored. Select Yes to restore the settings or No to cancel the restore. Supplemental Guide – DOC. 8327B TSS-7/TSS-10: Room Scheduling Touch Screens• 13... -
Page 18: Firmware Upgrade
Click Enter Setup to force the touch screen to enter its built-in setup interface. Enter Standby Click Enter Standby to force the touch screen to enter standby mode. 14 • TSS-7/TSS-10: Room Scheduling Touch Screens Supplemental Guide – DOC. 8327B... -
Page 19: Save Changes
Click App Upgrade to update the currently selected application. The update progress is shown in a pop-up window. Once the update is complete, click OK to close the pop-up window. Supplemental Guide – DOC. 8327B TSS-7/TSS-10: Room Scheduling Touch Screens• 15... -
Page 20: Status
The following Device information is displayed: Model: The touch screen model name • Firmware Version: The firmware version loaded onto the touch screen • Serial Number: The touch screen serial number • 16 • TSS-7/TSS-10: Room Scheduling Touch Screens Supplemental Guide – DOC. 8327B... -
Page 21: Network
Network Proxy Settings: Reports whether network proxy settings are enabled or • disabled for the touch screen For more information on configuring network settings, refer to "Network" on page 21. Supplemental Guide – DOC. 8327B TSS-7/TSS-10: Room Scheduling Touch Screens• 17... -
Page 22: Usb
Click Display to view the display status. Status Tab – Display The Display Status field indicates whether the display is on, in standby mode, or in screensaver mode. 18 • TSS-7/TSS-10: Room Scheduling Touch Screens Supplemental Guide – DOC. 8327B... -
Page 23: Settings
Each selection is described in the sections that follow. System Setup Click System Settings to configure general network and touch screen settings. Settings Tab - System Setup (Continued on following page) Supplemental Guide – DOC. 8327B TSS-7/TSS-10: Room Scheduling Touch Screens• 19... - Page 24 Settings Tab - System Setup (continued) 20 • TSS-7/TSS-10: Room Scheduling Touch Screens Supplemental Guide – DOC. 8327B...
- Page 25 Brightness Medium Preset: Enter a value (1‒100) for the LCD display's medium brightness preset. ‒ Brightness Low Preset: Enter a value (1‒100) for the LCD display's low brightness preset. Supplemental Guide – DOC. 8327B TSS-7/TSS-10: Room Scheduling Touch Screens• 21...
- Page 26 Crestron Default or User Project. Crestron Fusion Cloud URL: Enter the URL used to connect the touch screen to • the desired Crestron Fusion Cloud server. 22 • TSS-7/TSS-10: Room Scheduling Touch Screens Supplemental Guide – DOC. 8327B...
-
Page 27: Network Proxy Settings
HTTPS Proxy Port: Enter the port number of the HTTPS proxy server. Username: Enter the username required for the HTTPS proxy server. Password: Enter the password required for the HTTPS proxy server. Supplemental Guide – DOC. 8327B TSS-7/TSS-10: Room Scheduling Touch Screens• 23... -
Page 28: Audio
Crestron XiO Cloud account. For more information on connecting to the Crestron XiO Cloud service, refer to "Connect to Crestron XiO Cloud Service" on page 59. 24 • TSS-7/TSS-10: Room Scheduling Touch Screens Supplemental Guide – DOC. 8327B... -
Page 29: Configure Date/Time
Schedule Display Date Format: Select the format that the date will display on the touch screen. Schedule Display Time Format: Select the format that the time will display on the touch screen. Supplemental Guide – DOC. 8327B TSS-7/TSS-10: Room Scheduling Touch Screens• 25... -
Page 30: Authentication Management
Current User Click the Current User tab to view and edit information for the current touch screen user. Authentication Management - Current User Tab 26 • TSS-7/TSS-10: Room Scheduling Touch Screens Supplemental Guide – DOC. 8327B... - Page 31 Enter a new password in the Password field, and then reenter the password in the Confirm Password field. Tap OK to save the new password, or tap Cancel to cancel the change. Supplemental Guide – DOC. 8327B TSS-7/TSS-10: Room Scheduling Touch Screens• 27...
- Page 32 5, 10, or 20 users. An Actions column is also provided for each user that allows various actions to be performed. The following selections may be selected from the Actions column. 28 • TSS-7/TSS-10: Room Scheduling Touch Screens Supplemental Guide – DOC. 8327B...
- Page 33 Click OK to return to the Authentication Management > Users page. Update User Click the editing button in the Actions column to edit settings for the selected user. The Update User dialog box is displayed. Update User Dialog Box Supplemental Guide – DOC. 8327B TSS-7/TSS-10: Room Scheduling Touch Screens• 29...
- Page 34 Create User Click Create User at the bottom of the page to create a new touch screen user. The Create User dialog box is displayed. Create User Dialog Box 30 • TSS-7/TSS-10: Room Scheduling Touch Screens Supplemental Guide – DOC. 8327B...
- Page 35 Active Directory authentication settings. Authentication Management - Groups Tab Enter text in to the Search Groups field to search for and display groups that match the search term(s). Supplemental Guide – DOC. 8327B TSS-7/TSS-10: Room Scheduling Touch Screens• 31...
- Page 36 Active Directory User: Reports whether the group is (Yes) or is not (No) • authenticated through Active Directory Click OK to return to the Authentication Management > Groups page. 32 • TSS-7/TSS-10: Room Scheduling Touch Screens Supplemental Guide – DOC. 8327B...
- Page 37 Directory on or off for the group. Click OK to save any changes and to return to the Authentication Management > Groups page. Click Cancel to cancel creating a new group. Supplemental Guide – DOC. 8327B TSS-7/TSS-10: Room Scheduling Touch Screens• 33...
-
Page 38: 802.1X Configuration
• Method, enter a password that is required for authentication. Enable Authentication Server Validation: Toggle the switch to enable or disable • using server validation for increased security. 34 • TSS-7/TSS-10: Room Scheduling Touch Screens Supplemental Guide – DOC. 8327B... - Page 39 If the CAs span multiple pages, use the navigation arrows on the bottom of the page to move forward or backward through the pages, or select a page number to navigate to that page. Supplemental Guide – DOC. 8327B TSS-7/TSS-10: Room Scheduling Touch Screens• 35...
- Page 40 Clicking the x button before the CA file is uploaded to the touch screen cancels the upload. Click the x button to close the Manage Certificates dialog box and to return to the 802.1x Authentication page. 36 • TSS-7/TSS-10: Room Scheduling Touch Screens Supplemental Guide – DOC. 8327B...
-
Page 41: Auto Update
• the touch screen immediately if new firmware is available. Applications Click Applications to a select a room scheduling application to run on the touch screen. Settings - Applications Supplemental Guide – DOC. 8327B TSS-7/TSS-10: Room Scheduling Touch Screens• 37... - Page 42 Each scheduling application uses a unique setup procedure for registering and configuring the application. For more information on setting up each scheduling application, refer to "Scheduling Application Setup" on page 39. 38 • TSS-7/TSS-10: Room Scheduling Touch Screens Supplemental Guide – DOC. 8327B...
-
Page 43: Scheduling Application Setup
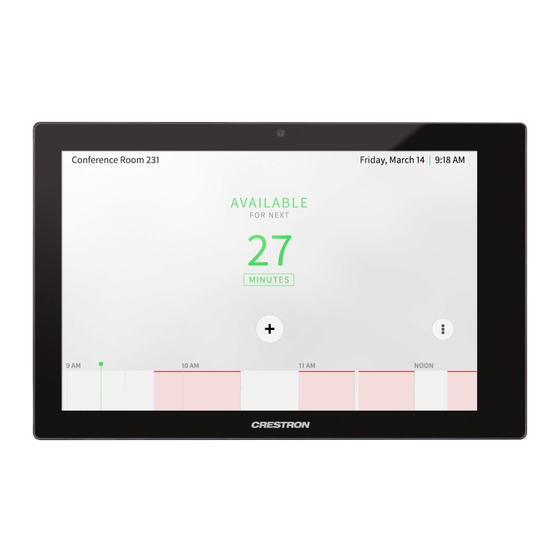
Scheduling Application Setup The TSS-7 and TSS-10 ship with a variety of preinstalled room scheduling applications that provide out-of-the-box functionality. Once an application has been selected, the application downloads from the cloud and installs on the touch screen automatically. The following room scheduling applications ship with the TSS-7 and TSS-10: Crestron room scheduling application •... -
Page 44: Crestron Room Scheduling Application
4. Select a language for the application from the Language drop-down menu. 5. Reboot the touch screen. The Crestron room scheduling application's user interface is displayed on the touch screen following the reboot. 40 • TSS-7/TSS-10: Room Scheduling Touch Screens Supplemental Guide – DOC. 8327B... -
Page 45: Zoom Rooms
Access the touch screen web configuration interface. For more information, refer to "Configuration via Web Interface" on page 12. 2. Navigate to Settings > Applications. 3. Select Zoom Rooms from the Application Mode drop-down menu. Supplemental Guide – DOC. 8327B TSS-7/TSS-10: Room Scheduling Touch Screens• 41... - Page 46 Flip Back Time: Enter a duration (in minutes) before the automatic flip • behavior occurs. 5. Reboot the touch screen. The Zoom Rooms application user interface is displayed on the touch screen following the reboot. 42 • TSS-7/TSS-10: Room Scheduling Touch Screens Supplemental Guide – DOC. 8327B...
- Page 47 Zoom Rooms account (supplied by IT). Tap < Pairing Code to return to the pairing code screen. Zoom Rooms User Interface - Sign In Screen Supplemental Guide – DOC. 8327B TSS-7/TSS-10: Room Scheduling Touch Screens• 43...
- Page 48 Select a conference room from the Select Room menu. 2. Tap Settings from the Zoom Rooms App to display conference room settings. Zoom Rooms User Interface - Conference Room Settings 44 • TSS-7/TSS-10: Room Scheduling Touch Screens Supplemental Guide – DOC. 8327B...
- Page 49 3. Tap Microphone, and then select an available microphone in the conference room. Zoom Rooms User Interface - Microphone Settings 4. Tap Speaker, and then select an available speaker in the conference room. Zoom Rooms User Interface - Speaker Settings Supplemental Guide – DOC. 8327B TSS-7/TSS-10: Room Scheduling Touch Screens• 45...
-
Page 50: Appspace
3. Select Appspace from the Application Mode drop-down menu. Settings - Applications (Appspace) 4. Reboot the touch screen. The Appspace application user interface is displayed on the touch screen following the reboot. 46 • TSS-7/TSS-10: Room Scheduling Touch Screens Supplemental Guide – DOC. 8327B... - Page 51 Enter the Appspace account URL in the first text field (cloud.appspace.com • is entered by default). Enter the Appspace account username in the second text field. • Enter the Appspace account password in the third text field. • Supplemental Guide – DOC. 8327B TSS-7/TSS-10: Room Scheduling Touch Screens• 47...
- Page 52 4. Enter a name for the touch screen in the device name field. The touch screen's MAC address is entered by default. Appspace User Interface - Register Your Device 5. Tap CONTINUE. 48 • TSS-7/TSS-10: Room Scheduling Touch Screens Supplemental Guide – DOC. 8327B...
- Page 53 Log in to the Appspace account that will be paired with the touch screen at www.appspace.com. 2. Note the six-digit registration code that is displayed in the second registration option provided by the Appspace user interface. Supplemental Guide – DOC. 8327B TSS-7/TSS-10: Room Scheduling Touch Screens• 49...
- Page 54 Appspace User Interface 3. Enter the six-digit code in the Device Registration panel on the Appspace dashboard page. Appspace Dashboard - Device Registration 4. Click GO. 50 • TSS-7/TSS-10: Room Scheduling Touch Screens Supplemental Guide – DOC. 8327B...
- Page 55 For more information on using the Appspace application, click the help icon on any of the Appspace dashboard pages, or visit https://docs.appspace.com/appspace/7.0/. For technical support, follow the procedures documented at https://docs.appspace.com/appspace/7.0/getting-started/support/. Supplemental Guide – DOC. 8327B TSS-7/TSS-10: Room Scheduling Touch Screens• 51...
-
Page 56: Teem
Tap Demo EventBoard to enter demo mode. To return to the main registration screen, tap Menu > Stop Demo Mode while in demo mode. 5. Navigate to https://app.teem.com/activate. 52 • TSS-7/TSS-10: Room Scheduling Touch Screens Supplemental Guide – DOC. 8327B... - Page 57 If the device is registered successfully, a growl notification appears confirming the device registration. For more information on using the Teem application, visit https://www.teem.com/support. For technical support inquiries, visit https://www.teem.com/contact/. Supplemental Guide – DOC. 8327B TSS-7/TSS-10: Room Scheduling Touch Screens• 53...
-
Page 58: Robin
4. Reboot the touch screen. The Robin user interface is displayed on the touch screen following the reboot. Robin User Interface 5. Tap Next on the user interface. 54 • TSS-7/TSS-10: Room Scheduling Touch Screens Supplemental Guide – DOC. 8327B... - Page 59 For more information, refer to https://support.robinpowered.com/hc. Robin User Interface - Add Display 7. Note the six-digit device PIN that is displayed in the user interface. Robin User Interface - PIN Supplemental Guide – DOC. 8327B TSS-7/TSS-10: Room Scheduling Touch Screens• 55...
- Page 60 For more information on using the Robin application, including adding and configuring a scheduling calendar, visit https://support.robinpowered.com/hc. For technical support inquiries, refer to the contact information provided at https://support.robinpowered.com/hc. 56 • TSS-7/TSS-10: Room Scheduling Touch Screens Supplemental Guide – DOC. 8327B...
-
Page 61: Ems Software
3. Select EMS from the Application Mode drop-down menu. Settings - Applications (EMS) 4. Reboot the touch screen. The EMS user interface is displayed on the touch screen following the reboot. EMS User Interface Supplemental Guide – DOC. 8327B TSS-7/TSS-10: Room Scheduling Touch Screens• 57... - Page 62 If the device is registered successfully, the application switches to a scheduling interface for the room. For more information on using the EMS Software application, including adding and configuring a scheduling calendar, visit https://portal.emssoftware.com/s/. For technical support inquiries, visit https://portal.emssoftware.com/s/support. 58 • TSS-7/TSS-10: Room Scheduling Touch Screens Supplemental Guide – DOC. 8327B...
-
Page 63: Space Connect
Space Connect User Interface 5. Use the onscreen keyboard to enter the email address for the Microsoft® administrator account or Google® G-Suite™ software room booking account and tap Login. Supplemental Guide – DOC. 8327B TSS-7/TSS-10: Room Scheduling Touch Screens• 59... - Page 64 8. On the Select a level screen, use the navigation arrows to choose the building level where the touch screen will be used, and then tap SELECT. Space Connect – Select a level Screen 60 • TSS-7/TSS-10: Room Scheduling Touch Screens Supplemental Guide – DOC. 8327B...
- Page 65 SELECT. NOTE: Crestron does not recommend using the other provided layouts, as they are not optimized for Crestron touch screens. Space Connect – Select a Layout Supplemental Guide – DOC. 8327B TSS-7/TSS-10: Room Scheduling Touch Screens• 61...
- Page 66 12. On the Set your room settings screen, configure any additional settings as needed using the provided toggles. Space Connect – Set your room settings Screen 13. Tap COMPLETE ROOM SETUP. The primary scheduling screen is displayed. 62 • TSS-7/TSS-10: Room Scheduling Touch Screens Supplemental Guide – DOC. 8327B...
- Page 67 Space Connect – Scheduling Screen For more information on using Space Connect and to access administrator-level settings, visit https://spaceconnect.azurewebsites.net. The administrator email and password must be entered to access this page. Supplemental Guide – DOC. 8327B TSS-7/TSS-10: Room Scheduling Touch Screens• 63...
-
Page 68: Nfs Rendezvous
Resource: Enter at least the first three letters of the resource (room), and • then tap the search button (magnifying glass icon) to select a resource from the options that are returned. 64 • TSS-7/TSS-10: Room Scheduling Touch Screens Supplemental Guide – DOC. 8327B... - Page 69 Rendezvous – Scheduling Screen For more information on using Rendezvous, refer to the Rendezvous Workspace User Guide by selecting Help from the administrator account portal. Supplemental Guide – DOC. 8327B TSS-7/TSS-10: Room Scheduling Touch Screens• 65...
-
Page 70: Gingco.net
URL: Enter the URL of the room that will be used with the touch screen. • User Name: Enter the username for the HTTP connection (optional) • Password: Enter the password for the HTTP connection (optional) • 66 • TSS-7/TSS-10: Room Scheduling Touch Screens Supplemental Guide – DOC. 8327B... - Page 71 To access the settings screen once in scheduling mode, press the touch screen display for 10 seconds. Gingco.net Scheduling Screen For more information on using Gingco.net, refer to the help topics within the Gingco.net account portal. Supplemental Guide – DOC. 8327B TSS-7/TSS-10: Room Scheduling Touch Screens• 67...
-
Page 72: Connect To Crestron Xio Cloud Service
2. In the Crestron XiO Cloud service, click the ENVIRONMENT menu button display a drop-down menu. Environment - Drop-Down Menu 3. Click Claim Device. The Claim Device dialog box appears. Claim Device Dialog Box 68 • TSS-7/TSS-10: Room Scheduling Touch Screens Supplemental Guide – DOC. 8327B... - Page 73 6. Click X to close the dialog box. The claimed device hostname in the device tree under the group Unassociated Devices. Unassociated Devices The device may now be managed or assigned to a group. Supplemental Guide – DOC. 8327B TSS-7/TSS-10: Room Scheduling Touch Screens• 69...
-
Page 74: Claim Multiple Devices
3. In the Crestron XiO Cloud service, click the ENVIRONMENT menu button display a drop-down menu. Environment - Drop-Down Menu 4. Click Claim Multiple Devices. The Claim Multiple Devices dialog box appears. 70 • TSS-7/TSS-10: Room Scheduling Touch Screens Supplemental Guide – DOC. 8327B... - Page 75 The devices may now be managed or assigned to a group. For information on creating environments, managing devices, and managing users with the Crestron XiO Cloud service, refer to the Crestron XiO Cloud User Guide (Doc. 8214). Supplemental Guide – DOC. 8327B TSS-7/TSS-10: Room Scheduling Touch Screens• 71...
- Page 76 Crestron Electronics, Inc. Supplemental Guide – DOC. 8327B 15 Volvo Drive, Rockleigh, NJ 07647 (2051727) Tel: 888.CRESTRON 06/24/19 Fax: 201.767.7576 Specifications subject to www.crestron.com change without notice.
Need help?
Do you have a question about the TSS-7 and is the answer not in the manual?
Questions and answers