
Summary of Contents for BRÖTJE IDA
- Page 1 User Guide Intelligent digital controller with App control RUB IDA ISR IDA OT IDA...
- Page 2 Dear end user, Thank you for choosing this IDA. You can control your home heating using the IDA or also by using an app. With this IDA, you are in the driver’s seat to control the temperature of your home. It’s all about your comfort, just the way you want it.
-
Page 3: Table Of Contents
What's new for the IDA ........ - Page 4 Connecting your home automation application with the IDA ....... . .
-
Page 5: Manual Menu
1 Manual menu Manual menu Fig.1 Introduction Introduction This chapter introduces you to the thermostat. You will find basic information, e.g. how to use the rotary dial and buttons plus how to interpret the information on the screen. Chapter: Introduction, page 6 AD-3001023-01 Fig.2 General use... -
Page 6: Introduction
It has a cable connection to the appliance. You can connect it to the internet via a wi-fi connection, so you can operate the IDA with an app on your mobile device. -
Page 7: The Ida And Its App
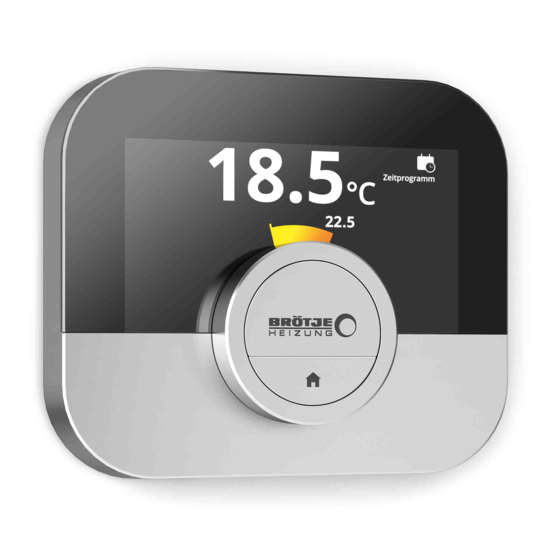
The IDA and its app Fig.8 The climate in your home contributes to your comfort; with the IDA you are able to control the temperature in your home the way you want it. In case you prefer to control your climate with your mobile device (e.g. -
Page 8: Entering The Quick Access Menu And Menu Items
2 Introduction 2.5.3 Entering the Quick Access menu and menu items Fig.11 The Quick Access menu gives you access to a selection of menu items. Long-press the select button to enter the Quick Access menu from the 21.0 home screen. °C Turn the rotary dial forward or backward to select a menu item. -
Page 9: Screen Shows No Information
After these 30 seconds the display is black, but the IDA is still active and >30 no information is lost. If the IDA is not operated for 3 minutes in total, it goes in stand-by mode. Any unconfirmed setting or selection is lost now. AD-3000995-01... - Page 10 2 Introduction Holiday period: Holiday period is ac tive Changing the mode quickly, page 13 Setting a holiday schedule, page 17 Fireplace mode: Fireplace mode is active Changing the mode quickly, page 13 Activating fireplace mode, page 19 Temperature scheduling: Tempera ture scheduling is active Changing the mode quickly, page 13 Creating a temperature schedule to control the room tem...
-
Page 11: Customising The Main Screen Display
Error icon Error display: The appliance reports an active error Error messages overview, page 36 Troubleshooting, page 42 Error display: The IDA has no inter net connection IDA connections, page 26 2.6.2 Customising the main screen display You can configure the main screen of the display by adding two information boxes on the screen, one to the left and one to the right of the rotary dial. -
Page 12: Messages On The Display
If you have multiple zones in your heating installation, you can control the temperature in every zone. A zone can be a specific room or, for example a floor. If there is an IDA in every zone, you can control a zone only with its own IDA. -
Page 13: General Use
Antifrost: The room temperature is set to the antifrost temperature setting. Holiday: The room temperature is set to the holiday temperature setting. Fireplace: Continue heating other rooms in the same zone while an additional heat source heats the room where the IDA is located. -
Page 14: Changing The Temperature For A Short Period In Scheduling Mode
Changing the temperature for a short period in scheduling mode Fig.21 You can change the temperature for a short set period when the IDA is in scheduling mode. At the end of the period the IDA will return to the 23.0 scheduled temperature. - Page 15 3 General use Fig.22 4. Select and confirm the day(s) that you want to program....Important ............................When you select more than one day, the days will be assigned the same day schedule.
-
Page 16: Copying A Weekday Of A Temperature Schedule
3.3.3 Selecting another temperature schedule Your weekly programme can differ from week to week. The IDA offers you three possible schedules to program. You can set which temperature schedule is active. First you have to enable the use of multiple schedules. -
Page 17: Changing The Zone Temperatures
When your appliance is fitted with a refilling unit, you can top up your installation in two ways: automatic and manual. You select the automatic or manual topping up option via the IDA app or the control panel on your appliance. -
Page 18: Creating A Holiday Schedule
3 General use 3.6.1 Creating a holiday schedule You can create a holiday schedule via the main menu or via the quick access menu. Creating a holiday schedule via the main menu 1. Enter the main menu. 2. Select Input Holiday Period. 3. -
Page 19: Deleting A Holiday Schedule
IDA is. For instance a fire lighted in your fireplace or a large number of people can heat the room so much, that the appliance stops heating all the rooms. -
Page 20: Switching The Central Heating On/Off
If your installation has a cooling unit and an outside temperature sensor, you can activate the auto mode via the IDA. In auto mode, the IDA can automatically adjust the inside temperatures by activating the heating and/or cooling function of the installation. Switching between heating and/or cooling depends on the set threshold. -
Page 21: Customisation
4 Customisation Customisation This chapter helps you with customising the thermostat. Next chapter: Messages and data, page 35 Previous chapter: General use, page 13 First chapter: Manual menu, page 5 AD-3001025-01 Hot water settings Important The hot water settings can only be changed for combi appliances. -
Page 22: Ida Settings
4.2.1 Setting the date and time When you start up the IDA for the first time, you enter automatically the menu to set the time and date. You enter this menu also when there has been a power outage and the IDA has no internet connection. -
Page 23: Main Screen Setting
4.2.4 Show help messages When you have just started to use the IDA, the display shows a help message after you change to a different mode. The message informs you about the use of the quick access menu. The display will stop showing these messages after some time. -
Page 24: Child Lock
Fig.35 4. Select Current Temperature or Target Temperature. 5. Confirm the selection. 21.0 This setting will stay until you change this setting again or reset the IDA to °C factory settings. Important The instructions in this manual are based on the default setting for current temperature. -
Page 25: Changing The Name Of A Zone
AD-3001008-01 Fig.39 10. Confirm to save the new name....Important ..You can choose another zone icon for the IDA with the app on your mobile device. <1 AD-3001009-01 4.2.10 Changing the display settings You can change the screen brightness and click sound of the rotary dial of the display. -
Page 26: Enabling Time Synchronization By Internet
7. Confirm the selection. IDA connections You can operate the IDA with the IDA app on a mobile device or with a home automation application. This allows you to control the appliance(s) in your installation when you are not near the IDA. You need a wi-fi network and a mobile device with Apple iOS or Android to make the connection. -
Page 27: Downloading The App
4 Customisation When you start up the IDA for the first time, you enter automatically the menu to connect to your wi-fi network. Before you start to set your wi-fi connection you have to approve the Terms and Conditions. Terms and conditions, page 43 During normal operation of the IDA you can decide to change or reconnect to your wi-fi network at a later moment. -
Page 28: Connecting The App With The Ida
4.3.3 Connecting the app with the IDA When you start up the IDA for the first time, you enter automatically the menu to register your IDA app or home automation application. You need an account based on your email address for the connection. During normal operation of the IDA you can decide to connect or reconnect the app with the IDA at a later moment. -
Page 29: Advanced Settings
4 Customisation Advanced settings 4.4.1 Resetting to default settings You can reset most of the IDA settings to their default settings at the same time. Important All connection settings for communication will be deleted too! The temperature schedules, control mode and holiday period will not be reset. -
Page 30: Activating Preheat
4 Customisation 4.4.4 Activating Preheat You can choose to preheat the room or a zone for a set period to give it a set temperature at the start time of the scheduled heating period. 1. Enter the main menu. 2. Select Settings. 3. -
Page 31: Setting The Control Strategy
Outside temperature: the IDA controls the heating on the basis of AD-3001255-01 the outside thermometer. Room & Outside: the IDA controls the heating on the basis of a mix of the outside thermometer and for a minor part on the basis of the room thermostat. -
Page 32: Setting The Cool Down Speed
4 Customisation Fig.48 3. Confirm the selection. 4. Select Yes to continue....5. Confirm the selection............... <1 AD-3001006-01 Fig.49 6. Select Heatup speed....Important The display shows Heatup speed only if your installation is fit for .. -
Page 33: Setting The Maximum Central Heating Power
4 Customisation Fig.52 4. Select Yes to continue. 5. Confirm the selection....6. Select Min. power............... Important The display shows Min. power only if your installation is fit for this option. -
Page 34: Register Predictive Maintenance
4.5.8 Register predictive maintenance The installler can register the IDA to the central server. The server will receive data from the IDA and the appliance. At some moment the server will give a signal to the installer that he should execute a timely maintenance activity. -
Page 35: Messages And Data
3. Confirm the selection. The display shows the current outside temperature. Energy consumption The IDA can display the energy that was used for heating and hot tap water supply from the moment of first use of the appliance. Important This menu item is only available for combi appliances. An appliance that can produce both central heating water and hot tap water. -
Page 36: Technical Information
5 Messages and data Technical information The IDA can display various built-in properties and parameters. 1. Enter the main menu. 2. Select Technical Information. 3. Confirm the selection. The display shows: Tab.7 Device Information Serial Number: Software Version: Wifi SSID:... -
Page 37: Service Message
The IDA shows the message in the top of the display..... : ... <1 AD-3001322-01 Fig.62 2. Short-press the select button. The IDA shows a small message in the top right hand corner of the ..21.0 display. °C Important <1... - Page 38 5. Confirm the selection. The IDA sends information to the manufacturer: The error code. Usage data of the IDA and the appliance from maximum the last four days. The display shows a message: The logging will be sent to the server.
-
Page 39: Installation
First chapter: Manual menu, page 5 AD-3001027-01 System overview 6.1.1 Systems with gateway Fig.63 The IDA can be connected to three types of appliances (based on the communication protocol): R-bus On/off protocol OpenTherm protocol BSB protocol The communication protocol depends on the type of appliance used in AD-3001129-01 your system. -
Page 40: Installation Of The Gateway
2.1. Away from heat sources (fire place, radiator, light, candles, direct sunlight, etc.) 2.2. Away from draughts 3. Check that the distance between the IDA and the appliance or gateway does not exceed 50 m (maximum cable length). AD-3001017-01 7726708 - v.01 - 18012019... -
Page 41: Installation Of The Ida
6 Installation Installation of the IDA The installation of the IDA is described in the Quick Start Guide that is delivered in the IDA package. 1. Mount the mounting bracket to the wall following the instructions in the Quick Start Guide. -
Page 42: Troubleshooting
The current temperature is equal to the The display will show the temperature target temperature. ring when the temperatures are different. The IDA shows a wrong date and time The power supply of the appliance Connect the IDA to the wi-fi network setting. -
Page 43: Appendix
IDA app. Before you start to setup your wi-fi connection and app connection you have to approve the Terms and Conditions. The Terms and Conditions cannot be viewed on the IDA. You have two options to view them: Visit the website of the manufacturer. -
Page 44: Erp Information
8 Appendix Tab.16 Electrical connection Maximum cable length for dedicated IDA bus 50 m Maximum cable resistance 2 x 5 ohm Tab.17 Wi-Fi connection Supported frequency band 2.4 Ghz (802.11b/g) Tab.18 Ambient conditions Storage temperature from - 25 °C to 70 °C... - Page 45 8 Appendix 7726708 - v.01 - 18012019...
- Page 46 8 Appendix 7726708 - v.01 - 18012019...
- Page 47 © Copyright All technical and technological information contained in these technical instructions, as well as any drawings and technical descriptions supplied, remain our property and shall not be multiplied without our prior consent in writing. Subject to alterations.
- Page 48 August Brötje GmbH | 26180 Rastede | broetje.de 7726708 - v.01 - 18012019 7726708...
Need help?
Do you have a question about the IDA and is the answer not in the manual?
Questions and answers