Table of Contents
Advertisement
Quick Links
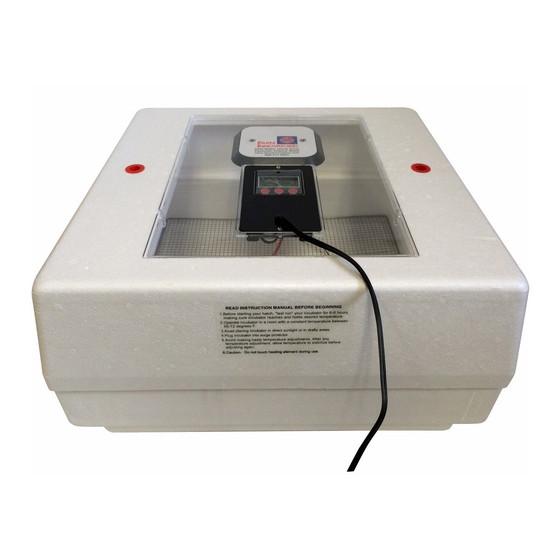
ABOUT OUR UNIT
Model 2350 - Digital Still Air Reptile Incubator
Our unit has a built in LCD display panel, single extra large observation window, extra
temperature probe, state of the art electronic PCB board and circuitry, indicator light, and
ventilation plugs along with built in moisture rings in the bottom of the incubator. 40 Watts /
120 VAC
GETTING STARTED WITH YOUR INCUBATOR
Remove the incubator from our packaging. You will see that the incubator comes in two
parts (top and bottom). The BOTTOM of the incubator is the cover without the large
observation window and power supply cord. The TOP of the incubator is the cover with the
heating element, LCD display panel with indicator light and extra large observation window
and power supply cord. Place the metal screen in the bottom of the BOTTOM cover for egg
container placement. Plug directly into a surge protector.
HEAT REGULATION
Your unit has a built in LCD display panel to display the internal temperature and read the
humidity percentage in the unit. The temperature is pre-set to 85° F from the factory. If you
wish to adjust the temperature UP or DOWN, press the MODE bottom once. The TEMP
display will start flashing. Next press the UP or DOWN red button as needed to adjust the
temperature. Finally, press the MODE bottom for day adjustment if needed and again to exit
the MODE. The set up is completed. The ideal temperature for incubation varies by
species. See chart below for common types:
Species
Incubation Temperature
82 – 88 degrees
Leopard Geckos
84 – 88 degrees
Bearded Dragons
74 – 78 degrees
Crested Geckos
78 – 82 degrees
Veiled Chameleons
80 – 84 degrees
Panther Chameleons
83 – 85 degrees
Corn Snake
85 – 88 degrees
Ball Python
For other reptile species, please consult internet or local library.
PLACEMENT OF THE INCUBATOR
Your digital incubator needs to be installed in a room with constant temperature. Avoid
drafty areas and direct sunlight. The ideal room temperature is 70 degrees F. +/- 3
degrees F for the Still Air Incubator.
Average Incubation Time
38 – 55 days
50 – 75 days
55 – 85 days
180 – 270 days
180 – 270 days
55 – 75 days
55 – 85 days
OPERATING THE INCUBATOR
Your unit has a built in LCD display panel to display the internal temperature, the humidity
percentage, and count down the days to hatch. The temperature is pre-set to 85 F from the
factory. The red indicator light will turn on and off frequently which is normal to control the
desired temperature for your egg species. We suggest running the incubator for 6 to 8 hours
prior to putting eggs in to confirm a steady, maintained temperature before starting your
project. The unit will read in the LCD display TEMP OK when the unit temperature is
between 74F and 90F. The "Days to Hatch" countdown is pre-set at 60 days. To adjust the
"Days to Hatch" countdown, hold the MODE button till temp flashes. Press MODE button
again till "Day" flashes. Adjust up or down till you reach desired days (1-99). This feature
will count down the days to hatch. It will flash when it reaches 0.
PLACEMENT OF EGGS IN THE INCUBATOR – VENTILATION/HUMIDITY
Moisten your incubation substrate (we recommend vermiculite) to the point where if you
squeeze it, it shouldn't drip water. It should stick together like a snowball. (If you use
Hatchrite™ brand bedding, there is no need to add water.) Then, fill a small deli cup about
2/3 full with the vermiculite. Take your finger, and make divots in the vermiculite, and
space the eggs apart by about ½". Set the egg in the hole, and bury it so just the tops of the
eggs show. Once the eggs are set, do not rotate them at all. Put a lid on the deli cup to hold
humidity. Make sure your cups have holes in the sides or lids for ventilation. Our advice is
to check the vermiculite once a week with your finger, making sure it still feels moist. If it
starts to dry a bit, take an eye dropper, or plastic syringe, and add some water into the
vermiculite to re-moisten it. Do not spray the eggs, or over-moisten the vermiculite, as this
can cause mold.
For snake eggs, they are commonly laid in "clumps", not single eggs. It is best to purchase
more vermiculite, follow the above directions for moistening it, and fill the bottom of the
incubator with it, instead of using deli cups. Incubate the eggs "loose" in the incubator, or
inside a larger Tupperware container, inside the incubator.
We suggest adding distilled warm water to the BOTTOM cover moisture slots to give the
eggs their natural moisture. Monitor and fill daily the moisture slots with warm water as
needed. This will depend on your room humidity level. The Hygrometer should show
relative humidity of approximately 60 - 80% during incubation for most species, 85-90% for
Ball Pythons.
Proper ventilation is paramount during embryo development and should increase during the
hatching process.
We suggest you remove one RED ventilation plug on the TOP cover when the reptiles start
to hatch. The RED ventilation plugs are located on opposite ends of the large observation
window. After hatching remove both RED ventilation plugs.
Advertisement
Table of Contents

Subscribe to Our Youtube Channel
Summary of Contents for Farm Innovators 2350
- Page 1 ABOUT OUR UNIT OPERATING THE INCUBATOR Model 2350 - Digital Still Air Reptile Incubator Your unit has a built in LCD display panel to display the internal temperature, the humidity Our unit has a built in LCD display panel, single extra large observation window, extra percentage, and count down the days to hatch.
- Page 2 2255 Walter Glaub Drive Plymouth, Indiana 46563 The Model 2350 is guaranteed for 30 days, under normal conditions and intended use of www.farminnovators.com service, from the original date of consumer purchase against defects due to materials and the Toll: (800) 277-8401 company’s workmanship only.
Need help?
Do you have a question about the 2350 and is the answer not in the manual?
Questions and answers