Advertisement
Advertisement

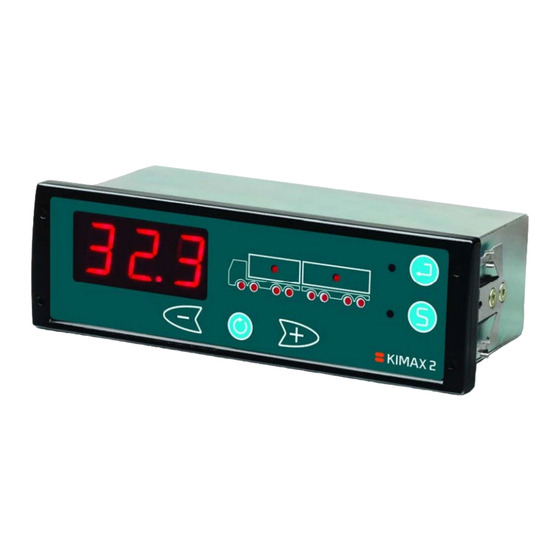
Summary of Contents for Kimax 2
- Page 1 KIMAX 2 Radio Installation and Instruction manual Software version 2.90 and up...
-
Page 2: Table Of Contents
Notes ........................42 This manual is edited for the Kimax 2 Radio. The menus and diagrams are also referring to the layout of the Kimax 2 Radio. This manual is primarily describing the standard functions for the Kimax 2 Radio. However variations from this manual can occur. To learn more about possible versions and special functions, visit www.kimax.com... - Page 3 Damage to your vehicle caused by installation of Kimax instruments or loss of time caused by recalibration or repairments of Kimax instruments are not covered by Sense-Tech Weighing Systems ApS in any case.
-
Page 4: How Does It Work
Vehicle air supply Air pressure input for Kimax In order to make the Kimax 2 Radio work properly on your vehicle, you need to teach the instrument how to calculate different loads. So before you can rely on your new on-board scale, each axle has to be calibrated after the installation. - Page 5 11,8 tons (HI value for the rear axle). In the same manner the HI values are now entered in the HI menu of the Kimax 2 Radio. Again it is important to enter the values right away, while the pressure in the air suspension system matches the loaded vehicle.
-
Page 6: Daily Use
Daily use When you switch on your Kimax 2 Radio, it will show the total weight of the entire vehicle in the 3-digit display measured in tons. The active axle LEDs as well as the load LED are on. - Page 7 Only if a Kimax 2 Sensor is installed on the trailer. Otherwise the instrument will return to the first active channel.
- Page 8 Depending on the software version. In some versions A2, A3 and A4 are disabled, when the display is turned off. There will only be a wireless signal if the Kimax 2 instrument is a model with a transmitter.
- Page 9 KIMAX2 Protecting Electrical Sensor Additional Introduction Daily use Configuration Calibration Menu calibration installation installation information When the instrument is showing the total weight , it is possible to enter the Tare mode by pressing . The LED next to turns on and the value previously shown on the display will be reset to 0,00 tons.
-
Page 10: Kimax 2 Menu
Sensor Additional Introduction Daily use Configuration Calibration calibration installation installation information Menu Kimax 2 Menu > 2 seconds Submenu OAA – Diagnostic menu (on next page) Submenu VER – Software version (on next page) Submenu See page 21 Submenu See page 18... -
Page 11: Entering The Kimax 2 Menu
Furthermore, you can read some additional setup values on the display, helping you understand how the Kimax 2 weighing system is working. By pressing for 2 seconds, you will get access to the Kimax 2 service menu. While you are in the menus, the LED next to will be turned on. - Page 12 HI. Press enter calibration submenu and the Kimax 2 will show the stored LO - value for the first active axle in the display (0,00 t – 99,9 t). The related axle LED(s) will be on. You can rotate between...
- Page 13 Id menu is only visible if HFA is set to either 0 or 1. (Master instrument) If the Kimax 2 Radio has a transmitter, make sure the Id setting on the Kimax 2 Radio and Kimax 2 Wireless terminal are similar. If the Kimax 2 Radio doesn’t have a transmitter, the Id setting has no function. The Id setting will...
- Page 14 A2. Press to enter the A1 alarm submenu and the Kimax 2 will show the stored A1 - value for the first active channel in the display (0,00 t – 99,9 t). The related axle LED(s) will be on. You can rotate between...
- Page 15 , will take you on to the next alarm submenu position called OFF. Press and you will enter the A4 menu, where the Kimax 2 will show the alarm level for the 3 external vehicle alarm of the truck instrument. All the assigned truck LEDs will...
- Page 16 – Date Pressing , will take you on to the next submenu position called CLO. Press once and the Kimax 2 displays the date: 01 - 31. Press and the Kimax 2 displays the month: 01 - 12. Press once more and the Kimax 2 displays the year: (2)000 –...
- Page 17 KIMAX2 Protecting Electrical Sensor Additional Introduction Daily use Configuration Calibration calibration installation installation information Menu OFF - leave Menu Pressing , will take you back to the first menu position, PPP. Press to leave the menu when you read OFF in the display.
-
Page 18: Configuration
Through the HFA menu the Kimax 2 instrument can be set up to be either a Master or a Slave instrument. Since the Kimax 2 Radio is intended for use inside the cabin of the truck it needs to be a Master instrument. - Page 19 KIMAX2 Protecting Electrical Sensor Additional Introduction Daily use Calibration Configuration Menu calibration installation installation information Configuration menu Access COF submenus Jump to next channel Jump to next channel Access menu Channel “n” Channel 1 1 ≤ n ≤ 8 Associated Associated Axle LED(s) Axle LED(s)
- Page 20 KIMAX2 Protecting Electrical Sensor Additional Introduction Daily use Calibration Configuration Menu calibration installation installation information How to set up HFA Enter the HFA-menu to make sure the setting is correct otherwise change it. Enter the menu and change the setting, remember to save the setting by pressing When you have finished setting up these Access menu Leave...
-
Page 21: Calibration
Calibration Once the installation and setup of your Kimax instrument is done, it is time to calibrate the instrument. This calibration is linking an actual unloaded weight of an axle together with a LO reading of this axle, - and linking a loaded weight of an axle together with a HI reading of this axle. - Page 22 Save LO value Enter the LO menu and save the LO Weight values for each Axle. Press the Enter button for 2 seconds to enter the Kimax 2 menu. (PPP is showed) Press the Scroll button some times until CAL is shown.
- Page 23 #1+2+3+4) - (Axle 1 + Axle 2 + Axle 3) Important: The measured values for the axles must be given in right away to the Kimax instrument while the vehicle is carrying the actual measured weight and is parked on an even surface without any brakes active.
- Page 24 Save HI value Enter the HI menu and save the HI Weight values for each Axle. Press the Enter button for 2 seconds to enter the Kimax 2 menu. (PPP is showed) Press the Scroll button some times until CAL is shown.
-
Page 25: Protecting Your Setup And Calibration
Kimax 2 Radio. In the locked position, you are able to read all measured weighing values on your Kimax 2 instrument. Furthermore, you can read the values in the service menus. However, you are not able to change the setup, configuration or calibration by accident. -
Page 26: Electrical Installation
For connecting cables use crimp connectors or another approved method. Avoid short- circuiting the system by faulty connections or squeezed cables. Fasten the cables at suitable intervals. Make sure all Kimax 2 instruments are protected by use of fuses in supply cables. Basic installation When... - Page 27 200 mA for sensor on trailer and must not be used for anything thing else than Kimax 2 Sensor boxes. Unused wires in the cable set are kept insulated from the chassis and any other...
- Page 28 When you have finished the setup of your system, you need to go to page 21 for instructions on how to calibrate the Kimax 2 system. When you have finished the calibration of your Kimax 2 system, you can go to page 25 to learn how to protect your setup, configuration and calibration.
-
Page 29: Serial Outputs
You need to set up your GPRS or FM300 to receive the above parameters too. In order to retransmit the Kimax 2 values through your GPRS unit, or receive the data in an FM300, you can set up a mask: “UUUUww .. - Page 30 Black Kimax 2 Terminal The possibility of controlling the Kimax 2 Radio in a visual environment exists in form of the Kimax 2 Terminal. By using the Kimax 2 Terminal it is possible to monitor and setup your Kimax instrument. Find out more about the Kimax 2 Terminal by visiting www.kimax.com...
-
Page 31: Alarms
Alarms Kimax 2 offers you two different kinds of alarm levels. A1 is an individual alarm level for each input channel. When the weight of one or more channels exceeds their stored A1 levels, the associated axle LEDs will start flashing. -
Page 32: Sensor Installation
Your air suspension system can be deviated in a left-hand side and a right-hand side with individual air circuits and individual level controlling valves due to minimizing rolling. In all cases, you will get the best accuracy and the fasted response, when you use Kimax 2 Instruments with double air-inlet for each axle. - Page 33 T-piece end of the hose, it will not work i the correct way, when you put it in the sensor end of the connecting hose. The throttles protect the pressure sensors in the Kimax 2 instruments against burst-pressure. Furthermore, the throttles protect the air circuit against unexpected leakage if one of the 6 mm hoses suffers damage.
- Page 34 When your lift-axle is engaged, the pressure in air 3 left equals air 2 left and the pressure in air 3 right equals air 2 right, axle 2 and 3 share the weight of the rear of your vehicle. When your lift-axle is disengaged (lifted from the road) the pressure in air 3 right and air 3 left is 0 bar and all the weight of the rear-end of your vehicle is carried and weighed by axle 2.
-
Page 35: Sg-Sensor Installation (Electrical Installation)
Blue signal 3 (optional) Crimp splice 1.5 mm Green signal 4 (optional) Connection diagram for 1 SG sensor on front axle and 2 SG sensors on one rear axle +10V supply SG sensor axle 1 for SG sensor extension cable... - Page 36 Menu calibration installation installation information Typical application: SG sensor on front axle combined with air suspension on rear axles. Kimax 2 Radio Air 1 left Air 1 right SG 1 sensor Air 1 right SG 1 Air 1 left For information on how to install SG sensors on your vehicle please visit www.kimax.com...
-
Page 37: Frequently Asked Questions
The values will not be saved. To unlock the instrument follow the description given on page 25. A 11: The Kimax instrument can be tested like in the description given in the section Basic test setup on page 40. -
Page 38: Additional Information
How to build Kimax 2 Radio in: Kimax 2 Radio is designed to fit directly into one of your free DIN radio slots. Your kit contains a mounting frame which can be placed in your free DIN radio slot when no frame is present already. - Page 39 Examples of typically used sets: Current consumption max. 90 mA Alarm 1 Flashing display Kimax 2 Radio 2 Air + 2 Air + 2 Air Part number 032220-0131 Alarm 2 Output open collector NPN 1 x display unit, cabin max. 0.2 A/ 50 VDC...
-
Page 40: Basic Test Setup
10,0 t when 10 bar is applied to all the channels. Apply e.g. 6 bar to all channels and you will get a total reading of 6 times 6,00 equal 36,0 on the display of the Kimax 2 Radio. -
Page 41: Calibration Scheme
KIMAX2 Protecting Electrical Sensor Additional Introduction Configuration Calibration Daily use Menu calibration installation installation information Calibration Scheme... -
Page 42: Notes
KIMAX2 Protecting Electrical Sensor Additional Introduction Configuration Calibration Daily use Menu calibration installation installation information Notes... - Page 43 KIMAX2 Protecting Electrical Sensor Additional Introduction Configuration Calibration Daily use Menu calibration installation installation information...
- Page 44 Sense-Tech Weighing Systems ApS ● Bygade 43 A ● DK 7173 Vonge ● Tel +45 7670 3001 ● Fax +45 7670 3002 ● mail@sense-tech.com ● www.sense-tech.com...
Need help?
Do you have a question about the 2 and is the answer not in the manual?
Questions and answers