Table of Contents
Advertisement
Advertisement
Table of Contents

Related Manuals for Platinum PT-DPF500C

Summary of Contents for Platinum PT-DPF500C
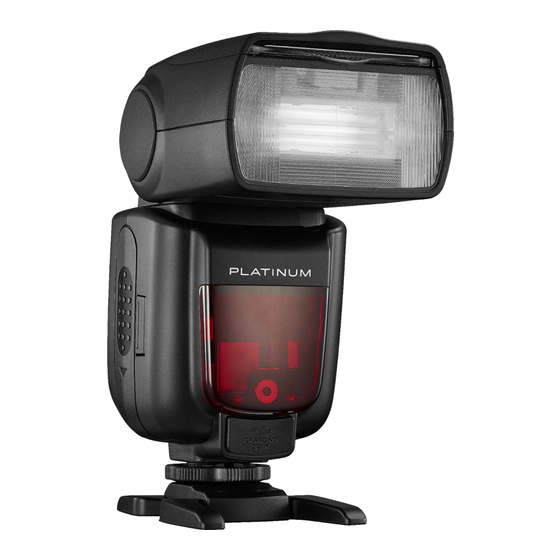
- Page 1 Advanced On-camera TTL Flash PT-DPF500C / PT-DPF500N Note: Camera flashes are designed for specific camera makes. For example, you cannot use the Canon flash (PT-DPF500C) with a Nikon camera. User Guide Before using your new product, please read these instructions to prevent any...
-
Page 2: Table Of Contents
Advanced On-camera TTL Flash for Canon or Nikon Contents Introduction ........... . . 3 Important Safety Instructions . -
Page 3: Introduction
ONE-YEAR LIMITED WARRANTY ........47 Introduction Congratulations on your purchase of a high-quality Platinum product. Your PT-DPF500C for Canon cameras or PT-DPF500N for Nikon cameras represents the state of the art in advanced on-camera TTL flash technology and is manufactured for reliable and trouble-free performance. -
Page 4: Features
• TTL compatibility for seamless integration with camera focus and metering system. • Advanced backlit screen for visibility in low-light • Uses 4 AA batteries (not included) Package contents • Platinum Advanced On-camera TTL Flash for Canon or Nikon • Carrying Case • Stand • User Guide... -
Page 5: Control Panel
Battery compartment Lock ring Control panel Note: The functions of the FN buttons 1 though 4 change depending on what setting you are accessing or adjusting. FN 2 button FN 3 button FN 1 (ZOOM/ FN 4 button C.FN) button MODE Wireless button... -
Page 6: Lcd (Canon)
LCD (Canon) Notes: • The LCD only shows the settings currently applied. • The functions displayed above FN (function) buttons 1 to 4, such as SYNC and , change according to the setting’s status. • When a button or dial is operated, the LCD lights. Auto-flash (E-TTL) mode High-speed/ second... -
Page 7: Optical Transmission Shooting
Optical transmission shooting Master flash Flash Gr Group flash mode Master flash Optical transmission Master flash ON Flash icon/ ratio Master flash OFF Firing group Channel (1, 2, 3, or 4) Slave flash Slave mode indicator Slave icon LCD (Nikon) Notes: •... -
Page 8: Manual (M) Mode
Manual (M) mode Manual flash mode Manual flash output Stroboscopic (RPT) mode Stroboscopic mode Number of flashes Flash frequency Radio transmission shooting/optical transmission shooting Master flash Flash mode Gr Group flash Radio Flash transmission exposure Optical compensation transmission Channel (1, 2, 3, or 4) Firing group Slave flash... -
Page 9: Installing Batteries
Installing batteries Note: Using premium batteries, such as non-rechargable lithium or high-output rechargable batteries, will noticeably reduce flash recycle time and improve battery life. 1 While pressing in on the battery compartment cover, slide the cover down, then lift the cover to open the compartment. -
Page 10: Low Battery Warning
Low battery warning If the battery power is low, Canon LCD icon blinks on the LCD. You need to replace the batteries. Nikon LCD Attaching your flash to the camera 1 If the camera has a plastic protective cover on the hotshoe, remove it. -
Page 11: Attaching Your Flash To The Stand
Attaching your flash to the stand 1 Rotate the lock ring on your flash’s mounting shoe counter-clockwise as far as it will go to make sure that the lock ring is completely loosened. 2 Slide your flash’s mounting foot into the slot on the stand. 3 Rotate the lock ring on your flash’s mounting foot clockwise until it locks in place. -
Page 12: Selecting A Flash Mode
2 Turn the select dial to select Sv APOT, then press the SET button. The LCD blinks. 3 Turn the select dial to select 60min or 30min. 4 Canon: Press the SET button to lock in the new setting, then press the FN 4 button to exit the screen. -
Page 13: Taking A Picture
To select Auto-flash mode • Press the MODE button one or more times to select E-TTL (Canon) or i-TTL (Nikon). Taking a picture 1 On the camera, press the shutter button halfway to focus. The aperture and effective flash range are displayed in the camera’s viewfinder. -
Page 14: Using Flash Exposure Bracketing (Canon Only)
2 Turn the select dial to select 0.3 (1/3 step), 0.7 (2/3 step), or +0 (no flash exposure compensation). 3 Press the SET button to save the setting. Using flash exposure bracketing (Canon only) Flash exposure bracketing helps you get a correct exposure especially when shooting a moving object or when environmental lighting is complex. -
Page 15: Locking The Flash Exposure (Canon Only)
Locking the flash exposure (Canon only) In Auto-flash mode, the camera automatically adjusts the flash exposure when you focus the camera. You can lock the flash exposure to prevent the camera from changing the flash exposure. 1 Center the subject in the camera’s viewfinder. -
Page 16: Using High-Speed Sync (Nikon)
• You cannot use Stroboscopic mode when using high-speed sync mode. • Over-temperature protection may be activated after 15 consecutive high-speed sync flashes. • When the over-temperature protection is started, displayed on the LCD. Using high-speed sync (Nikon) 1 Press the FN 4 (SYNC) button. -
Page 17: Using Second-Curtain Sync (Canon)
Using second-curtain sync (Canon) With a slow shutter speed, you can create a light train that follows the subject. Your flash fires right before the shutter closes. • Press the FN 4 (SYNC) button one or more times until the (second curtain sync) icon is displayed. -
Page 18: Using Manual Mode
Using Manual mode In Manual mode, you can manually adjust the flash output from 1/1 full power to 1/128th power in one-third stop increments. Use a hand-held flash meter to determine the flash output you need. 1 Press the MODE button one or more times to select M (Manual mode). -
Page 19: Using The Optical S1 Secondary Flash Setting
Using the Optical S1 secondary flash setting The S1 secondary flash with optical sensor mode makes your flash fire synchronously when the main flash fires. This produces the same effect as using a radio trigger to create multiple lighting effects. Note: S1 and S2 optical triggering and off-camera high-speed modes are only available in Manual flash mode. -
Page 20: Calculating The Shutter Speed
Nikon LCD 2 Turn the select dial to choose the flash output amount you want. 3 Press the FN 3 (MULTI) button to select the frequency. The next item to set blinks on the LCD. 4 Turn the select dial to set the number of flashes. 5 Press the FN 4 (Hz) button to select Hz, then turn the select dial to select the number of flashes per second. -
Page 21: Maximum Stroboscopic Flashes (Canon)
If number of flashes is displayed as “––” the firing continues until the shutter closes or the battery is exhausted. The number of flashes are limited as follows: Maximum Stroboscopic flashes (Canon) Flash output/Hz 1/16 1/32 1/64 1/128 Flash 12-14 15-19 20-49 50-199 output/Hz 1/16 1/32... -
Page 22: Using Wireless Flash Shooting: Optical Transmission
Using wireless flash shooting: optical transmission Notes: • Master flash refers to the camera flash on a camera. Slave flash refers to flashes controlled by the master flash. • The master flash can control all of the slave flashes using wireless. -
Page 23: Slave/Master Positioning And Operating Range
Slave/master positioning and operating range For wireless flash shooting in optical transmission mode, position the master flash and one slave flash as shown below: 49.2 ft. (15 m) Indoor Slave 32.8 ft. (10 m) Outdoor Master 80° 26.2 ft. 39.4 ft. (8 m) (12 m) Switching between normal flash and... -
Page 24: Turning The Master Flash On Or Off (Canon)
Slave flash setting • On the slave drive, press the button one or more times to select and make sure that SLAVE is displayed on the LCD. The LCD backlight turns orange. Note: To return to normal flash shooting, set the wireless setting to OFF. -
Page 25: Setting The Communication Channel (Canon)
Setting the communication channel (Canon) If other wireless flash systems are nearby, you can change the channel IDs to prevent signal interference. Important: The channel IDs selected on the master flash and the slave flashes must match. 1 Press the FN 4 button one or more times until MENU 3 is displayed on the LCD. -
Page 26: Using Fully Automatic Wireless Flash Shooting (Canon)
Using fully automatic wireless flash shooting (Canon) You can use one or more slave flashes in fully automatic wireless flash shooting. Using one slave flash 1 Attach the master flash to the camera. 2 Set the master flash to MASTER mode. See Switching between normal flash and wireless flash (Canon) -
Page 27: Using Multiple Slave Flashes
Using multiple slave flashes When you need a stronger flash output or more convenient lighting operation, increase the number of slave flashes and make sure that they are all set up as a single flash group. To add slave flashes, use the same steps as outlined in Using one slave flash on page 26. - Page 28 2 Press the MODE/Lock button to change to Stroboscopic (RPT) mode (Canon). The settings from Step 1 and the active slave flash Channel and Group selections are displayed on the LCD. Note: You can set the M, A, B, or C group to the TTL mode independently.
-
Page 29: Using Fully Automatic Wireless Flash
Using fully automatic wireless flash The flash exposure compensation (FEC) and high-speed sync (SYNC) settings that you set on the master flash are automatically sent to the slave flash. You do not need to change settings on the slave flash. 1 Set the FEC setting. -
Page 30: About Slave Group Control
4 On the master flash, press the FN 3 (Gr) button, turn the select dial to set the amount of flash ratio (from 0 to +/-3 in +/-0.3 increments), then press the SET button to confirm. 5 If you are using three slave flashes, press the FN 2 ( button, turn the select dial to the flash exposure compensation amount, then press the SET button to confirm. -
Page 31: Manually Setting The Slave Flashes
Notes: • When you select RATIO OFF, set A, B, or C as the firing group for the slave flashes. • To fire all slave flashes with the same flash output, select RATIO OFF. 4 Press the FN 3 (Gr) button, turn the select dial to select the flash output (from 0 to +/-3... -
Page 32: Using Wireless Flash Shooting In Stroboscopic Mode (Canon)
Using wireless flash shooting in Stroboscopic mode (Canon) • Set the master flash to Stroboscopic (MULTI) mode (Canon), then adjust the settings on the flashes as needed. See Using Stroboscopic mode on page 19. Using manual wireless flash shooting in Stroboscopic mode (Nikon) 1 Press the MODE button one or more... -
Page 33: Using Wireless Flash Shooting: Radio (2.4G) Transmission
Using wireless flash shooting: radio (2.4G) transmission Important: When a Canon camera’s shooting mode is set to a fully automatic mode or an Image Zone mode, the operations in this section are not available. Set the camera’s shooting mode to P/Tv/Av/M/B (Creative Zone Mode). Using a master or slave flash with a radio transmission wireless shooting function makes it easy to shoot with advanced wireless multiple flash lighting, in the same way as TTL auto-flash... -
Page 34: Positioning And Operating Range Using Multiple Slave Flashes
Notes: • Mount the slave flash on the included stand. See Attaching your flash to the stand on page 11. • Before shooting, perform a test flash and test shooting. • The transmission distance might be shorter depending on conditions such as the positioning of the slave flash, the surrounding environment, and weather conditions. -
Page 35: Auto Shooting With Using Different Flash Modes For Each Group (Canon Only)
Auto shooting with using different flash modes for each group (Canon only) Auto external flash metering Ceiling Manual E-TTL II flash Manual flash Manual flash Shooting with a different flash mode for each group (Canon only) Important: This feature is only available when you use radio transmission mode. - Page 36 2 On each slave flash, press the FN 4 button one or more times until MENU 1 is displayed on the LCD, then press the FN 3 (Gr) button to select A, B, C, D, or E. 3 On the master flash, press the FN 4 button one or more times until MENU 1 is...
-
Page 37: Using Other Applications
6 On the master flash, if you are using M mode, set the flash output. If you are using ETTL mode, set the flash exposure compensation amount as needed. Repeat this step for each group. 7 On the master flash, press the FN 4 ( ) button to return to shooting-ready mode. -
Page 38: Creating A Catchlight
Creating a catchlight With the catchlight panel, you can create a catchlight in the subject’s eyes to add life to the facial expression. 1 Point the flash head upward by 90°, then pull out the wide panel. The catchlight panel comes out at the same time. -
Page 39: Using The Wide Panel To Extend The Flash Coverage
Using the wide panel to extend the flash coverage When your flash is in manual zoom mode, you can use the built-in wide panel to extend the flash coverage for 14mm, wide-angle lenses. 1 Pull out the wide panel and place it over the flash head. -
Page 40: Canon Functions
Canon functions Custom Custom Settings & Function Settings Function function description meters m/ft. Distance indicator C.Fn-00 feet Auto power off C.Fn-01 FEB ACL FEB auto cancel C.Fn-03 0 – + FEB order C.Fn-04 – 0 + AF-assist beam C.Fn-08 60min... -
Page 41: Controlling Your Flash From The Camera's Menus (Canon)
Controlling your flash from the camera’s menus (Canon) If you attach your flash to an EOS camera which has a speedlite control function, you can control your flash using the camera’s menus. For more information, see the documentation that came with the camera. -
Page 42: Understanding Protection Functions
Understanding protection functions Over-temperature protection • To avoid overheating and damage to the flash head, do not fire more than 30 continuous flashes in fast succession at 1/1 full power. After 30 continuous flashes, let your flash cool for at least 10 minutes. •... -
Page 43: Protection Error Messages
Protection error messages Your flash provides additional real-time protection to secure your flash and your safety. Error messages and descriptions are: Displayed on Meaning the LCD A failure has occurred on the recycling system so that your flash cannot fire. Restart your flash. -
Page 44: Upgrading Firmware
is not displayed in the camera’s viewfinder • Wait until your flash is fully recycled and your flash ready indicator lights up. • If the flash ready indicator lights up but is not displayed in the view finder, make sure that your flash is securely attached to the camera hotshoe. -
Page 45: Specifications
Exposure control system PT-DPF500C: E-TTL II auto-flash and manual flash PT-DPF500N: i-TTL auto-flash and manual flash Flash exposure PT-DPF500C: Manual. FEB: ± 3 stops in 1/3 stop compensation (FEC) increments (Manual FEC and FEB can be used at the same time.) PT-DPF500N: Manual FEB: ±3 stops in 1/3 stop... -
Page 46: Legal Notices
Recycle time Approx. 0.1 ~ 2.6 seconds (Panasonic eneloop Ni-MH batteries) Red LED indicator lights when your flash is ready. Full power flashes Approx. 230 (2500mA Ni-MH batteries) Power saving Power off automatically after approx. 90 seconds of idle operation. (60 minutes if set as slave) Hotshoe, 3.5mm sync line, Wireless control port Sync triggering mode... -
Page 47: One-Year Limited Warranty
Product is determined to be defective by an authorized Platinum repair center or store personnel, Platinum will (at its sole option): (1) repair the Product with new or rebuilt parts; or (2) replace the Product at no charge with new or rebuilt comparable products or parts. Products and parts replaced under this warranty become the property of Platinum and are not returned to you. - Page 48 PROVINCE. Contact Platinum: 1-800-499-3964 www.bestbuy.com/platinum The Pt logo is a registered trademark of Best Buy. PLATINUM is a trademark of Best Buy and its affiliated companies. Registered in some countries. *Distributed by Best Buy Purchasing, LLC 7601 Penn Ave South, Richfield, MN 55423 U.S.A.
- Page 52 1-800-499-3964 The Pt logo is a registered trademark of Best Buy. PLATINUM is a trademark of Best Buy and its affiliated companies. Registered in some countries. *Distributed by Best Buy Purchasing, LLC 7601 Penn Ave South, Richfield, MN 55423 U.S.A.
Need help?
Do you have a question about the PT-DPF500C and is the answer not in the manual?
Questions and answers