
Summary of Contents for Cron HDI-600
- Page 1 High-precisionDigital Imager USER MANUAL Hangzhou CRON Machinery & Electronics Co., Ltd. Jinyi Road 875, Xiaoshan Economic & Technological Development Zone Hangzhou, 311215, P.R.China TEL:0571-82838989 FAX:0571-82838877 1 / 55...
- Page 2 Version: A1 Date: 2017-11-12 Revision History Version: A2 Date: 2018-4-19 2 / 55...
-
Page 3: Table Of Contents
Contents Chapter 1:About this manual ..................... 4 Chapter 2:Overview ......................4 2.1 Overview ...........................5 2.2 System dimension& weight....................6 2.3 Power requirement ......................6 2.4 Power connection & wiring ....................6 2.5 Safety & Cautions labels ....................7 2.6 Safety Information ......................9 Chapter 3:Installation Site and Environmental Requirements ........... 10 3.1 Space requirement ......................10 3.2 Flooring &... -
Page 4: Chapter 1:About This Manual
———————————————————————————————— CRON welcomes any valuable comments and suggestions: CRON welcomes your comments and suggestions on this document, and it’s our sincere commitment to provide upmost relevant detail in this document to meet your requirements. To send in any comments or suggestions, please visit http://www.cron.com.cn. -
Page 5: Overview
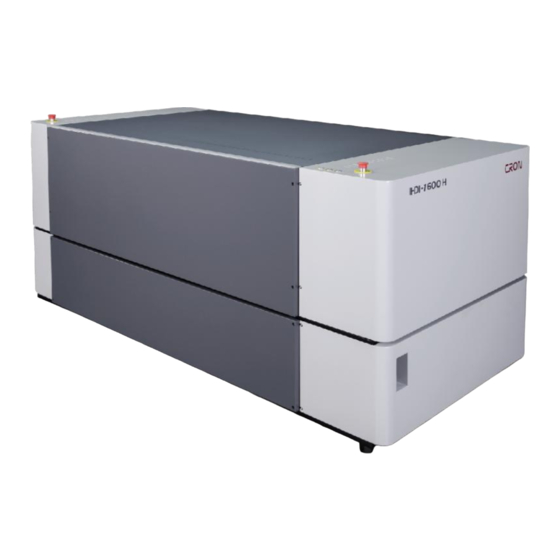
Productivity >1.2m /h, Dot reproduction: 1%-99%。 c) Format: HDI-600(660mm X 560mm), HDI-920(920mm X 675mm), HDI-1600(1524mm X 1200mm). d)Materialsused are selection of environmentally friendly materials and comply with environmental laws and regulations. We avoid using hazardous materials in the device and strong abide to environmental protectionrequirements. -
Page 6: System Dimension& Weight
Overview 2.2 System dimension & weight Table 2-1:System equipment size, weight table Device Model W(cm) L(cm) H(cm) Weight(kg) HDI-600** HDI-920** HDI-1600** 1480 Remark: equipment, size, weight will be vary depends on required configurations System 2.3Power requirement Table 2-2:Power requirements of the system... -
Page 7: Safety & Cautions Labels
Overview 2.5Safety and Caution labels In the use of this device, please strictly comply with the requirements of the warning signs in the device! WARNING! Before using the High-precision Digital flexo Imager, please read carefully and understand the manual content.Strictly follow all safety rules and regulations process while operating the equipment.Failure to follow the safety precautions will not only damage the equipment but may even result in personal injury. - Page 8 Overview Beware of hand crush! Please open or close the lead cover slowly, and avoid hands being crushed. Drum is rotating! Do not touch! Do not touch the drum while it is rotating the drum, it will cause injury! Caution hot surface! Do not touch the high temperature working part of equipment directly,...
-
Page 9: Safety Information
◆Be attention to the machinery operation, always wear gloves, tools and parts must be placed in an orderly manner; ◆Do not perform any maintenance or modifications to the equipment system that is not authorized by CRON. ◆Do not place any foreign objects on the device;... -
Page 10: Chapter 3:Installation Site And Environmental Requirements
Device Model W(cm) L(cm) W(cm) L(cm) HDI-600** HDI-920** HDI-1600** 3.2 Flooring & hallway access Doors and corridors at the installation site must be wide enough ( ≧ 145cm) so that the machine can be pushed into the room.Floor level should be maintained at ± 4mm. If installation to be done above ground floor, this requires an industrial elevator that have can load more than 2000kg. -
Page 11: Chapter 4:Offloading, Unboxing And Installing
4.1On-site conditions during offload handling Customer needs to provide handling equipment and tools to ensure the safe handling of the machine to the installation site.In the meantime, CRON engineers will assist with the handling and uncrating on site. 4.2Shipment packing A High-precision Digital flexoImagerunit is usually packed in a wooden crate box for easy shipping and handling. -
Page 12: Offloading, Unboxing And Installation
4.5.2Unboxing preparation First of all, check the crate box is intact, tilt indicator whether has any toner presence of overflow beyond the guide line. Ifproblems are found, they should be documented and feedback to CRON immediately. Picture 4-2: Tilt indicator... - Page 13 Operation Instructions 4.5.3 Uncrate the box: Use long-nose pliers to loosen the wooden case lock; A) locked stage B)unlocked stage 4.5.4 Follow the steps to remove the wooden box cover, side panels and pallet base(shown in Figure 3 and Table 1); Figure 3: Panels removal instructions Table 1:Wooden crate panels list Figure/Model...
- Page 14 Operation Instructions 4.5.5Removal of aluminium foil: Cut the foil bag at the bottom in circle, then remove foil bag (Figure 4).Be careful not to scratch the equipment while cutting the foil bag.Then unscrew the hex screws 8-M6 * 10, unscrew the nut 4-M10,remove the fixing brackets(Figure 4);...
- Page 15 4.5.10 Removal of the device’s “scanning platform fixation bracket”: a-1) HDI-600 ** / 920 ** Model Scanning Platform fixation bracket is located inside the device. When removing, open the device upper cover and remove the limit screws;...
- Page 16 Operation Instructions b-1)HDI-1600 ** Model’s scanning platform fixation bracket is located inside the device. After removing the upper cover of the device, you can notice the scanning platform unit. c) Use a hex wrench to remove the fixing screws of the "Scanning Platform Fixation Bracket" of the device and pay special attention when removal;...
-
Page 17: Chapter 5:Operation Instructions
Operation Instructions Chapter 5: Operation Instructions ————————————————————————————————— 5.1 Turning on device A) Open the circuit breaker(at the rear of the device) to the ON position. Then turn the cam switch to the ON position to allow power supply access to the device. 5.2 Connecting to computer Refer to 4.6.7, connect the computer USB port 5.3 Laboo-HDI installation &... - Page 18 5.3.2Verify and making sure HDI device driver is installed correctly: a) Under Windows Control Panel - Device Manager, confirmed that the HDI device driver has been properly installed. The following hardware “CRON laser device, V1C” can be found under the Universal Serial Bus controller.
- Page 19 Operation Instructions 5.3.3 After LaBoo-HDI software successfully installed, double-click the icon of LaBoo-HDI software shortcut on the desktop, the startup interface as shown below: 5.3.4After launching the LaBoo-HDI, below is the main interface of the software: 5.3.5 Confirm dongle installation and information: The dongle and device information can be obtained through the dongle icon in the upper right corner of the software.
- Page 20 Operation Instructions 5.3.6 Newly installed software first need to setup the initial template, click the “New”green button (at lower left) to create and setup an initial new template: Setup a template size within the model specification allowable range, confirm "template name", "media material", "resolution", "format", "laser power", "exposure speed"...
- Page 21 Operation Instructions 5.3.8 Enter to the device parameter settings: After engineer mode password is entered, there will be a pop-up windowswith 3 options prompted. Click on the right option “Parameters” button. 5.3.9To read in device parameters, there are 2 options available:: a) Import from file: Obtained one of the disk(Parameters disk) that bundled with device.
-
Page 22: Create Work Template
Operation Instructions 5.4 Create work template Once device’s parameter valueis correctly loaded into LaBoo-HDI software, you can proceed with the software for further operation; 5.4.1 Create new job template: Click the "New Template" button to bring up the new template dialog box. - Page 23 Operation Instructions not exceed the factory default maximum power; Note: If the Auto Power Adjust is checked, platemaking exposure is automatically adjusted according to Light Sensitivity value entered. It is strongly recommended to choose this option. Exposure drum speed selection, in accordance with the actual production settings. Maximum Exposure exposure speed is determined by the plate sensitivity, maximum laser power and drum speed Speed...
- Page 24 Operation Instructions Note: Please refer to the Laboo-HDI "User's Manual" for detail software operation. 24 / 55...
- Page 25 Operation Instructions 5.5 HDI-600 ** / HDI-900 ** Operation Description Status (light) Indicator: Label Process Description Status The device is powered on, the PC LaBoo software is not Standby Green + Red light connected Connected to LaBoo software and acquired device...
- Page 26 Operation Instructions 5.5.1 Loading process: Manual adjustment for plate loading operation (dotted line box) Normal loading operation 26 / 55...
- Page 27 Operation Instructions a) The device is ready for loading process either “Load Plate”command is executed under command function, or job “Output”during plate imaging operation. b) The drum is rotated to the loading position, the head clamp is opened and device is holding on for next command, button light is flashing, plate stoperthe positioning column rises, waiting for the next operation action.
- Page 28 Operation Instructions button to have the tail Clamp closed and clamped on the plate. At this point, buttons lights are flashing, and awaiting to be pressed for next operating action. d-2)If found Tail Clamp position beyond or more than 2±1mm, you need to manually adjust the Tail Clamp shaft position, either press on the button to have Drum rotates clockwise 2mm distance each time, or press on...
- Page 29 Operation Instructions operating action. d) Observe the plate on the Drum adsorption, if plate end not detach from Drum surface, you may manually peel the plate end off from Drum surface, and gently drag the plate onto the platform guide, press the button, device will automatic unload the whole plate until the Head Clamp position, button light is flashing, and waiting to be pressed for next operating action.
- Page 30 Operation Instructions 5.6HDI-1600 Plate Output: After clicking the job output command, the HDI device is ready for manual procedures on plate output HDI-1600 plate output buttons Label Description Status Used to switch back to manual adjustment during automatic (Flashing effective) loading For confirming the next step in the automatic loading process (Flashing effective)
- Page 31 Operation Instructions a) While in job “Output” command, or “Load Plate” command, the HDI device will proceeds with plate loading procedures. b) Device’s loading platform is ready at home position,the button’s light is flashing state. You may place the plate on the loading platform now. (Make sure to place the correct plate size according to template specification).
- Page 32 Operation Instructions be activated, and drum first rotates to a position where plate pressing roller is engaged to press and support on the plate before drum further continues to rotate until plate mounting comes to the plate end position. At this time, both buttons’lights are flashing, awaiting to be pressed for next operating action.
- Page 33 Operation Instructions f-1) Press on the button, loading platform will return to its original home position, and HDI device will starts output imaging. f-2)If button is pressed,loading platform is remained unmoved after lifted up(drum uncover), HDI device will proceeds with output imaging. Not advise for normal user operation. 5.6.2 Unloading process: a) Once job “Output”...
- Page 34 Operation Instructions light is flashing, awaiting to be pressed for next operating action. e) Press the button once again, loading platform will returned to its original home position,remove plate from platform and process completes. 34 / 55...
-
Page 35: Chapter 6:Systemmaintenance
Important: Strongly recommended that the following maintenance should be carried out by a trained engineer or under the direction of a CRON qualified engineer. 6.1Device internal cleaning & inspection procedures 6.1.1Drum surface cleaning: After certain period of usage, plate pressing roller (mounting roller) and... - Page 36 For HDI-600/HDI-920 series, open the right side service access cover of the device , you can observe and access Optical Power sensor and the optical lens section for cleaning;...
- Page 37 System Maintenance c) Manually move the scanning platform to the most outer side, dismantle the dust removal module(remove itsscrew located on upper side) in order to access to the lens. Clean the lens with special dust-free cotton bud or glass/mirror wiping paper; 6.1.3 Regularly lubricants level check: Equipment lack of oil could easily get rusted, causing overloaded and other mechanical problem.Please check/inspect gears structure regularly (eg: hood sliding gears, plate loading rocker gears), linear bearing rail, guide raillubrication conditions and guide rail oil...
- Page 38 System Maintenance 6.1.5 Check the scanning platform side screw, worknut lubrication and pitch cleanliness. Regularly top up lubricating oil, such as worknut pitch worn off(loose pitch) , replace the lead screw’s worknut. 6.1.6 Check the drum motor timing belt tightness and wear & tear conditions, if necessary, adjust the timing belt tightness or replace the timing belt if found fatigue.
- Page 39 System Maintenance 6.1.9 Remove the HDI device front lower casing, open the built-in vacuum cleaner(dedusting unit) to access to the filter. Clean or replace the filter core from time to time. 6.1.10 Inspect the cooling system unit:Coolant level can be observed through the round window shown below.
-
Page 40: Daily Routine Maintenance
System Maintenance 6.2 Daily Maintenance HDI Device daily maintenance itemize list Maintenance Cycle Attribute MaintenanceItems Inspection Cleanin Replacement H/Clamp torsion springs 40000 imp ---- ---- Lens/Optical Sensor cleaning 1-2 weeks 2 weeks ---- Front guide rail lubrication 12months ---- 24months Focus/Zooming mechanism lubrication 3months 6months... -
Page 41: Chapter 7:Abnormal Problems Analysis And Handling
Device inspection, diagnostic, handling and replacement of parts components should be only conducted by well trained and qualified technical personnel appointed by CRON. Technical personnel involve in diagnostic and troubleshooting works should remove all metal items from body before carry out the works. - Page 42 Consumables Parts and Spare Parts Error Message. Handling suggestion Please clean lens Do resolution adjustment and follow instructions to clean lens. ongle. Cannot find d Check dongle. Command execute failed! Do not send this command under current status Laser box temperature abnormal, cannot output! Turn off machine and use air-con to change temperature or current is:** degree,shall be 15-35 degree.
- Page 43 Consumables Parts and Spare Parts Error Message. Handling suggestion Tail clamp adjust failed. Please clean air slot on drum or Contact engineer Tail clamp position is over limit, please check. Please clean air slot on drum or Contact engineer Plate size is over limit (drum cannot be balanced!). Please clean balance block sensor or Contact engineer Vacuum pressure is not correct.
-
Page 44: Common Plate-Making Problems And Causes
Consumables Parts and Spare Parts 7.2Common plate-making problems and causes Table 7-2: Common plate-making problems and causes Problem description Cause analysis Typical results 1.Main exposure time too short Dots shoulder thin, low 2.Plate washing time too long run length, dots holding 3.Imaging power too low not strong 4.Dot compensation too low... -
Page 45: Common Instruments Used For Plate Testing Process
Consumables Parts and Spare Parts 7.3 Common instruments used for plate testing process Table 7.3: Tools used during plate testing process Description Figure 100X Optical Magnifier LED back lighting viewing board Thickness Gauge (0.001mm) 3D Dots Measuring Device 45 / 55... - Page 46 Consumables Parts and Spare Parts Transmission Densitometer Film Ruler (1.5m) 46 / 55...
- Page 47 Consumables Parts and Spare Parts Chapter 8: Consumables Parts and Spare Part 8.1 HDI-600Bundled Spare Parts List DESCRIPTION PICTURE TYPE Bundled with Parts Name Driver UIM24004(2.9A) new machine Parts No 022021080 Details Common driver for Drive Motors Bundled with Parts Name Optocoupler Sensor GK152-C/M new machine Parts No...
-
Page 48: Hdi-920Bundled Parts List
Consumables Parts and Spare Parts 8.2HDI-920Bundled Spare Parts List DESCRIPTION PICTURE TYPE Bundled with Parts Name Driver UIM24004(2.9A) new machine Parts No 022021080 Details Common driver for Drive Motors Bundled with Parts Name Optocoupler Sensor GK152-C/M new machine Parts No 022025063 Used on mechanism drive motors for Zero Details... -
Page 49: Hdi-1600Bundled Parts List
Consumables Parts and Spare Parts 8.3 HDI-1600Bundled Spare Parts List DESCRIPTION PICTURE TYPE Bundled with Parts Name Driver UIM24004(2.9A) new machine Parts No 022021080 Details Common driver for Drive Motors Bundled with Parts Name OptocouplerSensor GK152-C/M new machine Parts No 022025063 Used on mechanism drive motors for Zero Details... -
Page 50: Chapter 9:Appendixes-Wiring Diagrams
Appendix Chapter 9: Appendix -Wiring Diagram - IN - IN - IN - IN - IN - IN - IN - IN - IN - IN - IN - IN - IN - IN - IN - IN - IN - IN - IN - IN... - Page 51 Appendix 黑 black 蓝 blue 轴流风机 黑 black Axial flow fan 蓝 blue DC24V 黑 black 蓝 blue 红 red 黄 yellow 蓝 blue 51 / 55...
- Page 52 Appendix 52 / 55...
- Page 53 Appendix 黑 black 蓝 blue 轴流风机 黑 black Axial flow fan 蓝 blue DC24V 黑 black 蓝 blue 红 red 黄 yellow 蓝 blue 红 red 黄 yellow 蓝 blue 53 / 55...
- Page 54 Appendix 54 / 55...
- Page 55 Appendix 上海衡孚开关电源 HENGFU Switch Power Supply HF25W-SL-5 黑 black 蓝 blue 黑 black 蓝 blue 上海衡孚开关电源 HENGFU Switch Power Supply HF320W-SC-24 黑 black 蓝 blue 红 red 黄 yellow 红 red 蓝 blue 黄 yellow 蓝 blue DSD-P 制动电阻 Break Resistor 400W10Ω...
Need help?
Do you have a question about the HDI-600 and is the answer not in the manual?
Questions and answers