Table of Contents
Advertisement
Advertisement
Table of Contents

Subscribe to Our Youtube Channel
Summary of Contents for CAME BlueForce Smart
-
Page 2: Table Of Contents
The SMART features of the Came Test allows the integrated NFC or Bluetooth hardware to see the data of the tests taken with the relative graphics directly on smartphone and tablets. -
Page 3: Initial Use - Instrument Functions
Initial Use - Instrument Functions ATTENTION! It is recommended to upgrade the FIRMWARE of the instrument to the latest available version To view the firmware version, refer to the instructions on page 13. To update the firmware, visit the download page of the Microtronics site: www.microtronics.it INSTRUMENT FUNCTIONS Short press <0.5 sec. - Page 4 Initial Use - Instrument Functions bLUE: (only for SMART enabled devices) give a long press on the right button to send the test parameters to the mobile device with iOS or NFC. See also Sending Memorised Tests on page 7. (NOTE: this function is not active if the device is connected to the PC via the USB cable).
-
Page 5: Instrument Functions - Detail
Instrument Functions - Detail FUNC SPECIAL MENU: When scrolling through the memorised tests, users can select the FUNC special menu, present between the first and last tests. This menu contains several functions: CANC, Aur, SENd, PCON, dAtE, Hour, CAL, PASS (the last one is present only if the bluetooth and NFC functions are disabled, see next section for detai To access the "sub-functions"... - Page 6 Instrument Functions - Detail ARITHMETICAL AVERAGE OF THE TEST VALUES To calculate the average, proceed as follows: any three of the tests performed can be used to calculate the average, e.g. : Test 01, Test 02 and Test 04. After reading the Test 01 parameters, the right button can be used to make the CANC function appear, followed by the Aur function. Pressing the right down for 2 seconds makes the Aur function disappear and the test is marked with a dot underneath it;...
-
Page 7: Using The Ftp Thermal Printer
Using the FTP Thermal Printer TEST VALUE PRINTOUT Test printout is possible for every single test memorised, after reading of the parameters: Fd -> td -> FS -> FE -> bLUE -> Prnt -> Aur - > dAtE -> Hour -> CANC . -
Page 8: Smart Functions-Sending Tests And Enabling
3) Long press the right button on the bLUE function and the test will be sent to the BlueForce Smart App; scrolling dots will appear underneath the word bLUE to indicate that the test is being sent (see below for a practical example) -
Page 9: Smart Functions - Using The Smart App
NFC symbol. BLUEFORCE SMART APPLICATION FUNCTIONS After sending the required test with the Came Test instrument, the device (smartphone, tablet etc.) will show this page, containing all information on the measurements taken (see details below). To display to correct graph according to the effective port and measurement point, the correct selection must be made via the relative icon: setting of the measurement type and points, then confirming by pressing OK-Confirm to re-process the parameters and display the results on the basis of the selected port and measurement point. -
Page 10: Installation - Blueforce Software For Windows Pc
Installation - BlueForce Software for Windows PC BLUEFORCE SOFTWARE FOR WINDOWS PC - DOWNLOAD Web link to download the BlueForce software for Windows PC: www.microtronics.it/attivazione_came.html To download updates, follow the instructions on the page: www.microtronics.it/download_came.html WARNING !!! The file is not harmful and enables/allows your Browser or Antivirus program to download the file Setup_blu_came_en.zip or update_blueforce_en.zip BLUEFORCE SOFTWARE FOR WINDOWS PC - INSTALLATION Download the file Setup_blu_came_en.zip, then extract the two files onto the computer desktop... -
Page 11: Usb Driver - Blueforce Software For Windows Pc
USB driver - BlueForce Software for Windows PC For instruments with USB interface, the DRIVER INSTALLATION instrument must be connected to the PC using USB CABLE - SUPPLIED the USB cable provided as shown (there is no need to switch the instrument on). For instruments with Bluetooth interface, connect the DRIVER INSTALLATION Plug'n Go! device to the PC’s USB socket as shown. -
Page 12: Serial Port - Blueforce Software For Windows Pc
Serial Port - BlueForce Software for Windows PC RECOGNITION FAILURE – SERIAL PORT ERROR If the message "serial port of pinch-force not open!" appears, the installation procedure described above has not been followed correctly. Use the manual serial port configuration procedure as described below: SERIAL PORT RECOGNITION The following procedure can be followed to ensure correct Serial Port recognition: Open the Control Panel... -
Page 13: Blue Force Software-Main Functions
Main functions of the Software BLUE FORCE SOFTWARE-MAIN FUNCTIONS (1) Main menu and commands: Print, new door, client, etc. (2) List of tests transferred from the gauge (3) Door typology (to perform the tests on the list straight away) (4) Tests moved/copied on point ofmeasurement (5) Details of the measuring points and relative heights (6) Details of the type of door and the relative... - Page 14 Blue Force Software - details Selection of the type of gate. The evaluation of test result, is carried out based on current selection of type of gate (sliding door, hinged door, tilting door, barrier, etc.) and on current measuring point. Therefore, this selection determines the validity (or not) of the result shown by Gauge.
- Page 15 Blue Force Software - details FURTHER DETAILS (RIGHT-CLICK) WARNING!! The right hand button of the mouse can be used at several stages. Use of this button activates short cuts for carrying out important functions such as Print, Delete, Copy, etc. Print PDF file / Edit / Erase Export / Import Client, Door, File Grid, Zoom (on graph only)
- Page 16 Blue Force Software - details Import door from file: this allows a door exported previously to be associated with a client (and entered in the database). To import the door, simply open the doorname.txt file found in the directory [door name] created with the “Export door to file” command. Associate test: by entering an impact test taken in a certain measurement position using the ‘Associate test’...
- Page 17 Blue Force Software - details FULL SCREEN GRAPH MODE The File -> Settings -> Graph menu offers a choice of two graph display functions: Normal and Full Screen. The default setting is Normal, while the Full Screen function allows the graph to be enlarged to occupy the whole of the screen.
-
Page 18: Blueforce Software - Detail
Blue Force Software - details BLUEFORCE SOFTWARE (Main menu) File: New verifier: It permits to create a new verifier. Pocket PC: It establishes the connection to pocket-PC (if presents), showing an additional window on the left, that represents the list of tests saved. Settings: Serial Port: It permits to select the serial port, associated with the instrument Info: It shows instrument data (serial number, calibration date) -
Page 19: Using The Came Test Instrument
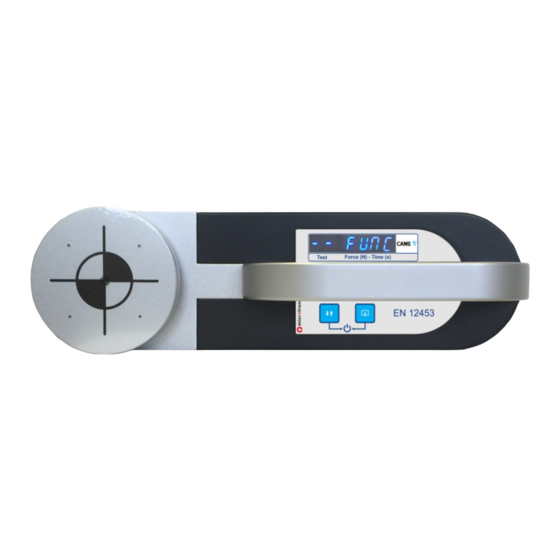
Instrument Use CARES FOR PROPER USE OF THE INSTRUMENT ATTENTION ! Follow the rules of "proper use and safety on work» ATTENTION ! Don't expose the instrument to high temperature (>80°C) ATTENTION ! Don't dip the instrument in any liquid. USE OF THE INSTRUMENT The Instrument is composed by: (1) Head... -
Page 20: Fitting Accessories
Accessory Assembly ACCESSORY ASSEMBLY LINEAR ACCESSORY 30-50 cm. (Picture 1) Tests based on EN 12445 norm, impose points of measure and distances well defined. For 30 cm and 50 cm it is necessary the linear accessory 30-50cm. MOUNT THE INSTRUMENT HOLDER (Picture 2-3) Remove the central screw of the handle, by means of enclosed hexagonal key. -
Page 21: Information Annex - En12453
Informative Appendix INFORMATIVE APPENDIX (questions and answers) Below there are listed the most common questions, asked by technicians. For closer examination, please refer to the norm EN 12453. Briefly, what does the EN 12453:2017 norm speak about? The EN 12453 norm “Industrial, commercial and garage doors and gates – Safety in use of powered operated doors – Requirements and test methods”... -
Page 22: General Provisions
General Info INSTRUMENT MAINTENANCE If possible, always put away the Instrument into its suitcase. To replace the 9V battery, you have to proceed in the following manner: unscrew the rear lid, remove the clip-connector from the exausted battery, replace the battery with an equivalent one (high capacity Alcaline), and close again the lid with screws, paying attention to embed correctly the battery on the lid seat. -
Page 23: Technical Data - Ce Certification
Technical Data - Certification TECHNICAL DATA Dimensions and Weight: 280x80x50mm - approx. 1.6 Kg Power supply: 9V alkaline battery Memory capacity: 80 tests Force acq. interval: 6 sec, sampling at 1kHz Force measurement range: 0-2000N (mechanical stop at approx. 2100N) Force measurement resolution: 1N Dynamic time measurement resolution: 0.01s Maximum force measurement error margin: range from 25 to 200N: +/- 0,5% F.S;...
Need help?
Do you have a question about the BlueForce Smart and is the answer not in the manual?
Questions and answers