Table of Contents
Advertisement
Welcome
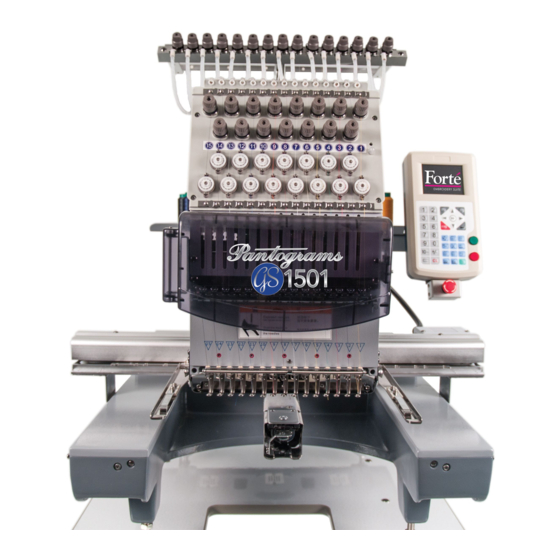
Congratulations on the purchase of your GS1501 Embroidery Machine and becoming part of the Pantograms
team. This JUMP START kit includes all the necessary information to help you get started as quickly and eas-
ily as possible. After reading this manual, be sure to watch the enclosed CD about our Forté software.
Service and Support ................................................................................................................................. 1-1
Unpacking Your GS1501 Embroidery Machine ........................................................................................ 2,3
Setting Up Your GS1501 Work Station ............................................................................................... 4,5,6,7
Setting Up Your GS1501 Embroidery Machine .....................................................................................8,9,10
Threading the GS1501 .................................................................................................... 11,12,13,14,15,16,17
Attaching the Tubular Arms ...............................................................................................................18,19,20
Tracing the Design ............................................................................................................................... 21,22
Installing the Cap Driver and Embroidering the Test Cap Design .............................................. 23,24,25,26
The GS1501 Control Panel .............................................................................................................. 27,28,29
Hooping Material on a Round Hoop .......................................................................................................... 30
Installing Forté Embroidery Suite Software ............................................................................................... 31
How to Load a Job ..................................................................................................................................... 32
EMBROIDERY BASICS (section 2)
Stitch Formation ........................................................................................................................................ 2-1
Needles ........................................................................................................................................................ 2
Thread .......................................................................................................................................................... 4
Bobbins ........................................................................................................................................................ 5
Backing ..................................................................................................................................................... 6,7
Stitch Troubleshooting.................................................................................................................................. 8
Needle, thread and Stabilizer Chart ............................................................................................................ 9
Tension ........................................................................................................................................................11
Hoops ........................................................................................................................................................ 12
Hooping Aids .............................................................................................................................................. 13
Tools .....................................................................................................................................................14,15
Hooping Technique ................................................................................................................................16,17
Hooping a Structured Cap ......................................................................................................................... 18
Hoopless Frame Technique ....................................................................................................................... 19
Hooping a Large Item or a Jacket Back ..................................................................................................... 20
Attaching a Large Hoop to the GS1501 ..................................................................................................... 21
Hooping a Satin Jacket .............................................................................................................................. 22
Common Hooping Problems ...................................................................................................................... 23
Embroidery Placement .................................................................................................................... 24,25,26
Anatomy of a Cap ....................................................................................................................................... 27
MACHINE BASICS (section 3)
GS1501 Embroidery Machine ................................................................................................................... 3-1
Setting the Upper Thread ............................................................................................................................. 3
Bobbin Placement in Case ........................................................................................................................... 4
Common Adjustments - Thread Breaks ...................................................................................................... 5
Setting the Upper Thread Tension .............................................................................................................. 6
Thread Looping ........................................................................................................................................... 7
Cleaning the Machine .................................................................................................................................. 7
GS1501 Control Panel .................................................................................................................8,9,10,11,12
1
Oiling the GS1501 ............................................................................................................................. 13,14,15
Advertisement
Table of Contents

Summary of Contents for Pantograms GS1501
-
Page 1: Table Of Contents
Welcome Congratulations on the purchase of your GS1501 Embroidery Machine and becoming part of the Pantograms team. This JUMP START kit includes all the necessary information to help you get started as quickly and eas- ily as possible. After reading this manual, be sure to watch the enclosed CD about our Forté software. - Page 2 EMBROIDERY SOFTWARE (section 4) Looking at the Work Area.......................... 4-1 Basic Digitizing ............................. 2 EMBROIDERY BUSINESS (section 5) Pricing ..............................5-1 Stitch Count ..............................2 Digitizing Fees and Decisions ........................3 Copyright, Trademark and Licensing ....................... 4,5 Stock Designs ............................. 6 GLOSSARY AND RESOURCES (section 6) Glossary of Embroidery Terms .........................
-
Page 3: Getting Started (Section 1)
Getting Started with Your Pantograms GS1501 Embroidery Machine Thank you for choosing Pantograms as your embroidery system provider. We strongly recommend you to read the following instructions for setting up the embroidery machine and sewing your first test designs. Service and Support The talented and knowledgeable people in our service and support department are ready to assist you should questions or problems arise. -
Page 4: Unpacking Your Gs1501 Embroidery Machine
Unpacking Your GS1501 Embroidery Machine Contents of box containing the workstation: • Embroidery machine • Thread stand • Tabletop • Workstation • Cap option • Tubular hoop holder • Tool kit • Sample test design • Starter kit • Owner’s manual •... - Page 5 Unpacking Your GS1501 Cut and remove the straps that encircle the box. Remove the box lid. Remove the inner tray containing the hoops and other accessories. Remove the workstation components. Replace the lid on the box to assemble the workstation.
- Page 6 (4) Four Casters Assorted fasteners You will need 5mm and 6mm Allen wrenches and a 12mm wrench or socket for the assembly process. These tools can be found in the toolbox that was included with your GS1501. Side of Workstation Table Tops...
- Page 7 Step 1 - Fasten back support to one side frame. Step 2 - Fasten other side frame to back support. Step 3 - Stand workstation frame upright. Step 4 - Place lower shelf onto supports.
- Page 8 Step 5 - Line up holes in shelf and support. Insert bolts through holes in both shelf and support and attach nut. Step 6 - Place table top on workstation. Line up holes and insert bolts through both table top and frame and attach nuts. Step 7 - Flip workstation over so that it is sitting on its table top.
- Page 9 Step 10 - Tighten bolts holding lower shelf and table top being careful not to over tighten. Step 11 - Insert plugs to cover bolts holding back support and side frames. You have now completed assembly of the workstation and it is ready to receive your GS1501.
- Page 10 Unpacking the GS1501 Remove the cover and lift off the outer shell of the GS1501 box. Two people can now lift the machine at its base and place it on the workstation. One person should carefully lift the back of the machine while the other inserts the feet into the treaded holes at each corner.
- Page 11 GS1501 Setup Remove the Phillips screw from the top of the two posts that will sup- port the thread tree. Using a 2.5mm Allen wrench, loosen (but do not completely remove) the set screw in the post then raise the post up to its final position and re-tighten the set screw.
- Page 12 Using the screws that were previously removed, attach the thread tree to the posts and tighten. You are now ready to install the thread on your GS1501...
- Page 13 Threading Your GS1501 Unwrap the thread tails from the post on the right and left hand sides of the machine. Carefully separate the thread by gently running your fingers through the bundle. Attach each of the thread tubes to the thread tree.
- Page 14 Take the end of the thread and insert through the eyelet next to the top tensioner for each thread. Run each thread from the eyelet through the thread tree. The following chart shows how each thread corresponding to each needle should be passed through the thread tree.
- Page 15 To remove the wrapper, simply hold the plasic firmly and twist and pull. Remove the adhesive label from the bottom of the thread cone by pushing in at the center, then discard.
- Page 16 To release the tail of the thread unsnap the base of the cone, and unwind until the thread is completely out of the base. Place the colors on whatever needle number you choose. Repeat the above steps for the other 14 cones and place on the thread rack.
- Page 17 How to tie a surgeon’s knot Using a pair of tweezers, carefully pull the thread loose from the Vel- cro bar. Make sure to grasp the thread behind the needle; gently pull the thread until the knot is just in front of the needle. Once the knot is directly in front of the eye of the needle, pull it out so that it lines up with the eye, and pull gently and the knot should pass through.
- Page 18 Now continue to gently pull the thread through the needle and presser foot and pull it into the spring at the front of the needle case then trim the thread above the spring. Gently pull enough thread from the cone and loop it to the right of the upper tensioner.
- Page 19 Remove any slack by pulling the thread back towards the cone of thread Repeat the above steps until the GS1501 is completely threaded. Note: Plug the power cord into the back of the machine and then into a standard 110 power outlet. We do recommend the use of an uninteruptable power supply (UPS) or a high quality surge protector to help protect your investment.
-
Page 20: Attaching The Tubular Arms
Attaching the Tubular Arms The tubular arms are what holds the hoop in place during normal embroidery and are very easy to attach. Install the left arm as shown below, notice which notches should be used, and also how the arm is attached to the pantograph. Tighten securely with the Allen wrench. - Page 21 Slide in the pre-hooped fabric, which you received with your GS1501 and push it forward until it locks in place. Press the #1 key on the control panel to move to needle #1.
- Page 22 Use the arrow keys on the control panel to center the needle in the hoop, you can use a standard ruler to measure from the needle to each side, and from the needle to the front and back of the hoop to make sure it is centered.
-
Page 23: Tracing The Design
Tracing the Design It is very important that you trace before embroidering. If you do not trace and hit a hoop you could cause damage to your GS1501 that is not covered under warranty. To trace press the Home button. - Page 24 Once the trace is completed, and you are satisfied with the centering of the hoop, press the green Start button to begin embroidering. The design will take approximately seven minutes to complete and will run through all needles. Completed design. To remove the hoop from the arms, lift up on the hoop while pressing down on the arms and pull it out of the holder.
-
Page 25: Installing The Cap Driver And Embroidering The Test Cap Design
Installing the Cap Driver and Embroidering the Test Cap Design Remove the tubular arms by loosening but not completely removing the Allen screws. Set these aside for future use. Slide the cap drive into place as shown. On the underside of the cap driver there are four rollers; these roller should align with the guide rail on the underside of the arm. - Page 26 When these are aligned correctly the cap driver will slide smoothly back towards the pantograph. The mounting screws will line up as shown. Use a Phillips screw driver to tighten the mounting screws on both the left and right sides. To load the cap test design, you must first exit embroidery mode by pressing the Embroidery Status Button...
- Page 27 Next press Enter to Confirm. Now press the Hoop / Cap Key to change to cap mode. Then Press the Enter Key to confirm. Then enter one more time when you see the message “Limit Switch work normal.”...
- Page 28 Press the Design Management Button At 1 press enter to select design for embroidery. Use the arrow keys to move to Embsup~1.mem and press Enter to select. Press enter one more time on the design information screen. Press Embroidery Status key. Press Enter.
-
Page 29: The Gs1501 Control Panel
GS1501 Control Panel Please refer to the diagram to familiarize yourself with the various buttons and functions. - Page 31 The Control Panel Display...
- Page 32 Hooping Material on Tubular Hoop • Take the 18cm hoop (included in the starter kit) and separate the two rings, placing the bottom ring on a flat surface with the tension screw towards you. • Place a piece of fabric and a piece of heavy cut-away backing on top of the bottom ring; make sure the material extends beyond the hoop and evenly all around.
-
Page 33: Installing Forté Embroidery Suite Software
Step 2 Click on Install Forte Software. Step 3 Exit After installing Forte, go to the following Website to install updates: www.pantograms.com/machinesupport.asp and scroll down to your level of software. Drawings Converter Installation 1. Insert Drawings CD. 2. Follow the Auto Run instructions. -
Page 34: How To Load A Job
How to Load a Job 1. Plug the USB drive into side USB port and attach hoop with garment and backing. 2. Press the EMB status key - Exit EMB status? Yes. Press enter. 3. Press the design input key. 4. -
Page 35: Stitch Formation
Stitch Formation Knowing the fundamentals of a stitch helps you solve sew out problems, perform machine maintenance and avoid downtime. Embroidery machines create a straight stitch called a 301 lock stitch using a rotary hook and bobbin. The rotary hook, also known as the hook assembly, consists of two parts: the hook basket (where the bobbin case sits) and the hook body (which rotates around the basket). -
Page 36: Needles
GS1501. Titanium needles are sold under different names such as “gebedur” by Groz-Beckert and “perfect durability” by... - Page 37 Specialty Needles Anatomy of a Needle Teflon or “Cool-Sew” coated needles are green in color and allow for higher speeds without the usual heat buildup from Butt running machines at 1,200 stitches per minute. They also offer better performance with adhesive and sticky-type backing preventing less gum build up on the needle.
-
Page 38: Thread
Thread When selecting thread for an embroidery project, always choose high quality machine embroidery threads. These threads come in a variety of weights from 30-weight to 120-weight. The higher the weight number, the finer the thread. The most common thread for machine embroidery is 40-weight polyester. Polyester thread is made from polyester fibers and is colorfast making it resistant to fading, sun, saltwa- ter and industrial laundering. -
Page 39: Bobbins
Bobbins You have a choice of winding your own bobbins or buying pre-wound commercial bobbins in disposable car- tridges. Self-wound bobbins tend to be inconsistent in the way the thread releases from the spool. A smooth, consistent release of thread is required in high-speed commercial embroidery machines. Self-winding is not recommended unless there is a unique color needed in small runs. -
Page 40: Backing
Backing Backing also known as stabilizer is the foundation for good embroidery. It is designed to support, or even replace, fabric under the stress of dense and multi-directional embroidery stitching. In conjunction with the embroidery hoop, backing helps hold the fabric as flat as possible to prevent distortion in the embroidery design. -
Page 41: Backing
Cut-away Cut-away backing provides the most stability. It also offers the sharpest embroidery on highly detailed designs that includes small lettering. Cut-away backing is denser with slightly longer fiber which grabs the thread better and allows tighter registration. It is highly recommended for knit fabric because it prevents the design from stretching out with frequent wearing and washing. - Page 42 Thread Break Troubleshooting Lower thread path and bobbin Improper Hook Timing. If thread breaks are occurring frequently on all sewing head’s needles. Lower Thread Path Problems. Make sure the bobbin is installed properly. Remove any lint or dirt build-up. Make sure the thread trimmer knife is fully retracted. Upper thread path and needle Improper Needle Depth.
-
Page 43: Needle, Thread And Stabilizer Chart
Needle, Thread and Stabilizer Chart Material Needle Thread Backing Topping Other Balsa Wood 75/11 - Adhesive tear-away Could use water Use spray adhesive glue 90/14 weight soluble but don’t with tear-away Sharp remove with water, just tear off Blanket 75/11 Cutaway Water soluble Needs good underlay... - Page 44 Needle, Thread and Stabilizer Chart Material Needle Thread Backing Topping Other Jelly Plastic 75/11 30 - 40 Adhesive tear-away, None Use adhesive tear-away Sharp weight wash-away to hold material to hoop but leave an opening where the embroidery design will be placed. Lay the water-soluble stabi- lizer under the adhesive tear-away to stabilize the...
-
Page 45: Tension
Excess dust and lint along the thread path can affect the thread tension. Checking Tension on GS1501 Machines To check for proper thread ten- sion, perform the “GS1501.dst” that is loaded in your embroidery machine. Check your bobbin case every... -
Page 46: Hoops
Hoops There are several types of hoops: tubular, magnetic, jacket back, hoopless frames and cylindrical attach- ments. The purpose of the hoop is to connect the fabric to the machine in a tight stable environment, so the fabric doesn’t move or distort as it is being sewn. Attachment ears on the hoops vary from one manufacturer to another so it is important to specify the machine manufacturer when ordering hoops. -
Page 47: Hooping Aids
Hooping Aids Hooping aids like the placement guide, hooping boards (hoopers) and laser alignment systems help make the task of positioning the hoop and placement of embroidery, easy and consistent from garment to garment. Embroidery that is in the same position and straight throughout the garments can be a time consuming skill to master. -
Page 48: Tools
Tube Threader A tube threader makes it easier and faster to load your thread into your GS1501 machine. This along with canned air, will increase your productivity and reduce the time you spend preparing your machine for use. Embroiderer’s Buddy Let the Embroiderer’s Buddy put your embroidery in it’s place! Achieve perfect and consistent embroidery... -
Page 49: Tools
Tools Scissors and Nippers There are many different types of scissors, nippers and specialty cutting instruments on the market. Each one has its purpose. Most embroiderers will have several types of cutting instruments to handle the cutting jobs in their shop. They are crafted from plastic, steel and other metals, and all price ranges. -
Page 50: Hooping Technique
Hooping Technique One of the most important techniques to learn for successful embroidery is hooping. Hooping is simply the act of placing a sandwich of stabilizer/backing and material within a frame so it can be attached to the ma- chine with the proper amount of tension. Tubular Hoop Technique First the material to be hooped should be taut, but not so tight it stretches in the hoop. - Page 51 Hoop Burns A common problem with hooping, hoop burns happen when the hoop is rubbing the fabric and leaves a ring on the finished garment/fabric after the hoop has been removed. Some types of fabrics hoop burn easily, such as velvet and silk. Hoop burns can be taken out of some fabrics with a steamer or Magic Sizing. To help prevent hoop burns and add more stability to the fabric, try placing another piece of backing on top of the fabric/garment and carefully cut out a window for the embroidery design.
-
Page 52: Hooping A Structured Cap
Hooping a Structured Cap 1. Attach cap driver by aligning the four rollers on the bottom of the cap driver with the guide rail on the underside of the arm. When aligned correct- ly, the cap driver will slide smoothly back towards the patograph. -
Page 53: Hoopless Frame Technique
Hoopless Frame Technique Hoopless window frames are the perfect solution for those hard to hoop items such as pockets, cuffs, collars and bags or anything that would be difficult to place in a hoop. They come with several different size window frames that are interchangeable. -
Page 54: Hooping A Large Item Or A Jacket Back
Hooping a Large Item or Jacket 1. Take the large hoop and separate the two rings placing the outer ring on a flat surface. 2. Cut a piece of cut-away backing material approximately 2-inches larger then the hoop and lay it on top. Make sure the excess backing is extending beyond the hoop evenly all around. -
Page 55: Attaching A Large Hoop To The Gs1501
Attaching a Large Hoop to the GS1501 1. Loosen the 3mm nuts on the left arm and right arm and remove arms. 2. Now take left arm and attach arm in the last two notches on the pantograph arm. Take the right arm and atach in the last two notches on the right side. -
Page 56: Hooping A Satin Jacket
Hooping a Satin Jacket Satin Jackets have all the characteristics of being a challenge to embroider. The slick, shiny material makes it difficult to hoop. Just when you think you have it all lined up properly in the hoop, you press down on the hoop to secure the jacket and the material slides causing the design to be off center. -
Page 57: Common Hooping Problems
Common Hooping Problems Proper hooping is one of the most challenging and important machine embroidery skills. Hooping the item correctly is critical to obtaining a professional result. Improper hooping can cause a myriad of issues such as misalignment of the design on the garment, puckering of the fabric , thread looping or breaking, or design reg- istration issues (when the stitches don’t line up or “register”... - Page 58 Home Decor - Monogram Placement Item Placement Size Bath Sheet Centered, 4" (101.6mm) above hem or 5" (127mm) 3" (76.2mm) above border Bath Towel Centered, 4" (101.6mm) above hem or 3" - 4" (76.2mm - 101.6mm) 2" (50.8mm) above border Hand Towel Centered, 2"...
- Page 59 Children’s Garments - Monogram Placement Garment Placement Size Center on bib .25" - .5" (6.35mm - 12.7mm) Shirts and Blouses Left front 3" - 5" (76.2mm - 127mm) from shoulder .25" - .5" (6.35mm - 12.7mm) seam and halfway between placket or center front and sleeve.
- Page 60 Men’s Garments - Monogram Placement Garment Placement Size Dress Shirt Collar Left side, .25" (6.35mm) above buttonhole from .25" - .375" (6.35mm - collar point centered. 9.52mm) Dress Shirt Cuff For top center of wrist, start 1" (25.4mm) from cuff .375"...
-
Page 61: Anatomy Of A Cap
Anatomy of a Cap Cap Style Guide 5 Panel Embroidered Eyelets Button Seamless front panel is reinforced with fused cotton buckram to provide sturdy front; has four sewn eyelets for ventilation; top of front seam is top stitched; has smooth, wide front area for decoration. - Page 62 Notes:...
- Page 63 GS1501 Main Components Upper Tensioners Lower Tensioners Operation Panel Safety Cover Pantograph Bobbin Tubular Hoop Holder Presser Foot...
-
Page 66: Bobbin Placement In Case
Bobbin Placement in Case Pigtail Latch Bobbin goes into bobbin case clockwise Bobbin tension screw Side view of bobbin in bobbin case, Wrap thread follow arrows around pigtail for thread path two times Turn this screw to adjust bobbin tension, 1/4 turn makes a significant change View looking inside... -
Page 67: Common Adjustments - Thread Breaks
Common Adjustments - Thread Breaks Always inspect needle position and determine if actual thread break has occurred. If no thread break is ap- parent, check all the thread paths. Then do a manual trim and check the bobbin supply. If thread has broken, follow the correct thread path and rethread the needle. -
Page 68: Setting The Upper Thread Tension
Setting Upper Thread Tension 1. Adjust the tension knob until the top of the plastic knob is flush with the top of the chrome post. 2. Follow the chart below to SET the tension knob for the type of thread you are using. Polyester threads require nearly twice the amount of tension as rayon. -
Page 69: Thread Looping
Thread Looping Always check the thread path first. Thread should pull smoothly through the thread path with no obstructions. Thread Tension Adjustment Typical Causes Solution Upper thread tension is too loose Tighten upper tension. Elasticity in the thread Tighten upper thread tension. Adjust take up spring, adjust the length of the take up spring, try a different brand of thread. - Page 72 Control Panel Keys Number/Key Pad Expansion Key Clear Speed Control (down) Speed Control (up) Escape Key Enter Key Any selections made must be confirmed by hitting Enter Position Arrows Hoop Movement Speed Switches speed of hoop movement from slow to fast Rotate Design Watch the F on the LCD screen...
- Page 73 Design Management 1. Select design for embroidery 2. Input design into memory (for loading an embroidery design into the memory of the embroidery machine via USB memory) 3. Output Memory Design 4. Copy Memory Design 5. Repair Memory Design 6. Delete Memory Design 7.
- Page 74 4. Contour Range Check - traces the outline of the design * Contour is recommended* 5. Design Range Check - traces in a rectangle or square going to the four outermost cor- ners of the design Service Technician Key - For further assistance contact Pantograms at 1.800.872.1555.
- Page 75 Press the Trimming Key 2-3 times. Locations That Require Lubrication Every 2 Weeks or 80 Hours of Operation 2. Each needle bar needs a single drop of oil once a week. There are a total of 15 on the Pantograms GS1501.
- Page 76 3. Located in front of the hand wheel on the right side of the machine there are 3 oiling spots marked in red. Lubricate with a single drop of oil. 4. Located on the same side as the hand wheel towards the back of the machine there is an oil spot marked in red.
- Page 77 7. Locate the hole behind the needle plate and lubricate with a single drop of oil. 8. Further back on the arm is a second hole towards the back. Lubricate with a singel drop of oil. Daily Maintenance Remove bobbin and blow out the rotary hook area with canned air. Weekly Maintenance Remove needle plate and blow area out with canned air.
- Page 78 Notes:...
-
Page 79: Looking At The Work Area
Looking At The Work Area Included with your level of Forté Embroidery Suite is a complete user manual. This manual along with the Forté Workbook on the following pages and EMBROIDERY SOFTWARE TRAINING CD will provide you with the tools to edit digitized designs or even master digitizing your own designs. Menu Bar Tool Bar Selection... - Page 80 Digitizing Basics Choosing a Stitch Type • Satin or Complex Fill - The easiest way to decide what stitch type to use is to measure the maximum width that will be generated when the object is digitized. In general, satin stitch is suitable for widths less then 8mm.
-
Page 81: Pricing
Pricing “Work smarter, not harder” Pricing is the core of your business and every new business owner wants to make sure he/she is charging the best price for the most return. After all, you got into this business to make money and support your family. One thing is important to remember, pricing must be consistent with an image. -
Page 82: Stitch Count
Stitch Count How many stitches per hour does your business generate? How many minutes of sewing are achieved in a typical hour? The average single head shop generates 4-6 hours of sewing and runs 1000 stitches per minute (even though the machines are capable of stitching 1200 this takes into account the complexity of the designs and materials used.) The remaining time is dedicated to production preparation, machine downtime, and administrative duties. - Page 83 The national averge for design creation/digitizing runs from $7 - $15 per thousand stitches. Remember price structures in this country varies from region to region. Pantograms recommends that you contact other embroiders within a 50 mile radius of your location to see what prices are in your area. If your business is reaching a niche market or creating specialty work your prices should be higher.
-
Page 84: Copyright, Trademark And Licensing
Copyright, Trademark and Licensing It is important for every business owner to fully understand the legal issues of copyright, trademark and licensing. A business owner could face huge fines and losses if they infringe on someone else’s copyright or trademark. Copyright Copyright is a form of protection to authors of “original works of authorship”... - Page 85 Trademark A trademark is a word, phrase, symbol or design, or a combination of words, phrases, symbols or designs that identifies and distinguishes the source of the goods of one party from those of others. To obtain your own trademark or for more information visit http://www.uspto.gov or write: General Information Services Division U.S.
-
Page 86: Stock Designs
Stock Designs Stock designs are a valuable resource to an embroidery shop. Today, there are so many choices available. But choosing the right designs for your business library is critical to your success as an embroiderer. Not all stock designs are the same when it comes to quality and market appeal. There are several things to consider when choosing stock designs: Quality Designs The designs need to run well and be production friendly. -
Page 87: Glossary Of Embroidery Terms
Glossary of Embroidery Terms Appliqué – decoration or trimming cut from one piece of fabric and stitched to another to add dimension and texture. If appliqué occupies a significant amount of the design, the stitch count is lower. Backing – woven or nonwoven material used underneath the item or fabric being embroidered to provide sup- port and stability. - Page 88 Embroidery – decorative stitching on fabric. Generally involves non-lettering designs but can include lettering and/or monograms. Evidence of embroidery exists during the reign of Egyptian pharaohs, in the writings of Homer and from the Crusaders of the 12th century. Evolved from hand work to manual sew- ing machines and from hand-looms and schiffli machines with hundreds of needles to high-speed, computer- ized multihead machines.
- Page 89 Pull Compensation – a degree of distortion built into a design by the digitizer to compensate for pull on the fabric caused by the embroidery stitches. Punching – conversion of artwork into a series of commands to be read by an embroidery machine’s com- puter.
-
Page 90: Glossary Of Embroidery Machine Terms
Glossary of Embroidery Machine Terms Arm Machine – multihead embroidery machine driven by a single main shaft. Each sewing head is attached to the shaft, usually by gears. Sewing heads resemble industrial sewing machines in the “arm” that the needle case is attached to. Bobbin Case –... -
Page 91: Fabric Terminology
Fabric Terminology Broadcloth - a plain weave tightly woven fabric, characterized by a slight edge effect in one direction, usually the filling. The most common broadcloth is made from cotton or cotton/polyester blend. Colorfastness - a term used to describe a dyed fabric’s ability to resist fading due to washing, exposure to sunlight, and other environmental conditions. -
Page 92: Industry Trade Shows
Industry Trade Shows The Imprinted Sportswear Shows www.issshows.com NBM Shows www.nbmshows.com Embroidery Mart www.embroiderymart.com Original Sewing & Quilt Expo www.sewingexpo.com SGIA – Specialty Graphic Imaging Association www.sgia.org Decorating Apparel Expo www.daxshow.com American Sewing Expo www.americansewingexpo.com Trade Organizations The National Network of Embroidery Professionals www.nnep.net Embroidery Trade Association (ETA) www.embroiderytrade.org...
Need help?
Do you have a question about the GS1501 and is the answer not in the manual?
Questions and answers