Table of Contents

Subscribe to Our Youtube Channel
Summary of Contents for HeMaTech 3925-0050
-
Page 1: Leak Tester 3925 - 0060
leak test flow test volume test test systems test machines Leak Tester 3925 – 0060 Operating Instructions EN 3925-0060 V207-00 MANUAL R03.doc Please read these instructions, before installing, starting up, storing or handling this device. - Page 2 Any trademarks referred to in this manual are the sole property of the corresponding owner. HeMaTech Prüftechnik GmbH & Co. KG Siemensstrasse 7 DE-71409 Schwaikheim Phone +49 (0)71 95/13 69 0 Fax +49 (0)71 95/13 69 29 Internet http://www.hematech.de © 2010 All rights reserved Edition 07/2010 EN 3925-0050 V205-00 MANUAL R01.doc...
-
Page 3: Table Of Contents
Contents Leak Tester 3925 – 0060 ........... 1 Operating Instructions ............1 Introduction ..............7 Concerning these operating instructions ..........7 Intended use ..................8 Warranty..................... 9 Structure of the manual ..............10 Safety measures .............. 12 Safety notes ..................12 Symbols used .................. - Page 4 3.2 Output format Profinet ..............67 4. Sequencer ..................77 4.1 Printout SEQUENCER PARAMETER ............ 79 5. Adjusting the filling/testing pressure manually (option 0050-04) ..... 81 6. Adjusting the vacuum manually (option 0050-01) ......... 83 Menu 4. DELETE ................84 Menu 5.
- Page 5 EC - Declaration of Conformity ............133 Index ....................134 Contact address: ................138...
-
Page 7: Introduction
The following pages will inform you about the proper use of the device in your produc- tion or testing environment. HeMaTech Prüftechnik attaches great importance to the safe, appropriate and eco- nomical use of the device. However, this requires that you read these operating in- structions thoroughly before you install and use the device. -
Page 8: Intended Use
Ordering spare parts Use only original spare parts from HeMaTech Prüftechnik. If you would like to order accessories or spare parts, you not only need to specify device type and serial number, but also article number and designation of the required components, which you can take from the list of consumables and spare parts. -
Page 9: Warranty
Warranty Warranty The warranty conditions for devices from HeMaTech Prüftechnik GmbH & Co. KG can be found in our terms and conditions of sales and delivery. If no other agreement has been made, the warranty period for design, material and manufacturing faults (except consumables), as well as for the omission of explicitly guaranteed properties, is generally 1 year, starting from the date of delivery. -
Page 10: Structure Of The Manual
In this section you find some examples for printouts of measurements, parameters, etc. Appendix This chapter contains wiring diagrams and technical data for the device. The index The index helps you to find required text passages quickly. EN 3925-0060 V207-00 MANUAL R03.doc HeMaTech Prüftechnik... - Page 11 Make all following entries and confirm these individually by pressing the ENTER- key. The insertion point jumps to the next field. Lists Lists are marked as follows: Variant A − − Variant B − Variant C … − EN 3925-0060 V207-00 MANUAL R03.doc HeMaTech Prüftechnik...
-
Page 12: Safety Measures
Work in the electrical system – e.g. changing fuses – must only be performed by trained expert staff. Further maintenance and repair work must only be performed by the customer service of HeMaTech Prüftechnik or by persons who have been author- ized by HeMaTech Prüftechnik. - Page 13 Do not carry out any repair work that is not explicitly permitted in these operating in- structions. Consult the customer service department of HeMaTech Prüftechnik GmbH & Co. KG. Unprofessionally performed work can cause damage to persons, material or device.
-
Page 14: Symbols Used
This safety note draws the attention to dangers, which could cause material damage or incorrect tests. NOTE! This symbol highlights hints and special features, which will ease the operation of the leak tester. EN 3925-0060 V207-00 MANUAL R03.doc HeMaTech Prüftechnik... -
Page 15: Product Description
As already indicated by the name differential pressure method, the pressure difference in the measuring branch caused by a leak in the specimen is compared with the pres- sure in the blocked off reference branch. Function schematic of differential pressure test EN 3925-0060 V207-00 MANUAL R03.doc HeMaTech Prüftechnik... - Page 16 Pressure Leak work piece Time Stabilizing Filling Measuring Venting Test time Pressure course in the test system during the test process EN 3925-0060 V207-00 MANUAL R03.doc HeMaTech Prüftechnik...
- Page 17 The differential pressure method The isolating valve shown in the illustration is an isolating valve which has been spe- cially developed for leak testers from HeMaTech Prüftechnik. The special requirements for leak testing were already accounted for in the development of the valve.
-
Page 18: Performance Characteristics
Resolution 1 Pa; limit contact setting up to max. 2000 Pa (100 Pa = 1 mbar = 10 mmWC). Measuring value display You can switch over to: PASCAL, mbar, psi, mmWC, mmHg, ml/min EN 3925-0060 V207-00 MANUAL R03.doc HeMaTech Prüftechnik... -
Page 19: Design And Working Principle
On/Off switch integrated in the membrane keyboard, − key switch to protect against unauthorized changing of test parameters and − − graphics display for device menus and up to 2 serial interfaces EN 3925-0060 V207-00 MANUAL R03.doc HeMaTech Prüftechnik... -
Page 20: Scope Of Delivery
2 Key for write protection switch 1 Operating instructions 2 Caps (for specimen connection and reference volume connection) Should one of these items be missing or damaged, you should immediately consult your supplier. Accessories EN 3925-0060 V207-00 MANUAL R03.doc HeMaTech Prüftechnik... -
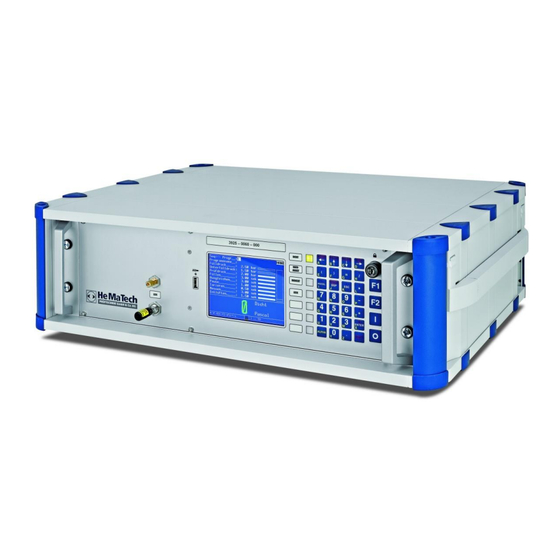
Page 21: View Of Device
(option) in pressure increase measurement to the outlet of a flow meter Connection socket for leak display (option) in pressure increase measurement to the inlet of a flow meter 11 LED to show the working status of the USB interface 12 USB interface EN 3925-0060 V207-00 MANUAL R03.doc HeMaTech Prüftechnik... - Page 22 30 Connection for specimen 31 Air relief outlet for silencer 32 Special connection see pneumatic diagram (option) 33 Power supply socket 100 … 240 V, 50 … 60 Hz, with fuse T 2.0 A EN 3925-0060 V207-00 MANUAL R03.doc HeMaTech Prüftechnik...
-
Page 23: Control Elements
LED next to this status field lights up, the current specimen is leaking, but can be reworked 14 Status field I.O. if the LED next to this status field lights up, the current specimen is with out leak EN 3925-0060 V207-00 MANUAL R03.doc HeMaTech Prüftechnik... - Page 24 By pressing the ESC-key you can abort a process that had been started and return to the previous menu. PgUp By pressing the keys SHIFT + PgUp you can scroll one page back. PgDn By pressing the keys SHIFT + PgDn you can scroll one page forward. EN 3925-0060 V207-00 MANUAL R03.doc HeMaTech Prüftechnik...
-
Page 25: Installation And Start-Up
Connecting peripheral equipment Installation and start-up Installation and start-up The installation measures described in this manual must only be carried out by trained specialists. The applicable regulations for electrical engineering must in any case be observed and complied with. Preparations ATTENTION! Choose an installation location, at which the device is neither ex- posed to extreme temperatures, nor to extreme humidity. - Page 26 Before connecting the reference volume make sure that the hoses for test medium and reference volume are undamaged and will not be kinked or squashed. The hoses should not be pressurized. EN 3925-0060 V207-00 MANUAL R03.doc HeMaTech Prüftechnik...
- Page 27 Serial interface with register programming format (see menu 3. SETUP PARAMETER command reference - remote control via serial interface). Serial interface with Profibus format (see menu 3. SETUP PARAMETER command reference - Profibus output format). EN 3925-0060 V207-00 MANUAL R03.doc HeMaTech Prüftechnik...
-
Page 28: Switching The Device On And Off
Press key I on the front of the device to switch on. The display light is switched on. Press key 0 on the front of the device to switch off. The display light is switched off. EN 3925-0060 V207-00 MANUAL R03.doc HeMaTech Prüftechnik... -
Page 29: Initializing
No connection to the Profibus leads to the message “connection failed” inticated in the help bar. By pressing the key “ESC” the failed connection is acknowledged and the main menu is displayed. EN 3925-0060 V207-00 MANUAL R03.doc HeMaTech Prüftechnik... -
Page 30: The Display
PgUp to scroll on page back PgDn to scroll one page forward function key to start/enable a certain system function Key symbol Operate the key switch EN 3925-0060 V207-00 MANUAL R03.doc HeMaTech Prüftechnik... -
Page 31: Working With The Program
Faulty or incorrectly entered data are automatically corrected by the program or re- placed by standard parameters specified in the system configuration. In such a case the user is informed about the changed or replaced data by a warning window. EN 3925-0060 V207-00 MANUAL R03.doc HeMaTech Prüftechnik... -
Page 32: Command Reference
5. Options After you have started the device and the initialization process is completed, the dis- play will show the MAIN MENU of the program or, if applicable, the previously set start menu. EN 3925-0060 V207-00 MANUAL R03.doc HeMaTech Prüftechnik... -
Page 33: Menu 1. Automatic
This menu can only be used to monitor the sequence. Dialog window MAIN MENU Move the cursor to the first menu option 1. Automatic. Press the ENTER-key on the control panel. The display shows the sub-menu AUTOMATIC. Dialog window AUTOMATIC EN 3925-0060 V207-00 MANUAL R03.doc HeMaTech Prüftechnik... - Page 34 Press the SHIFT-key and any arrow key on the control panel. The filling curve display appears on the screen. Filling curve display window Press the ESC-key on the control panel to return to the MAIN MENU. EN 3925-0060 V207-00 MANUAL R03.doc HeMaTech Prüftechnik...
-
Page 35: Sequencer
At the end of any test step the output of the corresponding test result is set for a short time. If none of the 10 possible steps is activated in the selected sequencer, the error mes- sage no step activated with error number 40 will be generated. EN 3925-0060 V207-00 MANUAL R03.doc HeMaTech Prüftechnik... -
Page 36: Automatic Mode Without Leak Simulation
If the signal Static Test X21/4 is applied instead of the signal Start X21/2, the speci- men will be exposed to the test pressure determined in the parameter set of the select- ed program. The specimen is kept pressurized, as long as the signal Static Test is applied. EN 3925-0060 V207-00 MANUAL R03.doc HeMaTech Prüftechnik... -
Page 37: Menu 2. Manual
Press the keys SHIFT and F2 to start the test with leak simulation. NOTE! If you selected the option EnvelopCurveTolerances ON in the dialog window SETUP TEST PARAMETER SET, the error message REFERENCE CURVE MISSING will be displayed when starting the first test. EN 3925-0060 V207-00 MANUAL R03.doc HeMaTech Prüftechnik... - Page 38 If you want to abort the test: press the keys SHIFT + ESC in succession. The test sequence is aborted, the up-to-date status of the test at the time of the abortion remains in the display. EN 3925-0060 V207-00 MANUAL R03.doc HeMaTech Prüftechnik...
-
Page 39: Determination Of A Reference Record
An audible signal will sound and the determined data will be written to the RAM memory. Press ESC to determine a new reference curve. A new measurement will be executed. EN 3925-0060 V207-00 MANUAL R03.doc HeMaTech Prüftechnik... -
Page 40: Sequencer
If an error occurs in the sequence, the output error will be set and the complete test sequence aborted. The error must be acknowledged as specified for the corresponding machine interface. After a restart the complete test sequence is repeated. EN 3925-0060 V207-00 MANUAL R03.doc HeMaTech Prüftechnik... - Page 41 At the end of any test step the output of the corresponding test result is set for a short time. If none of the 10 possible steps is activated in the selected sequencer, the error mes- sage no step activated with error number 40 will be generated. EN 3925-0060 V207-00 MANUAL R03.doc HeMaTech Prüftechnik...
-
Page 42: Pressurize (Flooding)
Into the test field Program: enter the desired number and press the ENTER-key to confirm. The dialog window with the desired program is displayed. You can check the pro- grammed test pressure build-up by the horizontal progress bar. Dialog window for manual pressurize EN 3925-0060 V207-00 MANUAL R03.doc HeMaTech Prüftechnik... - Page 43 NOTE! In the operation modes for automatic and semi-automatic testing, the duration of pressurizing is determined by application of the signal PRESSURIZE ON. EN 3925-0060 V207-00 MANUAL R03.doc HeMaTech Prüftechnik...
-
Page 44: Menu 3. Setup
Dialog window SETUP 1. Set parameter (Test program) If you confirm the selection 1. Parameter set in the dialog window SETUP by pressing the ENTER-key, the following dialog window will open: Dialog window SET PARAMETER EN 3925-0060 V207-00 MANUAL R03.doc HeMaTech Prüftechnik... - Page 45 Calculate the underfill pressure as in the following example: Fill pressure F = 2.10 bar/ü Test pressure P = 1.90 bar/ü Underfill pressure = P – (F – P) = 1.90 – (2.10 - 1.90) = 1.70 bar/ü EN 3925-0060 V207-00 MANUAL R03.doc HeMaTech Prüftechnik...
- Page 46 Auto Zero: Enter the auto zero time in seconds from 0.10 … 999.99. Default value is 0.50 sec. Measuring: Enter the measure time in seconds from 0.10 … 999.99. Default value is 3.00 sec. EN 3925-0060 V207-00 MANUAL R03.doc HeMaTech Prüftechnik...
- Page 47 Enter the fixture offset from 0 … 999 Pa. Default value is 0 Pa. EN 3925-0060 V207-00 MANUAL R03.doc HeMaTech Prüftechnik...
- Page 48 The start point of the reference curve is the point in time from which the reference curve is recorded, after the leak test has been started. Record end: Enter the record end point in seconds from 0.10 … 999.99. Default value is 3.00 sec. EN 3925-0060 V207-00 MANUAL R03.doc HeMaTech Prüftechnik...
- Page 49 If you want to exit the menu without saving: Press the ESC-key. The first dialog window SET PARAMETER is displayed again. Press the ESC-key again, to return to the dialog window SETUP. EN 3925-0060 V207-00 MANUAL R03.doc HeMaTech Prüftechnik...
- Page 50 If the values do not meet the specifications, the program will adjust the corresponding parameters accordingly and shows this by inverse representation in the display. You may either correct the parameters, or accept them in the changed form. EN 3925-0060 V207-00 MANUAL R03.doc HeMaTech Prüftechnik...
-
Page 51: Printout Parameter
Dialog window SET PARAMETER Press key F2 to activate the dialog window PRINT DATA for data transfer via in- terface. On the display appears the window Print Data. Set Parameter – Print Data EN 3925-0060 V207-00 MANUAL R03.doc HeMaTech Prüftechnik... - Page 52 The file name consists of the serial number and the ending PAR. e.g. 10100100.PAR. If a file with same file name already exists, the file will be opened and the data append to the file. EN 3925-0060 V207-00 MANUAL R03.doc HeMaTech Prüftechnik...
-
Page 53: Copying An Existing Test Program
Turn the key switch anti-clockwise to switch the write protection ON. An audible signal will sound and the device saves the changed data to the RAM memory. Copied test program Press the ESC-key to exit the menu. EN 3925-0060 V207-00 MANUAL R03.doc HeMaTech Prüftechnik... -
Page 54: Date & Time
Turn the key switch back to write protection ON. An audible signal will sound and the device saves the changed data to the RAM memory. Press the ESC-key to exit the menu. EN 3925-0060 V207-00 MANUAL R03.doc HeMaTech Prüftechnik... -
Page 55: Serial Ports
You can use the keys – and + to select the number (7 or 8) of data bits. Stop bits: You can use the keys – and + to select the number (1 or 2) of stop bits. EN 3925-0060 V207-00 MANUAL R03.doc HeMaTech Prüftechnik... - Page 56 The interface has been setup for the line printer output format. Press the ESC-key to exit the menu. NOTE! The interface type is determined by the hardware and cannot be changed through the program. EN 3925-0060 V207-00 MANUAL R03.doc HeMaTech Prüftechnik...
- Page 57 Result with 2 digits Unit with 2 digits Measuring value with 6 digits Hour Minute Second with 6 digits Day Month Year with 8 digits Program number with 2 digits Successive number with 8 digits EN 3925-0060 V207-00 MANUAL R03.doc HeMaTech Prüftechnik...
- Page 58 01 = I.O. / I.O. 02 = Rework 1 / LT 03 = Leak / UT 06 = Leak / Coarse Leak (Major leak) -- = Error messages are identified by 2 minus dashes. EN 3925-0060 V207-00 MANUAL R03.doc HeMaTech Prüftechnik...
- Page 59 The individual positions are separated by semicolon. The data set is closed with a carriage return and a line feed (CR+LF). Examples: No Leak 00000001;01;01022000;152621;000000;01;01;00 Gross leak 00000002;01;01022000;152637;------;01;04;00 Fault 00000003;01;01022000;152718;------;01; --;25 EN 3925-0060 V207-00 MANUAL R03.doc HeMaTech Prüftechnik...
- Page 60 Result with 2 digits Unit with 2 digits Measuring value with 6 digits Hour Minute Second with 6 digits Day Month Year with 8 digits Program number with 2 digits Successive number with 8 digits EN 3925-0060 V207-00 MANUAL R03.doc HeMaTech Prüftechnik...
- Page 61 Specifies the limit contact for leak in the adapted structured representation. The output width is always 6 digits. Examples for the output of measuring data in the format File02. Accept 00000001;01;24022002;152621;000000;01;01;00;1,00:3,00;1,0000000;50;100 Gross leak (major leak) 00000002;01;24022002;152637;------;01;04;00;1,00:3,00;1,0000000;50;100 Error 00000003;01;24022002;152718;------;01; --;25;1,00:3,00;1,0000000;50;100 EN 3925-0060 V207-00 MANUAL R03.doc HeMaTech Prüftechnik...
-
Page 62: Output Format Profibus
Line printer, File 01, File 02, Profibus, Record and optional special formats, such as REGISTER, REGISTER+TO, REGISTER+TO+CS. Speed: 9600 … 115200 Baud Data bits: Stop bits: Parity: None Protocol: None Format: Profibus Bus address: 0 … 99 EN 3925-0060 V207-00 MANUAL R03.doc HeMaTech Prüftechnik... - Page 63 Command reference Menu 3. SETUP The Profibus inputs and outputs If the Profibus is activated, it will take over the following inputs/outputs: Description Type Byte/Bit 3925-0050 LEAK 3925-0150 3925-0350 FLOW VOLUME Input Internal reserved Input Internal reserved Input Internal reserved...
- Page 64 Menu 3. SETUP Command reference Description Type Byte/Bit 3925-0050 LEAK 3925-0150 3925-0350 FLOW VOLUME Not used Not used Not used Not used Not used Not used Not used Not used Not used Not used Not used Not used Not used...
- Page 65 Command reference Menu 3. SETUP Description Type Byte/Bit 3925-0050 LEAK 3925-0150 3925-0350 FLOW VOLUME Output External reserved Output External reserved Output External reserved Output External reserved Output External reserved Output External reserved Output External reserved Output External reserved External reserve...
- Page 66 Menu 3. SETUP Command reference Description Type Byte/Bit 3925-0050 LEAK 3925-0150 3925-0350 FLOW VOLUME Output 7 . 0 ... 7 Measuring value identifier Output 8 . 0 ... 7 1. Digit measuring value Output 9 . 0 ... 7 2. Digit measuring value Output 10 .
-
Page 67: Output Format Profinet
The interface format is defined by the hardware and can not be changed via the program. The test device with Profinet interface has 6 input bytes and 17 output bytes. The breakdown is as follows. The naming conventions of Profinet must be observed. EN 3925-0060 V207-00 MANUAL R03.doc HeMaTech Prüftechnik... - Page 68 BCD 40 (Program selection) Input 3 . 7 BCD 80 (Program selection) Input External reserve Input External reserve Input External reserve Input External reserve Input External reserve Input External reserve Input External reserve Input External reserve EN 3925-0060 V207-00 MANUAL R03.doc HeMaTech Prüftechnik...
- Page 69 Internal reserved Output Internal reserved Output Internal reserved Output Internal reserved Output Internal reserved Output Internal reserved Not used Not used Not used Not used Not used Not used Not used Not used EN 3925-0060 V207-00 MANUAL R03.doc HeMaTech Prüftechnik...
- Page 70 Reject / UT LT (Min) Output 6 . 5 No leak / O.K. Reserve Output 6 . 6 Enveloping curve Measuring active Filling n.o.k. (optional) Output 6 . 7 Measuring active UT (Max) EN 3925-0060 V207-00 MANUAL R03.doc HeMaTech Prüftechnik...
- Page 71 All data outputs take place in the ASCII format. For devices with Profinet you require the GSDML-file for configuring the Profinet Mas- ter, this file is delivered on a separate USB-Stick. EN 3925-0060 V207-00 MANUAL R03.doc HeMaTech Prüftechnik...
- Page 72 For remote controlling purposes the user is provided with a powerful set of commands. Protocol for the complete control for all functions and parameters for the test device. The following information describes the functions in detail: EN 3925-0060 V207-00 MANUAL R03.doc HeMaTech Prüftechnik...
- Page 73 Result storing variable (ResultStore Variables) Read RVRnnn Result variable (Result VaRiables) Read SPVnnn,nnn Sequencer parameter variables Read/write (Sequencer Parameter Variables) SSPnnn Program specific parameter Read (Software SystemParameter) STAnnn Status variable (STAtus variables) Read EN 3925-0060 V207-00 MANUAL R03.doc HeMaTech Prüftechnik...
- Page 74 There is no monitoring of whether values are inside the permissible range. The transfer of impermissible values can lead to unexpected reactions of the device! Parameters with "Read" access can be released for writing, if desired. EN 3925-0060 V207-00 MANUAL R03.doc HeMaTech Prüftechnik...
- Page 75 Command reference Menu 3. SETUP Examples: Single enquiry of the status of test pressure valve "Y2" on leak tester 3925-0050: Command Feedback DOU1<CR> 0<CR> 1<CR> Multiple enquiry of the status of test pressure valve "Y2" and shut-off valve "Y3" on...
- Page 76 Dialog window to set up the interface for Record data output In order to set up an interface for the output of record data to a PC, you should select the Format: Record. EN 3925-0060 V207-00 MANUAL R03.doc HeMaTech Prüftechnik...
-
Page 77: Sequencer
For each step of the test sequence you can, in case of N.O.K.=continue with YES or NO, use the keys - and + to decide whether the next step of the test sequence should be performed. EN 3925-0060 V207-00 MANUAL R03.doc HeMaTech Prüftechnik... - Page 78 Turn the key switch back to write protection ON. An audible signal will sound and the device saves the changed data to the RAM memory. Press the ESC-key to exit the menu. EN 3925-0060 V207-00 MANUAL R03.doc HeMaTech Prüftechnik...
-
Page 79: Printout Sequencer Parameter
terface. On the display appears the window Print Data. Set Parameter – Print Data from: / to: Enter the range of previous program parameter you want to output into the text EN 3925-0060 V207-00 MANUAL R03.doc HeMaTech Prüftechnik... - Page 80 The file name consists of the serial number and the ending SEQ. e.g. 10100100.SEQ If a file with same file name already exists, the file will be opened and the data append to the file. EN 3925-0060 V207-00 MANUAL R03.doc HeMaTech Prüftechnik...
-
Page 81: Adjusting The Filling/Testing Pressure Manually (Option 0050-04)
The program appears in the display and you can directly adjust the filling pressure. Press F2 to toggle between the lines Filling pressure and Testing pressure. Dialog window for manual adjustment of filling and testing pressure EN 3925-0060 V207-00 MANUAL R03.doc HeMaTech Prüftechnik... - Page 82 Dialog window for manual setting of testing pressure Keep changing the testing pressure controller, until the testing pressure indicator bar is inside the tolerance range or corresponds with the nominal value. Press the ESC-key to exit the menu. EN 3925-0060 V207-00 MANUAL R03.doc HeMaTech Prüftechnik...
-
Page 83: Adjusting The Vacuum Manually (Option 0050-01)
Setting the vacuum of the test program manually Keep changing the testing pressure controller, until the testing pressure indicator bar is inside the tolerance range or corresponds with the nominal value. Press the ESC-key to exit the menu. EN 3925-0060 V207-00 MANUAL R03.doc HeMaTech Prüftechnik... -
Page 84: Menu 4. Delete
Turn the key switch back to the vertical write protection position. An audible signal will sound and the device will delete the data from the RAM memory. Press the ESC-key to exit the menu. EN 3925-0060 V207-00 MANUAL R03.doc HeMaTech Prüftechnik... -
Page 85: Menu 5. Print Menu
1. View Program Status In the dialog window PROGRAM STATUS you can view all program numbers, which are already occupied, in the display. Program locations already used appear inversed. Dialog window PROGRAM OVERVIEW EN 3925-0060 V207-00 MANUAL R03.doc HeMaTech Prüftechnik... -
Page 86: Data Collection
You can press ENTER to view the next 20 results. Press the key F2, to activate the dialog window PRINT DATA for data transfer via interface. On the display appears the window Print Data. EN 3925-0060 V207-00 MANUAL R03.doc HeMaTech Prüftechnik... -
Page 87: Print Data Collection
You can output the selected program parameter through the selected interface by pressing the F2-key. The message Print data is active! is display in the display. Press the ESC-key to exit the menu. EN 3925-0060 V207-00 MANUAL R03.doc HeMaTech Prüftechnik... -
Page 88: Operating Data
Enter the number of the test program into the field Program: and press the ENTER-key to confirm. The result counters of the desired program are displayed. Press the ESC-key to exit the menu. EN 3925-0060 V207-00 MANUAL R03.doc HeMaTech Prüftechnik... -
Page 89: Backup
You can use the buttons – and + to choose YES or NO. The proposed entry is NO. System parameters_: YES/NO You can use the buttons – and + to choose YES or NO. The proposed entry is NO. EN 3925-0060 V207-00 MANUAL R03.doc HeMaTech Prüftechnik... -
Page 90: Error Counter Status
10100100. 6. Error counter status In this menu you can view the error counters on the display. Unoccupied error num- bers are identified by dashes. Dialog window ERROR COUNTER STATUS EN 3925-0060 V207-00 MANUAL R03.doc HeMaTech Prüftechnik... -
Page 91: Record
Press the ESC-key to exit the menu. Press the key F2, to activate the dialog window PRINT DATA for data transfer via interface. On the display appears the window Print Data. EN 3925-0060 V207-00 MANUAL R03.doc HeMaTech Prüftechnik... - Page 92 You can output the selected recording via the selected interface by pressing the F2-key. The message Print data is active! is display in the display. Press the ESC-key to exit the menu. EN 3925-0060 V207-00 MANUAL R03.doc HeMaTech Prüftechnik...
-
Page 93: Record Reverence
Press the ESC-key to exit the menu. Press the key F2, to activate the dialog window PRINT DATA for data transfer via interface. On the display appears the window Print Data. EN 3925-0060 V207-00 MANUAL R03.doc HeMaTech Prüftechnik... - Page 94 You can output the selected recording via the selected interface by pressing the F2-key. The message Print data is active! is display in the display. Press the ESC-key to exit the menu. EN 3925-0060 V207-00 MANUAL R03.doc HeMaTech Prüftechnik...
-
Page 95: Menu 6. Settings
The write protection is disabled and you can start with the settings. Press the keys – or + to select the desired setting and press ENTER to confirm. The insertion point jumps to the next subject. EN 3925-0060 V207-00 MANUAL R03.doc HeMaTech Prüftechnik... - Page 96 Turn the key switch back to the vertical write protection position. An audible signal will sound and the device saves the changed data to the RAM memory. Press the ESC-key to exit the menu. EN 3925-0060 V207-00 MANUAL R03.doc HeMaTech Prüftechnik...
-
Page 97: System Parameters
Ser #1. Press key or to scroll through the following five pages: The first dialog window SETTING SYSTEM The second dialog window SETTING SYSTEM The third dialog window SETTING SYSTEM EN 3925-0060 V207-00 MANUAL R03.doc HeMaTech Prüftechnik... - Page 98 The fourth dialog window SETTING SYSTEM Press key F2 to output the system parameters via interface . The dialog window SETTING SYSTEM – PRINT DATA Press the ESC-key to exit the menu. EN 3925-0060 V207-00 MANUAL R03.doc HeMaTech Prüftechnik...
-
Page 99: Pressure Control
Dialog window SETUP PRESSURE SYSTEM during detection Once the test device has determined the parameters for the pressure system, the de- vice is reset and rebooted. After the boot process the display will show the dialog window specified under EN 3925-0060 V207-00 MANUAL R03.doc HeMaTech Prüftechnik... - Page 100 If higher pressure than the determined maximum pressure Nominal pres- is programmed during setup, the tester will submit the error 28 sure out of range Trouble shooting chart . In this case refer to the in chapter Maintenance EN 3925-0060 V207-00 MANUAL R03.doc HeMaTech Prüftechnik...
-
Page 101: System Status
(AIn00..03) analog outputs of electronics module (AOut00..01) − During the program sequence you can directly follow the signal sequence of inputs and outputs. Press the ESC-key to exit the menu. EN 3925-0060 V207-00 MANUAL R03.doc HeMaTech Prüftechnik... -
Page 102: Options
Here you specify which I/O configuration the leak tester should use for machine con- Signal exchange with machine control trol. Chapter contains detailed information on these adjustment possibilities. You can choose from: Automatic − − Semi-automatic − Minimal EN 3925-0060 V207-00 MANUAL R03.doc HeMaTech Prüftechnik... - Page 103 The error limit F13 is defined as -10 Pa by default. Any other value could result in faulty measurements. This value should therefore only be changed in consultation with HEMATECH PRÜFTECHNIK. Decimal places Pa Here you can select the number of decimal places of measurement unit Pa. This value determines in what number of decimal places the measurement unit is displayed.
-
Page 104: Testing And Setup
If the pressure values can not be adjusted because the tester has a lower pressure range, use the maximum possible test pressure for self testing. Press the ESC-key to change to the MAIN MENU. EN 3925-0060 V207-00 MANUAL R03.doc HeMaTech Prüftechnik... - Page 105 When performing a self-test without specimen and a leak of 5 ml/min under a test pressure of 1 bar/ü over a measuring time of 3 s, the leak tester must indicate a measuring value of approx. 1300 Pa. EN 3925-0060 V207-00 MANUAL R03.doc HeMaTech Prüftechnik...
-
Page 106: Setting Up The Device For Specimen
20 Pa. This measuring time depends on the leak rate to be measured and the setting of the limit contacts. This setting is bet be made with a specimen with limiting leak. EN 3925-0060 V207-00 MANUAL R03.doc HeMaTech Prüftechnik... -
Page 107: Leak Simulation (Option)
With subsequent start, test sequence with activated leak simulation Activating leak simulation in Manual mode In MANUAL mode the leak simulation is activated by pressing the keys Shift+F2. Start of test sequence with activated leak simulation EN 3925-0060 V207-00 MANUAL R03.doc HeMaTech Prüftechnik... -
Page 108: Maintenance
Maintenance contract For devices manufactured by us you can, if desired, enter into a maintenance contract with HEMATECH PRÜFTECHNIK for regular inspections and preventive maintenance. We will inform you about the exact terms and conditions on request. Maintenance plan The following table shows the maintenance work required to maintain the tester in op- erable condition for normal operation. -
Page 109: Errors, Causes And Remedy
After rectification of the error apply the START-signal to interface (X 21/2), press the ESC-key Operation mode AUTOMATIC (Minimal) After rectification of the error apply the START-signal to interface (X 21/2) again, press the ESC-key. EN 3925-0060 V207-00 MANUAL R03.doc HeMaTech Prüftechnik... -
Page 110: Trouble Shooting Chart
Should any faults not be listed in the chart, please do not hesitate to contact the cus- tomer service of HeMaTech Prüftechnik directly. Remedy All activities in the column , which are marked with *, must only be performed by trained expert personnel. - Page 111 Pressure increase in Check the device for any after closing the specimen movements shut-off valve Apex of filling time incorrect specimen Check the specimen not reached Supply line worn Check the supply line EN 3925-0060 V207-00 MANUAL R03.doc HeMaTech Prüftechnik...
- Page 112 Replace the P/I-converter* Rated pressure out Network pressure too Redetermine the pressure sys- of range low during pressure tem in menu 6. Settings/3. determination Pressure system not used not used not used not used EN 3925-0060 V207-00 MANUAL R03.doc HeMaTech Prüftechnik...
- Page 113 Coarse leak (major sequence too high leak) on specimen, (under vacuum), oth- erwise like error 26 No reference curve Generate a reference curve No test step acti- Activate test step vated in sequencer EN 3925-0060 V207-00 MANUAL R03.doc HeMaTech Prüftechnik...
-
Page 114: Signal Exchange With Machine Control
For subsequent testing the signal Machine ready must be applied again. Error is reset when removing and renewing the signal Automatic. Measuring device busy (optional) will be submitted from the start to the end of a test. EN 3925-0060 V207-00 MANUAL R03.doc HeMaTech Prüftechnik... -
Page 115: Automatic Operation
Once the measurement is finished, the test result (no leak, Leak or rework) is submitted and the output ready for operation is set. NOTE! The signal machine ready must be set before each measurement, whereby the signal for program selection may always be present. EN 3925-0060 V207-00 MANUAL R03.doc HeMaTech Prüftechnik... - Page 116 X20/1 Reset output Ready for test Test sequence Filling Equalizing ... Set output TEST RESULT Output X20/4 .. 6 START Test result Remove input X21/2 Prüfgerät Setzen Ausgang Ausgang BETRIEBSBEREIT EN 3925-0060 V207-00 MANUAL R03.doc Betriebsbereit X20/1 HeMaTech Prüftechnik nein...
- Page 117 Signal Exchange with Machine Control Automatic operation Automatic operation in a time-way diagram EN 3925-0060 V207-00 MANUAL R03.doc HeMaTech Prüftechnik...
-
Page 118: In Semi-Automatic Operation
Reset Ausgang Prüfergegnis Test result Ablauf der Test sequence Prüfung Filling Füllen Equalizing … Ausgleichen ... Set output Setzen Ausgang Ausgang PRÜFERGEBNIS TEST RESULT Output Prüfergebnis Test result X20/4 .. 6 X20/4 .. 6 EN 3925-0060 V207-00 MANUAL R03.doc HeMaTech Prüftechnik... - Page 119 Signal Exchange with Machine Control In semi-automatic operation Semi-automatic operation in a time-way diagram EN 3925-0060 V207-00 MANUAL R03.doc HeMaTech Prüftechnik...
- Page 120 Set output X21/10 … 17 Equalizing ... Ready for Reset output READY FOR OPERATION operation Output Test result Set output START Input X20/1 TEST RESULT Output X21/2 Test result X20/4 .. 6 EN 3925-0060 V207-00 MANUAL R03.doc HeMaTech Prüftechnik...
- Page 121 Signal Exchange with Machine Control In semi-automatic operation Minimal operation in a time-way diagram EN 3925-0060 V207-00 MANUAL R03.doc HeMaTech Prüftechnik...
-
Page 122: Sample Printouts
Sample printouts This section shows some sample printouts of the tester via serial interface to a printer or PC. Protocol printout ┌─────────────────────────────────────────────────────────────────────┐ │ │ │ HeMaTech Prüftechnik, Siemensstraße 7, D-71409 Schwaikheim │ │ │ │ Leak tester 3925-0050m1-00-00000000 │ │... -
Page 123: Program Parameters
Sample printouts Program parameters Program parameters ┌──────────────────────────────────────────────────────────────────────┐ │ │ │ HeMaTech Prüftechnik GmbH & Co KG, D-71409 Schwaikheim │ │ │ │ Leak Tester 3925-0050m1-00-00000001 │ │ │ └──────────────────────────────────────────────────────────────────────┘ Program number__________: 1 Program name____________:hydraulic space Workpiece_______________:dosing system Operator________________:Mueller Last parameter change___:25012010 Print date______________:-------- ────────────────────────────────────────────────────────────────────────... -
Page 124: Result Memory
Result memory Sample printouts Result memory ┌──────────────────────────────────────────────────────────────────────┐ │ │ │ HeMaTech Prüftechnik GmbH & Co KG, D-71409 Schwaikheim │ │ │ │ Leak Tester 3925-0060-00-00000001 │ │ │ └──────────────────────────────────────────────────────────────────────┘ Count Program Date Time Value Unit Result ──────────────────────────────────────────────────────────────────────── 25012010 122146 Pascal... -
Page 125: System Parameters
Sample printouts System parameters System parameters ┌──────────────────────────────────────────────────────────────────────┐ │ │ │ HeMaTech Prüftechnik GmbH & Co KG, D-71409 Schwaikheim │ │ │ │ Leak Tester 3925-0050m1-00-00000001 │ │ │ └──────────────────────────────────────────────────────────────────────┘ Type___________________:DHP0050m1-00 Hardware version_______:1 Software version_______:2.03 Software revision______:4 System MCU_____________:1.08 System DCU_____________:2.14 System CCU_____________:1.00... - Page 126 07 000000 17 000000 27 000000 000000 ------ 08 000000 18 000000 28 000000 000000 ------ 09 000000 19 000000 29 000000 000000 ------ 10 000000 20 000000 30 000000 000000 ------ ──────────────────────────────────────────────────────────────────────── EN 3925-0060 V207-00 MANUAL R03.doc HeMaTech Prüftechnik...
-
Page 127: Appendix
Appendix Appendix This section provides you with an overview of plug assignment, pneumatic diagrams for overpressure and vacuum, the declaration of conformity and technical data. EN 3925-0060 V207-00 MANUAL R03.doc HeMaTech Prüftechnik... -
Page 128: Plug Assignment
Plug assignment Appendix Plug assignment EN 3925-0060 V207-00 MANUAL R03.doc HeMaTech Prüftechnik... -
Page 129: Pneumatic Diagram (Vacuum Device)
Appendix Pneumatic diagram (vacuum device) Pneumatic diagram (vacuum device) EN 3925-0060 V207-00 MANUAL R03.doc HeMaTech Prüftechnik... -
Page 130: Pneumatic Diagram (Overpressure Device)
Pneumatic diagram (overpressure device) Appendix Pneumatic diagram (overpressure device) EN 3925-0060 V207-00 MANUAL R03.doc HeMaTech Prüftechnik... -
Page 131: Technical Data
Reference curve end: 0.10 … 999.99 sec Enveloping curve start: 0.00 … 999.99 sec Enveloping curve end: 0.10 … 999.99 sec Write protection via key switch Result signals No leak, Rework 1 and Leak EN 3925-0060 V207-00 MANUAL R03.doc HeMaTech Prüftechnik... - Page 132 10 bar/ü, dry, oil free and filtered Connections Supply air connection G 1/4 Test connection G 1/8 (optional G 3/8) Venting via silencer G 1/4 Weight approx. 24 kg Order-number 3 925-0050 (Subject to alterations) ** Option EN 3925-0060 V207-00 MANUAL R03.doc HeMaTech Prüftechnik...
- Page 133 Prüftechnik GmbH & Co. KG Siemenstrasse 7 D 71409 Schwaikheim Harald Hellerich Geschäftsführer Schwaikheim, 03.01.2005 HeMaTech Prüftechnik GmbH & Co.KG Persönlich haftender Gesellschafter: Kreissparkasse Waiblingen BLZ: 602 500 10 Kto.: 150 112 11 Sitz der Gesellschaft: D 71409 Schwaikheim HeMaTech Verwaltungsgesellschaft mbH Dresdner Bank AG Stuttgart BLZ: 600 800 00 Kto.
- Page 134 Control panel 21 Error 10 94 Copying a test program 48 Error 13 87, 95 Cycle Test 30 Error 14 95 Cycle Test, manual menu 35 Error 15 95 Error 16 95 Data backup 75 EN 3925-0060 V207-00 MANUAL R03.doc HeMaTech Prüftechnik...
- Page 135 Intended use 6 Overpressure device 114 Interface setup 50 Vacuum device 113 Interface(s) 30 Pneumatics 17 Intervention limit Precision needle valve 19 for leaks 45 Pressure course in test system 14 for rework 45 EN 3925-0060 V207-00 MANUAL R03.doc HeMaTech Prüftechnik...
- Page 136 Type plate 6, 20 Setting up the filling/testing pressure Settings 30, 79 Underfilling: 42 Setup of machine control interface 86 Setup of machine interface 86 View of device 19 SHIFT, control key 22 EN 3925-0060 V207-00 MANUAL R03.doc HeMaTech Prüftechnik...
- Page 137 Appendix Index Working principle 17 Warranty 7 Write protection switch 19, 29 EN 3925-0060 V207-00 MANUAL R03.doc HeMaTech Prüftechnik...
- Page 138 Contact address: HeMaTech Prüftechnik GmbH & Co. KG Siemensstrasse 7 DE-71409 Schwaikheim Phone +49 (0)71 95/13 69 0 Fax +49 (0)71 95/13 69 29 Internet http://www.hematech.de Notes: EN 3925-0060 V207-00 MANUAL R03.doc HeMaTech Prüftechnik...
Need help?
Do you have a question about the 3925-0050 and is the answer not in the manual?
Questions and answers