
Related Manuals for Kuat Racks Sherpa 2.0


Summary of Contents for Kuat Racks Sherpa 2.0
- Page 1 SHERPA ™ RACK PACKAGING IS AN ASSEMBLY FIXTURE. READ UNBOXING INSTRUCTIONS TO EASE ASSEMBLY.
- Page 2 Parts: Unpacking and assembly instructions. STEP 1. Remove parts box and bracing. Open parts box. Rear Tray Mount Inner Tray Assembly Outer Tray Assembly Pivot Handle Lock Cable Pivot Assembly Front Tire Safety Strap 2x M10x450 Bolt with lock washer Included in the bag: 2x M10 Washers...
-
Page 3: Parts Needed
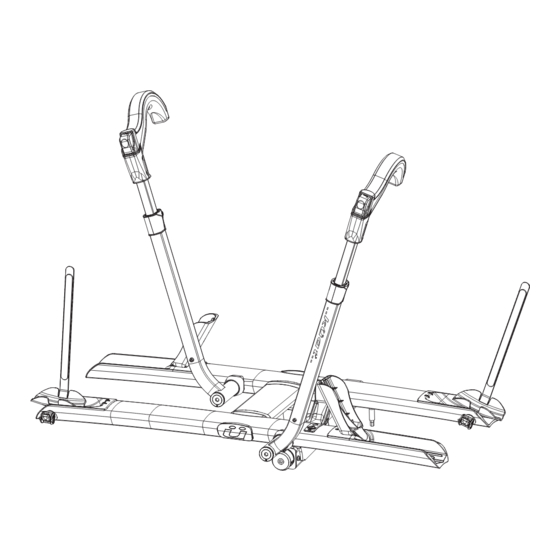
STEP 3. Place trays into build position. NOTE: Tighten to 15ft-lbs(20Nm), alter nating bolts between each tu rn . Excessive tighening will damage the rack. AVISO: Apriete a 20Nm, a lternando entre l os p ernos d e cada vuelta. Tighening excesivo puede dañar el bastidor. -
Page 4: Installation Instructions
Installation instructions. STEP 6. Install pivot handle. Parts Needed: STEP 1. Install into hitch receiver. x1 Pivot x1 M8x22 Bolt x1 M8 Lock Washer Handle/Pedal 5/8” 15m m STEP 2. Attach the locking hitch pin. Turn the knob to tighten the hitch cam. NOTE: for loosening, r e-tighten if needed. - Page 5 Loading bicycles. STEP 4. Position the front tire hook against the tire and as STEP 1. Pivot the tray assembly down, using the pivot close to the fork as possible. handle to release the tray. STEP 2. Open the front tire cradles. NOTE: Keep front tire cradles folded down when not in use.
- Page 6 STEP 5. Ensure rear bicycle tire is properly seated in the rear NOTE: Fr ont Tir e Safety Strap must be used when driving cradle. Feed strap through ratchet pawl and pull strap down to over r ough terrain or with bicycles 35 lbs or heavi tighten.
-
Page 7: Tips And Tricks
Additional Notes. NOTE: The rack can be tilted away providing additonal clearance for trunk or rear hatch access. Locking bicycles. Parts AVIS: Le rack peut Œt r e inclinØ loin fou rnissant jeu supplØment Needed: Loop the lock cable around the pour le t ronc ou l’accŁs de hayon. - Page 8 La garantie prend fin lorsque le propriétaire original se départit du produit en le vendant Si tiene usted alguna pregunta o problema con su portabicicletas, por favor contacte a Kuat Racks ou en le transférant à une autre personne.
- Page 9 kuatracks.com info@kuatracks.com 1.877.822.5828...
Need help?
Do you have a question about the Sherpa 2.0 and is the answer not in the manual?
Questions and answers