
Summary of Contents for FENDO OY F-19S
-
Page 1: Instructions For Use
15.11.2017 INSTRUCTIONS FOR USE SLICING MACHINE F-19S Manufacturer: FENDO OY P.O. Box 49 01801 Klaukkala FINLAND Tel. +358-9-8789220 fax. + 358-9-878 92233 Original instructions... -
Page 2: Table Of Contents
TABLE OF CONTENTS 1. Introduction ....................2 2. Technical specifications ................2 2.1 Results from noise emission tests ................3 3. Installation ....................3 3.1 Safety ........................3 3.2 Starting and stopping .................... 4 3.3 Operation instructions ................... 5 4. Cleaning ..................... 6 5. -
Page 3: Introduction
1. Introduction Slicing machine F-19S is developed especially for use in the retail and wholesale trade as well as in industry. As the slicer is constructed of stainless materials it will remain clean and in good condition for a long time. This guarantees a long life and trouble free operation. -
Page 4: Results From Noise Emission Tests
2.1 Results from noise emission tests Results of the noise emission measurements carried out in the place of operation: Noise emission, weighting “A”: 73 dB(A). 3. Installation 3.1 Safety It is recommended, that all users must be given the correct training in the safe use of the meat press. -
Page 5: Starting And Stopping
3.2 Starting and stopping The machine can be started by pressing the white start switch (Picture 1, No. 1a). The machine may be stopped as follows: 1. by pressing the BLACK stop switch (No. 1b). 2. in the case of emergency by pressing the EMERGENCY SWITCH (No. 1c) Check the correct direction of rotation. -
Page 6: Operation Instructions
3.3 Operation instructions The machine must be cleaned thoroughly before use (see Chapter 4, Cleaning). 1. Cut excess fat and hard tendons and gristle away from the meat to be processed. Cut the meat into 1–1,5 kg pieces. 2. Check that the upper and lower combs are assembled correctly. Also check that the turn knobs are properly tightened. -
Page 7: Cleaning
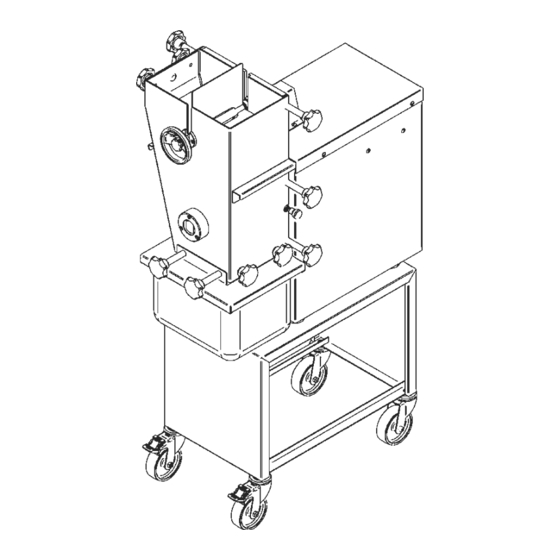
4. Cleaning The cleaning procedure may be performed only a person, who is trained for the operation. To make the cleaning easier the machine must be disassembled: - Step 1: Turn the power off and remove the plug from the wall socket. - Step 2: Remove the meat container (Picture 2, No. - Page 8 Picture 2. Disassembling the machine and cleaning.
-
Page 9: Care And Maintenance
5. Care and maintenance There are no special parts requiring maintenance. The sharpness of the blades should be checked periodically and the blades must be sharpened if necessary. The manufacturer also provides a sharpening service. The blades of the machine may be damaged if inappropriate items (e.g. tools) are dropped into the blade housing while the machine is running. -
Page 10: Appendix 1 Fault Finding
APPENDIX 1 Fault finding FAULT REASON SOLUTION The machine will not a) Emergency switch is Lift up the emergency start pressed down switch b) The direction control switch Turn the switch to the is positioned to “0” correct position c) The safety switch of the Check the assembly paddle wheel is not of the paddle wheel... -
Page 11: Appendix 2 Dimensional Drawing
APPENDIX 2 Dimensional drawing... -
Page 13: Appendix 4 Spare Parts List
APPENDIX 4 Spare parts list Description Note Front plate Hand knob Finger screw Handwheel Bearing Bearing GFM-4044-30 Bearing (incl. part 06) Hand knob Meat tray holder Washer Meat tray Paddle wheel Circlip 22 mm (DIN 472) Bearing SS 627 ZZ Circlip 7 mm (DIN 471) Bushing... - Page 14 Description Note Thermal overload relay ZB 12-6 Transformer FR60B-38024 40VA Cable gland, angled Cable gland Plug Lifting hook for blade set Washing stand Box for blade set Brush 9 mm Brush 18 mm Brush 27 mm Stand Wheel with brake Wheel Feeding vessel (incl.
-
Page 23: Appendix 5 Quantity Of The Blades And Spacers
APPENDIX 5 Quantity of the blades and spacers...
Need help?
Do you have a question about the F-19S and is the answer not in the manual?
Questions and answers