Table of Contents
Advertisement
OWNER'S AND USER'S MANUAL
M100+
Laboratory Turbidimeter
TM
Models 28060 & 28061
M100+ (April 2019)
Rev. 1.76
Read Manual and all product labels BEFORE
using the equipment. Do not use unless you
know the safe and proper operation of this
equipment. Keep this Manual available for
easy access by all users. Replacement
Manuals are available at HFscientific.com
HF scientific
3170 Old Metro Parkway
Ft. Myers, FL 33916
Phone: 239-337-2116
Fax: 239-332-7643
Toll-free: 888-203-7248
E-Mail: HF.Info@WattsWater.com
Website: HFscientific.com
Advertisement
Table of Contents

Subscribe to Our Youtube Channel
Related Manuals for HF Scientific M100+ 28060

Summary of Contents for HF Scientific M100+ 28060
- Page 1 OWNER’S AND USER’S MANUAL M100+ Laboratory Turbidimeter Models 28060 & 28061 HF scientific 3170 Old Metro Parkway Read Manual and all product labels BEFORE Ft. Myers, FL 33916 using the equipment. Do not use unless you Phone: 239-337-2116 know the safe and proper operation of this Fax: 239-332-7643 equipment.
- Page 2 M100+ (April 2019) Rev. 1.76...
- Page 3 M100+ (April 2019) Rev. 1.76...
- Page 4 Attention Owners and Users Thank you for purchasing the M100+™ turbidimeter. This equipment will provide safe and productive operation as long as it is installed, used, maintained, and serviced in accordance with the instructions in this manual and is properly maintained. Importantly, unless the user is adequately trained and supervised, there is a possibility of personal injury, property damage or damage to the equipment.
-
Page 5: Table Of Contents
Table of Contents Section Page Understanding Safety Information ......................1 Specifications ............................. 2 1.0 Overview ............................3 1.1 The M100+ Product Description ....................3 2.0 Unpacking and Inspection ......................... 4 3.0 Site Selection ............................. 5 4.0 Setup, Configuration and Calibration ....................5 4.1 Operating Screens ........................ -
Page 6: Understanding Safety Information
Understanding Safety Information This manual contains safety and use instructions that must be followed during the installation, commissioning, operation, care and maintenance, and service of the M100+. All responsible personnel must read this manual prior to working with this instrument and should familiarize themselves with the following safety symbols, signals, and pictorials. -
Page 7: Specifications
Specifications M100+ White Light Conforms to specifications set forth in EPA method 180.1 This Model uses a tungsten filament Model 28060 (Nephelometric Method) § lamp. M100+ Infrared Conforms to specifications set forth in ISO 7027: Water Model 28061 Quality - Determination of Turbidity. This model uses an IR LED lamp. -
Page 8: Overview
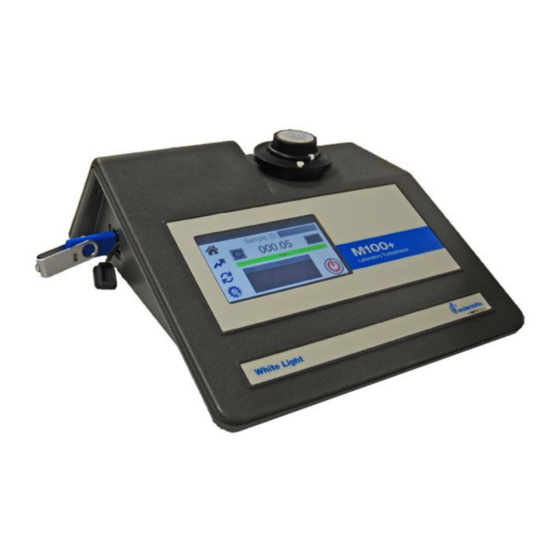
1.0 Overview Standard Inserted in Optics Power Supply Touch screen USB Connector The M100+ Product Description The M100+ is a process turbidimeter that allows for the laboratory measurement of the turbidity of sample water. The white light M100+ has been designed to meet the design criteria specified by the US EPA 180.1 on turbidity measurement. -
Page 9: Unpacking And Inspection
Remove the instrument from the packing carton. Carefully inspect all items to ensure that no visible damage has occurred during shipment. If the items received do not match the order, please immediately contact the local distributor or the HF scientific Customer Service department. -
Page 10: Site Selection
3.0 Site Selection The M100+ must be used in a suitable dry location with adequate ventilation. It should not be located where chemicals such as chlorine are located. It must be operated and stored between 1 and 40°C. The instrument should be used on a stable table top and less than 90 cm (3 feet) from a power source. -
Page 11: Operating Screens
Operating Screens There are four main operating screens in the form of Icons, Home ( ), Trend ( ), Calibration ( ), and Setup ( ). To change between screens, simply touch the appropriate icon. Home ( ) screen is the normal reading screen. -
Page 12: Configuring The M100
Configuring the M100+ The M100+ has been designed to provide the ability to customize the instrument according to your needs at any time during normal operation. The Setup screen has been split into sub-menus to facilitate instrument configuration. This section describes how to use each of the sub-menus to configure the instrument. -
Page 13: Screen Brightness
4.2.1 Screen Brightness Press the Setup icon. Select Screen Brightness. Adjust current Screen Brightness. Use & or the drag cursor. Push to save and return to Setup Menu. 4.2.2 Auto/Manual Readings Press the Setup icon. Select Auto/Manual Readings. ... -
Page 14: Auto Power Down
4.2.3 Auto Power Down Press the Setup icon. Auto Power Down. The M100+can be set to power down automatically. The factory setting is to power down after 30 minutes. To save lamp life it is recommended that auto power down is used. ... -
Page 15: Set Date/Time
4.2.5 Set Date/Time Press the Setup icon. Select Set Date/Time. Date/Time: Set the date and time by using the & buttons. When complete, press the to save the setting and return to Setup menu. Time Format: Allows you to select 12 or 24 hour time. This menu will change slightly if the 24-hour format is selected. -
Page 16: Data Resolution
4.2.7 Data Resolution Press the Setup icon. Select Data Resolution. Sets the resolution or number of digits after decimal point shown in Home screen. Use & to set the resolution. The screen shows a representation. Push ... -
Page 17: Calibration Reminder
4.2.10 Calibration Reminder Press the Setup icon. Select Calibration Reminder. Sets how often a calibration reminder comes up on Home screen. The USEPA recommends calibration every quarter (90 days). Use the & buttons to set period in days. ... -
Page 18: Firmware Update
4.2.12 Firmware Update Press the Setup icon. This screen is used to update firmware via USB. Insert the USB thumb drive containing the software into the USB port. Push to continue. If the inserted USB thumb drive contains a lower revision number than that currently installed, then the M100 will ask if you are sure you want to continue. -
Page 19: About Device
4.2.14 About Device Press the Setup icon. This menu shows the current setting of the Device ID, the lamp type, and the firmware revision number. Firmware revision can be compared to available firmware on the website. Push ... -
Page 20: Calibration Standards
Formazin is used to achieve the accuracy quoted for the instrument. A Formazin Stock Solution Kit is available from HF scientific (Catalog No. 50040). The HF scientific ProCal, primary calibration standards (refer to section 8.0 Accessories and Replacement Parts List), are more stable than Formazin and have a minimum shelf life of 12 months. -
Page 21: Care Of Procal Standards
4.3.3 Indexing Calibration Cuvettes To achieve the greatest accuracy, and account for normal scratches and aberrations in cuvette glass when calibrating, HF Scientific recommends indexing the cuvettes. Standards and standard kits purchased from HF Scientific are supplied with indexing rings. Complete instructions regarding how to index the cuvettes are included in the calibration kits. -
Page 22: Calibration Procedures
4.3.4 Calibration Procedures Command button: Follow directions Formazin Calbration Screen Select Range that appear here for calibration. ProCal Calibration Screen Select the calibration function of the instrument by pressing the Calibrate icon. Select the appropriate calibration standard - either Formazin or ProCal - then press . - Page 23 Calibration steps (Using ProCal): 1. Press the High Range A button on the left side of the screen. 2. Insert the High Range A standard. 3. Press the Command button in the middle of the screen to start the calibration. 4.
-
Page 24: Alternate Calibration Ranges
4.3.5 Alternate Calibration Ranges Alternately you could choose to calibrate to 1000 NTU, which requires 1000 NTU, 10 NTU, and 0.02 NTU. Press the 1000 button on the left side and start at step 5 above. A calibration for the only the 10 NTU range requires only the 10 NTU and 0.02 NTU. -
Page 25: Operation
5.0 Operation Home Screen Time Current Reading Update Reading Sample ID (Name) Home NTU/FNU Trend Diagnostic Banner Calibration Setup On/Off Reading List All operations start on the Home screen. Refer to the above figure for all operations. When the instrument is in Automatic Readings (section 4.2.2.), Update Reading button will not show. -
Page 26: Trend Screen
Trend Screen Time To get session Sample ID readings Selection Download/Print Screen Selection Graph Select Sample ID first. After a reading session in the Home screen, if Trend screen is selected, the Reading List from the Home screen is cleared but this information is now saved under Sample ID in the Trend screen. -
Page 27: Usb Connection
5.3.1 USB Connection The M100+ has two USB connections, a USB-A on the side and a USB-B on the back. Only the side connection is active at this time. The USB-B at the back of the instrument may be used in a future firmware update. The USB-A connection can be used to upload new software or download logged data and calibration reports via a USB thumb drive. -
Page 28: Troubleshooting
4.2.5 Technical and Customer Assistance If for any reason assistance is needed regarding this instrument please do not hesitate to contact either the HF scientific Technical Service Department or the HF scientific Customer Service Department for parts orders. HF scientific... -
Page 29: Routine Maintenance
If cuvettes become scratched or stained they should be replaced. Replacement cuvettes are available from HF scientific your local HF scientific agent. Use Cat # 50051pack of 3 cuvettes with caps or 50052 for a pack of 10 cuvettes with caps. -
Page 30: Accessories And Replacement Parts List
8.0 Accessories and Replacement Parts List The items shown below are recommended accessories and replacement parts. Accessory Cat. # Photo Replacement Lamp Assembly White Light with 24082S Instructions Replacement Lamp Assembly IR Light with 21396S Instructions Operating Manual, M100+ 29293 39957 ProCal Calibration Kit, .02, 10 &... -
Page 31: Limited Warranty
9.0 Limited Warranty HF scientific inc., as a vendor, warrants to the original purchaser of this instrument that it will be free of defects in material and workmanship, in normal use and service, for a period of one year from date of invoice. HF scientific inc.’s obligation under this warranty is limited to replacing, at its factory, the instrument or any part thereof.
Need help?
Do you have a question about the M100+ 28060 and is the answer not in the manual?
Questions and answers