Table of Contents
Advertisement
Quick Links
Advertisement
Table of Contents
Troubleshooting

Summary of Contents for JBT Fresh'n Squeeze Citrus Juicer
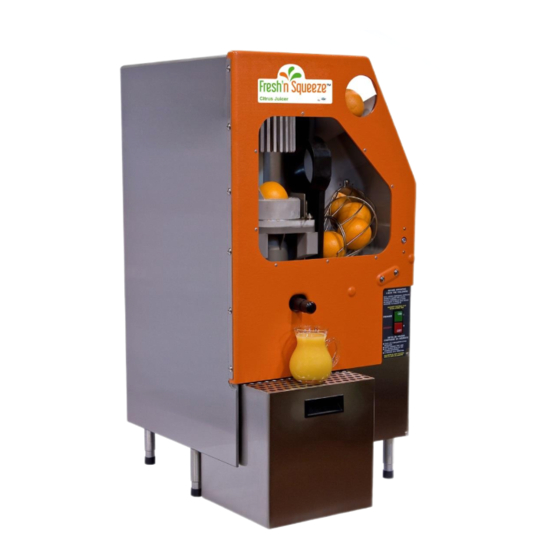
- Page 1 Operator & Service Manual Citrus Juicer November 2017...
- Page 2 Operator & Service Manual Citrus Juicer Copyright © John Bean Technologies Corporation 2017 JBT Corporation 400 Fairway Avenue Lakeland, FL 33801 (863) 683-5411 Manual No. FNS-0006-060-EN FNS-0006-060-EN November 2017 Rev F...
-
Page 3: Table Of Contents
Safety Information ···················································· 4 Safety Instructions ···················································· 5 Technical Specifications ············································ 6 ························································ General Information Operating Instructions ·············································· 10 Cleaning Instructions ················································ 12 Maintenance ···························································· 16 Periodic Inspection ··················································· 19 Troubleshooting-Operator ········································· 21 Troubleshooting-Service ·········································· 24 Rebuilding ······························································· 27 Rebuild Tooling Kits ················································· 42 Drive Parts·······························································... -
Page 4: Safety Information
Lakeland, FL 33801 863.683.5411 The local JBT Corporation service representative in your country. We're here to help. With proper handling, the JBT Corporation, Fresh ‘n Squeeze Citrus Juicer will provide safe, efficient and convenient service for years to come. Revision History Rev. -
Page 5: Safety Instructions
Please, for your safety: FOLLOW THOSE INSTRUCTIONS AT ALL TIMES. Should the Citrus Juicer safety labels become damaged or unreadable, contact JBT Corporation for replacement labels. Safety Instructions Carefully review the following safety instructions. -
Page 6: Technical Specifications
Technical Specifications Fruit Size: ········································ 2-1/2” to 3-1/4" major diameter Oranges - FL: ···································· 125 to 80 count Oranges - CA: ··································· 138 to 88 count Lemons, Limes: ································· 138 to 115 count Holding capacity: ······························· 15 to 20 fruit Speed: ·············································... -
Page 7: General Information
It is simple to operate and uses a minimal number of parts. ALWAYS follow cleaning and maintenance schedules in this manual to prevent equipment damage. For a quick introduction to the JBT Corporation Citrus Juicer, please review the diagram on the next page. FNS-0006-060-EN... - Page 8 Single Feed Hole 1/4 Turn Lock Juice Nozzle Counter Top Waste Container Figure 1a. JBT Corporation Citrus Juicer FNS-0006-060-EN November 2017 Rev F...
- Page 9 Upper Cup Spring Upper Cup Upper Splash Fruit Lift Guard Lower Cup Fruit Guide Lower Cup Spring Juice Manifold Orifice Tube Note: Groove part of Orifice Tube in slot. Lower Splash Guard Figure 1b. Juicing Components Assembly Waste Chute Waste Container Cart Figure 1c.
-
Page 10: Operating Instructions
Operating Instructions Equipment Check Before plugging the JBT Corporation Citrus Juicer into an electrical outlet, the following steps must be performed: Locate the Citrus Juicer on a level surface. This will prevent fruit feed problems. Check waste container. Make sure that waste container is in place. - Page 11 Operating Instructions Juicing CAUTION: DO NOT RUN THE CITRUS JUICER WITHOUT FRUIT FOR MORE THAN ONE MINUTE; IT CAN RESULT IN EQUIPMENT DAMAGE. CAUTION: READ AND UNDERSTAND THE SAFETY AND OPERATING INSTRUCTIONS BEFORE OPERATING THE CITRUS JUICER. Turn on Citrus Juicer. Push the "ON-OFF"...
-
Page 12: Cleaning Instructions
DO NOT use abrasive pads such as Scotch Brite , steel wool, etc. The recommended cleaner is JBT Corporation brand CorKlean. CorKlean is a low-foaming alkaline equipment cleaner. It is safe on aluminum, 100% water soluble and free rinsing. CorKlean has been especially formulated for cleaning food processing equipment. - Page 13 Place juicing components into soaking container. Prepare cleaning solution. JBT Corporation brand CorKlean is recommended, see page 12. Read the product label. Follow the manufacturer's mixing directions and safety precautions. Immerse all components in cleaning solution.
- Page 14 Figure 2. Juicing Components FNS-0006-060-EN November 2017 Rev F...
- Page 15 Scrub components. Use a brush, towel, or sponge. DO NOT use abrasive pads such as Scotch Brite®, steel wool, etc. Thoroughly rinse with clean water, then thoroughly rinse with sanitizer solution. Follow the manufacturer's mixing directions and safety precautions. As an alternate cleaning method, all juicing components can be put in a dishwasher.
-
Page 16: Maintenance
Maintenance Before performing any maintenance, DISCONNECT ELECTRICAL PLUG. After every juice run: Check cutter and knives for sharpness. CAUTION: CUTTER AND KNIVES ARE SHARP. Refer to Figure 3 to determine condition of cutter. If dull, sharpen with a whetstone. Refer to Figure 4a. to sharpen cutter. If cutter is severely damaged or rolled over, replace cutter. - Page 17 Figure 3. Installation of good cutter Figure 3a. Bad cutter- REPLACE cutter Figure 3b. Cutter that can be sharpened Figure 4a. Sharpening Cutter Figure 4b. Sharpening knife with Whetstone with Whetstone FNS-0006-060-EN November 2017 Rev F...
- Page 18 Figure 5. Severely Damaged Orifice Tube Check for loose or missing nuts and bolts. Tighten or replace nuts and bolts as necessary. DO NOT exceed torque ranges specified in Operator & Service Manual. ALWAYS use JBT Corporation recommended spare parts. FNS-0006-060-EN November 2017 Rev F...
-
Page 19: Periodic Inspection
Periodic Inspection by Service Technician Perform the following steps after every 3-4 months. Test all interlock switches. The Citrus Juicer should stop automatically when juicing cover is opened. If juicer is a counter top model, Citrus Juicer should stop when waste container is pulled out. If Citrus Juicer continues to run when either is opened, the interlock switch is defective. - Page 20 Grease Fittings Refer to Figure 7. ® Using a grease gun with a flexible hose, grease seven fittings with Super Lube Teflon grease. Try to force grease into thrust washer between crank arms/sprockets and the main frame. Figure 7. Grease Fitting Locations Check optional hopper shaft seal &...
-
Page 21: Troubleshooting-Operator
Troubleshooting-Operator CAUTION: NEVER REACH INTO MOVING PARTS TO CLEAR A JAM, NO MATTER HOW SIMPLE IT SEEMS. Citrus Juicer will not start. Citrus Juicer is not plugged into electrical outlet. Building circuit breaker has tripped. Juicing area door not closed. Optional counter top waste container not properly installed. Citrus Juicer is jammed. - Page 22 Troubleshooting-Operator Citrus Juicer stalls trying to squeeze a fruit. NOTE: Do not continue to process fruit if juicer is stalling more than once per case. Fruit has part of stem on it. Turn off Citrus Juicer. Remove fruit from Citrus Juicer and restart. Peel is too thick.
- Page 23 Troubleshooting-Operator Fruit is being chopped instead of juiced. Fruit is too large for Citrus Juicer. Turn off Citrus Juicer. Remove oversized fruit. Maximum diameter is 3-1/4". Fruit feeder is sticky or unclean. Turn off Citrus Juicer. Remove fruit. Clean fruit lift. Citrus Juicer not level.
-
Page 24: Troubleshooting-Service
Troubleshooting-Service Citrus Juicer will not start. Citrus Juicer is not plugged into electrical outlet. Building circuit breaker has tripped. Juicing area door not closed and locked. Optional waste container not in place or pushed all the way in. Buzzing sound comes from on/off switch. Juicer needs to be on a separate (its own) electrical circuit with a minimum of 100 volts supply. - Page 25 Figure 10a. Figure 10b. FNS-0006-060-EN November 2017 Rev F...
- Page 26 Troubleshooting-Service Citrus Juicer emits a "squealing" sound during operation. Rod end, rotary, or linear bearings need lubrication. See Periodic Inspection item 5, page 20. Rod end, rotary, or linear bearings need replaced. See rebuilding. Hopper disk does not rotate. Note that disk operates in intermittent motion and only rotates on the up stroke of juicer. Drive cable has come off one of the pulleys.
-
Page 27: Rebuilding
Rebuilding It is best to replace all bearings at the same time. Step-by-Step instructions for replacing all bearings and rod ends. Remove all juicing components. Refer to Figure 2, page 14. Remove fruit lift. Remove 1/4-20 x 3" hex head cap screws. Remove splash guards in juicing area. - Page 28 Upper Drive Splash Guard Center Splash Guard Lower Drive Splash Guard Figure 11. Front View of Citrus Juicer Figure 12. Back View of Citrus Juicer FNS-0006-060-EN November 2017 Rev F...
- Page 29 Rebuilding Rotate drive so upper cup drive is in the down position. Remove chain, spring clip type master link. Be careful - drive arms may move as chain is removed. Remove large sprocket. Use a 9/16” socket and a 3/16" Allen wrench. From the back use a 9/16"...
- Page 30 Figure 14. Loosening Lower Crank Arm Figure 15. Sprocket with Shaft being Removed FNS-0006-060-EN November 2017 Rev F...
- Page 31 Rebuilding Remove linear shafts. With a 3/16" Allen wrench, loosen setscrews at top and bottom of all three shafts. Back screws out at least 1/4" to clear flats on shafts. If shafts are stuck, use bearing removal puller with 3/8"- 16 x 2"...
- Page 32 Figure 17. Assembly of 5/8" Rod Ends Figure 18. Assembly of 1/2" Rod Ends FNS-0006-060-EN November 2017 Rev F...
- Page 33 Rebuilding Remove sleeve bearings from upper and lower drive arms. Refer to figures 19a., 19b. and 20. Bearings can be pulled out using puller, 1" removal slug, and short threaded removal rod; or can be driven or pressed out using driver. New bearings can be installed by compression (Figure 21) by using installation pilot, installation washer and long threaded installation rod, or just use installation pilot and press bearings into place.
- Page 34 Figure 20. Removing Bearings from Lower Drive Arm Figure 21. Installation of Bearings into Drive Arms FNS-0006-060-EN November 2017 Rev F...
- Page 35 Rebuilding Re-assemble rod end assemblies to drive arms, again making sure left-hand threaded ends are on the crank arms. Refer to Figures 22 and 23. Use Loctite #242 on all fasteners. Tighten to torques as shown. Make sure rod end lock spacer is installed on rod end in upper drive arm.
- Page 36 Figure 23. Completed Assembly of Lower Drive Arm FNS-0006-060-EN November 2017 Rev F...
- Page 37 Rebuilding Remove sleeve bearings from main frame. Refer to Figures 24 and 25. The outer upper drive shaft bearing can be removed using puller, 1-1/4" removal slug, and short threaded removal rod. The inner bearing can be removed the same way, or can be pressed out using driver. The lower shaft bearings can be removed the same way except using 1"...
- Page 38 Figure 25. Removing Bearings from Upper Rotary Drive Figure 26. Installation of Bearings and Thrust Washers FNS-0006-060-EN November 2017 Rev F...
- Page 39 Rebuilding Before installing chain, align timing marks as shown. Refer to figure 27. This is critical to operation of the machine. Adjust chain as shown in Periodic Inspection section. To check to see if upper cup crank rod end link needs to be adjusted, install juice manifold, upper and lower cup.
- Page 40 Figure 28. Checking for Cup Clearance FNS-0006-060-EN November 2017 Rev F...
- Page 41 Rebuilding Remove juicing components and install the upper drive splash guard (groove goes down and in) and upper cup spring onto drive arm. Refer to Figure 29. Figure 29. Installation of Upper Splash Guards Install lower splash guard. Be sure "up" stamped on part faces up, and guard is flat against wall.
-
Page 42: Rebuild Tooling Kits
Rebuild Tooling Kit 060-00202 Item Part Number Description 060-00180-B Tool, FNS, Bearing Pilot Install 060-00181-B Tool, FNS, Bearing Washer Install 060-00182-B Tool, FNS, Bearing Puller 060-00183-B Tool, FNS, Bearing Slug 1" 060-00184-B Tool, FNS, Bearing Slug 1-1/4" 060-00185-B Tool, FNS, Bearing Driver Remove 060-00186-B Tool, FNS, Rod, Bearing Install 060-00187-B... - Page 43 Figure 31. Rebuild Kit FNS-0006-060-EN November 2017 Rev F...
-
Page 44: Drive Parts
Drive Parts 060-02002 Item Part Number Description 060-02007-R Main Frame Machining 005-576-061 Key, Sq, 1/4" x 3/4" Lg 005-576-242 Key, Sq, 1/4" x 1" Lg 007-120-205 Fitting, Grease 1/4-28 x 45° 060-02043 Pin, Cup Locator 005-576-223 Key, Sq, 3/16" x 1", SS 060-02016 Arm, Drive , Upper Cup (Includes (4) item 45 &... - Page 45 Figure 32. Drive Parts FNS-0006-060-EN November 2017 Rev F...
-
Page 46: Juicing Parts
Juicing Parts 060-02000 Item Part Number Description 060-02003 Cover Assembly (See Page 58 for Detail) 060-02022 Tube, Strainer, CJ, 0.033 060-02088 Tube, Strainer, CJ, 0.040 060-02089 Tube, Strainer, CJ, 0.055 060-02034 Nozzle, Short, 4-3/4" Lg 060-02130 Nozzle, Long, 8-3/4" Lg 060-02310 Nozzle, Straight (CFA) 060-02038... - Page 47 Figure 33. Juicing Parts FNS-0006-060-EN November 2017 Rev F...
-
Page 48: Cart Assembly Enclosed Parts
Cart Assembly Enclosed Parts 060-2134 Item Part Number Description 060-02117 Cart Frame 060-02053 Chute, Waste, Counter Top Models 004-401-022 Screw, Mach Truss, #10-24 x 3/8" Lg, SS 060-02132 Shelf 060-02133 Cart Floor 060-02123 Cart Door 009-080-536 Caster, Swivel 004-352-315 Screw, Cap Hex, 5/16-18 x 3/4" Lg, SS 004-816-070 Washer, Plain, 5/16, SS 004-111-040... - Page 49 Figure 34. Cart Assembly, Enclosed FNS-0006-060-EN November 2017 Rev F...
-
Page 50: Electrical Parts (110 Volt)
Electrical Parts (110 Volt), 060-02005 110 Volt Citrus Juicer Item Part Number Description 060-02065 Holder, Cord Grip 060-02064 Motor Assembly, 110V/60 Hz (prior to 8/2013) 060-02266 Motor Assembly, 110V/60 Hz (after 8/2013) (for Motor Replacement, see below) 060-02041 Electrical Box Assembly 060-00096-09 Wire, Jumper, 16 Ga, 2"... - Page 51 Figure 35. Electrical Parts (110 V) FNS-0006-060-EN November 2017 Rev F...
- Page 52 Sumitomo to Nord Motor Conversion Kit (110 Volt), 060-10157 Item Part Number Description 060-10156 Adapter, Sumitomo to Nord Motor Conversion Plate 060-02266 Motor Assembly, CJ, 110V/60Hz, Nord, Mfg Use 004-816-072 Washer, Plain, 5/16", SS 004-806-060 Washer, Lock Reg, 5/16", SS Screw 004-356-160 Screw, Cap, Socket, 5/16-18 X 1-1/4"...
- Page 53 Figure 36. Sumitomo to Nord Motor Conversion Kit FNS-0006-060-EN November 2017 Rev F...
-
Page 54: Electrical Parts (220 Volt)
Electrical Parts (220 Volt), 060-02005-01 (50 Hz), 060-02005-02 (60 Hz) 220 Volt Citrus Juicer Item Part Number Description 004-401-026 Screw, Mach Truss #10-24 x 5/8" Lg, SS 006-220-046 Terminal, #10 Ring End, 10-12 Ga, Double Crimp Type 006-200-267 Switch, Safety, Schmersal 060-02041-01 Electrical Box Assembly, 220V 060-02064-01... - Page 55 Figure 36. Electrical Parts (220V) FNS-0006-060-EN November 2017 Rev F...
-
Page 56: Electrical Box Assembly
Electrical Box Assembly 060-02041 110 Volt Citrus Juicer Item Part Number Description 060-02039 Box, Electrical 006-060-078 Connector, Cord, 1/4 NPT for 3/16, #056-14-1002 007-143-386 Connector, 1/2", #S2112 006-221-079 Terminal, Block 006-200-511 Switch, On/Off 009-235-073 Gasket, Weber #AZZ63 Weber 004-397-018 Screw Mach, Round, #4-40 x 1" Lg, SS 004-440-011 Screw, Tap, Pan "F"... - Page 57 Figure 36. Electrical Box FNS-0006-060-EN November 2017 Rev F...
-
Page 58: Cover Parts
Cover Parts 060-02003 Item Part Number Description 060-02019 Fruit Guide 060-02152 Guard, Splash, Lower, SS 060-02032 Spring, Cup, Upper 060-02150 Guard, Splash, Center 004-392-193 Screw, Machine, Pan Head, #6-32 x 7/8" Lg, SS 060-02151 Guide, Center 060-02279 Guard, Splash, Upper, SS 060-02045 Fruit Guide, Wire Frame 060-02240... - Page 59 Figure 37. Covers FNS-0006-060-EN November 2017 Rev F...
-
Page 60: Hopper Parts - Low Profile
Hopper Parts – Low Profile 060-02092 Item Part Number Description 060-02083 Hopper, Basket Only 060-02081 Disk, Hopper 060-02079 Hub, Mounting 060-02076 Hub, Drive Disk 060-02082 Bumper, Disk 004-401-032 Screw, Mach Truss Head,10-24 x 1" Lg, SS 005-098-741 Bearing, Flange, 5/8B, Dixon #DR6F-1014-8 005-250-323 Clutch, Overrunning, 5/8 Bore x 5/8 Lg 060-02075... - Page 61 Figure 38. Hopper Parts – Low Profile FNS-0006-060-EN November 2017 Rev F...
-
Page 62: Hopper Parts - High Capacity (Round)
Hopper Parts – High Capacity (Round) 060-02198 Item Part Number Description 060-02339 Shaft, Hopper Disk, Dual Clutch 060-02301 Pin, Dowel 005-301-050 Collar, Nylon, 3/4"B 005-098-741 Bearing, Flange, 5/8"B X 7/8" OD X 1" LG 004-405-017 Screw, Set, Hex SKT, Cup Point, #10-32 x 1/4" LG, S/L, SS 060-02091 Post, Mounting, Short 060-02090... - Page 63 Figure 38. Hopper Parts – High Capacity (Round) FNS-0006-060-EN November 2017 Rev F...
-
Page 64: Waste Container Assembly
Waste Container Assembly 060-02231/060-02231-01 Item Part Number Description 060-02230 Waste Container (6-1/2" Deep) 060-02230-01 Waste Container (10-1/2" Deep) 009-270-011 Drawer Pull, Black, Southco #P2-41 060-02059 Door Button 060-02084 Bracket, Safety Key 004-385-028 Screw, Flat Head SS #8-32 x 3/8" Spanner Security Type 060-02087 Safety Key 009-020-130... - Page 65 Figure 40. Waste Container Assembly FNS-0006-060-EN November 2017 Rev F...
-
Page 66: Miscellaneous Parts
Miscellaneous Parts Item Part Number Description 060-00084 Rod, Orifice Clean Out 009-080-328 Brush, Metal Wire, 1" Diameter 009-080-327 Brush, Plastic 003-091-001 CorKlean Cleaner, 10 lb. 009-092-019 Decanter, 1 Gallon, Translucent 009-425-020 Key, Tool Head 009-710-031 Sharpening Stone 009-092-018 Red Cutter Cap 060-05058-B Key Ring (Not Shown)
Need help?
Do you have a question about the Fresh'n Squeeze Citrus Juicer and is the answer not in the manual?
Questions and answers